LG D5988S, Owner'S Manual
The LG D5988S Owner's Manual is essential for users to unleash the full potential of their device. This comprehensive manual provides step-by-step instructions and valuable tips for optimum performance. Visit our website to easily download this manual for free, ensuring seamless product setup and superior user experience.
Share
Download


Reviews:
No comments
Related manuals for D5988S

FT 43479 W
Brand: Farberware Pages: 17

RemScan
Brand: ziltek Pages: 6

Family Series
Brand: HAEGER Pages: 20

F13T-94G
Brand: Lotus cooker Pages: 49

Fashion Ultraviolet
Brand: Taurus Pages: 72

Brevis
Brand: wad Pages: 27

SNAFRB1
Brand: smith+nobel Pages: 12

SW5L70D
Brand: Supra Pages: 24

GUD57EE
Brand: GE Pages: 48

PFD95
Brand: GE Pages: 128

HTX24GASKWS
Brand: GE Pages: 24

R8580X2ES
Brand: NEFF Pages: 44

M14A
Brand: Mediclinics Pages: 72

CF2
Brand: Cobra Pages: 19

CRDE350AW
Brand: Haier Pages: 15
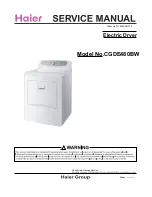
CGDE480BW
Brand: Haier Pages: 16

CG700AW
Brand: Haier Pages: 36

CGDE450AW
Brand: Haier Pages: 80


