Ledco Professor 27, Operation Manual
The Ledco Professor 27 is a versatile laminator perfect for all your document protection needs. Ensure optimal performance by following the detailed instructions in the Operation Manual, available for free download from our website. Keep your laminator in top condition with this essential manual. Download it now from manualshive.com.
Share
Download


Reviews:
No comments
Related manuals for Professor 27

Xyron ezLaminator
Brand: Xyron Pages: 2

KH 4410
Brand: Lervia Pages: 13

HeatSeal H210
Brand: GBC Pages: 14
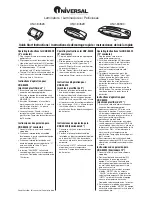
UNV-84528
Brand: Universal Pages: 2

Contour 300H
Brand: Rexel Pages: 4

Proteus A3/125
Brand: Fellowes Pages: 31

RSH-1151
Brand: RS Pages: 10

27-4007-A3
Brand: Mega Electronics Pages: 15

6000L
Brand: Fusion Pages: 6

LM-420H
Brand: Aurora Pages: 1


