Leader LT 4448, Instruction Manual
The Leader LT 4448 is a powerful and versatile product designed for all your needs. With its comprehensive Instruction Manual, you can easily set up and operate the device. Download the manual for free from manualshive.com and make the most of your Leader LT 4448.
Share
Download


Reviews:
No comments
Related manuals for LT 4448

MFP6
Brand: Agu Pages: 88

RX-7032VSL
Brand: JVC Pages: 59

Cucina HR7730
Brand: Philips Pages: 56

Impressum
Brand: KITCHEN CREW Pages: 88
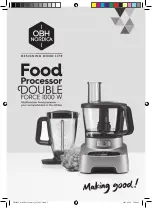
Double Force
Brand: OBH Nordica Pages: 24

pro 2000 6798
Brand: OBH Nordica Pages: 44

VT-1621 W
Brand: Vitek Pages: 52

VT-1637
Brand: Vitek Pages: 20

0008007858
Brand: essentiel b Pages: 88

DMFP100
Brand: Dash Pages: 19

LVM-110
Brand: TE Pages: 7

TKG MCH 1000
Brand: Team Kalorik Pages: 36

QUBE SP27
Brand: Fbt Pages: 44

MS02-CD3/T
Brand: Fbt Pages: 44

MEK 7000 UC
Brand: Bosch Pages: 37

mum53 series
Brand: Bosch Pages: 60

MUM57 SERIES
Brand: Bosch Pages: 256

PL-2
Brand: Pendulum Pages: 7


