background image

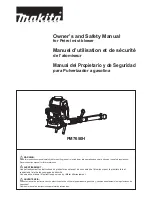
Operator's Manual / Manual del usuario

26cc 2-Cycle Leaf Blower NPTBL26A

EN p. 2

Read all safety rules and instructions carefully before operating this tool.
601 Regent Park Court Greenville, SC 29607, SC 29650 1-866-384-8432
Lea con cuidado todas las reglas e instrucciones de seguridad antes de utilizar esta herramienta.
601 Regent Park Court Greenville, SC 29607, SC 29650 1-866-384-8432

NOTICE: 

Only use unleaded gasoline containing up to 10% ethanol. Do not use E15 or E85 fuel in this blower. It 

will violate the federal law, damage the blower and void your warranty.

AVISO: 

Utilice solo gasolina sin plomo que contenga un máximo de 10 % de etanol. No reposte este soplador 

con gasolina E15 o E85. Es una violación de la ley Federal, dañará el soplador y anulará su garantía.

Save this manual for future reference
Conserve este manual para referencia futura.

Sopladora de Hojas de 26cc y 2 Tiempos NPTBL26A

ES p. 40

Summary of Contents for NPTBL26A

Page 1: ...e SC 29607 SC 29650 1 866 384 8432 NOTICE Only use unleaded gasoline containing up to 10 ethanol Do not use E15 or E85 fuel in this blower It will violate the federal law damage the blower and void yo...

Page 2: ...OLS 8 9 KNOW YOUR BLOWER 10 ASSEMBLY 11 14 BATTERY PACK AND CHARGER 15 16 OPERATION 17 23 MAINTENANCE 24 29 ENVIRONMENTALLY SAFE BATTERY DISPOSAL 30 TROUBLESHOOTING 31 32 LAWNMASTER WARRANTY 33 EXPLOD...

Page 3: ...Tank Capacity 400 ml Fuel Oil Ratio 40 1 Max Air Speed 200 MPH Max Air Volume 350 CFM Net Weight 11 3 lbs 5 1 kg Battery Model No 07LB2001 S Battery Type 7 2 VDC Lithium Ion 2 0 Ah Charger Model No Y...

Page 4: ...d secure Make sure attachments are properly installed and securely fastened Be sure accessories are properly attached and in the position recommended by the manufacturer Maintain a firm grip while usi...

Page 5: ...and avoid contact after it has been used wait until the surfaces cool down Contact with hot surfaces could result in serious burns Do not operate the blower in poor lighting Do not place any objects i...

Page 6: ...w all charging instructions and do not charge the battery pack outside the temperature range specified in the instructions Charging improperly or at temperatures outside of the specified range may dam...

Page 7: ...radio or television reception which can be determined by turning the equipment off and on the user is encouraged to try to correct the interference by one or more of the following measures Reorient or...

Page 8: ...tion Always wear eye protection with side shields marked to comply with ANSI Z87 1 along with hearing protection when operating this equipment Gasoline and Lubricant Use unleaded gasoline intended for...

Page 9: ...ordinary trash Consult your local waste authority for information regarding available recycling and or disposal options SYMBOL SIGNAL MEANING DANGER Indicates an imminently hazardous situation which i...

Page 10: ...Stop Switch 2 Handle 3 Cruise Control Lever 4 Choke Lever 5 Primer Bulb 6 Air Filter Cover 7 Fuel Tank Cap 8 Fuel Tank 1 2 3 4 5 6 7 23 8 24 9 10 11 12 13 20 21 14 22 15 18 17 16 19 9 Spark Plug Cap 1...

Page 11: ...the battery pack from the product when assembling parts This product requires assembly Carefully remove the product and any accessories from the box Make sure that all items listed in the packing list...

Page 12: ...e spanner provided to loosen it Fig 1 Insert the rear blower tube into the front opening on the blower Pay attention that the notch on the blower tube aligns with the middle of the upper part of the f...

Page 13: ...nto the front blower tube Align the indexing tabs with correct sized index channels once achieved turn clockwise to lock into place Make sure the blower tubes and the concentrator nozzle are assembled...

Page 14: ...serting the battery pack It should slide into position and click To remove the battery pack Locate the battery release button press and hold the button up Fig 8 Slide the battery pack off the battery...

Page 15: ...affect the battery CHARGER LEDS If the battery is not connected to the charger a continuous green LED light indicates that the plug is plugged into an outlet socket and the battery charger is ready f...

Page 16: ...ications and then disconnect the charger from the power supply Remove the charging connector from the charging port Fig 10 NOTE It is normal for the battery pack and the charger to become warm but not...

Page 17: ...us personal injury Before each use inspect the entire product for damaged missing or loose parts such as screws nuts bolts caps etc Tighten securely all fasteners and caps and do not operate this prod...

Page 18: ...hroughout the United States contains ethanol The maximum ethanol content allowed by law for use in outdoor power equipment is limited to 10 E10 Most small power equipment engines are designed to use n...

Page 19: ...illage that may have occurred NOTICE It is normal for smoke to be emitted from a new engine after first use Fig 12 WARNING The operation of this tool requires gasoline an extremely flammable liquid Al...

Page 20: ...itch to RUN position NOTE If the engine does not start repeat step 5 until the engine starts If the blower fails to start check the Troubleshooting section in the manual NOTE This 2 cycle blower is eq...

Page 21: ...ndicator is located above the start button and can be used to indicate the battery status Fig 18 When pushing the start button to start the engine a green light indicates a fully charged battery a red...

Page 22: ...bris or gravel Debris may be sucked into blower intake vent resulting in possible damage to the unit and could result in serious personal injury OPERATION USING THE CONCENTRATOR NOZZLE See Fig 20 Use...

Page 23: ...ound the outer edges of a debris pile Do not blow directly into the center of a pile Watch out for children pets open windows or freshly washed cars and blow debris safely away Press the STOP switch t...

Page 24: ...er Service Toll Free Number 866 384 8432 GENERAL MAINTENANCE Avoid using solvents when cleaning plastic parts Most plastics are susceptible to damage from various types of commercial solvents and may...

Page 25: ...Do not allow foreign material into the recessed cavity or on the contacts Wipe with a dry cloth Do not use solvents water or place in wet conditions Always unplug the charger when the battery pack is...

Page 26: ...AIR FILTER See Figs 22 25 Keep the air filter clean for proper performance and long life Rotate the air filter knob counter clockwise and gently pull off the air filter cover Fig 22 Remove the air fil...

Page 27: ...nt part Remove the spark plug cap Fully cover the spark plug using the provided socket wrench Rotate the wrench counter clockwise to remove the spark plug Fig 26 27 Check the spark plug for fouling wo...

Page 28: ...stops HIGH ALTITUDE ENGINE OPERATION Initially your engine is configured for operation below 2000 ft altitude If the blower is being used above 2000 ft altitude the engine must be re configured accord...

Page 29: ...enance Part Inspect For Damage Before Each Use Clean Every 5 Hours Replace Every 25 Hours or Yearly Replace Every 50 Hours CATALYTIC MUFFLER ASSEMBLY Y SPARK SCREEN Y AIR FILTER ASSEMBLY Includes Air...

Page 30: ...nd corrosive materials are in the batteries used in this battery pack Lithium ion a toxic material To avoid injury and risk of fire explosion or electric shock and to avoid damage to the environment C...

Page 31: ...Plug Replacement section in this manual No fuel Check that there is sufficient fuel in the fuel tank Push the primer bulb until the bulb is full of fuel If the bulb does not fill the primary fuel deli...

Page 32: ...spark plug is worn out Clean or replace the spark plug Reset the spark plug gap Refer to the Spark Plug Replacement section in this manual The engine overheats Allow the engine to run at idle for 5 m...

Page 33: ...y part that has become inoperative due to alteration misuse commercial use abuse neglect accident or improper storage or maintenance 2 The unit if it has not been operated and or maintained in accorda...

Page 34: ...34 EXPLODED VIEW NPTBL26A EXPLODED VIEW 8 9 10 11 7 1 7 1 2 3 4 5 6 12 7 2 7 3 7 4 7 5 7 6 7 7 7 8...

Page 35: ...e Control Lever 1 7 5 Stop Switch 1 7 6 PCB Assembly 1 7 7 Anti Vibration Pad 1 7 8 301001115 Throttle Lever 1 8 321001114 7 2V Lithium Ion Battery 1 9 301001116 Rear Blower Tube 1 10 301001117 Front...

Page 36: ...36 EXPLODED VIEW 26CC 2 CYCLE ENGINE 3 1 2 4 5 6 7 8 9 10 11 12 13 14 15 16 17 18 19 20 21 22 23 24 25...

Page 37: ...on Shank 1 13 Cylinder Assembly 1 14 321001139 Spark Plug 1 15 Positive Stop Switch Cable 1 16 321001138 Muffler Insulation Sheet 1 17 301001132 Muffler 1 18 Ignition Coil Assembly 1 19 Throttle Lever...

Page 38: ...38 NOTES...

Page 39: ...39 NOTES...

Page 40: ...su soplador 48 Montaje 49 52 Bater a y cargador 53 54 Funcionamiento 55 62 Mantenimiento 63 69 Eliminaci n ambientalmente segura de la bater a 70 Resoluci n de problemas 71 72 Garant a de LawnMaster...

Page 41: ...400 ml Proporci n combustible aceite 40 1 M xima velocidad del aire 200 MPH M ximo volumen de aire 350 CFM Peso neto 5 1kg 11 3 lbs N de modelo de la bater a 07LB2001 S Tipo de bater a Iones de litio...

Page 42: ...cerrados Compruebe que los aditamentos est n bien instalados y fijados en su lugar Compruebe que los accesorios est n bien conectados y en la posici n recomendada por el fabricante Agarre bien el sopl...

Page 43: ...utilizarlo sobre todo observe el silenciador la entrada de aire y el filtro de aire No toque el motor o el silenciador cuando el motor est encendido y evite el contacto despu s que lo ha utilizado es...

Page 44: ...fuego o temperaturas excesivas La exposici n al fuego o a temperaturas sobre los 130 C 265 F puede provocar una explosi n No modifique ni intente reparar la bater a seg n aplique salvo seg n se indic...

Page 45: ...a ina sobre las comunicaciones por radio Sin embargo no hay garant a alguna de que no pueda ocurrir interferencia en una instalaci n en particular Si este equipo provoca una interferencia da ina a la...

Page 46: ...uditiva Siempre use protecci n ocular y protectores laterales que cumplan con la norma ANSI Z87 1 y tambi n protecci n auditiva cuando opera este equipo Gasolina y lubricante Use gasolina sin plomo pa...

Page 47: ...sechar las bater as en la basura normal Consulte a su autoridad local de desechos en cuanto a las opciones leg timas para desechar o reciclarlas S MBOLO SE AL SIGNIFICADO PELIGRO Indica una situaci n...

Page 48: ...nca de ahogue 5 Pulsador de cebado 6 Tapa del filtro de aire 7 Tap n del tanque de combustible 1 2 3 4 5 6 7 23 8 24 9 10 11 12 13 20 21 14 22 15 18 17 16 19 8 Tanque de combustible 9 Tap n de la buj...

Page 49: ...oducto requiere armado Con cuidado extraiga el producto y sus accesorios de la caja Aseg rese de que todos los elementos mencionados en la lista de componentes del empaque est n incluidos Inspeccione...

Page 50: ...l paquete para aflojarlo Fig 1 Inserte el tubo de soplado frontal en la apertura frontal del soplador Ponga atenci n de que la marca en el tubo del soplador est alineada con el centro en la parte supe...

Page 51: ...l tubo de soplado posterior Alinee las pesta as de ndice con el tama o correcto de los canales de ndice una vez lo haya hecho gire hacia las manecillas del reloj para fijarlos en su lugar Aseg rese de...

Page 52: ...zarse hasta su posici n y hacer clic Extracci n de la bater a Encuentre el bot n para liberar la bater a presione hacia arriba y sost ngalo Fig 8 Deslice el paquete de bater as hacia afuera de la ranu...

Page 53: ...o de carga no afecta a la bater a LED DE CARGA Si la bater a no est conectada al cargador una luz LED verde continua indica que el enchufe est conectado en una toma de corriente y que el cargador est...

Page 54: ...ificaciones luego desconecte el cargador de la toma de corriente Quite el conector de carga del puerto de carga de la bater a Fig 10 NOTA Es normal que la bater a y el cargador se calienten pero no de...

Page 55: ...ados podr a causar lesiones severas Antes de cada uso inspeccione el producto completo en busca de piezas da adas faltantes o sueltas tales como tornillos tuercas tapas etc Apriete con seguridad todos...

Page 56: ...orizados para exteriores tales como su equipo motorizado LawnMaster y hacer esto puede anular su Garant a Limitada de LawnMaster No obstante si toma las debidas precauciones la gasolina que contiene 1...

Page 57: ...ombustible sin sellar mientras contenga combustible Coloque la tapa inmediatamente despu s de llenarlo e inspeccione el tanque Revise que la tapa est bien sellada y limpie cualquier derrame que pueda...

Page 58: ...e de combustible y apri telo con firmeza NO llene el tanque en el lugar de trabajo el repostaje debe ocurrir a al menos 3 metros 10 pies de donde el operador desee encender el motor Mantenga la herram...

Page 59: ...presionar la palanca de aceleraci n la palanca de ahogue cambiar a la posici n de RUN operar NOTA Despu s de que el motor arranque y se encienda suelte la palanca de aceleraci n y permita que el sopl...

Page 60: ...luz roja indica que la bater a debe cargarse CONTROL AUTOM TICO DE VELOCIDAD Consulte la Figura 19 Puede utilizar la palanca de control autom tico de velocidad para operar el soplador sin mantener pr...

Page 61: ...ede aspirar la suciedad por su ventilador de entrada lo que causar da os a la unidad y podr a causar lesiones personales serias FUNCIONAMIENTO USAR LA BOQUILLA CONCENTRADORA Consulte la Figura 20 Use...

Page 62: ...exteriores de una pila de suciedad No sople directamente hacia el centro de una pila Tenga cuidado con los ni os mascotas ventanas abiertas o autom viles reci n lavados y sople los sedimentos de maner...

Page 63: ...ayuda o bien al servicio de atenci n al cliente llamada gratuita al 866 384 8432 MANTENIMIENTO GENERAL Evite el uso de solventes al limpiar piezas pl sticas La mayor a de los pl sticos son susceptible...

Page 64: ...ibre de sedimentos No deje que materiales extra os entren en la cavidad o en los contactos Limpie con un pa o seco No use solventes agua o exponga el dispositivo a condiciones h medas Siempre desenchu...

Page 65: ...o a un individuo calificado para quitar el bloqueo El protector contra chispas debe limpiarse o cambiarse cada 50 horas o una vez al a o para garantizar el rendimiento adecuado de su producto Los pro...

Page 66: ...EAS DE GASOLINA PELIGRO ADVERTENCIA El combustible es EXTREMADAMENTE inflamable Tenga mucho cuidado al mezclarlo almacenarlo o manipularlo No seguir estas instrucciones podr a causar lesiones personal...

Page 67: ...zar este filtro de combustible CAMBIO DE LA BUJ A Consulte las Figuras 26 29 La buj a de este motor puede reemplazarse con una buj a id ntica o igual a la que viene con la herramienta La brecha de la...

Page 68: ...r bajo 600 metros 2000 ft de altitud Si est utilizando el soplador a m s de 2000 pies de altura debe reajustar el motor para estas condiciones Usar el motor en la configuraci n incorrecta a una altitu...

Page 69: ...e no haya da os antes de cada uso Limpie cada 5 horas Cambie cada 25 horas de uso o una vez al a o Cambie cada 50 horas de uso CONVERTIDOR CATAL TICO Y PROTECTOR DE LA BUJ A Y FILTRO DE AIRE Incluye F...

Page 70: ...ientes materiales t xicos y corrosivos est n en las bater as del paquete Litio ionizado un material t xico Para evitar el riesgo de incendio explosi n descarga el ctrica y da os al medioambiente Cubra...

Page 71: ...e Revise que haya suficiente combustible en el tanque de combustible Presione el pulsador de cebado hasta que est lleno de combustible Si el pulsador no se llena el sistema de suministro de combustibl...

Page 72: ...ste manual La buj a est agotada Limpie o cambie la buj a Reajuste la brecha de la buj a Consulte la secci n Cambio de la buj a de este manual El motor se sobrecalienta Deje que el motor funcione en ra...

Page 73: ...est inoperativa por culpa de una alteraci n mal uso uso comercial abuso negligencia accidentes y almacenamiento o mantenimiento inadecuados 2 La unidad en caso de que no se haya utilizado y o recibid...

Page 74: ...74 VISTA EN DETALLE NPTBL26A VISTA EN DETALLE 8 9 10 11 7 1 7 1 2 3 4 5 6 12 7 2 7 3 7 4 7 5 7 6 7 7 7 8...

Page 75: ...l autom tico de velocidad 1 7 5 Interruptor de detenci n 1 7 6 Conjunto de piezas de la placa PCB 1 7 7 Almohadilla antivibraci n 1 7 8 301001115 Palanca del acelerador 1 8 321001114 Bater a de Iones...

Page 76: ...76 VISTA EN DETALLE DEL MOTOR DE 2 TIEMPOS DE 26CC 3 1 2 4 5 6 7 8 9 10 11 12 13 14 15 16 17 18 19 20 21 22 23 24 25...

Page 77: ...n del cig e al 1 13 Conjunto de piezas del cilindro 1 14 321001139 Buj a 1 15 Cable positivo del interruptor de detenci n 1 16 321001138 Hoja de aislamiento del silenciador 1 17 301001132 Convertidor...

Page 78: ...78 NOTAS...

Page 79: ...79 NOTAS...

Page 80: ......

Reviews: