Laser STB-6000, User Manual
The Laser STB-6000 is an innovative set-top box equipped with advanced features for an enhanced viewing experience. Ensure optimal performance by referring to the detailed User Manual available for free download from manualshive.com. Get the most out of your device with step-by-step instructions and troubleshooting tips.
Share
Download


Reviews:
No comments
Related manuals for STB-6000
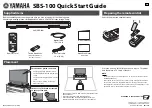
SBS-100
Brand: Yamaha Pages: 2

VLS-DVBT2-FTA1
Brand: Valueline Pages: 68

RTI95 T2 HD UK
Brand: SAGEMCOM Pages: 52

MMC-B19
Brand: Laser Pages: 11

WVH111
Brand: Philips Pages: 36

neoViu D1
Brand: Philips Pages: 8

HDTP 8530
Brand: Philips Pages: 40

WVH111
Brand: Philips Pages: 2

SBB105D
Brand: Philips Pages: 2

MK39
Brand: RKM Pages: 6

MK80
Brand: RKM Pages: 7

DFTA16HD
Brand: Bush Pages: 19

BU10FVZS1
Brand: Bush Pages: 20

BU11FVZS2
Brand: Bush Pages: 20

BFSAT02SD
Brand: Bush Pages: 20

DFTA2
Brand: Bush Pages: 23

DFTA46R
Brand: Bush Pages: 26

DFTA60BR
Brand: Bush Pages: 27


