Larscom ACST-1500B Series, Инструкция по установке и эксплуатации
Посетите наш веб-сайт, чтобы бесплатно загрузить руководство по установке и эксплуатации для серии Larscom ACST-1500B. Этот руководство содержит важную информацию о продукте, чтобы обеспечить его правильную установку и работу. Не забудьте загрузить его с manualshive.com.
Поделиться
Скачать


Отзывы:
Нет отзывов
Похожие инструкции для ACST-1500B Series

BT06
Бренд: Obdstar Страницы: 10

VIO
Бренд: BACtrack Страницы: 13

FLEXI
Бренд: Badgematic Страницы: 28

Select S80
Бренд: BACtrack Страницы: 2

STELLA
Бренд: MADRIX Страницы: 28

microLAN
Бренд: BACTcontrol Страницы: 28

CEFL PIR
Бренд: DANLERS Страницы: 2

ST
Бренд: Haas Automation Страницы: 26

Crouse-hinds series
Бренд: Eaton Страницы: 32

COOPER POWER SERIES
Бренд: Eaton Страницы: 8

MATRIX
Бренд: ICELED Страницы: 4

U.18H36
Бренд: Facom Страницы: 4

FL-100
Бренд: FaceLake Страницы: 2

FX5401
Бренд: FabiaTech Страницы: 2

Fanless Series
Бренд: FabiaTech Страницы: 77

MU100
Бренд: Yamaha Страницы: 178

EMT-10
Бренд: Yamaha Страницы: 15
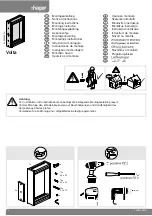
Volta
Бренд: hager Страницы: 4


