background image

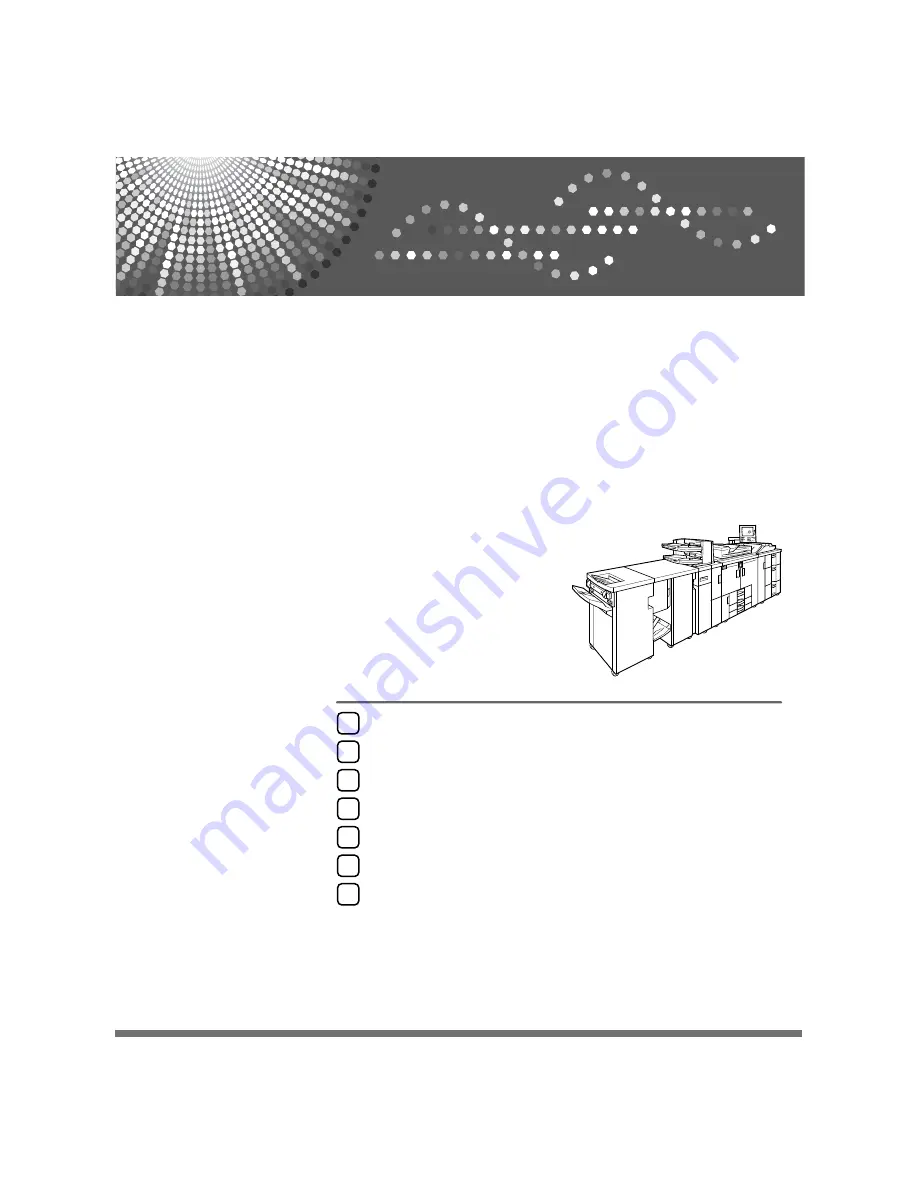
Printer/Scanner Unit

Type 1356

Operating Instructions

Scanner Reference

Read this manual carefully before you use this machine and keep it handy for future reference. For safe and correct use, be sure to read the
Safety Information in "About This Machine" before using the machine.

Sending Scan Files by E-mail

Sending Scan Files to Folders

Storing Files Using the Scanner Function

Delivering Scan Files

Scanning Originals with the Network TWAIN Scanner

Various Scan Settings

Appendix

1

2

3

4

5

6

7

Summary of Contents for Type 1356

Page 1: ...r future reference For safe and correct use be sure to read the Safety Information in About This Machine before using the machine Sending Scan Files by E mail Sending Scan Files to Folders Storing Fil...

Page 2: ...e machine Certain options might not be available in some countries For details please contact your local dealer Trademarks Adobe PostScript and Acrobat are trademarks of Adobe Systems Incorporated Pen...

Page 3: ...at the administrators can use to protect data from being tampered or prevent the machine from unauthorized use Also refer to this manual for the procedures for registering administrators as well as se...

Page 4: ...anuals as PDF files For UNIX Supplement please visit our Web site or consult an authorized dealer PostScript3 Supplement and UNIX Supplement include descriptions of functions and settings that might n...

Page 5: ...Using a Registration Number to Specify a Sender Name 28 Selecting the Sender by Searching the Machine s Address Book 28 Specifying the E mail Subject 31 Specifying the E mail Message 32 Selecting a Me...

Page 6: ...er a File 82 Installing DeskTopBinder Lite from the Supplied CD ROM 83 Network Delivery Scanner Screen 84 Basic Operation for Delivering Files 85 Switching to the Network Delivery Scanner Screen 88 Sp...

Page 7: ...8 Changing the Registered Program Name 138 Registering Initial Values for Initial Display 139 Scan Settings When Using Twain Scanner 140 Setting Original Orientation on the TWAIN Scanner 140 When Scan...

Page 8: ...vi...

Page 9: ...ead these notes They can be found in the Safety Information section of About This Machine Indicates points to pay attention to when using the machine and explanations of likely causes of paper misfeed...

Page 10: ...ginals using the TWAIN driver Use the TWAIN driver to specify the machine where originals will be scanned from a client computer For details see chapter 5 Scanning Originals with the Network TWAIN Sca...

Page 11: ...ery Scanner Screen Reference p 13 E mail Screen p 41 Scan to Folder Screen p 68 List of Stored Files p 84 Network Delivery Scanner Screen Simplified Display This section explains how to switch to the...

Page 12: ...Check Modes screen Use the Check Modes screen to check scanning and transmission settings Pressing Check Modes switches the screen from the initial scanner screen to the Check Modes screen Check Mode...

Page 13: ...ncel TX Press to close a preview and interrupt a transmission 4 Continue TX Press to close a preview and continue a transmission 5 Display File Displays a file s name and size 6 Display Page Displays...

Page 14: ...s U or T to switch between results Transmission File Status 1 Date Time Displays the time and date transmission was specified by this machine or the time and date when Completed Error or Can celled wa...

Page 15: ...on results by pressing Job List at the bottom of the screen To check transmission results press Scanned Files Status and then display the Transmission File Status screen Depending on security settings...

Page 16: ...ne s destination list or from the Destination List managed by the delivery server Destination List Display Priority 2 Select whether to prioritize the e mail destination list or the folder destination...

Page 17: ...E mail Select whether or not to divide files that exceed the size specified in Max E mail Size and send them as multiple e mails E mail Information Language Select the language in which document info...

Page 18: ...10...

Page 19: ...r You need to have an access to an e mail server that supports SMTP Simple Mail Transfer Protocol to send scan files by e mail However it is not essential to have an e mail server inside the LAN where...

Page 20: ...or details see Network Guide Items to set up in System Settings vary depending on the network environ ment For more information about network settings see General Settings Guide For more information a...

Page 21: ...lso when sending the same files by both e mail and Scan to Folder 3 E mail icon Indicates that the E mail screen is dis played Displays the destinations regis tered in the delivery server or this mach...

Page 22: ...n or Scan to Folder screen appears switch to the E mail screen For details see Switching to the E mail Screen C Place originals D If necessary press Scan Settings to specify scanner settings such as r...

Page 23: ...tions can be made to appear one by one by pressing U or T next to the destination field To cancel a selected destination display the destination in the destination field and then press Clear You can c...

Page 24: ...witching to the E mail Screen p 105 Various Scan Settings p 114 Adjusting Image Density p 115 Setting of Original Feed Type p 127 Setting File Type and File Name p 18 Specifying E mail Destinations p...

Page 25: ...is being displayed switch to the E mail screen as follows A Press Delivery Dest The E mail screen or Scan to Folder screen appears B If the Scan to Folder screen appears press E mail The E mail screen...

Page 26: ...how to select the destination from the machine s address book Important To use this function you must register the destinations in System Settings in advance For details see General Settings Guide You...

Page 27: ...ear in the destination list Selecting destinations by entering the registration numbers Select the destination from the machine s address book using its registration number A Press Reg No B Using the...

Page 28: ...by combining Name and E mail Address C Enter part of the destination name To search by e mail address enter part of the address D Press OK E If necessary press Advanced Search and then specify the de...

Page 29: ...ayed as search results By pressing Advanced Search the following criteria appear Beginning Word The names which start with the entered character or char acters are targeted For example to search for A...

Page 30: ...ettings Manual Entry may not be displayed To change a registered destination e mail address press Edit to the left of the destination field to display the soft keyboard use the soft keyboard to enter...

Page 31: ...ok Register the LDAP server in advance in System Settings If authentication is required to access the selected server the authentication screen appears To authenticate enter the user name and password...

Page 32: ...n the LDAP server Search Options can be registered in System Settings For de tails see General Settings Guide By pressing Details you can view details about the selected destinations Up to 100 destina...

Page 33: ...enter A B or C Exclude Words The names which do not contain an entered character or characters are targeted For example to search for ABC enter D Fuzzy Search a vague search The function of this vague...

Page 34: ...ing the information to be registered see General Set tings Guide D Press OK Note Depending on the security setting Prg Dest may not appear In such case you cannot complete the registration To register...

Page 35: ...ings Guide In System Settings you can specify the administrator s e mail address as the default sender name This lets you send e mail without entering anything for Sender Name For detail see General S...

Page 36: ...git registration number assigned to the required destination folder If the entered number is less than five digits press q after the last number Example To enter 00006 Press 6 and then press q D Press...

Page 37: ...nd Folder Name You can also search by combining the Beginning Word or End Word criteria with the other criteria The illustrated screen is an example The items that actually appear on the screen may di...

Page 38: ...which correspond to an entered character or char acters are targeted For example to search for ABC enter ABC Include one Word The names which contain an entered character or char acters are targeted...

Page 39: ...Specifying the E mail Subject 31 1 Specifying the E mail Subject This section explains how to specify the e mail subject A Press Subject The soft keyboard appears B Enter the subject C Press OK...

Page 40: ...ge can be created in the following ways Select the e mail message from the list Enter the message directly Selecting a Message from the List You can select a message from the list Important The messag...

Page 41: ...the E mail Message 33 1 Manual Entry of a Message You can enter the message manually A Press Text B Press Manual Entry The soft keyboard appears so you can enter the message C Enter the message D Pres...

Page 42: ...he setting for sending the file by e mail and then send the file For details about sending a file by e mail see Basic Operation for Sending Scan Files by E mail Note If you simultaneously store scan f...

Page 43: ...etails about specifying the setting see General Settings Guide B Send a stored file by e mail Alternatively store a file and simultaneously send it by e mail For details about sending a stored file by...

Page 44: ...ee Copy Document Server Reference To display details about the functions for managing stored files using Web Image Monitor click Help on the upper right of each Web browser s win dow You can send the...

Page 45: ...iles by Scan to Folder This section outlines the function for sending scan files by Scan to Folder Sending files to shared folders 1 This machine You can send scan files to shared net work folders To...

Page 46: ...des file transfer services among computers on the same network Transferred files are stored on this server It is essential to have the FTP server inside the LAN WAN where this machine belongs It is no...

Page 47: ...nd settings for sending scan files by Scan to Folder Important Files can be sent to shared folders on client computers Files can also be sent to FTP servers if any exist on the network Files can also...

Page 48: ...n when settings made with the control panel Web Image Monitor Tel net or other methods do not permit the use of SMB and FTP sending files is still possible Registering Destination Folders in the Addre...

Page 49: ...3 Scan to Folder icon Shows that the Scan to Folder screen is displayed 4 Manual Entry To specify destinations not registered in the address book press this button to dis play the soft keyboard and th...

Page 50: ...see Switching to the Scan to Folder Screen C Place originals D If necessary press Scan Settings to specify scanner settings such as resolu tion and scan size For details see Various Scan Settings E If...

Page 51: ...ted destination again By pressing Check Modes you can switch from the initial scanner screen to the Check Modes screen so you can check the settings For details see Check Modes If you press Preview an...

Page 52: ...being displayed switch to the Scan to Folder screen as follows A Press Delivery Dest The E mail screen or Scan to Folder screen appears B If the E mail screen appears press Folder The Scan to Folder...

Page 53: ...ins how to select the destination from the machine s address book Important To use this function you must register the destinations in System Settings in advance You can select a destination registere...

Page 54: ...teps Display the destination by selecting its initial letter from the title Display the destination by pressing U or T Note Depending on the security setting some destinations may not appear in the de...

Page 55: ...it This section explains how to search the machine s address book for the destina tion and select it A Press Search Dest B To search by name press Name To search by path press Folder The soft keyboard...

Page 56: ...dress and Folder are registered in the machine s address book For de tails see General Setting Guide By pressing Details you can view details about the selected destinations Up to 100 destinations ca...

Page 57: ...folder may require authentication You can send a file to a shared folder over the network by any of the following methods Enter the path to the destination directly Specify the path by browsing the n...

Page 58: ...pass word a confirmation message appears IPv4 address entry is supported by Windows98 Me 2000 XP Windows NT4 0 and Windows Server 2003 Computer and shared folder names containing more than 12 characte...

Page 59: ...ich the destination folder is located E Select the client computer that has the destination folder If you cannot find the computer you are looking for press Up One Level and browse that level If authe...

Page 60: ...not enough free hard disk space You can register the path to the destination in the machine s address book For details see Registering the Path to the Selected Destination in the Ad dress Book Referen...

Page 61: ...est A connection test is performed to check whether the specified folder exists L Check the connection test result and then press Exit M Press OK Note If you change the protocol after entering the pat...

Page 62: ...pecify the path by browsing the NDS tree or NetWare server for the destina tion Reference p 45 Selecting the Destination from the Machine s Address Book Entering the path to an NDS tree or NetWare ser...

Page 63: ...of the password field The soft keyboard appears I Press Connection Test A connection test is performed to check whether the specified share folder exists J Check the connection test result and then p...

Page 64: ...appears If you selected Bindery under Connection Type the NetWare server list ap pears E Search for the destination folder in the NDS tree or NetWare server If you cannot find the destination folder...

Page 65: ...taining the user object If the user name is user and the name of the Context is context the user name will be user context The machine may fail to transfer the file if you do not have write privileges...

Page 66: ...ied by browsing the network to the machine s address book A In the destination field display the destination you want to register B Press Prg Dest C Press Names and then specify the name and other inf...

Page 67: ...d the file For details about sending a file by Scan to Folder see Basic Operations When Using Scan to Folder Note Depending on the security setting Access Privileges may appear instead of User Name Fo...

Page 68: ...Sending Scan Files to Folders 60 2...

Page 69: ...g passwords Scan file stored in the machine may be lost if some kind of failure occurs We advise against using the hard disk to store important files The supplier shall not be responsible for any dama...

Page 70: ...client computer after receiving them on the computer You can also store a file and simultaneously send it by e mail or Scan to Fold er or store it and simultaneously deliver it For details see Simult...

Page 71: ...ify scanner settings such as resolu tion and scan size For details see Various Scan Settings D If necessary specify the scanning density For details see Adjusting Image Density E If necessary press Or...

Page 72: ...d them For details see Simultaneous Storage and Sending by E mail Si multaneous Storage and Sending by Scan to Folder and Simultaneous Storage and Delivery If a destination or sender has been selected...

Page 73: ...a User Name You can specify a user name for the stored file A Press Store File The Store File screen appears B Press User Name A list of user names appears C Press the user name you want to specify Th...

Page 74: ...le A stored file is allocated a name starting with SCAN followed by a 4 digit number Example SCAN0001 You can change this file name A Press Store File The Store File screen appears B Press File Name T...

Page 75: ...forget it consult the system administrator of the machine By specifying a password you can ensure that only the people who know the password can view the file A Press Store File The Store File screen...

Page 76: ...ecify an item on the display panel it is highlighted like Keys that cannot be selected appear like 1 Keys for searching for files Press to switch to the screens for search ing for a file by user name...

Page 77: ...r on this screen Reference p 71 Checking a Stored File Selected from the List Searching the List of Stored Files You can search for files from the stored files using the user name or file name You can...

Page 78: ...for a stored file by its file name A Press Select Stored File B Press File Name The soft keyboard appears C Enter the file name For information about how to enter characters see About This Machine D P...

Page 79: ...ection explains how to preview a file selected from the list of stored files A Press Select Stored File The list of stored files appears For details about the list of stored files see List of Stored F...

Page 80: ...lay Position When the preview is enlarged the loca tion of the part of the page displayed on the preview screen is indicated Checking Stored Files from a Client Computer Using DeskTopBinder Lite or We...

Page 81: ...upplied CD ROM Using Web Image Monitor to Display Stored Files The stored files are displayed and can be checked also on a client computer using Web Image Monitor The stored files will appear in the W...

Page 82: ...more than one file repeat this step If you select more than one file the files are sent or delivered in the selected order By pressing Queue you can send the selected files one by one C Press OK The...

Page 83: ...When you send a stored file by e mail either the file can be attached to the e mail or the URL of the file location can be sent This setting must be made in advance in Scanner Features For details se...

Page 84: ...nage Delete File The Manage Delete File screen appears C Select the file you want to delete D Press Delete File A confirmation message about deleting the file appears E Press Yes Note Files waiting fo...

Page 85: ...ile The list of stored files appears B Press Manage Delete File C Select the file containing the file information you want to change If you select a password protected file a screen for entering the p...

Page 86: ...nuals supplied with DeskTopBinder Depending on the security setting Change Access Priv may appear instead of Change User Name For details about specifying Change Access Priv con sult the administrator...

Page 87: ...s supplied with DeskTopBinder Changing a password Enter the password for accessing the stored file Important Be sure not to forget the password If you forget it consult the system admin istrator of th...

Page 88: ...Image Monitor or DeskTopBinder you can also change the pass word of a file stored in the machine from the client computer For details about Web Image Monitor see Web Image Monitor Help For details abo...

Page 89: ...u can send scan files to the delivery server 2 Delivery server Install the ScanRouter delivery software on thiscomputer to useitasthe deliveryserver After receiving a scan file the delivery server del...

Page 90: ...For details see General Settings Guide Specify the machine s IPv4 address and subnet mask In Effective Protocol enable IPv4 Set Delivery Option to On C If necessary change settings in Send Settings u...

Page 91: ...ilities CD ROM into the CD ROM drive The installer is automatically started and the Scanner PostScript Drivers and Utilities dialog box appears B Click DeskTopBinder Lite The DeskTopBinder Lite Setup...

Page 92: ...No Press this key to specify the destination using a 3 digit registration number 4 Manual Entry To send a file by e mail via the delivery server to a destination not registered in the delivery server...

Page 93: ...etting remains press Clear Modes B If the E mail screen or Scan to Folder screen appears switch to the network delivery scanner screen For details see Switching to the Network Delivery Scanner Screen...

Page 94: ...press Clear You can cancel a destination selected from the address book by pressing the selected destination again You can use the Message Disposition Notification function when sending e mail via de...

Page 95: ...ings p 114 Adjusting Image Density p 115 Setting of Original Feed Type p 89 Specifying Delivery Destinations p 97 Specifying the Subject of the E mail to Be Transmitted via the Deliv ery Server p 93 S...

Page 96: ...en is being displayed switch to the net work delivery scanner screen A Press Delivery Dest The network delivery scanner screen appears Note You cannot switch from the E mail screen or Scan to Folder s...

Page 97: ...tination by entering the registration number Select the destination by searching in the delivery server Selecting a destination from the Destination List From the destination list select a destination...

Page 98: ...delivery software A Press Reg No B Using the number keys enter the three digit registration number and then press q You can also enter a registration number of fewer than three digits Example To enter...

Page 99: ...can enter the name or comment You can also search by combining Name and Comment C Enter part of the destination name To search by comment enter part of the comment D Press OK E If necessary press Adv...

Page 100: ...tart with the entered character or char acters are targeted For example to search for ABC enter A End Word The names which end with the entered character or characters are targeted For example to sear...

Page 101: ...ods Select the sender from the sender list in the delivery server s Destination List Select the sender by entering the registration number Select the sender by searching the delivery server s Destinat...

Page 102: ...he number keys enter the three digit registration number assigned to the required destination folder If the entered number is less than five digits press q after the last number Example To enter 006 P...

Page 103: ...rching the delivery server s Destination List A Press Sender Name B Press Search C To search by name press Name To search by comment press Comment The soft keyboard appears so you can enter the name o...

Page 104: ...he selected destinations Up to 100 items can be displayed as the search results By pressing Advanced Search the following criteria appear Beginning Word The names which start with the entered characte...

Page 105: ...erver 97 4 Specifying the Subject of the E mail to Be Transmitted via the Delivery Server This section explains how to specify the e mail subject when sending a file by e mail via the delivery server...

Page 106: ...ile D Press OK E Specify the setting for delivering the file and then send the file For details about delivering a file see Basic Operation for Delivering Files Note A file which is simultaneously sto...

Page 107: ...which is on the supplied CD ROM For details about installing the TWAIN driver see Installing the TWAIN Driver from the Supplied CD ROM To use the network TWAIN scanner a TWAIN compliant application su...

Page 108: ...uter and then sends the scan file over the network to the client computer 2 Client Computer Specifies the scanner settings and controls the scanner using an application such as DeskTopBinder Lite that...

Page 109: ...e connected the machine to the network using an Ethernet cable make the following settings For details see General Settings Guide Specify the machine s IPv4 address and subnet mask In Effective Protoc...

Page 110: ...AIN Driver starts Follow the instructions Note Before you start the installation check the system requirements for the TWAIN driver For details about the system requirements see Software Supplied on C...

Page 111: ...ck OK F Place originals G On the File menu point to Add Document and then click Scan to display the Scanner Control dialog box A dialog box that is used to control a scanner using the TWAIN driver is...

Page 112: ...he connected scanner appears in the title bar of the Scanner Control dialog box If there is more than one scanner of the same model on the network make sure you have selected the correct scanner If yo...

Page 113: ...can Settings This section describes various scan settings Scan Settings This section explains how to make Scan settings A Press Scan Settings B Specify resolution scan size and other settings as requi...

Page 114: ...ture of photographs pictures and characters two value Creates scanned images suitable for printing Black White Photo Originals containing photographs and other pictures two value Creates scanned image...

Page 115: ...scanned The following items and sizes can be selected Auto Detect Scans original sizes using the automatic size detect function Mixed Sizes Scans a batch of originals of the same width by different le...

Page 116: ...ne applies margins to the scan area If Auto Detect is selected for scanning originals from the exposure glass the machine detects the size of individual originals and scans accordingly If only Auto De...

Page 117: ...X1 to 17 0 inch and Y1 to 8 0 inch E Set Start Position X2 and Y2 to 0 inch and then press q For example set X2 and Y2 to 0 inch and press q F Specify Scan Area X3 and Y3 using the number keys and the...

Page 118: ...2 and Scan Area X3 and Y3 Relationship of Original Size Start Position and Scan Size differs depending on the original orientation and set position Make settings correctly by referring to the followin...

Page 119: ...q For example set X1 to 17 0 inch and Y1 to 8 0 inch E Specify Start Position X2 and Y2 using the number keys and then press q For example set X2 to 2 0 inch and Y2 to 1 0 inch F Specify Scan Area X3...

Page 120: ...n ON For details see Setting of Original Feed Type Placing an original Place originals face up in the ADF face down on the exposure glass Original Orientation is Reverse Orientation OFF Original Orien...

Page 121: ...rm width for dele tion all around the original top bottom left and right sides If you select Different Width you can specify in inch a different width for deletion for each side Placing an original in...

Page 122: ...7 Selecting Auto Density corrects scanning density to improve resolution of paper types such as non white paper like newspaper or transparent originals To ad just image density when Auto Density is se...

Page 123: ...rientation This section explains how to correctly display the top bottom orientation of scanned originals on a client computer screen A Press Original Feed Type B In Original Orientation press the key...

Page 124: ...Place originals correctly by referring to the following table Exposure Glass ADF Original orientation Control Panel Key top edge touches top left corner of exposure glass top edge touches rear of exp...

Page 125: ...nner driver does not change When you specify Full Color Gray Scale or Auto Color Select for Scan Type and single page TIFF JPEG or multi page TIFF is selected as the file type re fer to the table belo...

Page 126: ...section explains the settings for the scanning the sides of originals One sided original This section explains the settings for scanning only one side of originals A Press Original Feed Type B In Ori...

Page 127: ...inal Settings select 2 Sided Original C In Page Opening Orientation select Top to Top or Top to Bottom according to the binding orientation of the originals D If the last page of the last original is...

Page 128: ...ils see Batch SADF A Press Original Feed Type B In Original Settings select Mix 1 2 Sided C Press OK Note To select Mix 1 2 Sided you must first select Batch or SADF Mix 1 2 Sided and Divide cannot be...

Page 129: ...Original Feed Type 121 6 Thin Paper This section explains settings for preventing thin originals being damaged when they are fed from the ADF for scanning A Press Original Feed Type B Press Thin Paper...

Page 130: ...t When all the originals have been scanned press q If you select Batch regardless of the default settings the machine waits until additional originals are placed If SADF is selected scanning starts as...

Page 131: ...ng additional originals After scanning additional originals using the exposure glass After changing settings while waiting for additional originals After opening closing the ADF Reference p 125 Scanni...

Page 132: ...creen for stopping or continuing scanning appears at the end of the scan F Press OK twice The current settings are displayed Note Divide and Mix 1 2 Sided cannot be selected at the same time The func...

Page 133: ...es see Setting File Type A Press Original Feed Type B Select Batch or SADF To scan originals using the exposure glass select Batch To scan originals using the ADF select SADF For detail about Batch an...

Page 134: ...me When the countdown ends transmission or storage starts automatically To start transmission or storage before the countdown is completed press q Countdown is canceled if Scan Set tings or other sett...

Page 135: ...h the ScanRouter delivery software Files are stored in TIFF or JPEG format If Store Only is selected for Store File file type cannot be specified If Send Store is selected for Store File files can be...

Page 136: ...ions support High Compression PDF High Compression PDF files created by this machine cannot be printed us ing PDF Direct Print function High Compression PDF files cannot be displayed correctly using D...

Page 137: ...re is inserted between the date and time and the four digit page number Example For a file scanned in single page TIFF at 10 ms 15 sec 15 30 hours on Dec 31 2020 the file name will be 2020123115301501...

Page 138: ...Name Type B Press Change to the right of the entry box C Using the number keys enter the starting digit of the serial number D Press q E Press OK Note You can change the starting digit only if other t...

Page 139: ...crypting PDF files Set a password to protect and encrypt a PDF file Only users who have the pass word can open and decrypt the PDF file Important Encryption is possible only for scan files sent by e m...

Page 140: ...Enter the password again and then press OK I In Encryption Level select 40 bit or 128 bit J Press OK twice Note A document password cannot be the same as the Master password You can enter up to 32 al...

Page 141: ...assword can reset or change these restrictions Important Encryption is possible only for scan files sent by e mail or Scan to Folder You cannot reset or change a file s restriction setting without the...

Page 142: ...etting You can specify the following security settings Print permission Prohibit Allow or Low Resolution Only Editing permission Prohibit or Allow Copying or extracting content permission Prohibit or...

Page 143: ...al Mix 1 2 Sided Top to Top Top to Bottom skip scanning back side of the last page Divide Original Orientation File Type Batch SADF Thin Paper Store File Preview and Reception Notice Setting made on t...

Page 144: ...the right side The initial screen reappears after a mo ment Recalling a Registered Content To recall settings registered in a program and use them for scanning A Press Program B Press Recall C Press t...

Page 145: ...e program whose settings you changed or the num ber of a different program in which you want to register the changed set tings H If you select a program that is already registered a confirmation messa...

Page 146: ...Yes The program is deleted and the initial screen reappears after a moment Changing the Registered Program Name To change the name of a registered program A Press Program B Press Change Name C Press...

Page 147: ...last page Divide Original Orientation File Type Batch SADF Thin Paper Store File Preview and Reception Notice A Make the necessary scan settings on the initial screen B Press Program C Press Program a...

Page 148: ...AIN Scanner Operation B In the Original Scan Method list select the place where the original is placed C In the Orig Orientn list select or D In the Orientation list select or E If an original is plac...

Page 149: ...ls of different sizes are scanned differently When Scanning Originals of Mixed Sizes Using TWAIN Scanner This section explains the differences between scanning mixed size originals us ing the TWAIN sc...

Page 150: ...Various Scan Settings 142 6...

Page 151: ...solution then press the Start key again appears on the machine s control panel display Change the condition until scanning is en abled Note Image compression level can limit Maximum image size When Us...

Page 152: ...ctly see the TWAIN driver Help If Binary Text Binary Photo Gray Scale 8 Colors or 8 Colors Photo is selected in Col Grad The originals can be scanned using combinations marked with in the table if Ori...

Page 153: ...iginals can be scanned using combinations marked with in the table if Original Orientation is L Note Enter A7 sizes directly 100 dpi 200 dpi 300 dpi 400 dpi 500 dpi 600 dpi 700 dpi 800 dpi 900 dpi 100...

Page 154: ...lor Select in Scan Type under Scan Settings you cannot select multi page TIFF as the file type You cannot specify High Compression PDF if Scan Type is set to Black White Text B W Text Line Art B W Tex...

Page 155: ...hed to this machine into the CD ROM drive of the client computer and then install by auto run Quick Install may not automatically work with certain operating system set tings If this happens start Set...

Page 156: ...r functions for stored files For details about DeskTopBinder Lite see DeskTopBinder Lite manuals or DeskTopBinder Lite Help File path DeskTopBinder Lite is stored in the following folder on the CD ROM...

Page 157: ...and registers them in a work folder of the DeskTopBinder For details see DeskTopBinder Help Function Palette Function Palette allows you to use DeskTopBinder functions such as Scan using TWAIN scanne...

Page 158: ...Item Maximum value Comments Number of subject line charac ters 128 alphanumeric charac ters Number of e mail message characters 80 alphanumeric charac ters This is the total number of char acters sel...

Page 159: ...meric charac ters Number of user name charac ters on FTP 64 alphanumeric charac ters Number of password charac ters on FTP 64 alphanumeric charac ters Number of path name charac ters on NCP 128 alphan...

Page 160: ...the control panel the first 16 characters are displayed When viewing the stored files from a client computer using Desk TopBinder all the entered char acters can be viewed Number of password charac te...

Page 161: ...he number of characters en tered directly from text Number of e mail address char acters 128 alphanumeric charac ters Number of addresses you can specify at the same time 500 addresses You can specify...

Page 162: ...more time Image sensor type CCD Image Sensor Scan type Sheet book Interface Ethernet interface 10BASE T 100BASE TX or 1000BASE T optional IEEE 1394 IPv4 over 1394 optional IEEE 802 11b wireless LAN op...

Page 163: ...Specifications 155 7 Network protocol IPv4 IPX Protocol for sending e mail SMTP POP3 Protocol for Scan to Folder SMB FTP NCP...

Page 164: ...n list 18 46 Display confirmation displays 4 Simplified Display 3 Display panel 3 Divide 123 Dropout Color 106 E Edit 113 Effective Protocol 39 E mail 143 E mail address 12 E mail destination 18 Addre...

Page 165: ...outer delivery software 81 Scan settings 8 105 Scan size 107 Scan to Folder 37 42 Scan Type 106 143 Screen 68 84 Scan to Folder 41 Search by comment 91 Searching by file name 70 78 Searching by user n...

Page 166: ...mission function folder transmission 151 sending e mail 150 simultaneous transmission 151 TWAIN Driver 102 103 147 TWAIN scanner 99 100 103 140 141 144 setting original orientation 140 Two sided origi...

Page 167: ...to Part 15 of the FCC Rules These limits are designed to provide reasonable protection against harmful interference when the equipment is operated in a commercial environment This equipment generates...

Page 168: ...Printer Scanner Unit Type 1356 Operating Instructions Scanner Reference EN USA B840 7601...

Reviews: