lancer LP2 Superchiller, Installation, Operation & Service Manual
The Lancer LP2 Superchiller is a cutting-edge cooling system designed to meet your beverage chilling needs. Ensure a seamless installation and efficient operation with our comprehensive Installation, Operation & Service Manual. Download this manual for free at manualshive.com and unlock the full potential of your Superchiller today.
Share
Download


Reviews:
No comments
Related manuals for LP2 Superchiller

Chill-O-Matic IN1500BKB
Brand: B&D Pages: 2

ECOWISE RTAF HE
Brand: Trane Pages: 124
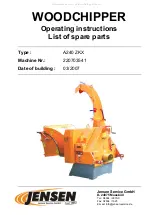
A240 ZKX
Brand: Jensen Pages: 54

CWUL-05
Brand: S&A Pages: 15

DELTA II 9100 Series
Brand: lancer Pages: 28

3300V
Brand: EarthQuake Pages: 24

5912311903
Brand: Scheppach Pages: 184

BXV Series
Brand: Tar River Pages: 80

FRESA 60
Brand: GOLDONI Pages: 44

FRESA 42
Brand: GOLDONI Pages: 44

FRESA 19
Brand: GOLDONI Pages: 39

Multiplex 42 MR04
Brand: Manitowoc Pages: 52

CWW/Y/A 1302
Brand: Clint Pages: 32

BX32
Brand: Victory Pages: 64

WER500H
Brand: Weed Eater Pages: 28

450 Series
Brand: Columbia Pages: 18

Premium Series
Brand: Nakayama Pages: 40

LCA Series
Brand: Galletti Pages: 36


