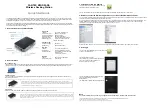
FAQ WS1516IT
Congratulations on purchasing this WS1516IT Professional Weather Station.
For your Weather Station to work properly, it must be started correctly, using good quality alkaline batteries,
and the time must be set manually. Please fully read instruction before installation.
If you found your weather station does not work correctly, you may be able to solve the problem by first
performing a Proper Restart, an Initial Set-up, and problem-solving with the trouble-shooting guide.
- Proper Restart (Quick Set-up Guide)
- Mounting Sensors
- Program Set Up
- Indoor Temperature Readings
- Outdoor Temperature/Humidity Readings
- Rain Readings
- Wind Readings
- Minimum and Maximum Readings
- History
- Display information
- Power Source
BATTERIES
We recommend new, plain alkaline batteries for our products.
Note: A good alkaline battery will have an expiration date printed on it. Alkaline batteries are dated six to
seven years beyond the current year. Therefore a battery with an expiration date three years beyond the
current year has already been sitting on a shelf for three to four years. Consider what happens to your car
battery if you let it sit unused for three to four years.
– Proper Restart (Quick Set-up Guide)
In the event of installing or changing batteries in any of the units, all units need to be reset by following the
setup procedures.
1. Remove batteries from the Thermo-hygro (outdoor) sensor, Rain sensor and the Base station. With the
batteries out of the Base station, press any button 20 times. Let everything sit without batteries for 10
minutes. Verify that the Base station is completely blank before proceeding.
2. Then disconnect and reconnect the Wind sensor cable (be sure it clicks into place). Reinsert the batteries
into the Thermo-hygro sensor and the Rain sensor. Be sure to use a new, quality alkaline battery (heavy duty
and rechargeable types should be avoided)
3. Reinstall batteries in the Base station and do not press any other buttons for AT LEAST 10 minutes while
the station completes its startup sequence. Pressing buttons before that time may prevent a good connection
to the sensors.
4. All of your sensors should be reading on your display.
5. Install the Rain gauge on a level platform that is stationary. If the gauge isnt level it will read low, and it it
is not stationary wind will cause it to read rain that is not falling. Tip: Be sure not to screw the rain sensor
down too tightly as that will result in a low or inaccurate reading.
6. Place the Rain gauge 2-3ft (or more) above the ground. This will prevent dirt from clogging the gauge and
will place it higher than most insects are willing to climb. Placing the gauge extremely high is generally not
a good idea as you may need to periodically clear debris such as leaves, spider nests etc.
7. Place the Thermo-hygro sensor in a well-shaded area that is protected from direct rainfall and sun, as it
will read high if exposed to the sun. If the sensor gets too wet it will never read accurate humidity again, so
take care to ensure that it will not be exposed to a downpour. Light incidental exposure to water typically
will not harm the sensor.