Kyoto Seimei, User Manual
Discover the comprehensive and indispensable user manual for the Kyoto Seimei, available for free download at our manualshive.com. This manual provides clear instructions, tips, and troubleshooting guidance, ensuring seamless operation and optimal functionality of your Kyoto Seimei product. Empower yourself with this user-friendly manual for a hassle-free experience.
Share
Download


Reviews:
No comments
Related manuals for Seimei

Polaris 60AZ-D
Brand: Meade Pages: 8

REINOGRIP multi
Brand: REINERT-RITZ Pages: 2
nIGHT aRROW 4
Brand: ATN Pages: 8
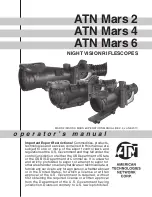
Mars 2
Brand: ATN Pages: 56

GiantView BT-70MM 45
Brand: ORION TELESCOPES & BINOCULARS Pages: 4

GoScope 80mm
Brand: ORION TELESCOPES & BINOCULARS Pages: 8

Observer 60mm AZ 9854
Brand: ORION TELESCOPES & BINOCULARS Pages: 16

Observer 70mm AZ 9881
Brand: ORION TELESCOPES & BINOCULARS Pages: 16

Strike 1000 PRO
Brand: Levenhuk Pages: 60

900-76 EQ2
Brand: Seben Pages: 16

SENDX2680A
Brand: ENGAGE Pages: 4

Astro-Tech AT80LE
Brand: Astronomy Technologies Pages: 2

Astro-Tech AT90EDT
Brand: Astronomy Technologies Pages: 2

Astro-Tech AT80EDT
Brand: Astronomy Technologies Pages: 2

AT8RC
Brand: Astronomy Technologies Pages: 4

Astro-Tech AT102EDF
Brand: Astronomy Technologies Pages: 2

Astro-Tech AT111EDT
Brand: Astronomy Technologies Pages: 2

DOBSONIAN GS680
Brand: ASTRONZ Pages: 14


