Kogan KADABXXSTDB, User Manual
The Kogan KADABXXSTDB User Manual is a comprehensive guide that enables smooth operation, setup, and troubleshooting of the product. Obtain this essential manual for free at manualshive.com, where you can easily download it in PDF format. Enhance your KADABXXSTDB experience with this reliable and user-friendly resource.
Share
Download


Reviews:
No comments
Related manuals for KADABXXSTDB

ACP60
Brand: Targus Pages: 23

iLightz
Brand: Ming Gear Pages: 30

BAR908HG
Brand: Oregon Scientific Pages: 166

Research iTone iR30
Brand: Emerson Pages: 18
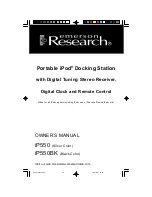
Research iP550
Brand: Emerson Pages: 36

iP500BK
Brand: Emerson Pages: 44

T612
Brand: Altec Lansing Pages: 8

WEST202GY
Brand: nedis Pages: 101

IPD-4500
Brand: LENCO Pages: 1

BAR210
Brand: Oregon Scientific Pages: 2

BAR206S
Brand: Oregon Scientific Pages: 72

ID-2
Brand: LENCO Pages: 26

EC-A115
Brand: Sharper Image Pages: 8

ISP150B
Brand: iLive Pages: 2

ISD582B
Brand: iLive Pages: 2

IS208B
Brand: iLive Pages: 2

Deluxe 1735
Brand: WeatherGuide Pages: 6

Tempest
Brand: WeatherFlow Pages: 16


