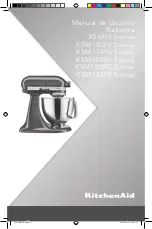
background image

Manual de Usuario

Batidora

KSM15 Series

KSM150PS Series

KSM175PS Series

KSM180RP Series

KSM180RC Series

KSM185PS Series

W11256121A.indd   1

14/06/2018   15:29:21

Summary of Contents for KSM150PS - Artisan Series Mixer

Page 1: ...Manual de Usuario Batidora KSM15 Series KSM150PS Series KSM175PS Series KSM180RP Series KSM180RC Series KSM185PS Series W11256121A indd 1 14 06 2018 15 29 21 ...

Page 2: ...W11256121A indd 2 14 06 2018 15 29 21 ...

Page 3: ...ing lowering the motor head 11 Attaching removing the flat beater Flex Edge beater wire whip or dough hook 11 Beater to bowl clearance 13 Placing removing the pouring shield 13 Using the pouring shield 14 Operating the speed control 15 Optional attachments 15 TIPS FOR GREAT RESULTS 17 Egg whites 17 Whipped cream 17 Mixing tips 18 CARE AND CLEANING 19 TROUBLESHOOTING 20 Included with select models ...

Page 4: ...ttachment knob Motor head locking lever not shown Beater shaft Bowl Bowl clamping plate Included with select models only Also available as an optional accessory The bowl design and material depend on the Stand Mixer model Pouring shield Wire whip 2 8 L stainless steel bowl Dough hook Flat beater Flex Edge beater W11256121A indd 4 14 06 2018 15 29 22 ...

Page 5: ...ructions Misuse of appliance may result in personal injury 2 This appliance is not intended for use by persons including children with reduced physical sensory or mental capabilities or lack of experience and knowledge unless they have been given supervision or instructions concerning use of the appliance in a safe way and understand the hazards involved W11256121A indd 5 14 06 2018 15 29 23 ...

Page 6: ...n operation 7 Unplug from outlet when not in use before putting on or taking off parts and before cleaning 8 Avoid contacting moving parts Keep hands hair and clothing as well as spatulas and other utensils away from accessories during operation to reduce the risk of injury to persons and or damage to the appliance 9 Do not operate any appliance with a damaged cord or plug or after the appliance m...

Page 7: ...washing 14 To avoid product damage do not use the Stand Mixer bowls in areas of high heat such as an oven microwave or on a stovetop 15 Refer to the Care and Cleaning section for instructions on cleaning the surfaces in contact with food 16 This appliance is intended to be used in household and similar applications such as staff kitchen areas in shops offices or other working environments farmhous...

Page 8: ...ical rating of the appliance The cord should be arranged so that it will not drape over the countertop or tabletop where it can be pulled on by children or tripped over unintentionally ELECTRICAL EQUIPMENT WASTE DISPOSAL Disposal of packing material The packing material is 100 recyclable and is marked with the recycle symbol The various parts of the packing must therefore be disposed of responsibl...

Page 9: ...doughs 2 SLOW MIXING For slow mixing mashing faster stirring Use to mix and knead yeast doughs heavy batters and candies start mashing potatoes or other vegetables cut shortening into flour and mix thin or splashy batters 4 MIXING BEATING For mixing semi heavy batters such as cookies Use to combine sugar and shortening and to add sugar to egg whites for meringues Medium speed for cake mixes 6 BEAT...

Page 10: ...ckwise ACCESSORY GUIDE ACCESSORY USES Flat beater and Flex Edge beater for normal to heavy mixtures Cakes creamed frostings candies cookies pie pastry biscuits meat loaf mashed potatoes Wire whip for mixtures that need air incorporated Eggs egg whites heavy cream boiled frostings sponge cakes mayonnaise some candies Dough hook for mixing and kneading yeast doughs Breads rolls pizza dough buns Incl...

Page 11: ...er motor head Push the locking lever to unlock and gently bring the head down The locking lever will automatically go back in the lock position when the head is down Before mixing test lock by attempting to raise motor head LIFTING LOWERING THE MOTOR HEAD NOTE Motor head should always be in the lock position when using the Stand Mixer ATTACHING REMOVING THE FLAT BEATER FLEX EDGE BEATER WIRE WHIP O...

Page 12: ...sible and turn to the left Then pull accessory from the beater shaft 2 Hold the locking lever in the unlock position and tilt motor head back 3 Slip accessory onto beater shaft and press upward as far as possible Then turn accessory to the right hooking accessory over the pin on the shaft W11256121A indd 12 14 06 2018 15 29 26 ...

Page 13: ...nd Mixer 2 Lift motor head Turn screw slightly counterclockwise left to raise flat beater or clockwise right to lower flat beater Make adjustment with flat beater so it just clears surface of bowl If you overadjust the screw the bowl lock lever may not lock into place Your Stand Mixer is adjusted at the factory so the flat beater just clears the bottom of the bowl If for any reason the flat beater...

Page 14: ...eld so the motor head covers the U shaped gap in the shield The pouring chute will be just to the right of the attachment hub as you face the Stand Mixer 2 Pour the ingredients into the bowl through the pouring chute Use the pouring shield to avoid having ingredients splashing out of the bowl when mixing as well as to easily pour ingredients into the bowl while mixing Included with select models o...

Page 15: ... CONTROL 1 Plug the Stand Mixer into a proper electrical outlet Always set speed control lever on lowest speed to start then gradually increase speed to avoid splashing ingredients See the Speed control guide chart 2 Do not scrape the bowl while the Stand Mixer is operating The bowl and beater are designed to provide thorough mixing without frequent scraping Scraping the bowl once or twice during ...

Page 16: ...m 4 Tighten attachment knob by turning clockwise until attachment is completely secured to Stand Mixer 5 Plug into proper electrical outlet 6 To remove Turn speed control to 0 Unplug Stand Mixer 7 Loosen attachment knob by turning it counterclockwise Rotate attachment slightly back and forth while pulling it out 8 Replace attachment hub cover Tighten attachment knob by turning it clockwise NOTE Se...

Page 17: ...henAid Stand Mixer egg whites whip quickly Avoid over whipping Pour cold whipping cream into chilled bowl Attach bowl and wire whip To avoid splashing gradually turn to designated speed and whip to desired stage AMOUNT SPEED less than 200 mL 3 4 cup GRADUALLY to 10 more than 200 mL 3 4 cup GRADUALLY to 8 Whipping stages Watch cream closely during whipping Because your KitchenAid Stand Mixer whips ...

Page 18: ...bowl See the Beater to bowl clearance section Cake mixes When preparing packaged cake mixes use Speed 4 for medium speed and Speed 6 for high speed For best results mix for the time stated on the package directions Adding nuts raisins or candied fruits Solid materials should be folded in the last few seconds of mixing on Speed 1 The batter should be thick enough to keep the fruit or nuts from sink...

Page 19: ... Do not store wire whip on shaft NOTE Stainless steel accessories are dishwasher safe Included with select models only Also available as an optional accessory CARE AND CLEANING 1 Always be sure to unplug Stand Mixer before cleaning Wipe Stand Mixer with a soft damp cloth Do not use household commercial cleaners Wipe off beater shaft frequently removing any residue that may accumulate Do not immers...

Page 20: ...it a pungent odor especially when new This is common with electric motors 3 If the flat beater hits the bowl stop the Stand Mixer See the Beater to bowl clearance section If your Stand Mixer should malfunction or fail to operate please check the following Is the Stand Mixer plugged in Is the fuse in the circuit to the Stand Mixer in working order If you have a circuit breaker box be sure the circu...

Page 21: ...r extraer el recipiente 28 Cómo levantar bajar la cabeza del motor 29 Como fijar extraer el batidor plano el batidor de borde flexible el batidor de alambre y el gancho para masa 29 Espacio entre el batidor y el recipiente 31 Cómo colocar extraer la cubierta de vertido 31 Uso de la cubierta de vertido 32 Funcionamiento del control de velocidad 33 Accesorios opcionales 33 SUGERENCIAS PARA OBTENER R...

Page 22: ...o de cabeza del motor no se muestra Eje del batidor Recipiente Placa de sujeción del recipiente Se incluye solo con modelos seleccionados También está disponible como un accesorio opcional El diseño y el material del recipiente dependen del modelo de batidora Cubierta de vertido Batidor de alambre Recipiente de acero inoxidable de 2 8 litros Gancho para masa Batidor plano Batidor con borde flexibl...

Page 23: ...erirse de gravedad si no sigue las instrucciones Todos los mensajes de seguridad le indicarán cuáles son los peligros potenciales en caso de no seguir las instrucciones PELIGRO ADVERTENCIA MEDIDAS IMPORTANTES Para la utilización de aparatos eléctricos como su Batidora es importante seguir en todo momento y observar las precauciones e instrucciones de seguridad que siguen 1 Lea y respete siempre to...

Page 24: ...bello y la ropa así como las espátulas y otros utensilios lejos de los accesorios durante el funcionamiento para reducir el riesgo de lesiones personales y o daños del electrodoméstico 9 No haga funcionar ningún electrodoméstico cuyo cable o enchufe estén dañados después de una falla de funcionamiento o si se ha caído o dañado de alguna otra manera En estos casos comuníquese con el Centro de Atenc...

Page 25: ...n horno convencional un horno microondas o una superficie de cocina 15 Consulte la sección Cuidado y limpieza para obtener instrucciones sobre la limpieza de superficies que estén en contacto con alimentos 16 Este electrodoméstico está diseñado para ser utilizado en el hogar como también en aplicaciones similares tales como áreas de cocina para el personal en tiendas oficinas u otros ambientes de ...

Page 26: ...uerte un incendio o un choque eléctrico ADVERTENCIA Voltaje 220 240 V Frequencia 50 60 Hz Potencia 300 W Para poder conectar el producto de manera adecuada verifique que La instalación eléctrica es adecuada de acuerdo a las especificaciones técnicas del producto que se indican en el presente Manual de Uso El producto será enchufado en un tomacorriente exclusivo en perfecto estado y con el voltaje ...

Page 27: ...r más rápido Úsela para mezclar y amasar masas fermentadas masas densas y confites comenzar a machacar papas u otras verduras incorporar la manteca en la harina y mezclar masas delgadas o más líquidas 4 MEZCLA BATIDO Para mezclar masas medianamente densas como las de galletas Úsela para mezclar azúcar y manteca y para agregar azúcar y para añadir azúcar a claras de huevo para preparar merengue Vel...

Page 28: ...cia la izquierda GUÍA DE ACCESORIOS ACCESORIO USOS Batidor plano y batidor de borde flexible para mezclas normales a densas Tortas coberturas en crema confites galletas base para tartas bizcochos pastel de carne puré de papas Use el batidor de alambre para mezclas en las que debe incorporar aire Huevos claras de huevo crema espesa coberturas hervidas tartas esponjosas mayonesa algunos confites Gan...

Page 29: ...a palanca de bloqueo regresará automáticamente a la posición bloqueada cuando baje la cabeza Antes de mezclar pruebe la función de bloqueo intentando levantar la cabeza del motor CÓMO LEVANTAR BAJAR LA CABEZA DEL MOTOR NOTA Cuando use la batidora la cabeza del motor debe estar siempre en la posición bloqueada COMO FIJAR EXTRAER EL BATIDOR PLANO EL BATIDOR DE BORDE FLEXIBLE EL BATIDOR DE ALAMBRE Y ...

Page 30: ...ntinuación jale el accesorio del eje del batidor 2 Mantenga la palanca de bloqueo en la posición desbloqueada e incline la cabeza del motor hacia atrás 3 Deslice el accesorio hacia el eje del batidor y presione hacia arriba lo más posible A continuación gire a la derecha el accesorio enganchándolo sobre el pasador situado en el eje W11256121A indd 30 14 06 2018 15 29 32 ...

Page 31: ...re el tornillo levemente hacia la izquierda para levantar el batidor plano o a la derecha para bajarlo Realice el ajuste con el batidor plano para que quede a una distancia mínima de la superficie del recipiente Si ajusta el tornillo en exceso es posible que la palanca de bloqueo del recipiente no se bloquee en su lugar La batidora se ajusta en la fábrica para que el batidor plano mantenga una dis...

Page 32: ...era que la cabeza del motor cubra el espacio con forma de U en la cubierta La tolva de vertido quedará justo a la derecha del conector de accesorios viendo la batidora de frente 2 Vierta los ingredientes en el recipiente a través de la tolva de vertido Use la cubierta de vertido para evitar salpicaduras de ingredientes fuera del recipiente mientras mezcla así como para verter fácilmente ingredient...

Page 33: ...a a un tomacorriente adecuado Siempre ajuste la palanca de control de velocidad en la velocidad más baja para comenzar y aumente la velocidad en forma paulatina para evitar salpicaduras de ingredientes Consulte la tabla Guía de control de velocidad 2 No raspe el recipiente mientras la batidora está funcionando El batidor y el recipiente están diseñados para ofrecer una capacidad de mezcla óptima s...

Page 34: ...el accesorio hacia atrás y hacia delante Cuando el accesorio esté en la posición correcta el pasador en el accesorio se ajustará a la muesca situada en el borde del conector 4 Apriete la perilla de accesorios girándola hacia la derecha hasta que el accesorio quede bien asegurado a la batidora 5 Enchufe a un tomacorriente adecuado 6 Para extraer Gire el control de velocidad a 0 Desenchufe la batido...

Page 35: ...dualmente hasta la velocidad designada y bata hasta obtener el resultado que desea CANTIDAD VELOCIDAD menos de 200 mL 3 4 de taza GRADUALMENTE hasta 10 más de 200 mL 3 4 de taza GRADUALMENTE hasta 8 Etapas de espumado Observe detenidamente la crema durante el espumado Como la batidora KitchenAid bate tan rápido las etapas de espumado están separadas por apenas unos segundos SUGERENCIAS PARA OBTENE...

Page 36: ...nsulte la sección Espacio entre el batidor y el recipiente Mezclas para bizcochuelo Cuando prepare mezclas para bizcochuelo envasadas use la Velocidad 4 para velocidad media y la Velocidad 6 para velocidad alta Para obtener resultados óptimos mezcle durante el tiempo señalado en las instrucciones del envase Adición de frutos secos pasas y futa confitada Debe incorporar los elementos sólidos durant...

Page 37: ...ompleto antes de secarlo No lo guarde en el eje NOTA los accesorios de acero inoxidable se pueden lavar en la lavavajillas Se incluye solo con modelos seleccionados También está disponible como un accesorio opcional CUIDADO Y LIMPIEZA 1 Siempre asegúrese de desenchufar la batidora antes de limpiarla Limpie la batidora con un paño suave húmedo No utilice limpiadores domésticos ni comerciales Limpie...

Page 38: ...e emanar un olor acre especialmente cuando está nueva Esto es normal con los motores eléctricos 3 Si el batidor plano golpea el recipiente detenga la batidora Consulte la sección Espacio entre el batidor y el recipiente Si la batidora tiene un funcionamiento incorrecto o decididamente no funciona revise lo siguiente Está enchufada la batidora El fusible en el circuito a la batidora funciona correc...

Page 39: ...a ser intervenido debido a inconvenientes o fallas de funcionamiento del mismo o de sus componentes y siempre que falle en condiciones normales de uso El término de vigencia de la Garantía otorgada a través del presente es de uno 1 año a partir de la fecha de compra original por el consumidor final del producto garantizado Durante dicho período el Garante asegurará la reparación gratuita del produ...

Page 40: ...esta Garantía que no tenga su origen en fallas respecto de las condiciones de calidad e idoneidad del producto de conformidad con los términos y alcances de la Garantía estará a cargo del Beneficiario Titular de la presente En tal sentido servicios tales como mantenimiento preventivo instalaciones adicionales y o similares así como todos los generados por las exclusiones mencionadas en el punto 4 ...

Page 41: ...vitamos a chequear los datos del Garante en el sello colocado por el Distribuidor Si tiene alguna consulta respecto de los Distribuidores oficiales o bien sus datos contáctenos a través de los medios señalados a continuación Línea telefónica 5064001423 Línea telefónica gratuita nacional 0800 0571029 Horarios de atención Llámenos de lunes a viernes de 8 00 a m a 6 00 p m y sábados de 8 00 a m a 2 0...

Page 42: ...os datos del Garante en el sello colocado por el Distribuidor Si tiene alguna consulta respecto de los Distribuidores oficiales o bien sus datos contáctenos a través de los medios señalados a continuación Línea Gratuita Nacional 01 8007510135 Horario de atención llámenos de lunes a viernes de 8 00 am a 5 00 pm E mail serviciook whirlpool com Sitio web www kitchenaid com do REPÚBLICA DOMINICANA Por...

Page 43: ...W11256121A indd 43 14 06 2018 15 29 36 ...

Page 44: ...and the design of the stand mixer are trademarks in the U S and elsewhere 2018 Todos los derechos reservados KITCHENAID y el diseño de la batidora son marcas comerciales en Estados Unidos y otros lugares 06 18 W11256121A indd 44 14 06 2018 15 29 37 ...

Reviews: