background image

B60-3069-00  CS  (K, P,  Y)
98/12 11 10 9 8 7 6 5 4 3 2 1 97/12 11 10 9 8 7 6 5 4 3 2 1

AUDIO VIDEO SURROUND RECEIVER

KR-897

KR-797

INSTRUCTION MANUAL

KENWOOD CORPORATION

This manual contains instructions for two models.  Model availability and features
(functions) may differ depending on country and sales area.

Model KR-897 is not available in except for U.S.A. and Canada.

MC

KR-897̲797(En).pm5

07.6.11, 5:05 PM

1

Summary of Contents for KR-797

Page 1: ...D RECEIVER KR 897 KR 797 INSTRUCTION MANUAL KENWOOD CORPORATION This manual contains instructions for two models Model availability and features functions may differ depending on country and sales area Model KR 897 is not available in except for U S A and Canada MC KR 897 797 En pm5 07 6 11 5 05 PM 1 ...

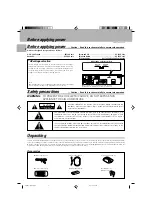
Page 2: ... S ENCLOSURE THAT MAY BE OF SUFFICIENT MAGNITUDE TO CONSTITUTE A RISK OF ELECTRIC SHOCK TO PERSONS THE EXCLAMATION POINT WITHIN AN EQUILATERAL TRIANGLE IS INTENDED TO ALERT THE USER TO THE PRESENCE OF IMPORTANT OPERATING AND MAINTENANCE SERVICING INSTRUCTIONS IN THE LITERATURE ACCOMPANYING THE APPLIANCE CAUTION TO REDUCE THE RISK OF ELECTRIC SHOCK DO NOT REMOVE COVER OR BACK NO USER SERVICEABLE PA...

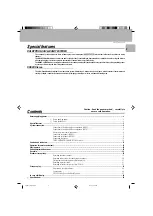
Page 3: ...EREO SRS 3D Stereo Contents Caution Read the pages marked 3 carefully to ensure safe operation Before applying power 2 3 Before applying power 2 3 Safety precautions 2 Special features 3 System connection 4 Connections of Audio and Video components KR 897 4 Connections of Audio and Video components KR 797 5 About the system control connections 6 Connection of speakers KR 897 7 Connection of speake...

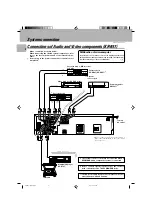
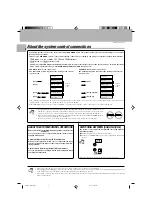
Page 4: ...not possible or erroneous display appears even though all connections have been made properly reset the micro computer referring to In case of difficulty Video deck 2 or DVD LD player IN OUT 2 Do not connect system control cord to the cassette deck connected to the TAPE 2 MONITOR jacks 1 The system control cord should be connected when a KENWOOD audio component system is connected 3 The KX W797 an...

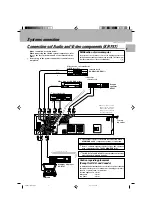
Page 5: ...lty Multipul CD player DP R797 1 System control cord OUT IN REC IN PLAY OUT Audio OUT IN OUT Audio Video deck 1 cassette deck 1 or MD recorder System control cord Graphic equalizer KE 597 cassette deck KX W597 KX W797 1 Caution regarding placement Except for U S A and Canada To maintain proper ventilation be sure to leave a space around the unit from the largest outer dimensions including projecti...

Page 6: ...rds are not connected properly the remote control or automatic operation between system components will not work properly Notes Notes Some CD players and cassette decks are not compatible with the SL16 system control mode Be sure to use the XS8 system control mode when making system connections with equipment that is not SL16 compatible Some MD players are not system control compatible You cannot ...

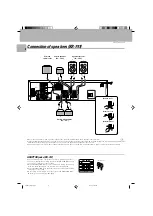
Page 7: ...b woofer should be a power sub woofer with a built in amp 1 Power amplifier KM 897 ª ª ª ª ª 2 Insert cord 1 Push lever 3 Return lever 1 For the operation of the power amplifier KM 897 refer to the instruction manual of the power am plifier KM 897 Speaker system A 8Ω 16Ω Connect the speakers for use in surround play to speaker sys tem A Speaker system B does not out put sound during surround play ...

Page 8: ...natural with ambiguous acoustic image positioning Be sure to connect the speakers and speaker cords correctly Connect a sub woofer if you want to enhance the bass sound The connected sub woofer should be a power sub woofer with a built in amp ª 2 Insert cord 1 Push lever 3 Return lever ADAPTOR jacks KR 797 When an adaptor type component such as a graphic equalizer is connected unplug the shorting ...

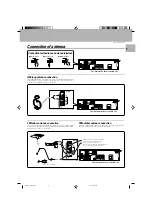
Page 9: ...utdoor antenna connection Lead the 75 Ω coaxial cable connected to the FM outdoor antenna into the room and connect it to the FM 75 Ω terminal FM indoor antenna connection The accessory antenna is for temporary indoor use only For stable signal reception we recommend using an outdoor antenna Remove the indoor antenna if you connect one outdoors REC OUT PLAY IN VIDEO 1 TAPE 1 PLAY IN TAPE 2 MONITOR...

Page 10: ... matched to the area where the unit is to be used for instance when you moved from area 1 to area 2 or vice versa desired reception of AM FM broadcasts is not expected In this case change the FM DE EMPHASIS CHANNEL SPACE setting in accordance with the area corresponding to the table The FM DE EMPHASIS is switched over at the same time REC OUT PLAY IN VIDEO 1 TAPE 1 PLAY IN TAPE 2 MONITOR VIDEO 2 S...

Page 11: ... to select the input source 0VOLUME CONTROL knob PHONES jack Plug headphones into this jack DISPLAY key Press to switch the displayed information between the surround mode display and input selector display Press and hold the DISPLAY key for more than 2 seconds to switch the display bright ness TUNING keys Press to select a radio station TAPE 2 MONITOR key Press to monitor the sound being re corde...

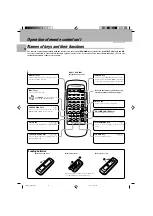
Page 12: ...ne or during setup of the surround mode VOLUME CONTROL keys Press to adjust the volume MUTE key Press to mute sound temporarily Insert two AA size R6 SUM 3 batteries as indicated by the polarity marking 2 1 2 1 CENTER MODE key Press to select the center mode in the DOLBY PRO LOGIC surround mode SETUP key Press to set up the balance or surround play Numeric keys Used as the numeric keys of the inpu...

Page 13: ...Stop key 6 Forward play key 1 Search key 6 Play key 7 Stop key 1 Search key Reverse play key 1 1 Switch ON the power of the main unit Approximate operating range 1 No remote control key is marked MD but the TAPE1 key can be used to control a MD player by switching the display of the main unit from TAPE1 to MD Remote sensor Model RC R0505 Infrared ray system Pressing the POWER key of the remote con...

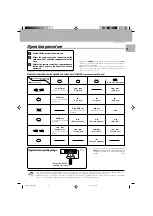
Page 14: ...indicator is ON The speakers connected to the SPEAKERS terminals on the rear panel output sound When the SPEAKERS indicator is OFF The speakers do not output sound Use this setting when listening through headphones The SPEAKERS indicator should light up 3 VIDEO1 2 MD 1 TAPE1 5 VOLUME CONTROL DOWN UP To decrease volume To increase volume INPUT SELECTOR C D The selected source is displayed Note Note...

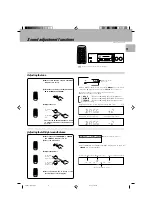
Page 15: ... 5 6 7 8 9 DISK SKIP 0 10 SOUND CENTER MODE A B 100 TUNER CD PHONO VIDEO2 MUTE 1 7 6 AV AUX REMOTE CONTROL UNIT RC R0505 4 2 AUTO BAND P CALL VOLUME CONTROL STANDBY SPEAKERS SRS 3D SPEAKERS INPUT SELECTOR VOLUME CONTROL 10 AUDIO VIDEO SURROUND RECEIVER KR 897 BAND DIMMER VIDEO1 TAPE1 SETUP TAPE2 MONITOR LEVEL CONTROL LISTEN MODE B A S S 2 B A S S 2 SURROUND 3 STEREO S DIRECT Adjustment of SRS Soun...

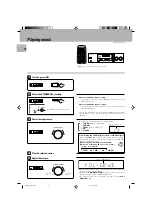
Page 16: ... during low volume listening N B Lights 1 Choose the playback source 3 Playback the source To cancel Press the SOURCE DIRECT key again Goes off POWER PHONES ON STANDBY UP DOWN 1 2 3 4 5 6 7 8 9 0 AUTO DIRECT MEMORY PRO LOGIC STEREO SRS 3D N B SOURCE DIRECT P CALL 3 STEREO TUNING TAPE2 MONITOR POWER 1 2 3 4 5 6 7 8 9 DISK SKIP 0 10 SOUND CENTER MODE A B 100 TUNER CD PHONO VIDEO2 MUTE 1 7 6 AV AUX R...

Page 17: ...EMORY PRO LOGIC STEREO SRS 3D N B SOURCE DIRECT P CALL 3 STEREO TUNING TAPE2 MONITOR POWER 1 2 3 4 5 6 7 8 9 DISK SKIP 0 10 SOUND CENTER MODE A B 100 TUNER CD PHONO VIDEO2 MUTE 1 7 6 AV AUX REMOTE CONTROL UNIT RC R0505 4 2 AUTO BAND P CALL VOLUME CONTROL STANDBY SPEAKERS SRS 3D SPEAKERS INPUT SELECTOR VOLUME CONTROL 10 AUDIO VIDEO SURROUND RECEIVER KR 897 BAND DIMMER VIDEO1 TAPE1 SETUP TAPE2 MONIT...

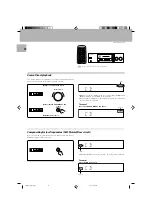
Page 18: ...OR A cassette deck or graphic equalizer can be connected to this unit s TAPE 2 MONITOR terminals If you connect a graphic equalizer turn the TAPE 2 MONITOR key ON If you connect a 3 head cassette deck you can monitor the source sound or the sound being recorded while recording Pressing the TAPE 2 MONITOR key lets you compare the recorded sound and the source sound Refer to the operating manual for...

Page 19: ...PLAY TAPE2 MONITOR The last frequency tuned before is displayed 1 How to switch the display Lights Receiving broadcast stations POWER PHONES ON STANDBY UP DOWN 1 2 3 4 5 6 7 8 9 0 AUTO DIRECT MEMORY PRO LOGIC STEREO SRS 3D N B SOURCE DIRECT P CALL 3 STEREO TUNING TAPE2 MONITOR POWER 1 2 3 4 5 6 7 8 9 DISK SKIP 0 10 SOUND CENTER MODE A B 100 TUNER CD PHONO VIDEO2 MUTE 1 7 6 AV AUX REMOTE CONTROL UN...

Page 20: ...ace FM 89 MHz 8 9 50 kHz space FM 92 5 MHz 9 2 5 50 kHz space FM DE EMPHASIS CHANNEL SPACE switch 0 Frequency indicator TUNED lights up when a station is tuned If you make a mistake the frequency display blinks for a few seconds In this case repeat step 3 from the beginning Receiving radio stations by specifying its frequency Blinks POWER PHONES ON STANDBY UP DOWN 1 2 3 4 5 6 7 8 9 0 AUTO DIRECT M...

Page 21: ...0 0 0 Receiving all preset stations in order P CALL Every time the key is pressed the next station in the order of the preset number is received When you press P CALL key When you press 4 P CALL key If the key is held pressed Preset stations will be received suc cessively for about half a second each The same operation is also available with the P CALL keys of the main unit Press the preset number...

Page 22: ...KR 897 KR 797 En 22 KR 897 797 En pm5 07 6 11 5 06 PM 22 ...

Page 23: ...r sound field with full of pres ence to movie theatres To use this mode connect the surround and center speakers DOLBY 3 STEREO mode If the left and right speakers are installed apart from each other the center acoustic image words etc may vary depending on the listener s position The DOLBY 3 STEREO mode provides an improved positioning of the center acoustic image regardless of the listening posi...

Page 24: ...n the remote con trol unit 2 Adjust the front speaker left right levels so that the left and right levels are identical 3 Press the SETUP key again to establish the setup After this the unit enters the condition for 4 Adjust the volume level of each speaker SETUP LEVEL CONTROL 3 Adjusting the front speaker balance 4 Adjusting the volume level of each speaker 5 Adjusting the delay time End of setup...

Page 25: ...ay time for your listening room by referring to How to calculate the proper delay time Select an integer value which is closest to the value obtained with How to calculate the proper delay time The delay time can be adjusted to 15 20 25 or 30 ms Delay time Surround speaker side Adjustment position Front speaker side LEVEL CONTROL SETUP LEVEL CONTROL To increase To decrease Noise like test tone mov...

Page 26: ...100 TUNER CD PHONO VIDEO2 MUTE 1 7 6 AV AUX REMOTE CONTROL UNIT RC R0505 4 2 AUTO BAND P CALL VOLUME CONTROL SPEAKERS SRS 3D SPEAKERS INPUT SELECTOR VOLUME CONTROL 10 AUDIO VIDEO SURROUND RECEIVER KR 897 BAND DIMMER VIDEO1 TAPE1 SETUP TAPE2 MONITOR LEVEL CONTROL LISTEN MODE Keys or controls to be used in this operation When playing videotape DVD or LD software carrying the mark a sound field with ...

Page 27: ...TO DIRECT MEMORY PRO LOGIC STEREO SRS 3D N B SOURCE DIRECT P CALL 3 STEREO TUNING TAPE2 MONITOR POWER 1 2 3 4 5 6 7 8 9 DISK SKIP 0 10 SOUND CENTER MODE A B 100 TUNER CD PHONO VIDEO2 MUTE 1 7 6 AV AUX REMOTE CONTROL UNIT RC R0505 4 2 AUTO BAND P CALL VOLUME CONTROL STANDBY SPEAKERS SRS 3D SPEAKERS INPUT SELECTOR VOLUME CONTROL 10 AUDIO VIDEO SURROUND RECEIVER KR 897 BAND DIMMER VIDEO1 TAPE1 SETUP ...

Page 28: ...rring to Connec tion of speakers 78 Press the MUTE key to OFF Set the SPEAKERS key to ON Set the TAPE 2 MONITOR key to OFF Set the input selector to the position other than tuner Turn the power off eliminate the short circuit ing then turn on the power again 78 Connect it properly referring to Connection of speakers 78 Adjust the Left Right balance Connect them properly referring to Connec tion of...

Page 29: ...s that the cable ground shall be connected to the grounding system of the building as close to the point of cable entry as practical FCC WARNING This equipment may generate or use radio frequency energy Changes or modifications to this equipment may cause harmful interference unless the modifications are expressly approved in the instruction manual The user could lose the authority to operate this...

Page 30: ...6 PHONO MM 75 dB LINE CD 93 dB Input sensitivity impedance PHONO MM 3 0 mV 47 kΩ CD 220 mV 47 kΩ Tone controls BASS 8 dB at 100 Hz MIDDLE 8 dB at 900 Hz TREBLE 8 dB at 10 kHz N B circuit 5 dB 80 Hz Output level impedance Sub woofer preout 2 0 V 600 Ω FM Tuner section Tuning frequency range 87 5 MHz 108 MHz Usable sensitivity MONO 1 3 µV at 75 Ω 13 2 dBf 75 kHz dev SINAD 30 dB 50 dB quieting sensit...

Page 31: ...mod S N 20 dB 13 µV 500 µV m Signal to noise ratio 30 mod 1 mV input 50 dB General Power consumption 250 W AC outlet SWITCHED Australia1 300 W max Dimensions W 440 mm H 127 mm D 389 mm Weight net 9 0 kg Audio section Rated power output at the STEREO operation 100 watts per channel minimum RMS both channels driven at 8 Ω from 40 Hz to 20 000 Hz with no more than 0 7 total harmonic distortion FTC 1 ...

Page 32: ... circuit 5 dB 80 Hz Output level impedance Sub woofer preout 2 0 V 600 Ω FM Tuner section Tuning frequency range 87 5 MHz 108 MHz Usable sensitivity MONO 1 3 µV at 75 Ω 13 2 dBf 75 kHz dev SINAD 30 dB 50 dB quieting sensitivity STEREO 31 6 µV at 75 Ω 41 2dBf Total harmonic distortion 1 kHz MONO 0 5 65 dBf input STEREO 0 6 65 dBf input Signal to noise ratio 1 kHz 75 kHz dev MONO 75 dB 65 dBf input ...

Reviews: