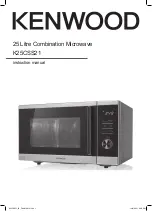
background image

25 Litre Combination Microwave
K25CSS21

instruction manual

K25CSS21_IB_Final210812.indd   1

K25CSS21_IB_Final210812.indd   1

12/8/2021   2:48 PM

12/8/2021   2:48 PM

Summary of Contents for K25CSS21

Page 1: ...25 Litre Combination Microwave K25CSS21 instruction manual K25CSS21_IB_Final210812 indd 1 K25CSS21_IB_Final210812 indd 1 12 8 2021 2 48 PM 12 8 2021 2 48 PM ...

Page 2: ... checking your microwave 11 clock setting 12 kitchen timer 13 microwave cooking 14 quick start cooking 15 grill cooking 16 combination cooking 16 convection cooking 17 with preheating 17 without preheating 17 multi stage cooking 18 auto cooking 19 auto cook menu table 20 weight defrost 22 time defrost 23 checking the cooking function 24 24 24 setting the child lock 24 cleaning your microwave 25 fr...

Page 3: ...fely We recommend that you spend some time reading this instruction manual in order that you fully understand all the operational features it offers Read all the safety instructions carefully before use and keep this instruction manual for future reference If items are missing or damaged please contact Partmaster UK only Tel 0344 800 3456 for assistance Grill Rack For use when grilling convection ...

Page 4: ...curely on the spindle You must always use the turntable plate and support whenever you use the microwave 5 To protect your work surface we recommend that you fix some non slip cushion buttons not included to the underside of the microwave getting ready This microwave is designed for home use only It should not be used for commercial catering 1 After unpacking your microwave check that it has not b...

Page 5: ...od causing lots of tiny vibrations The vibrations get so great that the moisture and the food heat up Microwave energy can heat unevenly so stirring to distribute heat is very important Always stir from the outside inwards If you are cooking a number of individual foods at the same time such as baked potatoes or small cakes arrange them evenly on the turntable plate so that they cook evenly Never ...

Page 6: ...owave Remove aluminium foil lids from containers before using in the microwave Some lids are made of card with an aluminium foil covering these should be removed too Use a microwave safe transparent lid if possible Stir food during cooking if the container has a lid or film cover Always use the glass turntable plate Use shallow containers with a large surface area Do not use containers that are mo...

Page 7: ...ave oven unattended while cooking Paper towels Use to cover food for reheating and absorbing fat Use with supervision for short term cooking only Greaseproof paper Use as a cover to prevent splattering or a wrap for steaming Plastic Microwave safe only Follow the manufacturer s instructions Should be labelled Microwave Safe Some plastic containers soften as the food inside gets hot Boiling bags an...

Page 8: ...rowave ready meals weighing up to 500g 1lb 2oz should have cooking instructions for heating categories A to E Follow the instructions for the letter that corresponds to the heating category of the oven The higher the output power and heating category of the oven the less heating time is required This is shown in the diagrams below Oven Output Power Less heating time required 600 700 800 900 1000 W...

Page 9: ...nd the door condensation As the steam cools you may find that condensation gathers in small pools inside your microwave and on the work surface beneath the door and vents Always dry the microwave after cooking foods with a high moisture content Your microwave is designed to let steam escape from the vents and around the door without microwave energy escaping There is no danger of microwave energy ...

Page 10: ...n to do quick start cooking of 30 seconds increase cooking time by 30 seconds by each press or Display Shows the clock cooking time and setting Microwave button Use this button to select the microwave power level Stop Cancel button Use this button to pause stop cooking and cancel cooking settings It can also be used to activate the child lock Grill Convec Combi button Use this button for grill con...

Page 11: ... cycle that allows you to check the operation of the microwave 6 When the cooking cycle has finished the water should be hot be careful when you take the cup out of the microwave 7 Press the Stop Cancel 2 button to clear any settings 1 2 For your safety the microwave stops if the door is opened during cooking Close the door and press the Start 30sec 1 button to continue the cooking cycle Smoke and...

Page 12: ...hin 0 59 5 Press the Clock Timer 1 button to complete the clock setting This is a 24 hour clock When the microwave is connected to the mains power for the first time or when the power is resumed after a power interruption the display will show 0 00 To re set the clock follow the above steps In the process of clock setting if the Stop Cancel 3 button is pressed the microwave will go back to the pre...

Page 13: ...00 2 Turn the Parameter 2 dial to set the timer time The longest time you can set is 95 minutes 3 Press the Start 30sec 3 button to confirm the setting and to start the countdown You can press the Stop Cancel 4 button to cancel the timer 4 Once the elapsed time is reached the microwave will sound and return to its original state The kitchen timer is not a clock it is a timer 2 4 1 3 K25CSS21_IB_Fi...

Page 14: ...an be set to 95 minutes 4 Press the Start 30sec 3 button to confirm and start cooking You can press the Stop Cancel 4 button once to pause the cooking Press the Stop Cancel 4 button again to cancel the cooking Display Microwave power P100 High P80 Moderately High P50 Medium P30 Moderately Low P10 Low When removing food from the microwave please ensure that the microwave has stopped Operating the m...

Page 15: ...0 seconds and so on The maximum cooking time is up to 95 minutes Alternatively you can also turn the Parameter 2 dial once to the left the cooking time of 95 00 minutes will appear Continuously turn the Parameter 2 dial to set your desired cooking time then press Start 30sec 1 button to start cooking Press the Stop Cancel 3 button once to pause the cooking Press the Stop Cancel 3 button again to c...

Page 16: ...se the supplied grill rack to place your food Place the grill rack on top of the turntable plate 1 Press the Grill Convec Combi 1 button repeatedly to select which combination cooking programme to use C 1 C 2 C 3 C 4 2 Press the Start 30sec 3 button to confirm the selection 3 Turn the Parameter 2 dial to set the cooking time The maximum cooking time can be set to 95 minutes 4 Press the Start 30sec...

Page 17: ... Parameter 2 dial to set the cooking time The maximum cooking time can be set to 95 minutes 6 Press the Start 30sec 3 button to confirm and start cooking You can press the Stop Cancel 4 button once to pause the cooking Press the Stop Cancel 4 button again to cancel the cooking 2 4 3 1 without preheating 1 Press the Grill Convec Combi 1 button repeatedly to select which preheat temperature to use 1...

Page 18: ...ress the Start 30sec 4 button to confirm and start cooking 6 Press the Stop Cancel 5 once button to pause the cooking Press the Stop Cancel 5 button again to cancel the cooking You can set a maximum of 2 stages for multi stage cooking If defrosting is among one of the stages then it should be set as the first stage Preheat auto cooking and quick start cooking are not available in multi stage cooki...

Page 19: ...the Start 30sec 2 button to confirm and start cooking 5 Press the Stop Cancel 3 button once to pause the cooking Press the Stop Cancel 3 button to cancel the cooking When using the auto cook menu it is not necessary to programme the time or cooking power Indicating the food type and weight is sufficient For some food you may need to turn it over during cooking to ensure it is thoroughly cooked and...

Page 20: ...er 350 g 350 g 4 30 500 g 500 g 6 00 A5 Fish 150 g 150 g 3 00 P80 Make sure food is thoroughly cooked before consuming Additional cooking time may be required for thicker pieces of fish 250 g 250 g 4 30 350 g 350 g 5 30 450 g 450 g 7 00 650 g 650 g 8 30 A6 Pasta 50 g 50 g 450ml cold water 18 00 P80 Only use suitable microwavable containers and cling film in the microwave Check regularly to ensure ...

Page 21: ...or frozen pieces of pizza Do not use any type of cling film or plastic or similar materials in convection mode These materials may melt and cause a hazard 300 g 300 g 10 30 400 g 400 g 11 30 A10 Chicken 500 g 500 g 25 00 C 4 Make sure food is thoroughly cooked before consuming Additional cooking time may be required for thicker pieces of chicken Do not use any type of cling film or plastic or simi...

Page 22: ...l the defrosting Large items may be frozen in the centre Therefore to ensure even thawing turn them over from time to time and break them into smaller pieces during defrosting When half of the defrosting time has passed a signal will sound twice reminding you to turn over the food Press the Stop Cancel 4 button once to pause the defrosting programme and open the microwave door After you turn over ...

Page 23: ...in the centre Therefore to ensure even thawing turn them over from time to time and break them into smaller pieces during defrosting When half of the defrosting time has passed a signal will sound twice reminding you to turn over the food Press the Stop Cancel 4 button once to pause the defrosting programme and open the microwave door After you turn over the food close the door then press the Star...

Page 24: ... The display will last for 2 3 seconds and the microwave will then return to its original display 3 1 2 setting the child lock This feature prevents the microwave from operating by locking the control panel until you cancel the lock Follow the steps below to set the child lock 1 Press the Stop Cancel 1 button for 3 seconds until a long tone is sound The child lock indicator will appear on the disp...

Page 25: ...microwave If grease is left to accumulate it can smoke and even catch fire Keep the inside of the door clean with a damp cloth Use warm soapy water for stubborn marks and dry thoroughly The inside of the door has a special coating and must not be cleaned with abrasive pads or cleaning powders Clean behind the door ledge Treat the glass turntable plate as you would any glass plate After you have us...

Page 26: ...side of the door Condensation is perfectly normal especially when you are cooking food with a high moisture content such as potatoes Does the microwave energy get through the window on the door No The door has a special metal screen with holes that lets you see inside but stops microwave energy from getting out Steam comes out of the side of the door and vents Can microwave energy get out too No T...

Page 27: ...h Approx 310 x 515 x 495 mm Power Consumption Microwave Input 1450 1500 W Grill Input 1050 1100 W Convection Input 2300 2500 W Features and specifications may change without prior notice Light source in this product is replaceable only by qualified engineers K25CSS21_IB_Final210812 indd 27 K25CSS21_IB_Final210812 indd 27 12 8 2021 2 48 PM 12 8 2021 2 48 PM ...

Page 28: ...ed below please quote their corresponding part numbers Replacement Part Part Number Glass Turntable Plate 12570000008334 Turntable Support 12170000000422 Grill Rack 12970000000353 K25CSS21_IB_Final210812 indd 28 K25CSS21_IB_Final210812 indd 28 12 8 2021 2 48 PM 12 8 2021 2 48 PM ...

Reviews: