background image

Summary of Contents for 95715

Page 1: ... q _15 ELECTRICSELF CLEANING RANGE Use Care Guide Sears Roebuck and Co Hoffman Estates IL 60179 U S A PIN 316000944 9810 www sears com ...

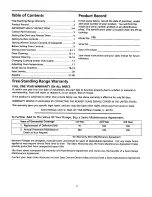
Page 2: ... will repair or replace it at our option free of charge If the product is subjected to other than private family use the above warranty is effective for only 90 days WARRANTY SERVICE IS AVAILABLE BY CONTACTING THE NEAREST SEARS SERVICE CENTER IN THE UNITED STATES This warranty gives you specific legal rights and you may also have other rights which vary from state to state Sears Roebuck and Co Dep...

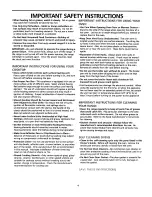
Page 3: ...any part of the appliance unless specifically recommended in the manuals All other servicing should be done only by a qualified technician This may reduce the risk of personal injury and damage to the range Never modify or alter the construction of a range by removing leveling legs panels wire covers anti tip brackets screws or any other part of the product Stepping leaning or sitting on the doors...

Page 4: ...ric shock or fire Glazed Cooking Utensils Only certain types of glass glass ceramic ceramic earthenware or other glazed utensils are suitable for cooktop service without breaking due to the sudden change in temperature Check the manufacturer s recommendations for cooktop use IMPORTANT INSTRUCTIONS FOR USING YOUR OVEN Use Care When Opening Oven Door or Warmer Drawer Stand to the side of the range w...

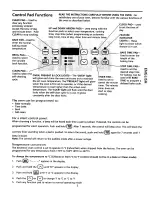
Page 5: ...ocks TIMER PAD_ Used to set or canceltheminute timer The minute timer does not sta_ orstop cooking BAKE TIME PAD Used to enter the length of the baking time STOP TIME PAD Used to set the I rl desired stop time Z for baking Can be used with BAKE _1 TIME to program a r delayed bake cycle The oven can be programmed to Bake normally Time bake Broil Self clean For a silent control panel When choosing a...

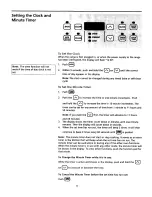
Page 6: ..._ first the timer will advance to 11 hours and 59 minutes The display shows the timer count down in minutes until one minute remains Then the display will count down in seconds When the set time has run out the timer will beep 3 times It will then continue to beep 3 times every 60 seconds until _ _ is pushed Note The minute timer does not start or stop cooking It serves as an extra timer in the ki...

Page 7: ... control knobs are turned off The suggested settings found in the chart below are based on cooking in medium weight aluminum pans with lids Settings may vary when using other types of pans Setting Type of Cooking HIGH HI Start most foods bring water to a boil pan broiling MEDIUM HIGH 7 8 Continue a rapid boil fry deep fat fry MEDIUM 4 6 Maintain a slow boil thicken sauces and gravies steam vegetab...

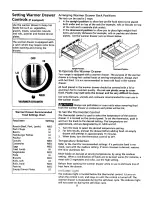
Page 8: ...uminum foil to maintain quality Do not use plastic wrap to cover food Plastic may melt onto the drawer and be very difficult to clean Use only dishware utensils and cookware recommended for oven use in the warmer drawer _ Always use potholders or oven mitts when removing food from the warmer drawer as cookware and plates will be hot To Set the Thermostat Control The thermostat control is used to s...

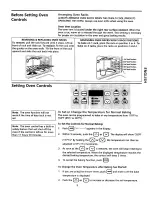
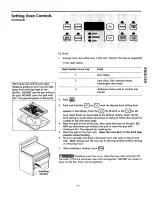
Page 9: ...sition 5th Rack Position Setting Oven Controls 1 Note The oven function will not work if the time of day clock is not set Note The oven control has a built in safety feature that will shut off the oven if the control is left on for more than 11 hours 59 minutes To Set or Change the Temperature for Normal Baking The oven can be programmed to bake at any temperature from 170 F to 550 F 65 C to 287 C...

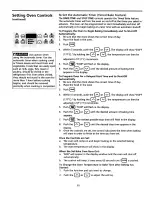
Page 10: ...djusted in 5 F 1 C increments Push _ 0 00 will flash in the display Push the _ _ or _ until the desired amount of baking time J i appears in the display To Program Oven for a Delayed Start Time and to Shut Off Automatically 1 Be sure that the clock shows the correct time of day 2 Place the food in the oven 3 Push _ 4 Within 5 seconds push the or The display will show 350 F 177 C By holding the or ...

Page 11: ..._V_Jfor LO broil Most foods can be broiled at the HI broil setting Select the LO broil setting to avoid excess browning or drying of foods that should be cooked to the well done stage 4 Place the grid on the broiler pan then place the food on the grid DO NOT use the broiler pan without the grid or cover the grid with aluminum foil The exposed fat could ignite 5 Place the pan on the oven rack Open ...

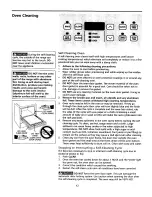
Page 12: ...y be left in the oven or may be removed If they go through the clean cycle their color will turn slightly blue and the finish will be dull After the cycle is complete and the oven has cooled rub the sides of the racks with wax paper or a cloth containing a small amount of baby oil or salad oil this will make the racks glide easier into the rack position 4 Remove any excess spillovers in the oven c...

Page 13: ... the W or IV 1 is released CLn appears in the display 5 As soon as the controls are set the motor driven lock will begin to close automatically and the LOCK indicator light will flash DO NOT open the door while the light is flashing it takes about 15 seconds for the lock to close 6 The LOCK light will glow until the cleaning cycle is completed or cancelled and the oven temperature has cooled When ...

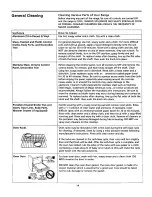
Page 14: ...s water in or around the controls may cause damage to the appliance Cleaners made especially for stainless steel such as Stainless Steel Magic trademark of Magic American Corp or similar products are recommended Always follow the manufacturer s instructions Be sure to rinse the cleaners as bluish stains may occur during heating and cannot be removed To replace knobs after cleaning line up the flat...

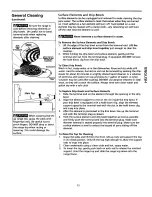
Page 15: ... drip Z bowls for about 20 minutes in a lightly diluted liquid cleanser or a solution G1 of ammonia and water 1 2 cup ammonia to 1 gallon of water A nylon r scrubber may be used after soaking DO NOT use abrasive cleaners or steel wool as they will scratch the surface Always rinse with clean water and polish dry with a soft cloth To Replace Drip Bowls and Surface Elements 1 Slide the terminal end o...

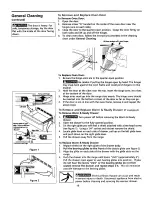
Page 16: ...ith the oven frame remove it and repeat the above steps To Remove and Replace Warm Ready Drawer if equipped To Remove Warm Ready Drawer 1 _ Turn power off before removing the Warm Ready drawer 2 Open the drawer to the fully opened position 3 On the right glide you will find a shield attached with a hex head screw see figure 1 Using a 114 socket and ratchet remove the shield 4 Locate glide lever on...

Page 17: ...t change the se f c eaning temperature The temperature control in the oven has been set at the factory When first using the oven be sure to follow recipe times and temperatures If you think the oven is too hot or too cool the temperature in the oven can be adjusted Before adjusting test a recipe by using a temperature setting that is higher or lower than the recommended temperature The baking resu...

Page 18: ...o tightly Contact builder or installer to make appliance accessible Carpet interferes with range Provide sufficient space so range can be lifted over carpet Oven control beeps and displays F1 or Electronic control has detected a fault condition Push CANCEL to clear the display F3 and stop the beeping Reprogram oven If fault recurs record fault number push CANCEL and contact an authorized Sears ser...

Page 19: ... Follow steps under Stopping or Interrupting a Self Cleaning Cycle under Oven Cleaning Soil not completely removed after self cleaning cycle Failure to clean bottom front top of oven frame of oven or door area outside oven seal These areas are not in the self cleaning area but get hot enough to burn on residue Clean these areas before the self cleaning cycle is started Burned on residue can be cle...

Reviews: