Kenmore 758.144171, Owner'S Manual
The Kenmore 758.144171 Owner's Manual is a comprehensive guide that provides step-by-step instructions for operating and maintaining your appliance. With a simple click, you can easily download this manual for free from our website, allowing you to access the necessary information conveniently and effortlessly.
Share
Download


Reviews:
No comments
Related manuals for 758.144171

01.368020.02.001
Brand: Princess Pages: 14

V5100N - Vicks Ultrasonic Humidifier
Brand: Vicks Pages: 8

OL-270R
Brand: Oulun Pages: 14

EE-8619
Brand: Crane Pages: 11

05613
Brand: cecotec Pages: 24

SRL Series
Brand: Sullair Pages: 62

LacAir SH 10B
Brand: Lacme Pages: 27

AX 410
Brand: TurMix Pages: 15

OCEADH12LPA0
Brand: Oceanic Pages: 31
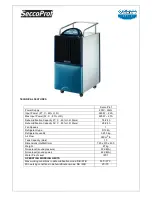
Secco Prof
Brand: Olimpia splendid Pages: 5

A3DH30B2A
Brand: Fedders Pages: 16

DryBox 200
Brand: Vellgoo Pages: 2

HUMIDI-TECH
Brand: DriSteem Pages: 32

operation and
Brand: Fedders Pages: 50

FLIPPERDRY 300
Brand: Fral Pages: 20

L20-D
Brand: Fresh Pages: 25

SD-08-2418
Brand: BENDIX Pages: 16

Herrmidisteam-SS
Brand: Herrmidifier Pages: 2


