Kellfri 13-VM360E, Instructions Manual
The Kellfri 13-VM360E is a versatile and efficient vertical mixer designed for mixing and distributing animal feed. Ensure proper operation and maintenance by downloading the free Instructions Manual from manualshive.com. This manual provides detailed guidance on setup, operation, and maintenance to maximize the performance of your machine.
Share
Download


Reviews:
No comments
Related manuals for 13-VM360E
L110-102001
Brand: Swisher Pages: 20

GREYHOUND 65761
Brand: Greyhound Pages: 37

65075
Brand: Greyhound Pages: 39

650
Brand: AVANT Pages: 34

LSE3502
Brand: MADER Pages: 72

CHOPPER 406 VE
Brand: Garland Pages: 120

5411074172466
Brand: Gardeo Pages: 63

5411074170523
Brand: Gardeo Pages: 86
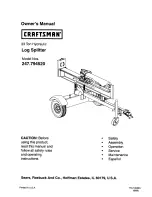
247.79452
Brand: Craftsman Pages: 27

3905320850
Brand: Woodstar Pages: 40

ODGO324-MTCH
Brand: Hearth & Home Pages: 14


