KBB KS1000, Assembly And Operating Instructions Manual
The Scheppach KS1000, a remarkable tool for precision cutting, offers unmatched versatility. Its user manual provides step-by-step instructions for operation. With our website, you can easily download the free manual, including a Translation from Original Manual, ensuring you have all the information you need for optimal usage. Visit manualshive.com for a seamless download experience.
Share
Download


Reviews:
No comments
Related manuals for KS1000

Compax3H C3H1xxV4 Series
Brand: Parker Pages: 44

BLDS4815
Brand: ZGC Pages: 6

OPEN DRIVE
Brand: TDE MACNO Pages: 66

BP06LU10
Brand: LG Pages: 2

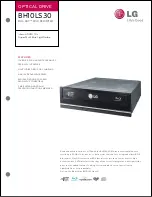
BH10LS30
Brand: LG Pages: 15

CED-8080B - - CD-RW Drive
Brand: LG Pages: 23

CED-8041B
Brand: LG Pages: 22

CED-8042B
Brand: LG Pages: 74
BH10LS30
Brand: LG Pages: 2

PADVW010U
Brand: Targus Pages: 13

EtherCAT EHS-580
Brand: Econ Pages: 36

V3000APT-1
Brand: Vicon Pages: 21

SGD7S-R70A
Brand: YASKAWA Pages: 267

900-00008
Brand: Parallax Pages: 8

SW-252B
Brand: Samsung Pages: 18

CD-RW5120i
Brand: Teac Pages: 52

Esoteric P-10
Brand: Teac Pages: 58

Bewegte Welt eMotion 1542
Brand: Viessmann Pages: 6


