


●
Please note that the manufacturer does not hold
responsibility for troubles caused by the use of imitation
parts.
●
Please read "Safety Instruction" (page 1-3) carefully before
use in order to prevent personal injuries or damages to the
product.
●
The content of manual can be changed without any notice.
www.idfone.co.kr
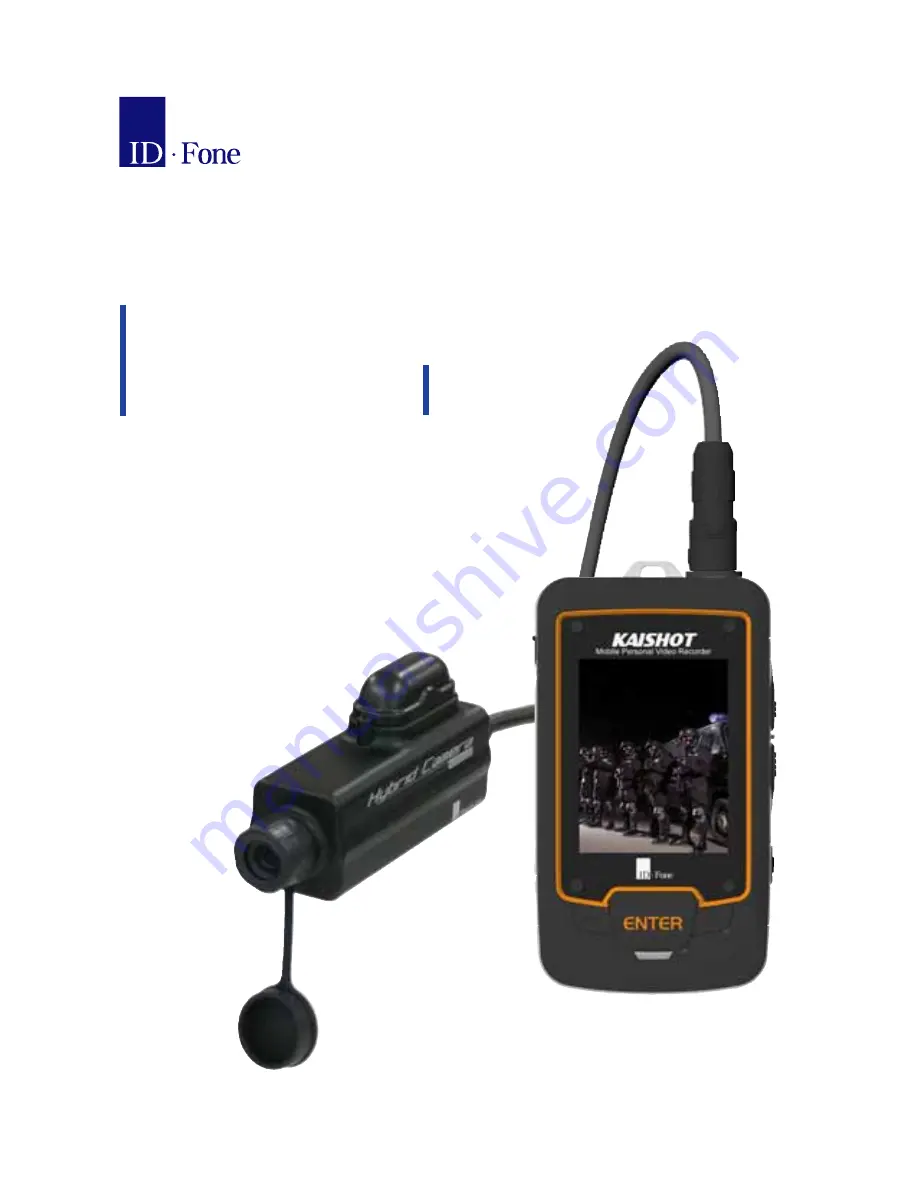
The actual product may look different
from the picture in the User Manual.
KAISHOT
IDF-PVR
(Series)
User Manual Ver1.1


