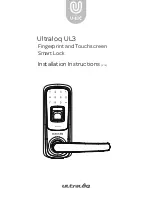
R8-5KD
User Manual
72.3mm
14.1mm
17
0.3
m
m
* Read and understand all instructions before you use your product.
* Warranty does not apply if damage was caused by failure to follow instructions.
* Only use the alkaline batteries.
* Do not expose the product and accessories to rain or water.
* Do not expose the product to corrosive substances so as not to damage the protective cover.
* Do not scrape the fingerprint sensor with sharp objects, otherwise it may cause permanent damage.
* When cleaning the product, please wipe with a soft cloth.
* If there is a low battery alert, please replace all the batteries in time and make sure they are properly installed.
Warning
1. You can operate following the voice guide by multi-language
(Chinese/English/Spanish/Portuguese/ Russian).
2. Master PIN Code(6~12 digit): Default master PIN code is “12
345678”, please modify it after installation.
3. User PIN Code(6~12 digit): Maximum capacity is 10 with user
number [00-09].
Touch screen keypad
Card reader area
Fingerprint sensor
Fingerprint sensor
4. Temporary user PIN code (6-12 digit): there is only one
temporary user PIN code.
5. Card: Maximum capacity is 100 with user number [00-99].
6. Fingerprint: Maximum capacity is 20 with user number
[00-19].
Definitions
Specifications
Preparing for Installation
Components
Installation
Outside escutcheon
Inside escutcheon
1
2
3
6
4
5
www.kaadasgroup.com
Shenzhen Kaadas Intelligent Technology Co., Ltd reserves all rights
for the final interpretation to this user manual
All design and specifications are subject to change without notice.
1.Check whether the door is left handed or right handed before installation.
1. Get the front escutcheon cable through the drill
hole on the door.
4. Get the outside escutcheon cable connected
to the inside escutcheon.
3. According to the actual installation height of the
lock, select the number of strike shims to be
installed, and fix them together with the strike.
After installing the strike,secure the strike cover
with the 2 mounting screws.
2. Get the front escutcheon cable through the
inside mounting plate and fix screws from
inside of the door.
* Be careful not damage
the connecting cable
2.Comfirm inside escutcheon installation direction.
3.Based on door type and direction, match and
hold installation template on door tightly and
drill a hole on door.
left handed door
left handed door
right handed door
right handed door
Outside
Outside
Master Mode:
The Master Mode could be entered by entering “#+Master PIN Code+#” to programming the lock.
Master PIN code:
The Master PIN Code is used for unlock, programming and setting feature. The default Master PIN code[12345678] is
required to be changed immediately after enter the menu at the first time.
Auto Re-lock:
After unlocking successful by PIN Code/Card/Fingerprint/APP, it will automatically lock in auto re-lock mode once the door is
closed.
One-Time PIN Code:
This code can only be used once and will be automatically deleted after using.
Manual Mode:
Auto re-lock mode could be adjusted to Manual Mode. In Manual Mode the lock could be locked by verifying user
code/fingerprint/card from outside.
Silent Mode:
Enabling Silent Mode shuts off the code confirmation tone playback for use in quiet areas. Silent mode is selected in the
voice setting of Master Mode.
Status LED:
Located on outside escutcheon.
Lockout Mode:
When wrong user PIN code/card/fingerprint for 5 times,the system will lock down for 3 minutes.
After that the lock will activate again. while the lock is lock down, the system will alarm when you are trying to use keypad.
Away Mode:
It is a security feature when you are leaving home for vacation or a long trip. If the lock is unlocked by the key or by the
thumbturn in away mode, the lock will sound an alarm.
Dual-verification Mode:
Any combination of fingerprint, PIN code and card can be flexibly used.
Reset button:
After reset operation, the lock will be restored to factory default settings, all user credentials will be deleted. Refer to reset guide.
Menu Table
7
X3
X3
X6
Strike shims
Strike shim
Strike cover
Outside escutcheon
Inside escutcheon
Flat Head Screws M5*40mm
(Door Thinckness 40-50mm)
Flat Head Screws M5*30mm
(Door Thinckness 30-40mm)
Wood Combination screws
ST4*20mm
Mounting Screws
M4*6mm
Inside Mounting Plate
Strike
6
6 9 m m
20
0.3
m
m
77.3mm
Dead bolt
Battery cover
left handed door
Edge the door
Inside
Inside
right handed door
Auto-Relock mode
and manual mode
switch
6. Fix battery cover screws after insert 4AA
batteries and test functions.
5. Get the inside escutcheon on the bracket and
fix screws.
1.Modify Master PIN code
2.User Setting
3.Delete Users
4. System Setting
5. Extended Function
6. System Query
7. Bluetooth Setting
Press
[3]
1. Delete User PIN Code
2. Delete Temporary PIN Card
3. Delete Fingerprint
4. Delete User Card
Press
[4]
1. Language Setting
2. Volume Setting
3. Opening Mode Setting
Press
[5]
1. Join the Remote Network
2. Exit the Remote Network
Press
[6]
1. Query Serial Number
2. Query Firmware Version
Press
[7]
1. Enable Bluetooth
Press
[1]
Modify Master PIN code
Press
[2]
1. Add User PIN Code
2. Add Temporary PIN Card
3. Add Fingerprint
4. Add User Card
Type C USB emergency
power supply
1. Delete a Single User PIN Code
2. Delete Codes
1. For adding front lock fingerprint
2. For adding rear lock fingerprint
1. For deleting front lock fingerprint
2. For deleting rear lock fingerprint
1. Delete a Single User Card
2. Delete Cards
1. Chines 2. English 3. Portuguese
4. Spanish
5. Russian
1. High Volume 2. Low Volume
3. Silent mode
1. Single -verification Mode
2. Dual-verification Mode