background image

Serial Number

IMPORTANT NOTE TO THE CUSTOMER:

In the space below, enter the serial number for your

television (located on the rear of the television cabinet).

Staple your sales receipt or invoice to the inside cover of this guide.

Keep this user's guide in a convenient place for future reference.

Keep the carton and original packaging for future use.
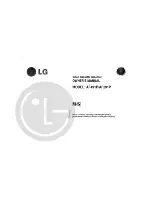
For models


:

TV-13142

TV-13142W

TV/VCR COMBO

USER’S GUIDE

(Illustration of TV-13142)

POWER

ON TIMER

REC TIMER

REC

STOP / EJECT

FF

PLAY

REW

VOLUME

CHANNEL

SP / EP

INPUT

PHONES VIDEO - IN - AUDIO

 / 

REC/ITR

VIDEO  CASSETTE  RECORDER

PLAY

STOP

TV

REC

PAUSE

FF

REW

TRACKING

AUTO

SLEEP

CALL

INPUT

ENTER

SET 

SET 

+

MENU

ZERO RETURN

RESET

PROGRAM

SP/ EP

TIMER

POWER

COUNTER

CANCEL

TV/CAP/TEXT

RETURN

0

8

5

2

7

4

1

9

6

3

MUTING

CH

CH

VOL

VOL

Summary of Contents for TV 13142

Page 1: ...ure reference Keep the carton and original packaging for future use For models TV 13142 TV 13142W TV VCR COMBO USER S GUIDE Illustration of TV 13142 POWER ONTIMER RECTIMER REC STOP EJECT FF PLAY REW VOLUME CHANNEL SP EP INPUT PHONES VIDEO IN AUDIO REC ITR VIDEO CASSETTE RECORDER PLAY STOP TV REC PAUSE FF REW TRACKING AUTO SLEEP CALL INPUT ENTER SET SET MENU ZERO RETURN RESET PROGRAM SP EP TIMER PO...

Page 2: ...tion against harmful interference in a residential installation This equipment generates uses and can radiate radio frequency energy and if not installed and used in accordance with the instructions may cause harmful interference to radio communications However there is no guarantee that interference will not occur in a particular installation If this equipment does cause harmful interference to r...

Page 3: ...s must not be blocked or covered The openings should never be blocked by placing the unit on a bed sofa rug or other similar surface This unit should never be placed near or over a radiator or heat source This unit should not be placed in a built in installa tions such as a bookcase or rack unless proper ventilation is provided or the manufacturer s instructions have been adhered to 10 POWER SOURC...

Page 4: ...against voltage surges and built up static charges Section 810 of the National Electrical Code ANSI NFPA 70 provides information with respect to proper grounding of the mast and support ing structure grounding of the lead in wire to an antenna discharge unit size of grounding conductors location of antenna discharge unit connection to grounding electrodes and requirements for the grounding electro...

Page 5: ...t the unit is in proper operating condition 22 WALL OR CEILING MOUNTING The product should be mounted to a wall or ceiling only as recommended by the manufacturer 23 HEAT The product should be situated away from heat sources such as radiators heat registers stoves or other products including amplifiers that produce heat 24 NOTE TO CATV SYSTEM INSTALLER This reminder is provided to call the CATV sy...

Page 6: ...can be programmed and confirmed on the screen Picture Adjustments Using The Remote Control The On Screen display allows precise remote control adjustment of BRIGHTNESS CONTRAST COLOR TINT and SHARPNESS Automatic Playback Rewind Stop Eject When loading a cassette tape without the erase prevention tab this TV VCR will automatically play back the cassette tape at the correct speed When a tape reaches...

Page 7: ...ATION TV OPERATION 17 TO MEMORIZE CHANNELS 21 SETTING THE V CHIP 24 PICTURE CONTROL ADJUSTMENTS 28 TO SET THE ON TIMER 30 TO SET THE OFF TIMER 31 PLAYBACK LOADING AND UNLOADING A VIDEO CASSETTE 32 PLAYBACK 33 SPECIAL PLAYBACK 35 RECORDING RECORDING A TV PROGRAM 37 INSTANT TIMER RECORDING ITR 39 TIMER RECORDING 40 OTHER FUNCTIONS FOR THE TIMER RECORDING 42 ADDITIONAL INFORMATION USING THE REAL TIME...

Page 8: ...ch to ON and leave the unit at room temperature until moisture condensation disappears Depending on the surrounding conditions this may take two or three hours Head Drum Video Tape PRECAUTIONS If you cause a static discharge when touching the unit and the unit fails to function simply unplug the unit from the wall outlet wait a few minutes and plug it back in The unit should return to normal opera...

Page 9: ...en you finish operating the unit always unload the cassette and turn off the power Avoid places subject to strong vibration Use in a horizontal flat position only AC Outlet Wider Hole and Blade TO USE AC POWER SOURCE Use the AC polarized line cord provided for operation on AC Insert the AC cord plug into a standard 120V 60Hz polarized AC outlet NOTES 1 Never connect the AC line cord plug to other ...

Page 10: ...e tape 7 Headphone Jack Plug monaural headphones or an earphone with an 1 8 miniplug into this jack for private listening 8 AUDIO VIDEO IN Jacks Audio and video signal cables from an external source can be connected here 9 INPUT Selector Button Switches the program for viewing between the VCR and an external input source 10 SP EP Selector Button Sets the tape speed for recording 11 CHANNEL Buttons...

Page 11: ...ction 3 ENTER Button Press to enter selected setup 4 CANCEL Button Press to cancel existing setups or to restore default values 5 MUTING Button Press to turn off the sound Press again to turn the sound back on 6 CALL Button Displays the present time day of the week channel counter speed selection and VCR mode if VCR is playing on the TV screen 7 REW Rewind Button In the Stop mode this button rapid...

Page 12: ...y compartment Reversed batteries may cause damage to the device 3 Do not mix different types of batteries together e g Alkaline and Carbon zinc or old batteries with fresh ones 4 If the device is not to be used for a long period of time remove the batteries to prevent damage or injury from possible battery leakage 5 Do not try to recharge batteries not intended to be recharged they can overheat an...

Page 13: ...lead wire to the 300 75 ohm matching trans former Attach the transformer to the combiner then attach the combiner to the antenna jack Separate VHF UHF Antennas 75 ohmVHF cable and 300 ohm UHF twin lead wires VHF 300 ohm UHF 300 ohm 300 75 OHM MATCHING TRANSFORMER not included COMBINER not included 300 75 OHM MATCHING TRANSFORMER not included VHF 75 ohm UHF 300 ohm COMBINER not included Connect the...

Page 14: ...ns shown below Set the TV VCR to the output channel of the converter descrambler box usually channel 3 or 4 and use the converter descrambler box to select channels FOR SUBSCRIBERS TO SCRAMBLED CABLE TV SERVICE 75 OHM COAXIAL CABLE If you subscribe to a cable TV service in which basic channels are unscrambled and premium channels require the use of a converter descrambler box you may wish to use a...

Page 15: ...ER button This TV VCR can display the on screen language in English Spanish or French Language selection step 3 will automatically appear on the screen when you press the MENU button initially Select language to use the other menu options Press the SET or button to select the LANGUAGE option then press the ENTER button Press the SET or button to select the desired language English ENGLISH Spanish ...

Page 16: ... MOUNTAIN ALASKA ENTER MENU STANDARD TIME M E N U TIMER REC SET TV SET UP CH SET UP AUTO REPEAT ON OFF SYSTEM SET UP ENTER MENU TIME ZONE SETTING STANDARD TIME When shipped from factory the AUTO CLOCK option is set to AUTO position If you turn the TV VCR on in Auto Clock setting the clock is not set With cable box connection if the Auto Clock Setting is unsuccessful please select the PBS channel c...

Page 17: ...ea always select OFF position in step 3 3 Press the SET or button to select one of the options then press the ENTER button Press the MENU button until the MENU screen is cleared When you want to set the Daylight Saving Time manually on the first Sunday in April you set to ON and on the last Sunday in October you set to OFF M E N U TIMER REC SET TV SET UP CH SET UP AUTO REPEAT ON OFF SYSTEM SET UP ...

Page 18: ...EPEAT ON OFF SYSTEM SET UP ENTER MENU NOTE After a power failure or disconnection of the power plug the time display will be lost In this case set the present time again if the Auto Clock did not set correctly If you want to correct the digits while setting press the CANCEL button until the item you want to correct then press the SET or button to correct the desired setting Press the SET or button...

Page 19: ... CHANNELS CATV VHF 2 13 STD HRC IRC 14 36 A W 37 59 AA WW 60 85 AAA ZZZ 86 94 86 94 95 99 A 5 A 1 100 125 100 125 01 5A TV VHF 2 13 UHF 14 69 Press the Direct Channel selection buttons to select the channel TV mode direct channel selection When the TV CATV menu option is in the TV position all channels can be instantly selected by using two 4 NOTE If a channel with no broadcast is selected the sou...

Page 20: ...o memory For proper operation before selecting channels they should be set into the memory See pages 21 and 22 To memorize channels CH 012 TV OPERATION CONTINUED Press the CALL button The clock date channel number real time tape counter tape speed and VCR operation will be indicated Press CALL button again to disappear the call display CALL VCR operation Play Rewind Fast forward Eject Recording Re...

Page 21: ...an be recorded and played back on a VCR with the Closed Captioned text intact The Closed Captioning text will disappear during Cue Rewind and Pause modes or if the VCR tracking is not adjusted properly Closed Captioned text is only displayed in locations where it is available SLEEP CHANNEL RETURN CAPTION CH 1 CH 012 SLEEP 120 To set the TV VCR to turn off after a preset amount of time press the SL...

Page 22: ...a VCR with the Closed Captioned text intact The Closed Captioned text will disappear during Cue Fast Forward Search Review Rewind Search and Pause Modes or if the VCR tracking is not adjusted properly TO VIEW CLOSED CAPTIONS Press the TV CAP TEXT button on the remote control to switch between normal TV and the two Closed Caption Modes Captions and Full Screen Text Captions This Closed Caption Mode...

Page 23: ...nnels they must be programmed into the TV VCR s memory In addition to normal VHF and UHF channels this TV VCR can receive up to 113 Cable TV channels To use this TV VCR with an antenna set the TV CATV menu option to the TV mode When shipped from the factory this menu option is in the CATV mode TV CATV SELECTION M E N U TIMER REC SET TV SET UP CH SET UP AUTO REPEAT ON OFF SYSTEM SET UP ENTER MENU 1...

Page 24: ... or button to select the CH SET UP mode then press the ENTER button AUTOMATIC MEMORY TUNING 1 2 M E N U TIMER REC SET TV SET UP CH SET UP AUTO REPEAT ON OFF SYSTEM SET UP ENTER MENU Press the SET or button to select the AUTO CH MEMORY mode then press the ENTER button The TV will begin memorizing all the channels available in your area 3 CH SET UP TV CATV AUTO CH MEMORY ADD DELETE ENTER MENU Press ...

Page 25: ...SET or button or using the Direct Channel Selection buttons 10 keys 0 9 or CHANNEL or button M E N U TIMER REC SET TV SET UP CH SET UP AUTO REPEAT ON OFF SYSTEM SET UP ENTER MENU CH SET UP TV CATV AUTO CH MEMORY ADD DELETE ENTER MENU Press the ENTER button to select the ADD or DELETE If you select an unmemorized channel the Channel indication will be red If you select the ADD mode the Channel indi...

Page 26: ...R PASSWORD NOTES If you forget the password you cannot set the V Chip To avoid forgetting the password write it down and keep in a safe place MENU SET SET ENTER M E N U TIMER REC SET TV SET UP CH SET UP AUTO REPEAT ON OFF SYSTEM SET UP ENTER MENU 4 3 2 1 appears instead of the number If you enter the V CHIP SET menu for the first time the password set screen will appear to register a password You ...

Page 27: ...TING CH CH VOL VOL 3 2 TO SET THE V CHIP Press the SET or button to display the desired setting then press the ENTER button In the V CHIP SET menu press the SET or button to select the desired rating then press the ENTER button 1 Press the MENU button until the MENU screen is cleared 3 ENTER MENU V CHIP SET V CHIP OFF US TV RATING OFF MOVIE RATING OFF CAN ENG RATING OFF CAN FRE RATING OFF CHANGE P...

Page 28: ...ill be no realistic scenes of violence Depictions of aggressive behavior will be infrequent and limited to portrayals that are clearly imaginary comedic or unrealistic in nature C8 Programming Intended for Children 8 and Over Violence Guidelines Any realistic depictions of violence will be infrequent discreet of low intensity and will show the consequences of the acts There will be no offensive la...

Page 29: ...13 CAN ENG RATING OFF CAN FRE RATING OFF CHANGE PASSWORD 2 Press the SET or button to select the TV SET UP then press the ENTER button 3 Press the SET or button to select the V CHIP SET then press the ENTER button 4 Enter the Password using the Direct Channel Selection button 0 9 then press the ENTER button 5 Press the SET or button to select CHANGE PASSWORD then press the ENTER button 6 Enter the...

Page 30: ...TURE ENTER MENU M E N U TIMER REC SET TV SET UP CH SET UP AUTO REPEAT ON OFF SYSTEM SET UP ENTER MENU Press the ENTER button until BRIGHTNESS appears on the screen then press the SET or button to adjust the brightness of the picture When the SET button is pressed the darker portions of the picture become lighter BRIGHTNESS 0 ENTER CANCEL MENU CONTRAST 32 ENTER CANCEL MENU Press the ENTER button un...

Page 31: ...ears on the screen then press the SET or button to adjust the tint of the picture This determines how accurately the colors are reproduced by the TV Adjusting the tint for natural facial tone is the best method of obtaining accurate color reproduction of the entire picture Press the ENTER button until COLOR appears on the screen then press the SET or button to adjust the color intensity of the pic...

Page 32: ...of the week as in step 4 then press the ENTER button TO SET THE ON TIMER EXAMPLE Turning on the TV to channel 12 at 7 00 AM MONDAY FRIDAY Press the MENU button Press the SET or button to select the TV SET UP option then press the ENTER button M E N U TIMER REC SET TV SET UP CH SET UP AUTO REPEAT ON OFF SYSTEM SET UP ENTER MENU Press the SET or button to select the ON OFFTIMER option then press the...

Page 33: ...EL 1 3 Press the SET or button to select the ON OFF TIMER option then press the ENTER button Press the SET or button to select the SET mode then press the MENU button until the MENU screen is cleared NOTE If a station being viewed stops broadcasting the TV will automatically shut itself off after 15 minutes To cancel the OFF TIMER function To cancel OFF timer follow above step 1 5 then press the S...

Page 34: ...e TV VCR automatically rewinds the tape to the beginning AUTO REWIND FEATURE the tape will be ejected automatically See NOTE on page 38 STOP EJECT NOTE Always eject the tape when not in use The cassette tape can be ejected even if the POWER is OFF TO RECORD AGAIN TO PREVENT ACCIDENTAL ERASURE After recording break off the erase prevention tab if you do not wish to record over the tape Cover the ho...

Page 35: ...TOP PLAYBACK 3 2 Press the PLAY button to begin playback will appear on the screen Press the STOP button once The tape will stop but remain fully loaded and ready to play PLAYBACK To play a prerecorded tape To turn on the TV VCR press the POWER button Load a prerecorded tape When loading a cassette tape without the erase prevention tab playback will start automatically NOTE This TV VCR selects the...

Page 36: ...st possible picture MANUAL TR will appear for 4 seconds on the screen To resume automatic tracking press the AUTO TRACKING button AUTO TR will appear for 4 seconds on the screen PLAYBACK CONTINUED DIGITAL TRACKING CONTROLS MANUAL TR AUTO TR TO REWIND OR FORWARD THE TAPE RAPIDLY Press the REW Rewind button in the Stop mode will appear on the screen Press the FF Fast Forward button in the Stop mode ...

Page 37: ...ar When pressed twice the search picture will increase speed Speed search time depends upon the speed used SP or EP during recording See chart below To rewind or fast forward a tape press the STOP button and then press the REW or FF button Press the PLAY button to resume normal viewing speed Press the PLAY button to resume normal viewing speed Press the PLAY button or PAUSE button to resume normal...

Page 38: ... REC SET TV SET UP CH SET UP AUTO REPEAT ON OFF SYSTEM SET UP ENTER MENU Press the MENU button Press the SET or button to select the AUTO REPEAT option Press the MENU button If you press the PLAY button the tape will play over and over until the repeat mode is canceled Press the ENTER button to select the ON position NOTE To cancel repeat mode follow above steps 1 and 2 then press the ENTER button...

Page 39: ...f and the VCR continues to record Press the STOP button to halt the recording and turn off the VCR The TV VCR Channel cannot be changed during recording Set the TV CATV option to the appropriate position See page 21 RECORDING A TV PROGRAM Press the SP EP button to select the desired tape speed SP or EP SP or EP will appear on the screen for 4 seconds TV VHF UHF channels CATV CABLE TV channels To t...

Page 40: ...material will appear on the screen and the REC indicator will blink on and off Press the PAUSE button or the REC button to continue the recording NOTE The PAUSE mode will be changed to STOP mode after five minutes to prevent damage to the tape or TO STOP RECORDING TEMPORARILY RECORDING A TV PROGRAM CONTINUED TO STOP RECORDING NOTE AUTO REWIND FEATURE This TV VCR will automatically rewind the video...

Page 41: ...mple Channel 12 Or press and release the CHANNEL or button See page 17 5 CH 012 ITR 0 30 CH 012 NOTE Press both the REC button and the PLAY button to increase the time needed for recording See the chart below To cancel Instant Timer Recording press the STOP button The TV VCR channel cannot be changed during recording once NORMAL REC twice 0 30 4 times 1 30 3 times 1 00 5 times 2 00 9 times NORMAL ...

Page 42: ...0 AM 012 SP ENTER CANCEL MENU NOTE If programming is performed without a tape in the TV VCR or with a tape without an erase prevention tab the Timer Recording is not possible If a tape without an erase prevention tab is in the TV VCR the tape will be ejected To record from the external equipment press the SET or button repeatedly until L LINE appears when setting the channel in step 5 Load a video...

Page 43: ...e digits while setting press the CANCEL button until the item you want to correct then press the SET or button to correct the desired setting Set the start time end time channel and tape speed as in step 4 Press the ENTER button to accept them To set the timer for another program press the SET or button until the position of the second program blinks then press the ENTER button Repeat steps 4 to 6...

Page 44: ...e everyday every week recording can be made continuously until the recording is canceled or the tape reaches the end During timer recording the automatic rewinding mechanism does not function You can correct or cancel the programmed setting in program confirm mode ENTER CANCEL MENU 23 TU 007 7 00PM 9 30PM EP ON OFF TIMER ENTER CANCEL MENU ON TIMER 7 00AM CH 012 MON FRI SET OFF TIMER 11 30PM SET on...

Page 45: ...ing programs will be lost The first recording time has priority over the next recording time as shown in the diagram 8 00 11 00 9 00 10 00 Program 1 Prog 1 Deleted Parts Non Recorded Portion Parts Prog 2 Prog 3 Program 2 Program 3 Recording Control Settings ENTER CANCEL MENU NOTE TO CANCEL A PROGRAM Press the SET or button to select the TIMER REC SET option in the MENU then press the ENTER button ...

Page 46: ...es through blank sections the counter stops USING THE REAL TIME TAPE COUNTER The On Screen Real Time Tape Counter shows the tape running time in Hours Minutes and Seconds You can easily determine how long the tape has been running or how much time is left on the tape TO VIEW THE COUNTER DISPLAY 1 2 Press the CALL button to display the Real Time Tape Counter Press the COUNTER RESET button to set th...

Page 47: ...can be indexed for any location on the tape by pressing the COUNTER RESET button and COUNTER ZERO RETURN button 5 Begin playback or recording Press the STOP button Press the ZERO RETURN button The tape will rewind and automatically stop at the 00 00 00 position Press the CALL button to display the counter 1 USING ZERO RETURN 3 Before playback or recording press the COUNTER RESET button to set the ...

Page 48: ...ess the INPUT button twice select AUDIO VIDEO input position The LINE will appear on the screen Insert a blank cassette with the erase preven tion tab intact into the TV VCR Insert a previously recorded cassette into the playback VCR or Camcorder LINE VIDEO OUT AUDIO OUT PLAYBACK VCR AUDIO VIDEO CORD NOT SUPPLIED RECORDING TV VCR To AV Jack To VIDEO AUDIO IN AUDIO VIDEO CORD NOT SUPPLIED PLAYBACK ...

Page 49: ...ls and appliances such as drills or hair dryers SNOW If the TV VCR is located far from the TV station in a fringe reception area where the signal is weak small dots may appear in the picture If the signal is extremely weak the installation of a larger external antenna may be necessary RADIO FREQUENCY INTERFERENCE RFI Caused by two way radios this type of interference produces moving ripples or dia...

Page 50: ...r channel Antenna CATV connector is not connected or possible local interfer ence Check CATV connection or VHF UHF antenna reposition or rotate antenna Cable TV channel is scrambled Try another channel CATV connector is not connected Check all CATV connections TV CATV Mode menu option is set to the TV mode Set the TV CATV Menu option to the CATV mode Contact your Cable TV company Make sure TV CATV...

Page 51: ...is old or worn Replace the tape Tracking adjustment is beyond range of automatic tracking circuit Adjust tracking manually using the TRACKING and buttons on the remote control Clean the video heads Video heads are dirty The remote control is not aimed at the sensor Aim the remote control at the remote sensor REMOTE CONTROL The batteries are not inserted correctly Insert correctly Replace the batte...

Page 52: ...gh the picture on program is normal This failure signifies that the head is getting dirty and occurs when playing poor quality or damaged tapes If the heads require cleaning use a high quality head cleaning system or have them cleaned professionally Auto Clock Setting Notes for Canadian customers regarding the clock feature of the TV 13142 and TV 13142W The XDS signals are carried only by certain ...

Page 53: ... System VHS 4 Rotary Heads Helical Scanning System Video Signal NTSC Color Cassette Tape VHS Audio Track 1 Track Tape Speed SP EP F FWD REW Time F FWD Approx 4 minutes and 50 seconds REW Approx 2 minute and 30 seconds T 120 Cassette GENERAL Power Source AC 120V 60Hz Power Consumption 65 Watts Dimensions W 14 1 4 x D 14 1 2 x H 15 1 16 Weight 24 3 Ibs 11kg Inputs Video In RCA 1Vp p 75 ohm Audio In ...

Page 54: ...PRINTED IN THAILAND JVC COMPANY OF AMERICA Division of U S JVC CORP 1700 Valley Road Wayne New Jersey 07470 JVC CANADA INC 21 Finchdene Square Scarborough Ontario Canada M1X 1A7 5800501A K 01 03 ...

Reviews: