background image

LET0248-006A

INSTRUCTIONS

    2004 Victor Company of Japan, Limited

MP-XV841US 

Printed in Taiwan
0504KHY

*

IDASS

VICTOR COMPANY OF JAPAN, LIMITED
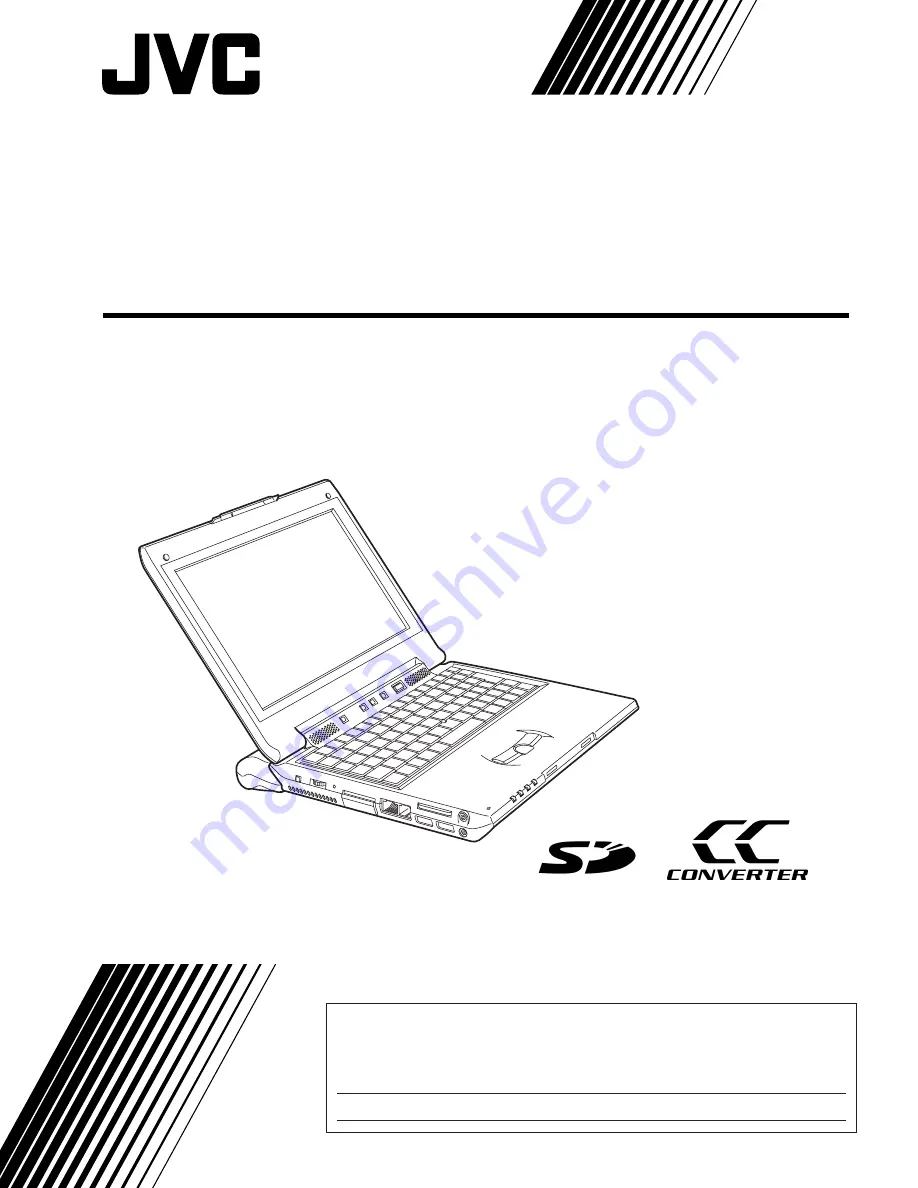
Mobile Mini Note PC

ENGLISH

For Customer Use:

Enter below the Model No. and Serial No. which is located on the bottom
of the Mobile Mini Note PC. Retain this information for future reference.

Model No.

Serial No.

XV841US̲Cover1̲4 7.0J

04.5.19, 7:38 PM

Page 1

Adobe PageMaker 7.0J/PPC

Summary of Contents for MP-XV841

Page 1: ...TIONS MP XV841US Mobile Mini Note PC ENGLISH For Customer Use Enter below the Model No and Serial No which is located on the bottom of the Mobile Mini Note PC Retain this information for future reference Model No Serial No ...

Page 2: ...THIS UNIT TO RAIN OR MOISTURE CAUTION RISK OF ELECTRIC SHOCK DO NOT OPEN CAUTION TO REDUCE THE RISK OF ELECTRIC SHOCK DO NOT REMOVE COVER OR BACK NO USER SERVICEABLE PARTS INSIDE REFER SERVICING TO QUALIFIED SERVICE PERSONNEL The lightning flash with arrowhead symbol within an equilateral triangle is intended to alert the user to the presence of uninsulated dangerous voltage within the product s e...

Page 3: ...Industries Alliance http www eiae org When using the AC Power Adapter in areas other than the USA The provided AC Power Adapter features automatic voltage selection in the AC range from 110 V to 240 V When using the wireless LAN WARNING Please heed the warning below Do not turn on the PC s power in trains aircraft hospitals or other places where the use of wireless LANs is restricted or prohibited...

Page 4: ...o 104 F Storage 10 C to 30 C 14 F to 86 F Recharging time is based on room temperature of 20 C 68 F The lower the temperature the longer recharging takes Terminals LCD Screen 1 To prevent damage to the LCD screen DO NOT push it strongly or apply any shocks place a thing on the LCD screen 2 To prolong service life avoid rubbing it with coarse cloth 3 Be aware of the following phenomena for LCD scre...

Page 5: ... from an air conditioner Moisture on the HDD disk and or the DVD pick up Lense can cause severe damage and can lead to internal damage to the Mobile Mini Note PC itself How To Handle CD ROMs Take care not to soil or scratch the mirror surface opposite to the printed surface Do not write anything or put a sticker on either the front or back surface If the CD ROM gets dirty gently wipe it with a sof...

Page 6: ...interference in a residential installation This equipment generates uses and can radiate radio frequency energy and if not installed and used in accordance with the instructions may cause harmful interference to radio communications However there is no guarantee that interference will not occur in a particular installation If this equipment does cause harmful interference to radio or television re...

Page 7: ...fore using your Mobile Mini Note PC hereinafter Mobile PC make sure that all of the following system components have been included in the container If you have found any shortage or problem contact the sales shop The illustrations provided in these instructions may differ in part from the actual products Modem cable 1 8 meters long Two stick caps Start Here manual External display cable Dedicated ...

Page 8: ... Agreement JVC grants to You a non exclusive right to use the Software 2 You may install and or use the Software on an HDD or other storage devices incorporated in the Product only 3 You may make a single copy of the Software for the back up and storage purpose if a back up copy of the Software has not been included with the Product on physical media such as CD ROM You may use such back up copy so...

Page 9: ... Should this Agreement be terminated You should immediately destroy the Software including any copy including erasure from any memory in the Product and any associated Materials and then will not possess them 9 Export Control You agree that You will not ship transfer or export the Software or underlying information and technology to any countries to which Japan and other relevant countries have em...

Page 10: ...may make a copy of the Software in whole or in part for the back up and storage purposes 3 Restriction 1 You may not modify reverse engineer decompile or disassemble except to the extent as permitted by the applicable laws the Software in any manner 2 You may not copy or use the Software in whole or in part other than as expressly specified in this Agreement 3 You may not remove the copyright and ...

Page 11: ...d States Department of Defense contract the use duplication or disclosure by the Government is subject to the restrictions as set forth in subparagraph c i ii of the Rights in Technical Data and Computer Software clause at DFARS 252 227 7013 Contractor Victor Company of Japan Limited 12 3 chome Moriya cho Kanagawa ku Yokohama Kanagawa 221 8528 Japan If the Software is acquired by You as any other ...

Page 12: ... 39 Connecting to the Internet 44 Disconnection from the Internet 45 Accessing a Web Page 46 E MAILING 47 Setting Up E Mail Software 47 Sending and Receiving E mails 50 OPERATIONS Using the Pointing Device 54 Using Keyboard 56 Using the center keys 58 Using the DVD CD function keys 59 HARDWARE Using the DVD ROM CD R RW drive 62 Using the SD Memory Card Slot 64 Using an External Monitor 65 Connecti...

Page 13: ... connector Docking port External monitor output Wireless LAN ON OFF switch Buckle i Link connector Speakers PC card slot PC card eject button Scroll button DC Input connector Left button Right button Stick Internal microphone used for network meetings etc Eject button Eject hole DVD ROM CD R RW drive Center keys Volume control DVD CD function keys ...

Page 14: ...14EN Headphone output Microphone input Wireless LAN antenna Reset button Ventilation slots Detachable lithium ion battery pack BN LL23US SD memory card slot ...

Page 15: ...EN15 SETTING UP 1 ...

Page 16: ...tup while the battery pack is charging To avoid data loss due to power failure or any other cause check the points for battery recharging in Page 18 1 Mounting Dismounting the Lithium Ion Battery Pack 1 Slide lock lever A in the direction of the arrow 2 Mount and lock the battery pack until it clicks 3 Slide lock lever A in the direction of the arrow 1 Slide lock lever A in the direction of the ar...

Page 17: ...put connector When recharging the battery pack 1 Plug the AC power cord into the AC adapter 2 Plug the DC cord of the adapter into the DC Input connector of the Mobile PC 3 Plug the AC cord of the AC adapter into the power receptacle 3 2 1 DC cord Continue to next page ...

Page 18: ...being recharged Battery indicator If you have unplugged the DC cable of the AC adapter and if you drive your PC with the lithium ion battery pack the battery indicator goes out Approximate recharging times Lithium ion battery pack BN LL23US Recharging time When the PC s power is off Approximately 180 minutes Recharging time When the PC s power is on Approximately 290 minutes Cautions If the batter...

Page 19: ...d in these electronic devices Consult each airline for details 1 Num Lock lamp A Caps Lock lamp Scroll Lock lamp Stand By lamp DVD ROM CD R RW access lamp SD access lamp HDD access lamp Wireless LAN access lamp When the Num Lock key is active When the Caps Lock key is active When the Scroll Lock key is active When the PC is turned on When the disc is accessed When the SD card is accessed When the ...

Page 20: ...setup is canceled You cannot use the Microsoft Windows or the PC software 3 Rename your computer and click Next The An Internet connection could not be chosen or How will this computer connect to the Internet screen appears Tips A unique computer name is required so that your PC is distinguished from other computers if you connect your PC to the network Although the PC is named automatically and s...

Page 21: ...sed after initial startup of the Microsoft Windows a confirmation screen asking for the deletion of desktop icons appears This is the Desktop Cleanup program that can delete icons that you have not used for a certain period from the desktop screen The software is not deleted even if you have cleared its icon from the desktop screen Use the following procedure to change the Windows date and time 1 ...

Page 22: ...pear 2 Click Turn Off computer The Turn off computer screen will appear 3 Click Turn Off The PC will be turned off automatically and Stand By lamp will go out Before closing the LCD panel make sure that Stand By lamp has turned off Tips To restart Windows without turning off the power click Restart on the Turn off computer screen Alternatively press the Shift button on the keyboard while Turn off ...

Page 23: ...EN 23 JVC ORIGINAL SOFTWARE AND SYSTEM APPLICATIONS 2 ...

Page 24: ...e starting the software setup quit and save the currently active application if any Otherwise your working data will be lost 1 Click start and click Run first at the right lower end of the Menu The Preparing to Install screen will appear and the software setup will start up 2 Read the License Agreement when displayed If you accept the Agreement click Yes 3 During setup the Sound video and game con...

Page 25: ...EN 25 4 When the software has been set up a prompt for PC restarting appears Click Finish to restart the PC ...

Page 26: ...Converter icon in the task tray by clicking the right mouse button 2 When the menu above appears click on the desired option Cautions If you have disabled the effect the CC Converter icon is shown in monochrome color in the task tray The actual sound playback may slightly be delayed due to processing of playback data Explanation of menu options Enable Makes the CC converter processing valid Disabl...

Page 27: ...e menu options can be selected as the intensity level of the effect to be exerted by the CC converter It is recommended that you select the level of intensity that matches the size of the speakers that will reproduce the sound the performance of the headphones and type of sound data compressed or non compressed More presence The CC converter functions to have the maximum effect The More presence l...

Page 28: ... have set at this point is held If you wish to restart the CC converter you can start up the program from the Start menu To change the CC converter setting and save the new status you must click Exit To restart the CC converter click Start All Programs CC Converter CC Converter Tips Do not change the sound playback device when you are playing back the sound data such as an audio file If you have c...

Page 29: ... profile click New and follow the instructions given by the Wizard Once a profile has been registered it can be selected from the profile management screen and the network settings can be changed An easy way to change the network is to click the icon on the task tray and select the profile from the menu which is then displayed The registered profiles are displayed and the network is connected by s...

Page 30: ...onger available Continue message now appears Select Yes This function will not be available after you will reinstall your operating system using those discs 4 The number of CD R discs required is displayed When the CD R discs have been readied click OK 5 When the Please insert a blank disc in the drive message appears insert one of the CD R discs into the drive and press OK The screen on which the...

Page 31: ...n Cautions At the third startup after the Windows initial setup a Norton AntiVirus Information Wizard screen appears Follow the on screen instructions to set up this application program You can update the antivirus definition file of this application within 90 days 䢇 RealOne Player Can play back a video file The RealOne Player can play back some video files not supported by the Windows Media Playe...

Page 32: ...y with software DVD players Audio CDs and video CDs can be played using WinDVD 5 Caution DVD Video play may become unstable immediately after the WinDVD 5 s settings have been changed 䢇 UltraPOST This self diagnosis tool is incorporated inside the BIOS It enables the self diagnosis of the hardware without involving the use of any media Use it at times when the operations need to be checked such as...

Page 33: ...ly on this PC Otherwise your ears or speaker system may be damaged due to loud noise To Uninstall a Standard Application Use the following procedure to uninstall a standard application program 1 Click the start button then Control Panel 2 Click the Add or Remove Programs icon The programs currently installed are listed 3 Click an application program you want to uninstall Click the Change Remove bu...

Page 34: ...34EN MEMO ...

Page 35: ...EN 35 NAVIGATE IN THE INTERNET WORLD 3 ...

Page 36: ...ay subscribe to wireless Internet with ISP available in your area See page 70 for more information Contracting with the Internet Service Provider An Internet service provider an enterprise or an organization that provides the Internet connection and related services is generally called a provider Contract with the provider We recommend that you compare available services and select the provider th...

Page 37: ...tor into the jack in the correct direction Modem cable 2 Plug the other end of the modem cable into the telephone line wall jack If a telephone set is already connected to the telephone line unplug the cable of the telephone set Tips Purchase a line splitter if you wish to plug in your telephone set and your PC to the same telephone line Remember that you cannot use the telephone set and the Inter...

Page 38: ...ty code in the Area code field Usually enter your city code here Enter the phone company ID number and extension number as necessary They are usually not required 6 Check the dialing type of your telephone line and select it correctly 7 Click OK and the New Location screen will close 8 Click OK and the Phone and Modem Option screen will close Modem setup will be complete NAVIGATE IN THE INTERNET W...

Page 39: ... your PC has networking functions you can connect it to the Internet via the network For the setup procedure when you connect to the Internet via a network see Page 66 1 Click start and then click Internet in the upper left part of the Menu The Welcome to the New Connection Wizard screen will appear Tips If the Welcome to the New Connection Wizard screen does not appear click the start button and ...

Page 40: ... and click Next The Internet Connection screen will appear 5 Click Connect using a dial up modem option and click Next The Connection Name screen will appear 6 Enter the ISP name and click Next The Phone Number to Dial screen may appear Tips It is convenient to use the contracted provider name as the ISP name NAVIGATE IN THE INTERNET WORLD ...

Page 41: ... Information screen will appear 8 Enter the User name and Password and enter the password again for confirmation and click Next The Completing the New Connection Wizard screen will appear 9 Click Finish The setup for connection wizard is complete Continue to next page ...

Page 42: ...pecified you need not set these addresses 10 Click start and Control Panel in this order The Pick a category screen of the Control panel will appear 11 Click Network and Internet Connection icon The or pick a Control Panel icon screen will appear 12 Click Network Connections The ISP name you have set in Step 6 is shown in the Dial up tag 13 Double Click the dialup connection icon Connect screen wi...

Page 43: ...n IP address automatically click Use the following DNS server addresses and enter the DNS server address printed on the document sent from the provider 18 After you have entered the addresses click OK 19 Respond with OK to the Properties 20 Click x at the upper right corner of the Connect screen All screens will close and the Internet connection is complete ...

Page 44: ...eft upper end of the Menu Then select Internet Properties 2 Click the Connections tab and make sure that the ISP name you have created in Step 6 The Internet Connection Setup on page 40 has been set to default in the Dial up and Virtual Private Network settings If not set as default select the ISP and click Set Default 3 Click Always dial my default connection and click OK 2 Click Connect The dial...

Page 45: ...ne company for fees depending on ISP number used Disconnect your PC from the Internet in one of the following ways when you are finished using the Internet Double click the task tray connection icon at the bottom right corner of the desktop screen When the Auto Disconnect dialog box appears click Disconnect Now Quit the Microsoft s Internet Explorer IE When the Auto Disconnect dialog box appears c...

Page 46: ...re starting the following steps connect your PC to the Internet using the Connecting to the Internet procedure on Page 44 When Microsoft s Internet Explorer is active you can access a Web site in one of the following ways 1 Directly enter the URL in the address bar 2 Jump to the destination link 3 Click Favorites and select a link from the left side of the screen Method 1 Method 2 Method 3 NAVIGAT...

Page 47: ...nt showing your email account setup details Some ISP does have webpage describing settings for Outlook Express for their service In that case follow steps found in their procedures 1 Click start and click E mail on the Menu Outlook Express will start and the Internet Connection Wizard screen will appear 2 Enter the name you wish to display in the Display name and click Next The Internet E mail Add...

Page 48: ...E mail Server Name screen will appear 4 Enter the Incoming mail server and Outgoing mail server and click Next Usually select POP3 as the My incoming mail server is a server but you can change it if necessary The Internet Mail Logon screen will appear NAVIGATE IN THE INTERNET WORLD ...

Page 49: ...ck Next The Congratulations screen will appear 6 Click Finish The Congratulations screen will close and Outlook Express will start up The setup for the E mail software is complete 7 To quit Outlook Express click x at the upper right corner of the screen ...

Page 50: ...il on the Menu Outlook Express will start 2 Click Create a new Mail message on the screen or click Create Mail in the toolbar The New Message screen will appear Tips To minimize the access fee to the provider and the use of the telephone line create your E mail messages before connecting to the Internet Disconnect from the provider Connect to the provider Create a response return E mail message Tr...

Page 51: ...et You will be connected to the Internet and the created mail will be sent to the specified address 6 If your mail transmission is successful try to receive E mail When you are connected to the Internet click Send Recv at the left upper end of the screen Your PC will be connected to the provider s mail server and you can receive E mail Assuming you have set your E mail address correctly in Step 3 ...

Page 52: ...Disconnect your PC from the Internet after you have transmitted E mail and finished accessing a Web site It may not be possible to send mail properly using a company network or roaming service If this problem arises the method below may solve it Before sending the mail first perform the receive mail operation even if no mail has been received and then click Send NAVIGATE IN THE INTERNET WORLD ...

Page 53: ...EN 53 OPERATIONS 4 ...

Page 54: ...f you press the stick slightly and move the pointer slowly for several seconds the pointer may return backward This is not a fault Two stick caps are included in the PC accessory pack When the cap has deteriorated replace it with a new one How to press the buttons Usually press the three buttons using your thumb Click Press the left button once and release it immediately Use this operation to sele...

Page 55: ...he left button and move it to the desired position and release the button Note The pointing devices have initially been set for the right handed person on the Mouse properties tab Scroll buttons You can scroll the screen in the desired direction by holding down the scroll button and moving the stick horizontally or vertically Note Some applications may not support the scroll buttons ...

Page 56: ...and Complete desktop picture is copied into clipboard You can copy only selected window by using the following keys together ALT FN Ins PrtSc Notes The hot keys are not supported in the MS DOS environment If a key top has come off refer to page 57 Using the Numeric Keypad Sixteen keys of the keyboard have been assigned to the numeric keypad Each of these keys has two labels in different colors to ...

Page 57: ...ter position of the rubber cushion and press the key top down until it clicks into place 4 Operate the key with its key top now in place as you would operate it normally and check that it does not come off How to attach any other key top The wire rod shown above is provided with Enter key left Shift key and Space key only When the key top of any other key has come off follow steps 2 to 4 above Not...

Page 58: ...OUND This tool is specially designed to be used with InterVideo WinDVD 5 for JVC It is used to switch the sound While it is operating the sound is switched by one setting in the following sequence each time the SURROUND key is pressed OFF DVS Dolby Virtual Speaker DH Dolby Headphone Dolby Virtual Speaker At this setting you can listen to music recorded using the 5 1 channel recording and playback ...

Page 59: ...s lit DVD CD operations Volume control operations 1 You can turn up the volume by moving the volume control toward you or turn it down by moving the control away from you 2 You can mute the sound by pressing the volume control The MUTE is turned off when this button is pressed again Volume control DVD CD function keys Press this to stop DVD or CD play Press this to start or temporarily stop DVD or...

Page 60: ...60EN MEMO ...

Page 61: ...HARDWARE 5 ...

Page 62: ...iscs bearing the or mark CD R Use discs bearing the mark CD RW Use discs bearing the High Speed or Ultra Speed mark CD ROM Use discs bearing the mark Music CD Use discs bearing the mark It may not be possible to read discs under some circumstances depending on such factors as the recording quality the presence of scratches dirt or deformation and copy protection Inserting the discs 1 Press the On ...

Page 63: ...pop out even if you press the Eject button If it is not possible to supply the power push a sharp pointed object such as a paper clip into the Eject hole on the left of the Eject button In the following situations the disc tray will not open even if the power is on After DVD ROM CD R RW access lamp has gone off press the Eject button and open the disc tray Immediately after the power has been turn...

Page 64: ...ng the copyright protection functions If you do not use an SD memory card on your PC keep the dummy card inserted in the slot to prevent dust or other foreign bodies getting into the PC When formatting an SD memory card or MultiMedia card in this PC s SD memory card slot for use in a DVC or digital camera first select FAT rather than FAT32 on the Windows XP format screen and then proceed with the ...

Page 65: ...ssing the push areas at the two ends No switching results when the Fn F10 keys are pressed if the CRT external monitor is not connected Do not disconnect the VGA cable during operation in the CRT external monitor mode The mode will not be switched by operating the Fn F10 keys while this cable is disconnected To enable the operation of these keys in this state the VGA cable must be re connected It ...

Page 66: ...type for your LAN environment You must contract with an Internet service provider Using a LAN cable connect the LAN connector on the unit with a communication device hub or router See the following for setting Setting for Network Connection Setting the IP address manually Important This PC will acquire the necessary initial settings automatically When you use this PC in a home network environment ...

Page 67: ... save the setting Setting a computer name or work group Tips To share data or a printer among a group of computers you must set the computers in the same work group This enables you to transfer data between computers 1 Click the start button and Control Panel 2 Click the Performance and Maintenance icon 3 Click the System icon The System Properties screen will appear 4 Click the Computer Name tab ...

Page 68: ...address you have to set a LAN local area connection in the Network connection screen 1 Click the start button and Control Panel 2 Click the Network and Internet Connections icon 3 Click the Network Connections icon With the correct LAN connection the following screen will appear 4 Check that Local Area Connection is enabled Tips If it is disabled move the mouse pointer to Local Area Connection and...

Page 69: ...rea Connection The Local Area Connection Status screen will appear 6 Click the Support tab and the Details button The Network Connection Details screen will appear 7 The MAC address is displayed as the Physical Address on the list ...

Page 70: ...art menu General Description of Wireless LAN The wireless LAN in this PC supports the following functions Automatic communication speed selection function IEEE802 11g 6 9 12 18 24 36 48 54 Mbps IEEE802 11b 1 2 5 5 11 Mbps Frequency channel selection IEEE802 11g b 2 412 2 462GHz 11ch Roaming between multi channels Power management function Compliance with IEEE802 11 and IEEE802 11b g standards Type...

Page 71: ...ick stacks of paper between the PC and access point Setup Procedure for the Wireless LAN Caution In order to make it easier to check the operation of the PC s wireless LAN start the access point before proceeding to use the wireless LAN in the infrastructure mode For use in the AdHoc mode start the PC that serves as the other end of the communication where the wireless LAN settings have already be...

Page 72: ...r electronic devices or equipment in places such as aircraft and hospitals from being adversely affected keep the wireless LAN functions shut down when starting up the PC or restoring its operation from the standby or hibernation mode 3 Set the IP address to be used by the wireless LAN This step must be taken only when the wireless LAN is to be used for the first time Once the wireless LAN has bee...

Page 73: ...een The Wireless Network Connection Properties screen now appears 3 Click the General tab on the Wireless Network Connection Properties screen and click Internet Protocol TCP IP to select the Internet protocol A screen such as the one shown below appears Continue to next page ...

Page 74: ...dress to be enabled On the Internet Protocol TCP IP Properties screen click and select Obtain an IP address automatically and Obtain DNS server address automatically and click the OK button For directly communicating with another PC using a peer to peer connection Set the IP address which has the same network address as the IP address of the PC that serves as the other end of the communication If ...

Page 75: ...een set to 192 168 10 1 click and select Use the following IP address on the PC s Internet Protocol TCP IP Properties screen and input 192 168 10 2 for instance in the IP address field Input 255 255 255 0 for Subnet mask and click the OK button When connecting to the Internet using a wireless LAN access point connected to an ADSL modem available from a retail store check the method used to set the...

Page 76: ...ts to deductively infer the encryption keys impersonation and data tampering WEP This stands for Wired Equivalent Privacy It refers to a technology used to prevent wireless LAN wiretapping and unauthorized intrusions to raise security levels by encrypting the contents of communications and transmitting the encrypted data between computers 7 When the computer is connected to the wireless network th...

Page 77: ... tray The Wireless Network Connection Status screen will appear 2 Click the Properties button on the Wireless Network Connection Status screen The Wireless Network Connection Properties screen will appear 3 Click the Wireless Networks tab on Wireless Network Connection Properties screen Continue to next page ...

Page 78: ...on 3 Select Data encryption 4 Input the Network key With 64 bit WEP a key consisting of up to five half size alphanumerics or 10 characters in the hexadecimal format may be input With 128 bit WEP a key consisting of up to 13 half size alphanumerics or 26 characters in the hexadecimal format may be input 5 Input the same data as for Network key in the Confirm network key field 6 Select Key index 6 ...

Page 79: ...current total battery level is displayed Use the following procedure 1 Click the start button and Control Panel 2 Click the Performance and Maintenance icon 3 Click the Power Options icon The Power Option Properties screen will appear 4 Click the Power Meter tab The total level of battery is displayed ...

Page 80: ...f The Stand By lamp is still lit in green The hard disk power is turned off with the LCD screen kept off The Stand By lamp is still lit in green The PC stores the current system status on the hard disk The Stand By lamp will go out The LCD screen is turned off The Stand By lamp flashes in green Tips To exit status 1 or 2 move the stick or press any key on the keyboard To exit status 3 press the Po...

Page 81: ...a long time System in hibernates status Continued operation on the PC displaying a battery low warning causes the result as follows 1 When the hibernates status is enabled The PC turns off while maintaining the current data 2 When the hibernates status is disabled The PC does not save the current data which will be lost We recommend that you enable the hiberbates status setting This function is en...

Page 82: ... precision components If you have damaged the memory board by adding a memory it is not covered by the warranty Also if you have damaged your PC you will be charged for its repair Take care not to cause excessive static electricity Do not add a memory board in a place where static electricity may be generated When you add or replace a memory board take care not to drop water or other liquids onto ...

Page 83: ...owing steps 1 Turn your PC upside down and remove screws 1 to 3 2 Open the memory expansion cover 3 Remove the lithium ion battery pack in the arrow direction Caution Do not loosen any other screws otherwise your PC may fail 3 Discharge any static electricity from your body by touching something metallic nearby Not on the PC 4 Add or remove a memory board Caution Add the 512M byte memory board to ...

Page 84: ...ply excessive force to it or the memory board may be damaged 2 Removing the memory board 1 Open the right and left support levers of the memory board by pressing them outward 2 Pull out the memory board in the arrow direction 5 Return the memory expansion cover mount the battery pack and retighten the three screws Memory slot direction Memory slot Memory board Position the memory board in such a w...

Page 85: ... icon 4 Click the System icon The System Properties screen will appear 5 The total amount of memory appears on the screen When a memory board has been added the number indicated by the location increases Note The size of the video memory assigned size is automatically assigned from the main memory to between 8MB and 64MB depending on the PC s operating conditions For this reason it cannot be chang...

Page 86: ...it means that the item concerned is trouble free If all the diagnosis items are trouble free Test Passed appears For information regarding UltraPOST operations refer to the button at the bottom right of the screen Do not use the extended diagnosis function since this is used for diagnosis purposes by the JVC PC Repair Centers 5 Click the X exit button at the top right of the UltraPOST screen The U...

Page 87: ...EN 87 PC RECOVERY REPEATED PC SETUP 6 ...

Page 88: ...ackup If you have recovered your PC it will have been returned to the status before shipment All files you have created applications you have added and various parameters you have set will have been cleared and lost Before starting system recovery back up any important files you have created on CD R disk or hard disk drive D of your PC If you have backed up the important information in drive D you...

Page 89: ...rts up after a delay exit Windows turn off the power and repeat the process 2 Read the License Agreement when displayed If you accept the Agreement type Y Tips If you respond with N the recovery is canceled The PC will restart and the Windows OS will start up 3 Select the recovery method disk partitioning When message Select the recovery method A Recommended C appears respond with the 1 or 2 key a...

Page 90: ...tart the PC appears Restart your PC Your PC has been returned to the original state before shipment 6 Set up the Windows OS by following the Initial Setup of Microsoft Windows procedure on Page 20 PC RECOVERY REPEATED PC SETUP 4 The system recovery starts and its progress is shown on the screen ...

Page 91: ...EN 91 TROUBLESHOOTING 7 ...

Page 92: ...fer to page 82 for JVC Support Power Q The power does not turn on A Check the following When you are using your PC on AC power Check that the AC adapter is connected For connection see 3 Recharge the battery pack by plugging the AC cord into DC Input connector on page 17 When you are using your PC on the battery Check that the battery is fully charged For how to charge the battery see 4 Make sure ...

Page 93: ...essage for terminating the application appears click End Now 5 Click x on the Windows Task Manager screen Tips When the application cannot be terminated forcibly restart Windows To restart Windows forcibly start Windows Task Manager click Shut Down on the toolbar then click Restart If your PC does not restart through the above procedure press the RESET button on the side of the unit page 14 or kee...

Page 94: ... start up your PC in the safe mode 1 Turn on the PC 2 As soon as the JVC logo appears hold down the F8 key Tips If the F8 key is pressed too late Windows tries to make a normal startup Restart your PC and go back to step 2 3 Select Safe Mode and press Enter 4 Check that the operating system is selected on the Please select the operating system to start screen Press Enter 5 When you see the To begi...

Page 95: ... external display and LCD modes Before disconnecting the VGA cable select a mode other than CRT externally connected and proceed Page 65 To adjust the LCD display brightness Pressing 7 of center keys turns the screen darker Pressing 6 of center keys turns the screen brighter When the Stand By lamp is flashing The PC is in standby mode The power saving mode is working Press the On Off key or any ke...

Page 96: ...efer to the instruction manual for your terminal adapter Check that the modem is recognized properly 1 Click the start button and Control Panel 2 Click the Printers and Other Hardware icon 3 Click the Phone and Modem Options icon then the Modems tab 4 Select the modem by clicking it click Properties then the Diagnostics tab 5 Click Query Modem When the modem is recognized properly the inquiry comm...

Page 97: ...con 3 Click the Network Connections icon 4 Right click the icon for the destination of connection to bring up a pop up menu Click Properties in the menu 5 Check the setting according to the instruction manual provided from your ISP On the General tab check the Connect using and Phone number settings Tips Some ISPs have different phone numbers for access points via ISDN lines from those for points ...

Page 98: ...rnal modem to slow down its speed of communication or fail to dial up depending on the condition of the telephone line In cases like this change to a setting other than Max Battery or Presentation such as Portable Laptop Q The PC cannot send or receive e mail messages A If you are using the Outlook Express software check the e mail software settings If you are using any other mailer than Outlook E...

Page 99: ...ess Network Connection has been disabled If it is disabled double click to enable it on the Connection Status screen Q The communication speed is slow A Check the distance between the PC and the other end of the communication In some cases the communication speed varies depending on the distance involved Depending on obstacles between PC and access point this could be normal Try changing locations...

Page 100: ...ery is not charged A Check the following When the battery cannot be charged When the lithium ion battery pack cannot be charged For how to mount the lithium ion battery pack see Mounting Dismounting the Lithium Ion Battery Pack on page 16 If you are still unable to charge the battery pack check the following Check that the AC adapter is connected correctly to an appropriate power socket and the PC...

Page 101: ...sc or the lens in the drive dirty If either one is dirty clean it Page 110 Is the disc scratched Replace the current disc with another disc to confirm that nothing is wrong with the PC Is there any dirt on the PC s turntable If it is dirty clean it Page 110 Is there any condensation in the PC or on the disc If condensation is present remove the disc and leave the PC powered off for an hour Is the ...

Page 102: ...ill has enough free space Try using different brand of the CD R discs Q I m going to save some data while keeping a number of writing software programs installed in the PC A You may not be able to save the data correctly in the following situations When a multiple number of writing programs are running at the same time including the resident writing programs When writing software with a different ...

Page 103: ...d in U S you must first set 1 as the region code When playing a DVD title with region code 1 sometimes the unit s region code is set to 1 automatically 2 To play a DVD title with a different region code change the unit s region code to match the region code of the DVD title However you are allowed to change the region code in this way only for five 5 times in total including the default setting 3 ...

Page 104: ...A To format an SD card CF card or other memory card with a memory capacity exceeding 32MB in this PC the FAT file system rather than the FAT32 file system must be selected on the Windows XP formatting screen By formatting cards in this way they can be used with digital cameras and other such devices When a memory card is to be formatted be absolutely sure to first back up its contents onto the PC ...

Page 105: ...er account computer administrator password 1 When a password deleting disk has been prepared You can delete the password using the disk For how to prepare a password deleting disk see Help and Support Center from the start menu 2 When another computer administrator account has been created If an additional computer administrator a user who has the administrator rights is created other than the use...

Page 106: ...the BIOS password even if you forget it To delete it forcibly you have to return your PC to us for chargeable service It may require hard disk drive replacement To bring up the BIOS menu turn on the PC and press the Alt and F2 keys while the JVC logo screen is shown Do not change the BIOS setting unless you have adequate knowledge of computers A wrong setting can make your PC unable to start up ag...

Page 107: ...APPENDIX 8 ...

Page 108: ... Norton AntiVirus 2004 http www symantec com region reg eu techsupp index html 2 RealOne Player http www service real com 3 InterVideo WinDVD 5 for JVC http www intervideo com 4 PINNACLE STUDIO 9 SE http www pinnaclesys com APPENDIX ...

Page 109: ...re trademarks or registered trademarks of Symantec Corporation in the U S and other countries 6 Symantec the Symantec logo and Norton AntiVirus are registered trademarks of Symantec Corporation in the U S 7 The SD logo is a registered trademark 8 CC Converter and the CC Converter logo are trademarks 9 DVD Logo is a trademark of DVD Format Logo Licensing Corporation 10 The Pinnacle System Inc logo ...

Page 110: ...When the lens is dirty Clean the lens with a commercial lens blower Lens blower for cameras Lens 8 If the turntable is dirty Use a cotton swab sold in stores to wipe the turntable black area gently in a circumferential motion Turntable Cotton swab Do not touch the lens Cautions Do not use record cleaners antistatic sprays or solvents such as benzine thinner or alcohol This may cause deformation or...

Page 111: ...EN 111 MEMO ...

Page 112: ...0 x 2 7 i LINK IEEE1394 4 pin S400 x 1 8 LAN connector 10 100BASE TX x 1 Modem jack RJ 11 x 1 MIC IN mini jack mono x 1 Headphone OUT mini jack stereo x 1 Type II PC card slot x 1 compatible with CardBus SD Memory card slot x 1 Keyboard Key pitch 16 mm Key stroke Formats supported CD CD DA CD ROM CD RW CD R CD ROM XA excluding ADPCM PhotoCD 9 multi session VideoCD 10 CD Extra CD CD text 10 Reading...

Page 113: ...he battery charging time may take up to 1 5 times as long as the value given here 16 These CD ROMs are required to re install the software provided with the PC They do not contain the operating system The data on these disks can be installed in this PC only Wireless LAN Specifications Wireless frequency band Modulation system Spread spectrum system Rated output Communication distance IEEE802 11g I...

Page 114: ...114EN Options separately available Option name Model Lithium ion battery pack BN LL23US Port replicator MP DPX1US APPENDIX ...

Page 115: ...e penetration of energy efficient computers and other office equipment The program backs the development and dissemination of products with functions that effectively reduce energy consumption It is an open system in which business proprietors can participate voluntarily The targeted products are office equipment such as computers monitors printers facsimiles copiers scanners and multifunction dev...

Page 116: ...2004 Victor Company of Japan Limited Printed in Taiwan 0504KHY IDASS VICTOR COMPANY OF JAPAN LIMITED ...

Page 117: ...instructions of this manual to use your Mobile Mini Note PC correctly Always read the Safety Precautions Keep this manual and the warranty card for further reference Thank you for purchasing the JVC MP XV841GB Mobile Mini Note PC MP XV841GB bile Mini Note PC ...

Page 118: ...off the mains plug from this equipment If the plug fitted is not suitable for the power points in your home or the cable is too short to reach a power point then obtain an appropriate safety approved extension lead or consult your dealer BESUREtoreplacethefuseonlywithanidenticalapproved type as originally fitted If nonetheless the mains plug is cut off be sure to re move the fuse and dispose of th...

Page 119: ...e best results and safety is to be assured DO read the operating instructions before you attempt to use the equipment DO ensure that all electrical connections including the mains plug extension leads and interconnections between pieces of equipment are properly made and in accordance with the manufacturer s instructions Switch off and withdraw the mains plug when making or changing connections DO...

Page 120: ...unity Switzerland Norway Iceland and Liechtenstein Declaration of Conformity with Regard to the R TTE Directive 1999 5 EC CAUTION FOR LASER This product utilizes laser Use of control adjustment or performance of procedures other than those specified herein may result in hazardous radiation exposure Do not open covers and do not repair yourself Refer servicing to qualified personnel Laser propertie...

Page 121: ...ic devices or medical equipment and cause accidents At present the policy of airline companies is to prohibit the use of electronic devices in aircraft at certain stages of a flight take off and landing This PC is classified as an electronic device For further details contact the airline companies Radio waves emitted from wireless LANs WARNING Please heed the warning below Do not use the wireless ...

Page 122: ...correct direction 4 Do not expose the batteries to excessive heat as they can leak or explode 5 Do not dispose of the batteries in a fire CAUTIONS Battery Packs The supplied battery pack is a lithium ion battery Before using the supplied battery pack or an optional battery pack be sure to read the following cautions 1 To avoid hazards do not burn do not short circuit the terminals do not modify or...

Page 123: ...te PC hereinafter Mobile PC make sure that all of the following system components have been included in the container If you have found any shortage or problem contact the sales shop The illustrations provided in these instructions may differ in part from the actual products Modem cable 1 8 metres long Two stick caps Start Here manual Telephone adapter External display cable Dedicated AC cable ...

Page 124: ... Agreement JVC grants to You a non exclusive right to use the Software 2 You may install and or use the Software on an HDD or other storage devices incorporated in the Product only 3 You may make a single copy of the Software for the back up and storage purpose if a back up copy of the Software has not been included with the Product on physical media such as CD ROM You may use such back up copy so...

Page 125: ... Should this Agreement be terminated You should immediately destroy the Software including any copy including erasure from any memory in the Product and any associated Materials and then will not possess them 9 Export Control You agree that You will not ship transfer or export the Software or underlying information and technology to any countries to which Japan and other relevant countries have em...

Page 126: ...may make a copy of the Software in whole or in part for the back up and storage purposes 3 Restriction 1 You may not modify reverse engineer decompile or disassemble except to the extent as permitted by the applicable laws the Software in any manner 2 You may not copy or use the Software in whole or in part other than as expressly specified in this Agreement 3 You may not remove the copyright and ...

Page 127: ...d States Department of Defense contract the use duplication or disclosure by the Government is subject to the restrictions as set forth in subparagraph c i ii of the Rights in Technical Data and Computer Software clause at DFARS 252 227 7013 Contractor Victor Company of Japan Limited 12 3 chome Moriya cho Kanagawa ku Yokohama Kanagawa 221 8528 Japan If the Software is acquired by You as any other ...

Page 128: ...tup 39 Connecting to the Internet 44 Disconnection from the Internet 45 Accessing a Web Page 46 E MAILING 47 Setting Up E Mail Software 47 Sending and Receiving E mails 50 OPERATIONS Using the Pointing Device 54 Using Keyboard 56 Using the centre keys 58 Using the DVD CD function keys 59 HARDWARE Using the DVD ROM CD R RW drive 62 Using the SD Memory Card Slot 64 Using an External Monitor 65 Conne...

Page 129: ... connector Docking port External monitor output Wireless LAN ON OFF switch Buckle i Link connector Speakers PC card slot PC card eject button Scroll button DC Input connector Left button Right button Stick Internal microphone used for network meetings etc Eject button Eject hole DVD ROM CD R RW drive Centre keys Volume control DVD CD function keys ...

Page 130: ...14EN Headphone output Microphone input Wireless LAN antenna Reset button Ventilation slots Built in lithium ion battery pack BN LL23E SD memory card slot ...

Page 131: ...EN15 SETTING UP 1 ...

Page 132: ...tup while the battery pack is charging To avoid data loss due to power failure or any other cause check the points for battery recharging in Page 18 1 Mounting Dismounting the Lithium Ion Battery Pack 1 Slide lock lever A in the direction of the arrow 2 Mount and lock the battery pack until it clicks 3 Slide lock lever A in the direction of the arrow 1 Slide lock lever A in the direction of the ar...

Page 133: ...put connector When recharging the battery pack 1 Plug the AC power cord into the AC adapter 2 Plug the DC cord of the adapter into the DC Input connector of the Mobile PC 3 Plug the AC cord of the AC adapter into the power receptacle 3 2 1 DC cord Continue to next page ...

Page 134: ...ack is being recharged Battery indicator If you have unplugged the DC cable of the AC adapter and if you drive your PC with the lithium ion battery pack the battery indicator goes out Approximate recharging times Lithium ion battery pack BN LL23E Recharging time When the PC s power is off Approximately 180 minutes Recharging time When the PC s power is on Approximately 290 minutes Cautions If the ...

Page 135: ...d in these electronic devices Consult each airline for details 1 Num Lock lamp A Caps Lock lamp Scroll Lock lamp Stand By lamp DVD ROM CD R RW access lamp SD access lamp HDD access lamp Wireless LAN access lamp When the Num Lock key is active When the Caps Lock key is active When the Scroll Lock key is active When the PC is turned on When the disc is accessed When the SD card is accessed When the ...

Page 136: ...select the No I don t accept option the initial Windows setup is cancelled You cannot use the Microsoft Windows or the PC software 3 Rename your computer and click Next The An Internet connection could not be chosen or How will this computer connect to the Internet screen appears Tips A unique computer name is required so that your PC is distinguished from other computers if you connect your PC to...

Page 137: ...sed after initial startup of the Microsoft Windows a confirmation screen asking for the deletion of desktop icons appears This is the Desktop Cleanup program that can delete icons that you have not used for a certain period from the desktop screen The software is not deleted even if you have cleared its icon from the desktop screen Use the following procedure to change the Windows date and time 1 ...

Page 138: ...pear 2 Click Turn Off computer The Turn off computer screen will appear 3 Click Turn Off The PC will be turned off automatically and Stand By lamp will go out Before closing the LCD panel make sure that Stand By lamp has turned off Tips To restart Windows without turning off the power click Restart on the Turn off computer screen Alternatively press the Shift button on the keyboard while Turn off ...

Page 139: ...EN 23 JVC ORIGINAL SOFTWARE AND SYSTEM APPLICATIONS 2 ...

Page 140: ...e starting the software setup quit and save the currently active application if any Otherwise your working data will be lost 1 Click start and click Run first at the right lower end of the Menu The Preparing to Install screen will appear and the software setup will start up 2 Read the Licence Agreement when displayed If you accept the Agreement click Yes 3 During setup the Sound video and game con...

Page 141: ...EN 25 4 When the software has been set up a prompt for PC restarting appears Click Finish to restart the PC ...

Page 142: ...Converter icon in the task tray by clicking the right mouse button 2 When the menu above appears click on the desired option Cautions If you have disabled the effect the CC Converter icon is shown in monochrome colour in the task tray The actual sound playback may slightly be delayed due to processing of playback data Explanation of menu options Enable Makes the CC converter processing valid Disab...

Page 143: ...e menu options can be selected as the intensity level of the effect to be exerted by the CC converter It is recommended that you select the level of intensity that matches the size of the speakers that will reproduce the sound the performance of the headphones and type of sound data compressed or non compressed More presence The CC converter functions to have the maximum effect The More presence l...

Page 144: ... up the program from the Start menu To change the CC converter setting and save the new status you must click Exit To restart the CC converter click Start All Programs CC Converter CC Converter Tips Do not change the sound playback device when you are playing back the sound data such as an audio file If you have changed the sound playback device wait five 5 or more seconds before playing back the ...

Page 145: ... profile click New and follow the instructions given by the Wizard Once a profile has been registered it can be selected from the profile management screen and the network settings can be changed An easy way to change the network is to click the icon on the task tray and select the profile from the menu which is then displayed The registered profiles are displayed and the network is connected by s...

Page 146: ...een readied click OK 5 When the Please insert a blank disc in the drive message appears insert one of the CD R discs into the drive and press OK The screen on which the blank CD automatic execution is selected may appear If it does cancel it 6 Data writing starts and when the Please insert a blank disc in the drive message appears from then on replace the disk 7 When Disk creation now completed me...

Page 147: ...n Cautions At the third startup after the Windows initial setup a Norton AntiVirus Information Wizard screen appears Follow the on screen instructions to set up this application program You can update the antivirus definition file of this application within 90 days 䢇 RealOne Player Can play back a video file The RealOne Player can play back some video files not supported by the Windows Media Playe...

Page 148: ...y with software DVD players Audio CDs and video CDs can be played using WinDVD 5 Caution DVD Video play may become unstable immediately after the WinDVD 5 s settings have been changed 䢇 UltraPost This self diagnosis tool is incorporated inside the BIOS It enables the self diagnosis of the hardware without involving the use of any media Use it at times when the operations need to be checked such as...

Page 149: ...ystem may be damaged due to loud noise Tips With some applications you will need to input the serial number S N on the CD ROM when the application is to be set up again To Uninstall a Standard Application Use the following procedure to uninstall a standard application program 1 Click the start button then Control Panel 2 Click the Add or Remove Programs icon The programs currently installed are li...

Page 150: ...34EN MEMO ...

Page 151: ...EN 35 NAVIGATE IN THE INTERNET WORLD 3 ...

Page 152: ...ider Get the information about the sign up to the provider connection fee service contents and other information from an Internet magazine We recommend that you compare available services and select the provider that best fits your needs If you have already contracted with a provider You can use your provider accounts such as user ID and password on your PC When you have contracted with a provider...

Page 153: ...tor into the jack in the correct direction Modem cable 2 Plug the other end of the modem cable into the telephone line wall jack If a telephone set is already connected to the telephone line unplug the cable of the telephone set Tips Purchase a line splitter if you wish to plug in your telephone set and your PC to the same telephone line Remember that you cannot use the telephone set and the Inter...

Page 154: ...ty code in the Area code field Usually enter your city code here Enter the phone company ID number and extension number as necessary They are usually not required 6 Check the dialing type of your telephone line and select it correctly 7 Click OK and the New Location screen will close 8 Click OK and the Phone and Modem Option screen will close Modem setup will be complete NAVIGATE IN THE INTERNET W...

Page 155: ... your PC has networking functions you can connect it to the Internet via the network For the setup procedure when you connect to the Internet via a network see Page 66 1 Click start and then click Internet in the upper left part of the Menu The Welcome to the New Connection Wizard screen will appear Tips If the Welcome to the New Connection Wizard screen does not appear click the start button and ...

Page 156: ... and click Next The Internet Connection screen will appear 5 Click Connect using a dial up modem option and click Next The Connection Name screen will appear 6 Enter the ISP name and click Next The Phone Number to Dial screen may appear Tips It is convenient to use the contracted provider name as the ISP name NAVIGATE IN THE INTERNET WORLD ...

Page 157: ... Information screen will appear 8 Enter the User name and Password and enter the password again for confirmation and click Next The Completing the New Connection Wizard screen will appear 9 Click Finish The setup for connection wizard is complete Continue to next page ...

Page 158: ...pecified you need not set these addresses 10 Click start and Control Panel in this order The Pick a category screen of the Control panel will appear 11 Click Network and Internet Connection icon The or pick a Control Panel icon screen will appear 12 Click Network Connections The ISP name you have set in Step 6 is shown in the Dial up tag 13 Double Click the dialup connection icon Connect screen wi...

Page 159: ...n IP address automatically click Use the following DNS server addresses and enter the DNS server address printed on the document sent from the provider 18 After you have entered the addresses click OK 19 Respond with OK to the Properties 20 Click x at the upper right corner of the Connect screen All screens will close and the Internet connection is complete ...

Page 160: ...eft upper end of the Menu Then select Internet Properties 2 Click the Connections tab and make sure that the ISP name you have created in Step 6 The Internet Connection Setup on page 40 has been set to default in the Dial up and Virtual Private Network settings If not set as default select the ISP and click Set Default 3 Click Always dial my default connection and click OK 2 Click Connect The dial...

Page 161: ...t your PC from the Internet in one of the following ways when you are finished using the Internet Double click the task tray connection icon at the bottom right corner of the desktop screen When the Auto Disconnect dialog box appears click Disconnect Now Quit the Microsoft s Internet Explorer IE When the Auto Disconnect dialog box appears click Disconnect Now ...

Page 162: ...efore starting the following steps connect your PC to the Internet using the Connecting to the Internet procedure on Page 44 When Microsoft s Internet Explorer is active you can access a Web site in one of the following ways 1 Directly enter the URL in the address bar 2 Jump to the destination link 3 Click Favorites and select Call a Web site from the Favorites Method 1 Method 2 Method 3 NAVIGATE ...

Page 163: ...led on your PC Tips It is convenient for E mail setup if you have the document sent from the provider to hand 1 Click start and click E mail on the Menu Outlook Express will start and the Internet Connection Wizard screen will appear 2 Enter the name you wish to display in the Display name and click Next The Internet E mail Address screen will appear Continue to next page ...

Page 164: ...E mail Server Name screen will appear 4 Enter the Incoming mail server and Outgoing mail server and click Next Usually select POP3 as the My incoming mail server is a server but you can change it if necessary The Internet Mail Logon screen will appear NAVIGATE IN THE INTERNET WORLD ...

Page 165: ...ck Next The Congratulations screen will appear 6 Click Finish The Congratulations screen will close and Outlook Express will start up The setup for the E mail software is complete 7 To quit Outlook Express click x at the upper right corner of the screen ...

Page 166: ...il on the Menu Outlook Express will start 2 Click Create a new Mail message on the screen or click Create Mail in the toolbar The New Message screen will appear Tips To minimize the access fee to the provider and the use of the telephone line create your E mail messages before connecting to the Internet Disconnect from the provider Connect to the provider Create a response return E mail message Tr...

Page 167: ...et You will be connected to the Internet and the created mail will be sent to the specified address 6 If your mail transmission is successful try to receive E mail When you are connected to the Internet click Send Recv at the left upper end of the screen Your PC will be connected to the provider s mail server and you can receive E mail Assuming you have set your E mail address correctly in Step 3 ...

Page 168: ...Disconnect your PC from the Internet after you have transmitted E mail and finished accessing a Web site It may not be possible to send mail properly using a company network or roaming service If this problem arises the method below may solve it Before sending the mail first perform the receive mail operation even if no mail has been received and then click Send NAVIGATE IN THE INTERNET WORLD ...

Page 169: ...EN 53 OPERATIONS 4 ...

Page 170: ... the mouse pointer moves more quickly Notes If you press the stick slightly and move the pointer slowly for several seconds the pointer may return backward This is not a fault Two stick caps are included in the PC accessory pack When the cap has deteriorated replace it with a new one How to press the buttons Usually press the three buttons using your thumb Click Press the left button once and rele...

Page 171: ...he left button and move it to the desired position and release the button Note The pointing devices have initially been set for the right handed person on the Mouse properties tab Scroll buttons You can scroll the screen in the desired direction by holding down the scroll button and moving the stick horizontally or vertically Note Some applications may not support the scroll buttons ...

Page 172: ...screens displayed in the Windows are copied onto the clipboard You can select a window and copy it using the Alt key together Alt Fn Ins Notes The hot keys are not supported in the MS DOS environment If a key top has come off refer to page 57 Using the Numeric Keypad Sixteen keys of the keyboard have been assigned to the numeric keypad Each of these keys has two labels in different colours to iden...

Page 173: ...tre position of the rubber cushion and press the key top down until it clicks into place 4 Operate the key with its key top now in place as you would operate it normally and check that it does not come off How to attach any other key top The wire rod shown above is provided with Enter key left Shift key and Space key only When the key top of any other key has come off follow steps 2 to 4 above Not...

Page 174: ...t the UNLOCK indicator is lit SURROUND This tool is specially designed to be used with InterVideo WinDVD 5 for JVC It is used to switch the sound While it is operating the sound is switched by one setting in the following sequence each time the SURROUND key is pressed OFF DVS Dolby Virtual Speaker DH Dolby Headphone Dolby Virtual Speaker At this setting you can listen to music recorded using the 5...

Page 175: ... and check that the UNLOCK indicator is lit DVD CD operations Volume control operations 1 You can turn up the volume by moving the volume control toward you or turn it down by moving the control away from you 2 You can mute the sound by pressing the volume control The control is released when it is pressed again Volume control DVD CD function keys Press this to stop DVD or CD play Press this to st...

Page 176: ...60EN MEMO ...

Page 177: ...HARDWARE 5 ...

Page 178: ...iscs bearing the mark CD RW Use discs bearing the High Speed or Ultra Speed mark CD ROM Use discs bearing the mark Music CD Use discs bearing the mark It may not be possible to read discs under some circumstances depending on such factors as the recording quality the presence of scratches dirt or deformation and copy protection Inserting the discs 1 Press the On Off key to turn on the PC s power 2...

Page 179: ...pop out even if you press the Eject button If it is not possible to supply the power push a sharp pointed object such as a paper clip into the Eject hole on the left of the Eject button In the following situations the disc tray will not open even if the power is on After DVD ROM CD R RW access lamp has gone off press the Eject button and open the disc tray Immediately after the power has been turn...

Page 180: ...ng the copyright protection functions If you do not use an SD memory card on your PC keep the dummy card inserted in the slot to prevent dust or other foreign bodies getting into the PC When formatting an SD memory card or MultiMedia card in this PC s SD memory card slot for use in a DVC or digital camera first select FAT rather than FAT32 on the Windows XP format screen and then proceed with the ...

Page 181: ...raight out while pressing the push areas at the two ends No switching results when the Fn F10 keys are pressed if the CRT external monitor is not connected Do not disconnect the VGA cable during operation in the CRT external monitor mode The mode will not be switched by operating the Fn F10 keys while this cable is disconnected To enable the operation of these keys in this state the VGA cable must...

Page 182: ...type for your LAN environment You must contract with an Internet service provider Using a LAN cable connect the LAN connector on the unit with a communication device hub or router See the following for setting Setting for Network Connection Setting the IP address manually Important This PC will acquire the necessary initial settings automatically When you use this PC in a home network environment ...

Page 183: ... save the setting Setting a computer name or work group Tips To share data or a printer among a group of computers you must set the computers in the same work group This enables you to transfer data between computers 1 Click the start button and Control Panel 2 Click the Performance and Maintenance icon 3 Click the System icon The System Properties screen will appear 4 Click the Computer Name tab ...

Page 184: ...address you have to set a LAN local area connection in the Network connection screen 1 Click the start button and Control Panel 2 Click the Network and Internet Connections icon 3 Click the Network Connections icon With the correct LAN connection the following screen will appear 4 Check that Local Area Connection is enabled Tips If it is disabled move the mouse pointer to Local Area Connection and...

Page 185: ...rea Connection The Local Area Connection Status screen will appear 6 Click the Support tab and the Details button The Network Connection Details screen will appear 7 The MAC address is displayed as the Physical Address on the list ...

Page 186: ...art menu General Description of Wireless LAN The wireless LAN in this PC supports the following functions Automatic communication speed selection function IEEE802 11g 6 9 12 18 24 36 48 54 Mbps IEEE802 11b 1 2 5 5 11 Mbps Frequency channel selection IEEE802 11g b 2 412 2 462GHz 11ch Roaming between multi channels Power management function Compliance with IEEE802 11 and IEEE802 11b g standards Type...

Page 187: ...ick stacks of paper between the PC and access point Setup Procedure for the Wireless LAN Caution In order to make it easier to check the operation of the PC s wireless LAN start the access point before proceeding to use the wireless LAN in the infrastructure mode For use in the AdHoc mode start the PC that serves as the other end of the communication where the wireless LAN settings have already be...

Page 188: ...r electronic devices or equipment in places such as aircraft and hospitals from being adversely affected keep the wireless LAN functions shut down when starting up the PC or restoring its operation from the standby or hibernation mode 3 Set the IP address to be used by the wireless LAN This step must be taken only when the wireless LAN is to be used for the first time Once the wireless LAN has bee...

Page 189: ...een The Wireless Network Connection Properties screen now appears 3 Click the General tab on the Wireless Network Connection Properties screen and click Internet Protocol TCP IP to select the Internet protocol A screen such as the one shown below appears Continue to next page ...

Page 190: ...dress to be enabled On the Internet Protocol TCP IP Properties screen click and select Obtain an IP address automatically and Obtain DNS server address automatically and click the OK button For directly communicating with another PC using a peer to peer connection Set the IP address which has the same network address as the IP address of the PC that serves as the other end of the communication If ...

Page 191: ...een set to 192 168 10 1 click and select Use the following IP address on the PC s Internet Protocol TCP IP Properties screen and input 192 168 10 2 for instance in the IP address field Input 255 255 255 0 for Subnet mask and click the OK button When connecting to the Internet using a wireless LAN access point connected to an ADSL modem available from a retail store check the method used to set the...

Page 192: ...ts to deductively infer the encryption keys impersonation and data tampering WEP This stands for Wired Equivalent Privacy It refers to a technology used to prevent wireless LAN wiretapping and unauthorized intrusions to raise security levels by encrypting the contents of communications and transmitting the encrypted data between computers 7 When the computer is connected to the wireless network th...

Page 193: ... tray The Wireless Network Connection Status screen will appear 2 Click the Properties button on the Wireless Network Connection Status screen The Wireless Network Connection Properties screen will appear 3 Click the Wireless Networks tab on Wireless Network Connection Properties screen Continue to next page ...

Page 194: ...m 3 Select Data encryption 4 Input the Network key With 64 bit WEP a key consisting of up to five half size alphanumerics or 10 characters in the hexadecimal format may be input With 128 bit WEP a key consisting of up to 13 half size alphanumerics or 26 characters in the hexadecimal format may be input 5 Input the same data as for Network key in the Confirm network key field 6 Select Key index 6 C...

Page 195: ...current total battery level is displayed Use the following procedure 1 Click the start button and Control Panel 2 Click the Performance and Maintenance icon 3 Click the Power Options icon The Power Option Properties screen will appear 4 Click the Power Meter tab The total level of battery is displayed ...

Page 196: ...5 minutes 4 System hibernates 3 hours 2 hours The LCD screen turns off The Stand By lamp is still lit in green The hard disk power is turned off with the LCD screen kept off The Stand By lamp is still lit in green The PC stores the current system status on the hard disk The Stand By lamp will go out The LCD screen is turned off The Stand By lamp flashes in green Tips To exit status 1 or 2 move the...

Page 197: ...ot used for a long time System in halt status Continued operation on the PC displaying a battery low warning causes the result as follows 1 When the halt status is enabled The PC turns off while maintaining the current data 2 When the halt status is disabled The PC does not save the current data which will be lost We recommend that you enable the halt status setting This function is enabled at the...

Page 198: ...y other memory board may not be recognized by your PC or its operation may be unreliable The PC inside contains precision components If you have damaged the memory board by adding a memory it is not covered by the warranty Also if you have damaged your PC you will be charged for its repair Take care not to cause excessive static electricity Do not add a memory board in a place where static electri...

Page 199: ...owing steps 1 Turn your PC upside down and remove screws 1 to 3 2 Open the memory expansion cover 3 Remove the lithium ion battery pack in the arrow direction Caution Do not loosen any other screws otherwise your PC may fail 3 Discharge any static electricity from your body by touching something metallic nearby Not on the PC 4 Add or remove a memory board Caution Add the 512M byte memory board to ...

Page 200: ...ply excessive force to it or the memory board may be damaged 2 Removing the memory board 1 Open the right and left support levers of the memory board by pressing them outward 2 Pull out the memory board in the arrow direction 5 Return the memory expansion cover mount the battery pack and retighten the three screws Memory slot direction Memory slot Memory board Position the memory board in such a w...

Page 201: ... icon 4 Click the System icon The System Properties screen will appear 5 The total amount of memory appears on the screen When a memory board has been added the number indicated by the location increases Note The size of the video memory assigned size is automatically assigned from the main memory to between 8MB and 64MB depending on the PC s operating conditions For this reason it cannot be chang...

Page 202: ...it means that the item concerned is trouble free If all the diagnosis items are trouble free Test Passed appears For information regarding UltraPOST operations refer to the button at the bottom right of the screen Do not use the extended diagnosis function since this is used for diagnosis purposes by the JVC PC Repair Centres 5 Click the X exit button at the top right of the UltraPOST screen The U...

Page 203: ...EN 87 PC RECOVERY REPEATED PC SETUP 6 ...

Page 204: ...you have recovered your PC it will have been returned to the status before shipment All files you have created applications you have added and various parameters you have set will have been cleared and lost Before starting system recovery back up any important files you have created on CD R disk or hard disk drive D of your PC If you have backed up the important information in drive D you must sel...

Page 205: ...t the Agreement type Y Tips If you respond with N the recovery is cancelled The PC will restart and the Windows OS will start up 3 Select the recovery method disk partitioning When message Select the recovery method A Recommended C appears respond with the 1 or 2 key as follows 1 If you respond with A All disk partitions and files of the hard disk are recovered and the entire PC system is initiali...

Page 206: ...sage Turn Power switch off and restart the PC appears Restart your PC Your PC has been returned to the original state before shipment 6 Set up the Windows OS by following the Initial Setup of Microsoft Windows procedure on Page 20 PC RECOVERY REPEATED PC SETUP ...

Page 207: ...EN 91 TROUBLESHOOTING 7 ...

Page 208: ...t turn on A Check the following Check that the Power key is pressed Press the On Off key to turn on your PC See Turning On Off key On on page 19 When you are using your PC on AC power Check that the AC adapter is connected For connection see 3 Recharge the battery pack by plugging the AC cord into DC Input connector on page 17 When you are using your PC on the battery Check that the battery is ful...

Page 209: ...essage for terminating the application appears click End Now 5 Click x on the Windows Task Manager screen Tips When the application cannot be terminated forcibly restart Windows To restart Windows forcibly start Windows Task Manager click Shut Down on the toolbar then click Restart If your PC does not restart through the above procedure press the RESET button on the side of the unit page 13 or kee...

Page 210: ... start up your PC in the safe mode 1 Turn on the PC 2 As soon as the JVC logo appears hold down the F8 key Tips If the F8 key is pressed too late Windows tries to make a normal startup Restart your PC and go back to step 2 3 Select Safe Mode and press Enter 4 Check that the operating system is selected on the Please select the operating system to start screen Press Enter 5 When you see the To begi...

Page 211: ... external display and LCD modes Before disconnecting the VGA cable select a mode other than CRT externally connected and proceed Page 65 To adjust the LCD display brightness Pressing 7 of centre keys turns the screen darker Pressing 6 of centre keys turns the screen brighter When the Stand By lamp is flashing The PC is in standby mode The power saving mode is working Press the On Off key or any ke...

Page 212: ...efer to the instruction manual for your terminal adapter Check that the modem is recognized properly 1 Click the start button and Control Panel 2 Click the Printers and Other Hardware icon 3 Click the Phone and Modem Options icon then the Modems tab 4 Select the modem by clicking it click Properties then the Diagnostics tab 5 Click Query Modem When the modem is recognized properly the inquiry comm...

Page 213: ...con 3 Click the Network Connections icon 4 Right click the icon for the destination of connection to bring up a pop up menu Click Properties in the menu 5 Check the setting according to the instruction manual provided from your ISP On the General tab check the Connect using and Phone number settings Tips Some ISPs have different phone numbers for access points via ISDN lines from those for points ...

Page 214: ...he internal modem to slow down its speed of communication or fail to dial up depending on the condition of the telephone line In cases like this change to a setting other than Max Battery or Presentation such as Portable Laptop Q The PC cannot send or receive e mail messages A If you are using the Outlook Express software check the e mail software settings If you are using any other mailer than Ou...

Page 215: ...by taking step 3 Set the IP address to be used by the wireless LAN on page 72 in the section entitled Setup Procedure for the wireless LAN If the wireless LAN cannot be set to ON or OFF First select My Network Places Display Network Connections and then check whether Wireless Network Connection has been disabled If it is disabled double click to enable it on the Connection Status screen Q The comm...

Page 216: ...ates the MAC address Battery Q The battery is not charged A Check the following When the battery cannot be charged When the lithium ion battery pack cannot be charged For how to mount the lithium ion battery pack see Mounting Dismounting the Lithium Ion Battery Pack on page 16 If you are still unable to charge the battery pack check the following Check that the AC adapter is connected correctly to...

Page 217: ...isc or the lens in the drive dirty If either one is dirty clean it Page 110 Is the disc scratched Replace the current disc with another disc to confirm that nothing is wrong with the PC Is there any dirt on the PC s turntable If it is dirty clean it Page 110 Is there any condensation in the PC or on the disc If condensation is present remove the disc and leave it standing for about an hour Is the ...

Page 218: ... that the hard drive still has enough free space Q I m going to save some data while keeping a number of writing software programs installed in the PC A You may not be able to save the data correctly in the following situations When a multiple number of writing programs are running at the same time including the resident writing programs When writing software with a different version has been inst...

Page 219: ...in Europe you must first set 2 as the region code When playing a DVD title with region code 2 sometimes the unit s region code is set to 2 automatically 2 To play a DVD title with a different region code change the unit s region code to match the region code of the DVD title However you are allowed to change the region code in this way only for five 5 times in total including the default setting 3...

Page 220: ...A To format an SD card CF card or other memory card with a memory capacity exceeding 32MB in this PC the FAT file system rather than the FAT32 file system must be selected on the Windows XP formatting screen By formatting cards in this way they can be used with digital cameras and other such devices When a memory card is to be formatted be absolutely sure to first back up its contents onto the PC ...

Page 221: ...er account computer administrator password 1 When a password deleting disk has been prepared You can delete the password using the disk For how to prepare a password deleting disk see Help and Support Centre from the start menu 2 When another computer administrator account has been created If an additional computer administrator a user who has the administrator rights is created other than the use...

Page 222: ...the BIOS password even if you forget it To delete it forcibly you have to return your PC to us for chargeable service It may require hard disk drive replacement To bring up the BIOS menu turn on the PC and press the Alt and F2 keys while the JVC logo screen is shown Do not change the BIOS setting unless you have adequate knowledge of computers A wrong setting can make your PC unable to start up ag...

Page 223: ...APPENDIX 8 ...

Page 224: ...n AntiVirus 2004 http www symantec com region reg eu techsupp index html 2 RealOne Player http www service real com 3 InterVideo WinDVD 5 for JVC http www intervideo com jsp Home jsp 4 PINNACLE STUDIO 9 SE http www pinnaclesys com APPENDIX ...

Page 225: ...re trademarks or registered trademarks of Symantec Corporation in the U S and other countries 6 Symantec the Symantec logo and Norton AntiVirus are registered trademarks of Symantec Corporation in the U S 7 The SD logo is a registered trademark 8 CC Converter and the CC Converter logo are trademarks 9 DVD Logo is a trademark of DVD Format Logo Licensing Corporation 10 The Pinnacle System Inc logo ...

Page 226: ...When the lens is dirty Clean the lens with a commercial lens blower Lens blower for cameras Lens 8 If the turntable is dirty Use a cotton swab sold in stores to wipe the turntable black area gently in a circumferential motion Turntable Cotton swab Do not touch the lens Cautions Do not use record cleaners antistatic sprays or solvents such as benzine thinner or alcohol This may cause deformation or...

Page 227: ... Return this battery pack to the sales dealer or to the municipal waste processor making sure that the battery pack is completely discharged Be aware of short circuiting for the not completely discharged batteries Lithiumbatterien und powerpacks nur im entladenen Zustand in die Altbatteriesammelgefäße bei Handel und öffentlich rechtlichen Entsorgunngsträgem gegeben werden sollen bzw bei nicht voll...

Page 228: ... also used as external display output connector 4 USB 2 0 x 2 7 i LINK IEEE1394 4 pin S400 x 1 8 LAN connector 10 100BASE TX x 1 Modem jack RJ 11 x 1 MIC IN mini jack mono x 1 Headphone OUT mini jack stereo x 1 Type II PC card slot x 1 compatible with CardBus SD Memory card slot x 1 Keyboard Key pitch 16 mm Key stroke Formats supported CD CD DA CD ROM CD RW CD R CD ROM XA excluding ADPCM PhotoCD 9...

Page 229: ...he battery charging time may take up to 1 5 times as long as the value given here 16 These CD ROMs are required to re install the software provided with the PC They do not contain the operating system The data on these disks can be installed in this PC only Wireless LAN Specifications Wireless frequency band Modulation system Spread spectrum system Rated output Communication distance IEEE802 11g I...

Page 230: ...114EN Options separately available Option name Model Lithium ion battery pack 1 BN LL23E Port replicator MP DPX1E APPENDIX ...

Page 231: ...EN 115 MEMO ...

Page 232: ......

Reviews: