background image

Filename [EN_XVC29SUS_Cov1.fm]
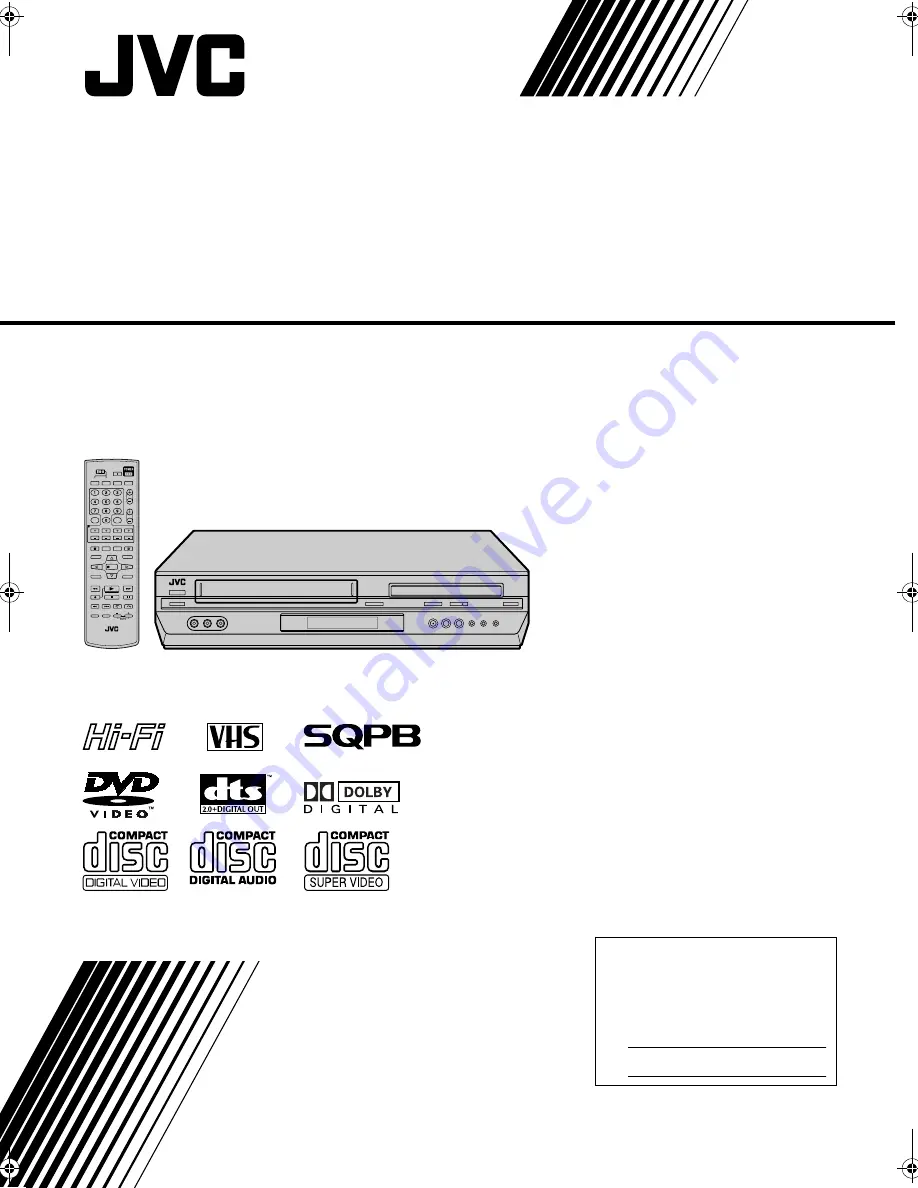
DVD PLAYER &

VIDEO CASSETTE RECORDER

INSTRUCTIONS

LPT1018-001A

HR-XVC29SU

For Customer Use:

Enter below the Model No. and 
Serial No. which are located on the 
rear of cabinet. Retain this 
information for future reference.

Model No.

Serial No.

EN_XVC29SUS_Cov1.fm  Page 1  Tuesday, December 14, 2004  2:39 PM

Summary of Contents for HR-XVC29SUC

Page 1: ...O CASSETTE RECORDER INSTRUCTIONS LPT1018 001A HR XVC29SU For Customer Use Enter below the Model No and Serial No which are located on the rear of cabinet Retain this information for future reference Model No Serial No ...

Page 2: ...could void user s authority to operate the equipment CAUTION THIS PRODUCT USES A LASER SYSTEM USE OF CONTROLS OR ADJUSTMENTS OR PERFORMANCE OF PROCEDURES OTHER THAN THOSE SPECIFIED HEREIN MAY RESULT IN HAZARDOUS RADIATION EXPOSURE DO NOT OPEN COVERS AND DO NOT REPAIR YOURSELF REFER SERVICING TO QUALIFIED PERSONNEL Declaration of Conformity Model Number HR XVC29SU Trade Name JVC Responsible Party J...

Page 3: ...ic shock 4 Power Cord Protection Power supply cords should be routed so that they are not likely to be walked on or pinched by items placed upon or against them paying particular attention to cords at plugs convenience receptacles and the point where they exit from the product 5 Ventilation Slots and openings in the cabinet are provided for ventilation To ensure reliable operation of the product a...

Page 4: ...alified service personnel 2 Damage Requiring Service Unplug this product from the wall outlet and refer servicing to qualified service personnel under the following conditions a When the power supply cord or plug is damaged b If liquid has been spilled or objects have fallen into the product c If the product has been exposed to rain or water d If the product does not operate normally by following ...

Page 5: ...peratures or humidity in direct sunlight in a dusty environment in an environment where strong magnetic fields are generated on a surface that is unstable or subject to vibration 2 DO NOT block the unit s ventilation openings or holes If the ventilation openings or holes are blocked by a newspaper or cloth etc the heat may not be able to get out 3 DO NOT place heavy objects on the unit or Remote 4...

Page 6: ...ograming 34 Satellite Auto Recording 39 OPERATIONS ON DVD DECK 40 Basic Playback 40 Playback Features 41 Using the on screen bar 47 JPEG Files Playback 49 EDITING VCR DECK 52 Edit From A Camcorder 52 Edit To Or From Another Video Recorder 53 Dubbing from DVD to VCR 54 EDITING DVD DECK 55 Digital Audio Dubbing 55 REMOTE 56 Remote Control Functions 56 Connecting To A Dolby Digital Decoder or An Ampl...

Page 7: ... matches that of the unit The region number for this unit is 1 Only discs whose region number includes 1 can be played back such as shown below Examples of DVD VIDEO labels which can be played back using this unit DVD VIDEO Marks Sometimes marks are printed on a DVD disc and or on its packaging to indicate information regarding the contents and functions of a disc Check marks indicating the conten...

Page 8: ... played back be sure to correctly align the disc with the grooves for its size If the disc is not in its groove it may be scratched or otherwise damaged To insert an 8 cm disc place it according to the inner groove 3 Press x OPEN CLOSE on the DVD deck to close the disc tray Pressing 4 PLAY also closes the disc tray Playback begins automatically if an auto playback DVD disc is loaded Although the V...

Page 9: ... 56 G DVD Open Close Button x OPEN CLOSE 墌 pg 8 40 50 H VHS Eject Button x EJECT 墌 pg 26 29 31 I Video Audio Input Connectors VIDEO AUDIO 墌 pg 52 J Remote Sensor K Front Display Panel 墌 pg 10 L Record Button 7 REC 墌 pg 31 32 M Rewind Button 3 REW 墌 pg 26 27 42 N Fast Forward Button FF 5 墌 pg 26 27 42 O Channel Button CH 墌 pg 27 31 32 P Progressive Scan Button PROGRESSIVE SCAN 墌 pg 15 A B H I J C F...

Page 10: ...ctors are only for DVD deck Front Display Panel A Operation Mode Indicators B VHS Indicator Lights up when selecting the VCR deck by pressing VCR DVD on the unit or VCR on the Remote C Channel Clock Auxiliary Input Mode Display F 1 VCR deck only Counter Display VCR deck Tape Speed SP EP VCR deck only Multi information window DVD deck The current group title track chapter number s time and status i...

Page 11: ... pg 28 The position of q in relation to B beginning or E end shows you where you are on the tape NOTE Depending on the type of tape being used the tape position indicator may not appear correctly F Audio Mode Display 墌 pg 30 G Operation Mode Indicators H Tape Speed SP EP I Cassette Loaded Mark J Index number 墌 pg 28 K Tape Remaining Time Indicator 墌 pg 33 L Counter Display A B D E F G H I J K L C ...

Page 12: ... the left column Z Weekly Button WEEKLY 墌 pg 35 a TV Channel Button TV CH 墌 See the left column b Channel Button CH 墌 pg 31 c Date Button DATE 墌 pg 34 Subtitle Button SUBTITLE 墌 pg 44 Angle Button ANGLE 墌 pg 45 d Timer Button TIMER 墌 pg 35 e Menu Button MENU 墌 pg 41 f Satellite Auto Recording Button REC LINK 墌 pg 39 g Display Button DISPLAY 墌 pg 33 40 h Play Button 4 PLAY 墌 pg 26 31 40 50 i Fast F...

Page 13: ...tomatically be set when the antenna is connected and when the AC power cord is first connected to an AC outlet If AUTO and the channel indicator are displayed on the front display panel before the unit is powered on the clock and tuner channels are being set automatically Wait for the time to be displayed on the front display panel before turning on the unit E Set the VCR channel The VCR channel i...

Page 14: ...can obtain high quality component video pictures If your TV is not stereo capable use the unit s AUDIO OUTPUT connectors to connect to an audio amplifier for Hi Fi stereo sound reproduction To operate the unit with your TV using the Component Video connection set your TV to its AV mode You can also use the TV VCR button on the unit s Remote to set JVC TV to the AV mode For switching the TV s mode ...

Page 15: ...laced format A Turn on the unit Press POWER B Select the DVD deck On the unit Press VCR DVD repeatedly so that the DVD indicator lights up on the front display panel On the Remote Press DVD so that the DVD indicator lights up on the front display panel C Switch the mode A Press and hold PROGRESSIVE SCAN on the unit for more than 3 seconds The current scan mode blinks on the front display panel B W...

Page 16: ...data from the PBS channel If this function is taking a considerable amount of time it may be necessary to perform the Semiauto or Manual Clock Set procedure INFORMATION If AUTO CLOCK is set to ON 墌 pg 23 the clock will be adjusted automatically by the host channel every hour except 11 00 PM midnight 1 00 AM and 2 00 AM using the incoming PBS channel clock setting data This automatic clock adjustme...

Page 17: ...vision conversion Select this when the aspect ratio of your TV is fixed to 16 9 wide TV The unit automatically adjusts the screen width of the output signal correctly when playing back a picture whose aspect ratio is 4 3 4 3 LB Letter Box conversion Select this when the aspect ratio of your TV is 4 3 conventional TV While viewing a wide screen picture the black bars appear on the top and the botto...

Page 18: ... that the VHS indicator lights up on the front display panel C Access the Main Menu screen Press SET UP D Access the Initial Set screen E Select the language F Return to the normal screen Press SET UP Turn on the TV and select the VCR channel or AV mode Slide the TV VCR DVD switch on the Remote to the right POWER Slide to the right Press rt to move the highlight bar arrow to INITIAL SET then press...

Page 19: ...nel C Access the DVD Set Up menu screen D Select the mode E Select the mode setting Press rt to select the desired setting then press ENTER F Return to the normal screen Press SET UP Turn on the TV and select the VCR channel or AV mode Slide the TV VCR DVD switch on the Remote to the right POWER Slide to the right A Press SET UP B Press w e to select LANGUAGE Press rt to move the hightlight to ON ...

Page 20: ...C Access the DVD Set Up menu screen D Select the mode E Select the mode setting Press rt to select the desired setting then press ENTER See Language Code List 墌 pg 21 F Return to the normal screen Press SET UP NOTE When the selected language is not available on the disc the disc s default menu language is played back Turn on the TV and select the VCR channel or AV mode Slide the TV VCR DVD switch ...

Page 21: ...upiak Indonesian Icelandic Hebrew Yiddish Javanese Georgian Kazakh Greenlandic Cambodian Kannada Korean KOR Kashmiri Kurdish Kirghiz Latin Lingala Laothian Lithuanian Latvian Lettish Malagasy Maori Macedonian Malayalam Mongolian Moldavian Marathi Malay MAY Maltese Burmese Nauru Nepali Dutch Norwegian Occitan Afan Oromo Oriya Panjabi Polish Pashto Pushto Portuguese Quechua Rhaeto Romance RN RO RU R...

Page 22: ...ay panel On the Remote Press VCR so that the VHS indicator lights up on the front display panel C Access the Main Menu screen Press SET UP D Access the Initial Set screen E Access the Clock Set screen Turn on the TV and select the VCR channel or AV mode Slide the TV VCR DVD switch on the Remote to the right POWER Slide to the right Press rt to move the highlight bar arrow to INITIAL SET then press...

Page 23: ...of a PBS channel from an adjacent time zone or from an incorrect PBS channel from a cable TV system If you selected AUTO for the host channel in step B be sure to select the correct time zone manually E Complete the Semiauto Clock Set Press SET UP to return to normal screen Manual Clock Set First follow steps A to E in Preparations 墌 pg 22 then go to the following steps A Set time date and year B ...

Page 24: ...utomatically set the receivable channels in your area in the order of their frequencies As Auto Set Up progresses the q mark on the TV screen moves from left to right When Auto Channel Set is complete SCAN COMPLETED appears on the TV screen If the scan was unsuccessful SCAN COMPLETED NO SIGNAL appears on screen Check the connections and start again F Return to the normal screen Press SET UP Turn o...

Page 25: ... then press ENTER or e E Access the Manual Channel Set screen F Add or skip the desired channels To add channels A Press the number keys to input a channel number you want to add B Press ENTER or e to set to ADD C Repeat A to B to add other channels To skip channels A Press rt or the number keys to select a channel number you want to skip B Press ENTER or e to set to SKIP C Repeat A and B to skip ...

Page 26: ...e right Clean the video heads using a dry cleaning cassette ECL 3F when Rough poor picture appears while a tape is played back The picture is unclear or no picture appears USE CLEANING CASSETTE appears on the screen only with SUPERIMPOSE set to ON 墌 pg 59 NOTE The heads get dirty in the following cases in an environment prone to extreme temperature or humidity in a dusty environment flaw dirt or m...

Page 27: ...press FF 5 for forward variable speed search or 3 REW for reverse variable speed search The speed changes for each direction by pressing 3 REW and FF 5 repeatedly When pressing FF 5 SP 5x 7x EP 11x 21x When pressing 3 REW Once 3 REW is pressed reverse search starts in 1x normal playback speed After this process each press of 3 REW changes the search speed between 5x and 7x in SP mode 11x and 21x i...

Page 28: ... 2 INDEX twice To locate the beginning of D from the current position press INDEX 6 once When the specified index code is located playback begins automatically Instant ReView Simply by pressing a single button the unit power comes on rewinds and begins playback of the last timer recorded program If you have several programs recorded you can easily access any of them NOTE Before starting make sure ...

Page 29: ...k Your unit can automatically play back the whole tape 100 times repeatedly 1 Start playback Press 4 PLAY 2 Activate Repeat Playback Press 4 PLAY and hold for over 5 seconds then release The Play indicator on the front display panel blinks slowly After playing back a tape 100 times the unit stops automatically 3 Stop Repeat Playback Press 8 STOP at any time Pressing 4 PLAY 3 REW FF 5 or 9 PAUSE al...

Page 30: ...ORM and will play back the one you select During Playback Pressing A MONITOR changes the soundtrack as follows You can also select the soundtrack on the Function Set screen 墌 pg 60 NOTES HIFI should normally be selected In this mode Hi Fi stereo tapes are played back in stereo and the normal audio track is played back automatically for tapes with only normal audio SUPERIMPOSE must be set to ON or ...

Page 31: ...he TV screen E Start recording Press and hold 7 REC and press 4 PLAY on the Remote or press 7 REC on the unit F Pause Resume recording Press 9 PAUSE Press 4 PLAY to resume recording You can select channel during the Record Pause mode G Stop recording Press 8 STOP Then press x EJECT on the VCR deck to remove the cassette NOTE When the end of the tape is reached during recording the unit stops and 䡬...

Page 32: ...recording is finished 1 Start recording Press 7 REC on the unit 2 Engage the ITR mode Press 7 REC again 䡬 blinks and 0 30 appears on the front display panel 3 Set the recording duration If you want to record for more than 30 minutes press 7 REC to extend the time Each press extends recording time by 30 minutes NOTES You can only perform ITR using the 7 REC button on the unit s front panel Still pi...

Page 33: ...press ON SCREEN the on screen display appears on the TV screen for 5 seconds then the displays other than the counter disappears To clear the counter display press ON SCREEN Depending on the type of tape being used the tape remaining time reading may not appear right away or is not correct may sometimes appear with blinking or the display may blink on occasion Second Audio Recording This unit s bu...

Page 34: ...s and release repeatedly to move 1 minute at a time E Enter the program date Press DATE The current date appears on the TV screen The date you enter appears in its place Before performing Express Timer Programing Make sure that the unit s built in clock is set properly Insert a cassette with the safety tab in place The unit will come on automatically Turn on the TV and select the VCR channel or AV...

Page 35: ...mber key 9 for weekly serials or DAILY number key 8 for daily serials Monday Friday Either WEEKLY or DAILY appears on the TV screen Pressing the button again makes the corresponding indication disappear NOTES You can program this unit to timer record as many as 8 programs If you try to program the unit to record a ninth PROGRAM FULL appears on the TV screen To record the extra program you must fir...

Page 36: ...e timer mode Press TIMER then press POWER B Access the Program Check screen C Access the Program screen PROG CHECK TIMER POWER Slide to the right Press PROG CHECK Press PROG CHECK again to check more information Each time you press PROG CHECK the next program s information appears ...

Page 37: ...ropriate button START STOP DATE CH DAILY number key 8 WEEKLY number key 9 and or SP EP E Return to the normal screen Press PROG CHECK as many times as necessary If there are still some programs remaining go on to step F F Return to the timer mode Press TIMER CH TIMER START STOP DATE DAILY WEEKLY SP EP PROG CHECK CANCEL Slide to the right ...

Page 38: ...ds then the normal screen appears To change a program press the appropriate button START STOP DATE CH DAILY number key 8 WEEKLY number key 9 and or SP EP when the Program screen on which you want to make changes is shown then press ENTER PROGRAM COMPLETED appears on the TV screen for about 5 seconds then the normal screen appears NOTE If the overlap is not yet solved or another overlap occurs with...

Page 39: ...ording is in progress For timer programing of the DBS receiver refer to the instruction manual of the DBS receiver Satellite Auto Recording is not possible if your DBS receiver does not have a timer Pressing the unit s POWER button while Satellite Auto Recording is in progress turns off the unit s power and disengages the Satellite Auto Recording mode If there are more than one satellite programs ...

Page 40: ...using the DVD menu 墌 pg 41 D Pause playback Press 9 PAUSE To resume normal playback press 4 PLAY E Stop playback Press 8 STOP When RESUME 墌 pg 64 is ON the unit memorizes the position on the disc where you have interrupted playback To resume playback press 4 PLAY To stop playback completely press 8 STOP again Press x OPEN CLOSE on the DVD deck to open the disc tray then remove the disc Turn on the...

Page 41: ...EXT or PREVIOUS appears on the TV screen Pressing SKIP 6 advances to the next page Pressing 2 SKIP returns to the previous page The method of the operation is different depending on the disc To cancel PBC Start playback by using the number keys instead of 4 PLAY To reactivate PBC Press TOP MENU or MENU Press 8 STOP to stop playback then press 4 PLAY Locating the Start Point of the Item or Skip the...

Page 42: ... Still Picture Frame By Frame Playback 1 Pause during playback Press 9 PAUSE 2 Activate frame by frame playback Press 9 PAUSE to advance a still picture To resume normal playback press 4 PLAY Slow Motion During playback press 9 PAUSE then press FF 5 for forward slow motion playback or 3 REW for reverse slow motion playback Each press of FF 5 changes the playback speed as follows 1 32 1 16 1 8 1 4 ...

Page 43: ...at the desired part 1 Access the on screen bar Press ON SCREEN twice The on screen bar appears on the TV screen 2 Select menu item Press w e to hightlight then press ENTER The following pop up window appears under the selected item 3 Select the repeat mode Press rt repeatedly to select A B 4 Select the start point Press ENTER at the beginning of the part you want to repeat point A The following di...

Page 44: ...s no possible to use the Time Search function Subtitle Selection You can select subtitle language During playback 1 Access the menu Press SUBTITLE The following pop up window appears on the TV screen Example DVD ENGLISH is selected out of 3 subtitle languages recorded 2 Select the subtitle language Press rt repeatedly to select the desired subtitle language To turn off the subtitle press SUBTITLE ...

Page 45: ...k 1 Access the menu Press A MONITOR The following pop up window appears on the TV screen Example ENGLISH is selected out of 3 audio languages recorded during DVD VIDEO playback 2 Select the audio setting Press rt or A MONITOR repeatedly to select the desired audio language Each time you press the button the audio selection changes The pop up window disappears if no operation is done for about 5 se...

Page 46: ... USER 2 4 Select the parameter Press rt repeatedly to select a parameter you want to adjust then press ENTER Adjust gradually and confirm picture appearance results are as preferred VFP menu disappears and the following pop up window appears on the TV screen 5 Adjust the parameter Press rt repeatedly to change the setting then press ENTER The current VFP settings appear again Repeat steps 4 and 5 ...

Page 47: ...back A Access the on screen bar Press ON SCREEN twice The on screen bar appears on the TV screen The currently selected item is highlighted B Select menu item Press w e to hightlight the item you want to work wiht then press ENTER The pop up window appears under the selected item After pressing ENTER When a pull down menu appears press rt to select the setting you want then press ENTER When a numb...

Page 48: ...tle language It is impossible to select OFF when using the on screen bar To select OFF press ON SCREEN to clear the on screen bar then press SUBTITLE repeatedly until OFF is selected 8 Angle selection See also page 45 During playback selects a desired scene angle in a multi angle part Menu Bar Functions for SVCD Video CD Audio CD 8 Time mode selection Selects the time mode shown in the status bar ...

Page 49: ...s the disc format for CD R RW Use ISO 9660 as the disc format for CD R RW The unit does not support packet writing for CD R RW The unit supports discs recorded with up to five multiple sessions Finalize the disc NOTES Because of the disc characteristics or recording condition some discs may not be played back or it takes time to start playback The unit does not support packet writing discs If ther...

Page 50: ... indicator lights up on the front display panel C Select the group Press rt to select the desired group then press e D Start playback Press rt to select the desired file then press ENTER or 4 PLAY You can skip a file across a group Press SKIP 6 to skip to the first file of the next group when the last file of the current group is selected The slide show playback starts from the selected file After...

Page 51: ... repeat playback of the current group or all groups While the control display is on the TV screen 1 Select the mode Press REPEAT to select the desired repeat mode Each time you press REPEAT the mode changes as follows GROUP ALL OFF No indication Back to the beginning 2 Start playback Press 4 PLAY To cancel Repeat Playback Press REPEAT repeatedly until the repeat mode display disappears from the TV...

Page 52: ...ut mode Press AUX number key 0 and or CH to select F 1 D Set the edit mode See PICTURE CONTROL on page 59 E Engage the Record Pause mode Use 4 PLAY FF 5 or 3 REW to locate the point where you start recording then press and hold 9 PAUSE and press 7 REC to engage the Record Pause mode F Start the camcorder Engage the Play mode of the camcorder G Start the unit Press 4 PLAY to engage the Record mode ...

Page 53: ...When using another recorder as the recording deck refer to its instruction manual D Set the edit mode See PICTURE CONTROL on page 59 E Engage the Record Pause mode of the recording deck Locate the point where you start recording then engage the Record Pause mode F Start the source player Engage the Play mode of the source player G Start the recording deck Engage the Record mode of the recording de...

Page 54: ...ittle before the start point Turn off the on screen bar if it appears on the TV screen D Start dubbing Press and hold 7 REC then press 4 PLAY on the Remote on DVD deck mode dub lights on the front display panel E End dubbing Press 8 STOP Be sure to press 8 STOP while the VCR indicator lights up on the unit NOTES You can dub from DVD to VCR regardless of the scan mode setting 墌 pg 15 However the pr...

Page 55: ... Press 3 REW a little then press 4 PLAY to start playback D Press 9 PAUSE to pause playback a little before the start point D Prepare the audio device for dubbing Select the input mode E Start dubbing A Press 4 PLAY to start playback on the DVD deck B Start recording on the audio device F End dubbing Stop recording on the audio device Then press 8 STOP to stop playback on the DVD deck NOTES There ...

Page 56: ...set the code NOTE Once the batteries are removed the remote control code is back to A On the unit A Turn off the unit Press POWER on the unit B Display the code Press 4 PLAY on the unit for over 5 seconds while the unit is turned off The code currently set appears on the front display panel If the code displayed on the front display panel is different from the code set on the Remote go to step C C...

Page 57: ... 62 CAUTIONS This unit has a dynamic range of more than 80 dB with regards to its Hi Fi audio capability It is recommended that you check the maximum level if you are going to listen to the Hi Fi audio signals through a stereo amplifier A sudden surge in the input level to the speakers may damage them Some speakers and televisions are specially shielded to prevent television interference If both a...

Page 58: ... the Remote Press VCR so that the VHS indicator lights up on the front display panel C Access the Main Menu screen Press SET UP D Access the Function Set screen E Select the mode Press rt to move the highlight bar arrow to the item you want to change F Select the mode setting Press ENTER or e G Return to the normal screen Press SET UP Turn on the TV and select the VCR channel or AV mode Slide the ...

Page 59: ... indicators may be disturbed depending on the type of tape being used 8 AUTO SP EP TIMER ON OFF When this function is set to ON the unit automatically switches to EP mode to allow complete recording if there is not enough tape to record the entire program while timer recording in SP mode For Example Recording a program of 140 minutes in length onto a 120 minute tape Make sure you set this function...

Page 60: ...it The STEREO indicator appears on the screen for about 5 seconds if the program is a stereo broadcast The SAP indicator appears on the screen for about 5 seconds if the program is a SAP broadcast Both indicators appear when a stereo program is accompanied by SAP sound 8 AUDIO MONITOR HI FI HI FI L HI FI R NORM MIX This unit can record two sound tracks simultaneously normal and Hi Fi on a Hi Fi st...

Page 61: ...the beginning D Select the mode Press rt to move the hightlight to RESUME then press ENTER E Select the mode setting Press rt to select ON then press ENTER F Return to the normal screen Press SET UP Turn on the TV and select the VCR channel or AV mode Slide the TV VCR DVD switch on the Remote to the right LANGUAGE MENU LANGUAGE 墌 pg 20 AUDIO LANGUAGE 墌 pg 20 SUBTITLE 墌 pg 20 ON SCREEN LANGUAGE 墌 p...

Page 62: ... menu is displayed for over 5 minutes 8 DIGITAL AUDIO OUTPUT PCM ONLY DOLBY DIGITAL PCM STREAM PCM Set to the appropriate mode according to the type of the device connected to DIGITAL AUDIO OUT connector on the rear of unit Set this item correctly according to the logo on the device It is not necessary to set this mode when you connect no device to DIGITAL AUDIO OUT connector PCM ONLY Select this ...

Page 63: ... PCM 48 kHz 16 bit linear PCM DVD VIDEO with DTS DTS bitstream 44 1 kHz 16 bit stereo linear PCM DVD VIDEO with Dolby Digital Dolby Digital bitstream 48 kHz 16 bit stereo linear PCM Audio CD Video CD 44 1 kHz 16 bit stereo linear PCM Audio CD with DTS DTS bitstream 44 1 kHz 16 bit stereo linear PCM NOTES The unit is not equipped with the DTS 5 1 channel decoding function When you play back a DVD V...

Page 64: ...out of the children s reach Timer recording programs will be performed even if the child lock function is activated 8 RESUME ON OFF When this function is set to ON you can use the resume function 墌 pg 40 ON The unit resumes playback from the position where playback has been stopped OFF This function is deactivated NOTE This function is not available for Audio CDs 8 ON SCREEN GUIDE ON OFF When this...

Page 65: ...edly so that the VHS indicator lights up on the front display panel On the Remote Press VCR so that the VHS indicator lights up on the front display panel 2 The playback picture does not appear while the tape is running If you are using the RF connection the TV receiver s channel selector is not set to the VCR channel the unit s VCR channel has not been correctly set If you are using the RF connec...

Page 66: ...ber does not match that of the unit Use the discs whose region number includes ALL or 1 墌 pg 7 This type of the disc cannot be played back See Unplayable Discs 墌 pg 7 The disc is not placed properly Remove the disc then place the disc properly in the disc tray 墌 pg 8 Placing a Disc 6 The language is not played back as you set The disc does not contain the language you set 7 Changing audio subtitle...

Page 67: ...CORRECTIVE ACTION 1 Recording cannot be started There is no cassette loaded or the cassette loaded has had its record safety tab removed Insert a cassette or using adhesive tape cover the hole where the tab was removed 2 TV broadcasts cannot be recorded F 1 has been selected as the input mode Set to the desired channel 3 Tape to tape editing is not possible The source another video recorder camcor...

Page 68: ...ntirety Next time make sure you have enough time on the tape to record the entire program 5 blinks for 10 seconds and the Timer mode is disengaged TIMER has been pressed when there are no programs in memory or the timer record information has been programed incorrectly Check the programed data and re program as necessary then press TIMER again 6 䡬 and on the front display panel won t stop blinking...

Page 69: ...de manually seem to have changed or disappeared After the manual settings were made Auto Channel Set was performed Perform manual setting again 6 Even though Auto or Semiauto Clock Set has been performed the clock is incorrect The clock setting data received from the host channel is incorrect Select a different host channel during Semiauto Clock Set 墌 pg 23 or perform Manual Clock Set 墌 pg 23 ATTE...

Page 70: ...too close together RECORDING Q When I pause and then resume a recording the end of the recording before the pause is overlapped by the beginning of the continuation of recording Why does this happen A This is normal It reduces distortion at the pause and resume points Q Can the unit indefinitely remain in the Record Pause mode A No The unit goes to its Stop mode automatically after 5 minutes to pr...

Page 71: ...nput Output RCA connectors IN x 1 OUT x 1 VIDEO AUDIO DVD deck Signal system NTSC Applicable disc DVD 12 cm 8 cm CD 12 cm 8 cm Audio characteristics DVD 4 Hz 22 KHz Frequency response CD 4 Hz 20 KHz S N Ratio 90 dB Harmonic distortion 0 1 Wow and flutter Below Measurable Level Dynamic range 90 dB Output Component Y RCA 1 0 Vp p 75 ohm Component PB PR RCA 0 7 Vp p 75 ohm Audio RCA 2 Vrms 1 Kohm Dig...

Page 72: ...deck only 20 On screen Language Set DVD deck 19 On screen Language Set VCR deck 18 Letter Box 17 Locating the Start Point of the Item or Skip the Item 41 M Manual Clock Set 23 Manual Tracking 30 Mode Set DVD deck AUDIO LANGUAGE 20 D RANGE COMPRESSION 63 DIGITAL AUDIO OUTPUT 62 DOWN MIX 63 MENU LANGUAGE 20 MONITOR TYPE 17 62 ON SCREEN GUIDE 64 ON SCREEN LANGUAGE 19 PICTURE SOURCE 62 RESUME 64 SCREE...

Page 73: ...28 Slow Motion 27 42 Sound Effect 46 Soundtrack Selection 30 Still Picture Frame By Frame Playback 27 42 Subtitle Selection 44 T Tape Position Indicator 11 Tape Remaining Time 33 Time Search 44 Timer Recording 34 39 Tuner Set 24 V Variable Speed Search 27 42 VFP function 46 W When programs overlap each other 38 Z Zooming 42 51 ...

Page 74: ...74EN WARRANTY Only in U S A ...

Page 75: ...EN 75 ...

Page 76: ...US EN HR XVC29SU Printed in China 0105KTH MW BJ ...

Reviews: