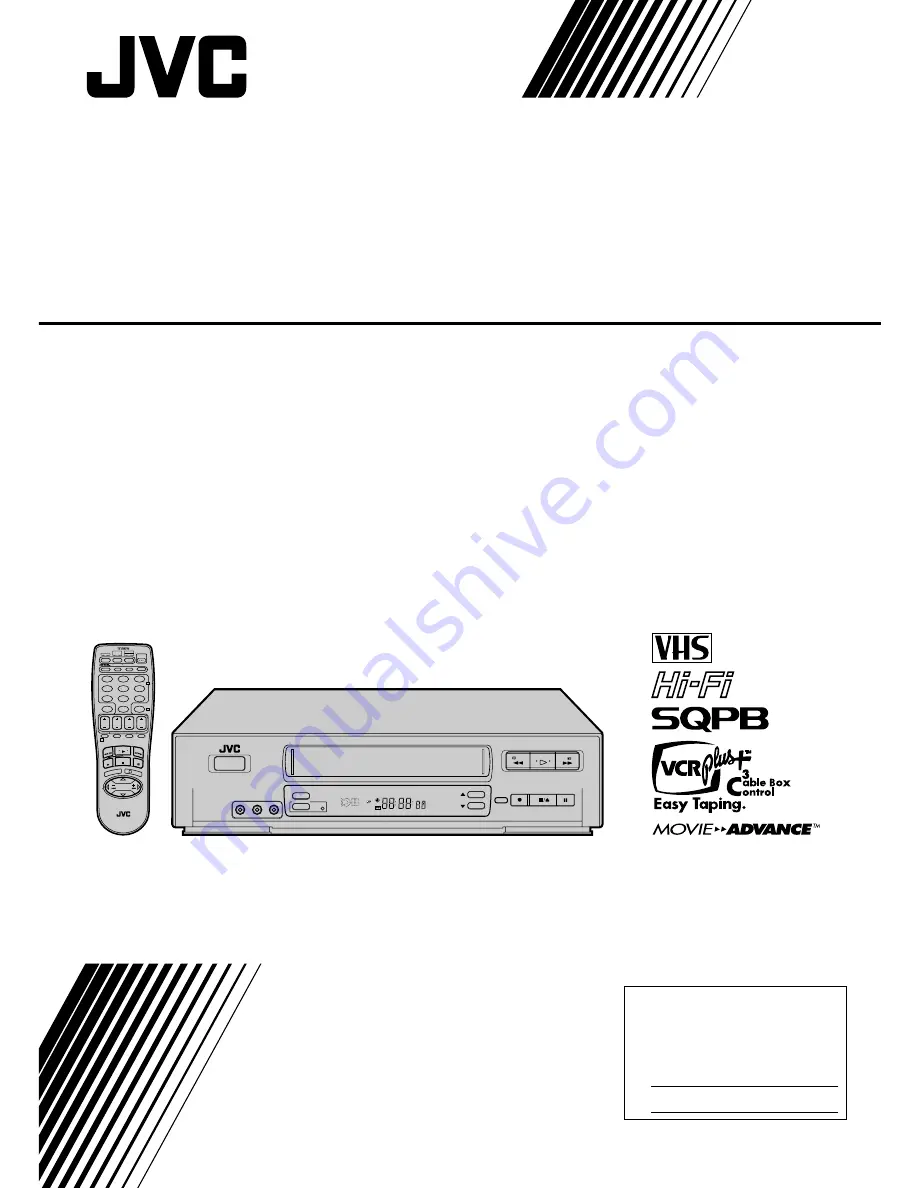
background image

HR-VP658U

VIDEO CASSETTE RECORDER

INSTRUCTIONS

LPT0007-001B

For Customer Use:

Enter  below  the Model No. and 
Serial  No. which are located on the 
rear of cabinet. Retain this 
information for future reference.
     
Model No.      
     
Serial No.    

OK

MENU

POWER

VIDEO (MONO)L–AUDIO–R 

STOP/EJECT

PAUSE

REC

REW

FF

PLAY

CH

R3 PICTURE

TV CH +

T

V

V

O

L

TV CH –

TV

V

O

L

+

TV

CANCEL

TIMER

START

STOP

DATE

PLAY

REW

REC

STOP

SHUTTLE

PLUS

PAUSE

FF

MENU

OK

CH

POWER

TV/VCR

C.RESET

DBS

DAILY(M-F)

AUX

WEEKLY

PROG

CHECK

PROG

SP/EP

SKIP SEARCH

DISPLAY

ENTER/OSD

CABLE/

DBS

1

2

3

4

5

6

7

8

9

0

2

4

1

3

EXPRESS PROGRAMMING

MULTI BRAND

REMOTE CONTROL UNIT

MBR SET

A/B

SP

VCR

Summary of Contents for HR-VP658U

Page 1: ... Serial No OK MENU POWER VIDEO MONO L AUDIO R STOP EJECT PAUSE REC REW FF PLAY CH R3 PICTURE TV CH T V V O L TV CH TV V O L TV CANCEL TIMER START STOP DATE PLAY REW REC STOP SHUTTLE PLUS PAUSE FF MENU OK CH POWER TV VCR C RESET DBS DAILY M F AUX WEEKLY PROG CHECK PROG SP EP SKIP SEARCH DISPLAY ENTER OSD CABLE DBS 1 2 3 4 5 6 7 8 9 0 2 4 1 3 EXPRESS PROGRAMMING MULTI BRAND REMOTE CONTROL UNIT MBRSE...

Page 2: ...D violent shocks to the VCR during transport MOISTURE CONDENSATION Moisture in the air will condense on the VCR when you move it from a cold place to a warm place or under extremely humid conditions just as water droplets form on the surface of a glass filled with cold liquid Moisture condensation on the head drum will cause damage to the tape In conditions where condensa tion may occur keep the V...

Page 3: ... paying particular attention to cords at plugs convenience receptacles and the point where they exit from the product 5 Ventilation Slots and openings in the cabinet are provided for ventilation To ensure reliable operation of the product and to protect it from overheating these openings must not be blocked or covered Do not block the openings by placing the product on a bed sofa rug or other simi...

Page 4: ...plained in the manual This section also illustrates the controls and connections on the front and rear panel the front display panel and the remote control The Z mark signals a reference to another page for instructions or related information Operation buttons necessary for the various procedures are clearly indicated through the use of illustrations at the beginning of each major section BEFORE Y...

Page 5: ... Preparation 11 Semi Auto 12 Manual 13 Tuner 14 Set Receivable Channels 14 Add Or Delete A Channel 15 Cable Box Control 16 Situate And Connect Controller 16 Set Cable Box Output Channel Cable Box Brand 17 DBS Receiver Control 19 Situate And Connect Controller 19 Set DBS Receiver Output Channel DBS Receiver Brand 20 SIMPLE PLAYBACK AND RECORDING 22 Simple Playback 22 Simple Recording 23 PLAYBACK AN...

Page 6: ...CABLE BOX VIDEO R L PAUSE AV COMPU LINK RF OUT RF Cable supplied Matching Transformer not supplied AC Power Cord Audio Video Cable not supplied TV ANT IN Antenna or Cable input Back of VCR 75 ohm terminal Back of VCR CH3 CH4 VIDEO AC Outlet Antenna or Cable Flat Feeder Coaxial Cable ...

Page 7: ...the AC is first connected to the VCR Z pg 8 If Auto or CH is displayed on the front display panel before the VCR is powered on the clock and tuner channels are being set automatically Wait for the time to be displayed on the front display panel before powering on the VCR FINAL PREPARATION FOR USE 5 Power on the VCR and select the VCR channel 3 or 4 by setting the switch on the rear of the VCR as s...

Page 8: ...receivable by your VCR It then automatically assigns each receivable channels to the CH5 buttons It skips non receivable channels During auto channel set the channel numbers are displayed as they are scanned and set When Plug Play has been completed successfully the correct time is displayed If an incorrect time or appears on the display panel see What To Do If Plug Play Has Failed on next page AT...

Page 9: ... time is displayed on the front display panel you may be receiving the clock setting data of a PBS channel from an adjacent time zone or an incorrect PBS channel from a cable TV system In this case perform the Semi Auto Z pg 12 or Manual Clock Set Z pg 13 procedure Auto channel set has already taken place and it need not be set again If appears on the display your antenna cable may not be connecte...

Page 10: ... INITIAL SET by pressing CH5 or SHUTTLE PLUS fi then press OK or SHUTTLE PLUS SELECT LANGUAGE 4 Move the highlight bar arrow to LANGUAGE by pressing CH 5 or SHUTTLE PLUS fi then press OK or SHUTTLE PLUS to select the desired language RETURN TO NORMAL SCREEN 5 Press MENU Turn on the TV and select the VCR channel 3 or 4 or AV mode POWER OK MENU 1 2 3 4 5 6 7 8 9 0 2 4 1 3 POWER MENU OK MAIN MENU FUN...

Page 11: ...ER ACCESS MAIN MENU SCREEN 2 Press MENU ACCESS INITIAL SET SCREEN 3 At the Main Menu screen move the highlight bar arrow to INITIAL SET by pressing CH5 or SHUTTLE PLUS fi then press OK or SHUTTLE PLUS ACCESS CLOCK SET SCREEN 4 Move the highlight bar arrow at the Initial Set screen to CLOCK SET by pressing CH5 or SHUTTLE PLUS fi then press OK or SHUTTLE PLUS CABLE BOX USERS SET CLOCK MANUALLY appea...

Page 12: ...that do not transmit clock setting data SELECT D S T MODE 7 You have three choices a Select AUTO and the adjustment to your VCR s clock will be made according to the incoming signal from the host channel b Select ON and the adjustment will be made based on the clock itself c Select OFF if Daylight Saving Time does not apply to you Move the highlight bar to D S T by pressing OK or SHUTTLE PLUS then...

Page 13: ...ctions Press OK or SHUTTLE PLUS until the item you want to change blinks then press CH 5 or SHUTTLE PLUS fi SELECT TIME ZONE 8 You can select the time zone automatically or manu ally Move the highlight bar to TIME ZONE by pressing OK or SHUTTLE PLUS then press CH 5 or SHUTTLE PLUS fi to select AUTO or the desired time zone AUTO ATLANTIC HAWAII EASTERN ALASKA CENTRAL PACIFIC MOUNTAIN NOTE If an inc...

Page 14: ...TED appears on screen If the scan was unsuccessful SCAN COMPLETED NO SIGNAL appears on screen Check the connections and start again RETURN TO NORMAL SCREEN 5 Press MENU INITIAL SETTINGS cont INFORMATION The VCR detects the band TV or CATV and selects the correct band automatically during Auto Channel Set The selected band will be displayed on the right side of BAND on the Tuner Set screen POWER OK...

Page 15: ... OK or SHUTTLE PLUS ADD OR SKIP DESIRED CHANNEL 4 Input the channel number using the NUMBER keys or by pressing CH5 or SHUTTLE PLUS fi then press OK or SHUTTLE PLUS to set to ADD or SKIP as required Repeat for each channel you want to add or skip RETURN TO NORMAL SCREEN 5 Press MENU OK MENU 1 2 3 4 5 6 7 8 9 0 2 4 1 3 MENU OK SHUTTLE PLUS C H NUMBER TUNER SET BAND CATV AUTO CHANNEL SET MANUAL CHAN...

Page 16: ...ctor on the rear of your VCR Set the VCR tuner to the same channel as the cable box RF output see page 17 also NOTE When connecting your cable box refer to its instruction manual CONNECT CONTROLLER TO VCR 4 Connect to the CABLE BOX connector on your VCR About Your Cable Box This VCR has two separate methods to control your Cable Box The VCR s Wireless Remote Control Unit can control your Cable Box...

Page 17: ...ur cable box is connected to your VCR If your cable box is connected to your VCR using an RF connection press CH 5 or SHUTTLE PLUS fi until the channel number representing the cable box s output CH2 CH9 appears on the screen If your cable box is connected to your VCR s FRONT AUDIO VIDEO IN connectors press CH 5 or SHUTTLE PLUS fi until ON F 1 FRONT appears on the screen If your cable box is connec...

Page 18: ...Y 3 9 22 ZENITH 3 9 22 NOTES Although the supplied Controller is compatible with many different cable box brands it is possible that it will not work with your cable box If your cable box doesn t respond to any code between 1 and 25 you can t use the Controller to change cable box channels In this case make sure to leave the cable box turned on and tuned to the proper channel before the scheduled ...

Page 19: ... your DBS Receiver This eliminates the need for a separate DBS Receiver Remote Control Unit The VCR s Controller can also control your DBS Receiver This allows the VCR to change your DBS receiver s channel number during timer recording Each method must be set up separately To set up the VCR s Remote Control unit refer to page 50 To set up the Controller go to page 20 CABLE BOX DBS receiver Control...

Page 20: ...SHUTTLE PLUS SELECT DBS RECEIVER OUTPUT CHANNEL 6 Your selection depends on how your DBS receiver is connected to your VCR If your DBS receiver is connected to your VCR using an RF connection press CH 5 or SHUTTLE PLUS fi until the channel number representing the DBS receiver s output CH3 CH4 appears on the screen If your DBS receiver is connected to your VCR s FRONT AUDIO VIDEO IN connectors pres...

Page 21: ... DISH Network 51 ECHOSTAR DISH Network 51 PRIMESTAR 50 SONY DSS 41 RCA DSS 40 NOTES It is possible that the Controller will not work with all types of DBS receiver If your DBS receiver doesn t respond to the code you can t use the Controller to change satellite channels In this case make sure to leave the DBS receiver turned on and tuned to the proper channel before the scheduled start of timer re...

Page 22: ...ess STOP EJECT to remove the cassette Turn on the TV and select the VCR channel 3 or 4 or AV mode 1 2 3 4 5 6 7 8 9 0 2 4 1 3 STOP EJECT PLAY PLAY REW Rewind FF Fast Forward STOP INFORMATION This video recorder is equipped with SQPB S VHS QUASI PLAYBACK that lets you watch tapes recorded in the S VHS format with regular VHS resolution SQPB does not deliver Super VHS resolution S VHS recording is n...

Page 23: ...ng of both the first SP and the first EP recording after inserting the cassette when Video Calibration is set to ON Z pg 32 PAUSE RESUME RECORDING 5 Press PAUSE Press PLAY to resume recording During record pause you can change the recording channel by using the CH5 buttons or NUMBER keys Video Calibration will not take place if the tape speed is changed while in record pause mode STOP RECORDING 6 ...

Page 24: ...ease SHUTTLE PLUS or to select the search speed To increase the speed in the forward direction press and release repeatedly to select the various forward search modes To decrease the speed in the forward direction press and release To play in reverse slow motion and in reverse play mode continue to press repeatedly after selecting all the forward slow motion modes To resume normal playback press P...

Page 25: ...ble manual tracking adjust ADJUST MANUAL TRACKING 2 Press CH 5 or on the VCR s front panel or remote Press briefly for fine adjust or press and hold for coarse adjust Watch the screen and continue adjusting until optimum picture and sound quality are achieved RE ENGAGE AUTOMATIC TRACKING 3 Press the CH5 and buttons on the VCR s front panel simultaneously When automatic tracking is re engaged Video...

Page 26: ...FUNCTION SET TUNER SET INITIAL SET PRESS 5 THEN OK PRESS MENU TO END NOTES Regardless of the setting this function has no effect with SP recordings during recording and during special effects playback When you finish viewing the tape be sure to set it back to OFF FUNCTION AUTO TIMER OFF SUPERIMPOSE ON AUTO SP EP TIMER OFF VIDEO STABILIZER ON NEXT PAGE SELECT WITH 5 AND OK PRESS MENU TO END ACTIVAT...

Page 27: ...be set to ON or the indicator will not appear Z pg 28 It may take a few seconds for the Tape Position Indicator to be displayed COUNT 0 33 27 B E Next Function Memory The Next Function Memory tells the VCR what to do after rewinding Before continuing ensure that the VCR is in stop mode a For Automatic Start Of Playback After Tape Rewind press REW then press PLAY within 2 seconds b For Automatic Po...

Page 28: ...appear on screen ACCESS MAIN MENU SCREEN 1 Press MENU ACCESS FUNCTION SET SCREEN 2 Move the highlight bar arrow to FUNCTION SET by pressing CH5 or SHUTTLE PLUS fi then press OK or SHUTTLE PLUS SELECT SUPERIMPOSE SET MODE 3 Move the highlight bar arrow to SUPERIMPOSE by pressing CH5 or SHUTTLE PLUS fi then press OK or SHUTTLE PLUS to select the desired mode a Select ON if you want the superimposed ...

Page 29: ...by pressing CH 5 or SHUTTLE PLUS fi then press OK or SHUTTLE PLUS to select the desired mode a Hi Fi b Hi Fi L c Hi Fi R d Normal e Mix RETURN TO NORMAL SCREEN 4 Press MENU OK MENU 1 2 3 4 5 6 7 8 9 0 2 4 1 3 MENU OK SHUTTLE PLUS C H FUNCTION AUTO TIMER OFF SUPERIMPOSE ON AUTO SP EP TIMER OFF VIDEO STABILIZER OFF NEXT PAGE SELECT WITH 5 AND OK PRESS MENU TO END PREVIOUS PAGE 2ND AUDIO RECORD OFF A...

Page 30: ... the beginning of the movie is detected and the Stop mode will be engaged Press PLAY to view the movie b If you selected MOVIE ADVANCE PREVIEW in step 3 and press OK the VCR will fast motion to the beginning of the next preview and normal playback will resume when it is detected Each press of SKIP SEARCH fast motions to the beginning of the next preview thereby skipping over one preview each time ...

Page 31: ...BLE AV COMPU LINK PLAYBACK 4 Press CH5 or SHUTTLE PLUS fi to move the highlight bar arrow to AV COMPU LINK then press OK or SHUTTLE PLUS to set to ON RETURN TO NORMAL SCREEN 5 Press MENU PERFORM AV COMPU LINK PLAYBACK 6 Simply insert a cassette and press PLAY if the cassette s record safety tab has been removed playback begins automatically Linked components are turned on and the TV set to its AV ...

Page 32: ...HUTTLE PLUS fi to move the highlight bar arrow to FUNCTION SET then press OK or SHUTTLE PLUS SELECT VIDEO CALIBRATION MODE 4 Press CH 5 or SHUTTLE PLUS fi to move the highlight bar arrow to VIDEO CALIBRATION then press OK or SHUTTLE PLUS to set to ON or OFF NOTE When recording or when playing back tapes recorded on this VCR set the Video Calibration to ON RETURN TO NORMAL SCREEN 5 Press MENU MAIN ...

Page 33: ...nction is operative To display the Video Calibration screen SUPERIM POSE must be set to ON or the Video Calibration screen will not appear Z pg 28 START RECORDING 1 Press and hold REC and press PLAY on the remote control or press REC on the VCR s front panel The VCR takes about 7 seconds to assess the quality of the tape in use then recording begins with the picture level optimized NOTES Calibrati...

Page 34: ... TV s channel selector to set the channel you want to watch RESET COUNTER TO ZERO 1 Before recording starts press C RESET The counter resets to zero and displays the exact elapsed time as the tape runs DISPLAY ELAPSED TIME ON SCREEN 2 During recording press OSD at any time to see the elapsed time All indications corresponding to the current status of the VCR are displayed for 5 seconds The counter...

Page 35: ...ed and 2ND AUDIO RECORD is set to ON the SAP audio is recorded on both the Normal and Hi Fi tracks The main audio program is not recorded If a non SAP program is received the main audio is recorded on both the Hi Fi and Normal audio tracks To Record SAP Programs ACCESS MAIN MENU SCREEN 1 Press MENU ACCESS FUNCTION SET SCREEN 2 Move the highlight bar arrow to FUNCTION SET by pressing CH5 or SHUTTLE...

Page 36: ...age 11 for the clock setting procedure ENTER PLUSCODE NUMBER 3 Press the appropriate NUMBER keys to enter the PlusCode number printed in the TV listings for the TV program you wish to record and press OK If the Guide Channel Set screen appears go to step 4 If the VCR Plus Program screen appears go to step 5 To make corrections press CANCEL and input the correct PlusCode number INPUT RECEIVING CHAN...

Page 37: ...rmal screen appears ENGAGE TIMER MODE 8 Press TIMER The VCR turns off automatically and is displayed on the display panel IMPORTANT If you have moved to a different area or if a broadcasting station s channel number has been changed the wrong VCR or CABLE CH number will be displayed on the VCR Plus Program screen in step 5 When this happens set the correct the Guide Channel number for that station...

Page 38: ...nnels These Guide Channel numbers are also called the VCR Plus Channel Codes Most TV listings have a section usually a chart indicating the Guide Channel numbers assigned to each station For accurate VCR Plus Programming the VCR Plus Guide Channel number for each station should match the channel number on which it is received in your area NOTES In many instances the VCR Plus Guide Channel numbers ...

Page 39: ...HANNEL NUMBER 6 Press CH5 SHUTTLE PLUS fi or the appropriate NUMBER keys to input the number of the channel on which the Guide Channel s broad casts are received Then press OK or SHUTTLE PLUS Repeat steps 5 and 6 for each instance RETURN TO NORMAL SCREEN 7 Press MENU OK MENU 1 2 3 4 5 6 7 8 9 0 2 4 1 3 MENU OK NUMBER SHUTTLE PLUS C H Ex When inputting the Guide Channel number 6 for WNJU Ind Ex If ...

Page 40: ...AM START TIME 4 Press START to enter the time you want recording to start Press and hold START to move in 30 minute increments or press and release repeatedly to move 1 minute at a time SET PROGRAM STOP TIME 5 Press STOP to enter the time you want recording to stop Press and hold STOP to move in 30 minute increments or press and release repeatedly to move 1 minute at a time SET PROGRAM DATE 6 Pres...

Page 41: ...00 11 00 12 00 ATTENTION If there is a conflict in the timer schedule and one program overlaps with another only the parts shown below in gray will be recorded Pattern 1 The program with the lower program number will be recorded Pattern 2 The program that is broadcast earlier will be recorded Pattern 3 The program that is broadcast earlier will be recorded followed by the remaining portion of the ...

Page 42: ...ss PROG CHECK the next program s information appears PR START STOP CH DATE 1 8 00P 10 00 12 12 24 2 10 00A 10 45 40 12 25 3 11 30P 01 00 125 12 25 4 5 6 7 8 PRESS CHECK TO NEXT CANCEL OR REVISE A PROGRAM 4 To cancel a program press CANCEL To revise a program press the appropriate button START STOP DATE CH SP EP RETURN TO NORMAL SCREEN 5 Press PROG CHECK as many times as necessary If there are stil...

Page 43: ...ow to FUNCTION SET by pressing CH 5 or SHUTTLE PLUS fi then press OK or SHUTTLE PLUS SELECT AUTO SP EP TIMER SET MODE 3 Move the highlight bar arrow to AUTO SP EP TIMER by pressing CH 5 or SHUTTLE PLUS fi then press OK or SHUTTLE PLUS to set to ON RETURN TO NORMAL SCREEN 4 Press MENU NOTES If you have programmed the VCR to timer record 2 or more programs the second program and those thereafter may...

Page 44: ...ou want to record for more than 30 minutes press REC to extend the time Each press extends recording time by 30 minutes NOTES You can only perform ITR using the REC button on the VCR s front panel After you set the ITR time the previous display reappears To check the remaining time press REC once during record ing and the remaining time will be displayed for about 5 seconds Be careful not to press...

Page 45: ... recorder SET RECORDER S INPUT MODE 3 Set to AUX With this VCR press the NUMBER key 0 and or CH to select depending on the connector being used L 1 for the rear AUDIO VIDEO IN connector or F 1 for the front AUDIO VIDEO IN connector START PLAYER 4 Set to its play mode NOTE If the player is equipped with a superimpose OSD disable feature then set SUPERIMPOSE to OFF before pressing PLAY Z pg 28 START...

Page 46: ...SETTE 2 Insert the cassette to be recorded on into the recorder SET RECORDER S INPUT MODE 3 Set to AUX Press the NUMBER key 0 and or CH to select depending on the connector being used L 1 for the rear AUDIO VIDEO IN connector or F 1 for the front AUDIO VIDEO IN connector If you re using a JVC Master Edit Control equipped camcorder step 4 If not step 8 ACCESS MAIN MENU SCREEN 4 Press MENU ACCESS FU...

Page 47: ...rder is equipped with a superimpose OSD disable feature then set its superimpose or display feature to OFF before pressing play START RECORDER 9 Set your VCR to its record mode If you are using a Master Edit Control equipped JVC camcorder it can put the recorder automatically into Record mode Refer to camcorder s instruction manual MENU 1 2 3 4 5 6 7 8 9 0 2 4 1 3 MENU SHUTTLE PLUS OK C H OK FUNCT...

Page 48: ...the remote control to operate the TV you don t have to repeat this step until you replace your remote control s batteries PANASONIC has two codes If the TV does not function with one code try entering the other OPERATE TV 3 First while holding down TV press the corresponding button POWER TV CH TV VCR TV VOL NUMBER keys For some brands of TV you must press ENTER after having pressed the NUMBER keys...

Page 49: ...e the cable box s channel press TV CH or the NUMBER keys The CH button can be used to change the VCR s channel only 1 2 3 4 5 6 7 8 9 0 2 4 1 3 POWER CABLE DBS M B R S E T STOP E N T E R NUMBER CABLE BOX BRAND NAME BRAND CODE ARCHER 01 05 17 CABLETENNA 01 17 CABLEVIEW 15 16 17 21 25 CITIZEN 15 16 17 21 25 CURTIS 02 DIAMOND 01 17 EASTERN 19 GC BRAND 15 16 17 21 25 GEMINI 15 GENERAL INSTRUMENTS 01 0...

Page 50: ...ing button POWER TV CH NUMBER keys Depending on the DBS receiver you may have to press ENTER after having pressed the NUMBER keys To change the DBS receiver s channel press TV CH or the NUMBER keys The CH button can be used to change the VCR s channel only POWER CABLE DBS M B R S E T E N T E R STOP NUMBER DBS BRAND NAME BRAND CODE JVC DISH Network 51 ECHOSTAR DISH Network 51 PRIMESTAR 50 SONY DSS ...

Page 51: ...to respond to B code control signals The remote control is preset to send A code signals because your VCR is initially set to respond to A code signals You can easily modify your VCR to respond to B code signals A B POWER NUMBER 1 STOP TURN VCR POWER ON 1 Press POWER ENGAGE CHILD LOCK 2 Press and hold POWER on the remote control until the Child Lock indicator appears on the front display panel Pow...

Page 52: ...undtrack cannot be heard POSSIBLE CAUSE If you re using the RF OUT connec tion Z pg 6 the channel selector on the TV is set incorrectly If you re using the AV connection Z pg 6 the TV receiver is set to the wrong mode This is normal Automatic tracking is engaged The video heads may be dirty The AUDIO MONITOR option was set incorrectly CORRECTIVE ACTION Set the channel selector to channel 3 or 4 Se...

Page 53: ...rogramming won t work 3 and on the front display panel won t stop blinking 4 The cassette is automatically ejected and and on the front display panel won t stop blinking 5 blinks for 10 seconds and the timer mode is disengaged 6 The cassette is automatically ejected the power shuts off and and won t stop blinking 7 Cable channels are not automatically switched during timer recording 8 Satellite ch...

Page 54: ...le box or DBS receiver 4 Even though Auto or Semi Auto clock setting has been selected the clock is incorrect POSSIBLE CAUSE Those channels have been preset to be skipped Recording is in progress The remote control brand setting is incorrect The clock setting data received from the Host Channel is incorrect TROUBLESHOOTING cont ATTENTION This VCR contains microcomputers External electronic noise o...

Page 55: ... effect does removing the safety tab have A It disables marking of index codes Q Sometimes during Index Search the VCR can t find the program I want to see Why not A There may be index codes too close together Q During playback on screen operational indicators sometimes jitter Why does this happen A If the condition of the tape being played back is not good jittering of the video including on scre...

Page 56: ... Channel Selection 12 I Index Search 25 Insert Cassette 22 Instant ReView 25 ITR Instant Timer Recording 44 L Language Selection 10 M Main Menu 10 Manual Channel Setting 15 Manual Clock Setting 13 Manual Tracking 25 MBR Multi Brand Remote Code Setting 48 Movie Advance 30 N Next Function Memory 27 O On Screen Display 28 P PBS Channel 8 Playback 22 Plug Play 8 R Record Safety Tab 23 Recording 23 Rep...

Page 57: ...nnectors Z pg 46 7 MENU Button Z pg 10 8 R3 PICTURE Button Z pg 26 9 R3 PICTURE Indicator Z pg 26 0 Front Display Panel Z pg 58 Remote Control Sensor Channel CH 5 Button Z pg 23 OK Button Z pg 10 Record REC Button Z pg 23 STOP EJECT Button Z pg 22 PAUSE Button Z pg 24 OK MENU POWER VIDEO MONO L AUDIO R STOP EJECT PAUSE REC REW FF PLAY CH R3 PICTURE SP VCR 1 0 8 9 7 2 3 4 5 6 ...

Page 58: ... LINK Connector Z pg 31 4 ANT IN Connector Z pg 6 5 Channel 3 4 Switch Z pg 6 6 VIDEO AUDIO Input Connectors Z pg 45 7 VIDEO AUDIO Output Connectors Z pg 45 8 RF OUT Connector Z pg 6 2 Tape Speed Indicators Z pg 23 3 Timer Mode Indicator 4 Child Lock Indicator Z pg 51 5 VCR Mode Indicator Z pg 34 6 Cassette Loaded Mark 7 Channel Display L 1 and F 1 for AUX mode Counter Display Z pg 8 Clock Display...

Page 59: ... 48 Installing Batteries 1 Open the battery compartment cover 2 Insert 2 AA size batteries provided in the direction indicated under the battery cover 3 Replace the cover How To Use The remote control can operate most of your VCR s functions 1 Point the remote control toward the sensor window 2 Press the appropriate operation button 3 The maximum operating distance of the remote control is about 8...

Page 60: ...cal scan system Signal to noise ratio 45 dB Horizontal resolution 240 lines Frequency range Normal audio 70 Hz to 10 000 Hz Hi Fi audio 20 Hz to 20 000 Hz Input Output RCA connectors IN x 2 OUT x 1 TUNER Tuning system Frequency synthesized tuner Channel coverage VHF Channels 2 13 UHF Channels 14 69 CATV 113 Channels RF output Channel 3 or 4 switchable preset to Channel 3 when shipped 75 ohms unbal...

Page 61: ...AL HEADQUARTERS JVC SERVICE ENGINEERING COMPANY OF AMERICA DIVISION OF US JVC CORP 107 Little Falls Road Fairfield NJ 07004 2105 Pack your JVC unit in the original carton or one of equivalent size and strength Enclose with the unit a letter stating the problem or symptom that exists and also a copy of the receipt or bill of sale you received when you purchased your JVC unit Print your home return ...

Page 62: ... with the products or if the model or serial number has been altered tampered with defaced or removed 2 Initial installation and installation and removal for repair 3 Operational adjustments covered in the Owner s Manual normal maintenance video and audio head cleaning 4 Damage that occurs in shipment due to act of God and cosmetic damage 5 Signal reception problems and failures due to line power ...

Page 63: ...EN 63 MEMO ...

Page 64: ...1998 VICTOR COMPANY OF JAPAN LTD U U C Printed in Malaysia 1297 HOV UN PJ JVC COMPANY OF AMERICA DIVISION OF US JVC CORP 41 Slater Drive Elmwood Park N J 07407 JVC CANADA INC 21 Finchdene Square Scarborough Ontario M1X 1A7 ...

Reviews: