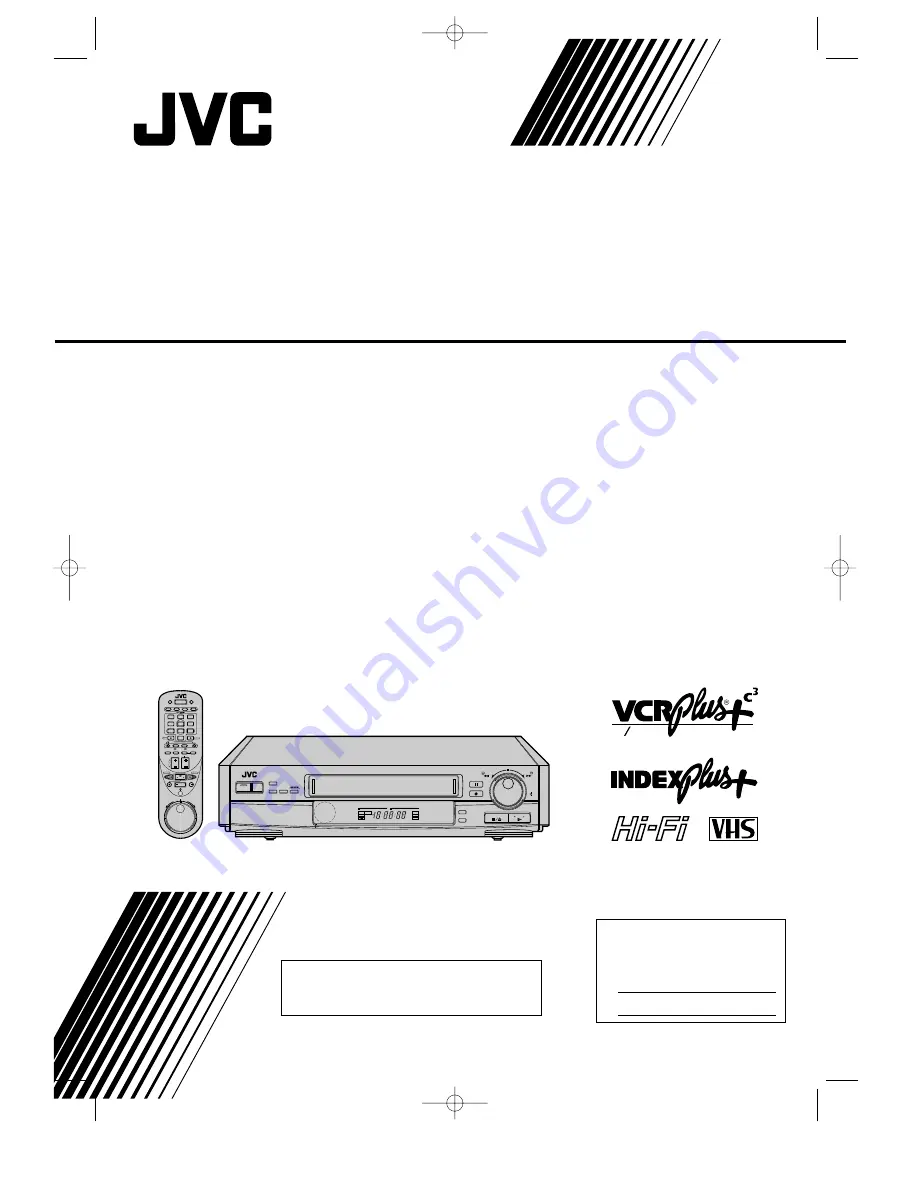
background image

HR-IP820U

INSTRUCTIONS

PU30425-1720

HR-IP8

20

U

VIDEO CASSETTE RECORDER

For Customer Use:
     
Enter below the Serial No. which is
     located on the rear of cabinet. Retain
     this information for future reference.
     
     Model No.          HR-IP820U
     
     
Serial No.

w

Channel

Changer

Cable

REW

FF

JOG

SHUTTLE

POWER

MENU

CH/

SET

A.DUB 

PAUSE

REC

STOP/EJECT

PLAY

SELECT

+

H

M

S

I T R

TIMER

VIDEO

M

SP

EP

R E C

SAP

PAUSE

ST

AM
PM

PLAY

L

dB

–20

15

10

8

4

6

2

0

2

4

6

+8

R

dB

–20

15

10

8

4

6

2

0

2

4

6

+8

00

00

00

00

00

00

00

00

00

00

0

00

00

00

00

00

00

00

00

00

00

0

INSERT 

TV/VIDEO

DISPLAY

INFO

TIMER

WEEKLY

POWER

DAILY(M–F)

AUX

OSD

CABLE

TV

VCR

SEARCH

F1

F2

F3

F4

VOL.

CH/SET

PLAY

STOP

JOG/SHUTTLE

REV

FWD

1

2

3

4

5

6

7

8

9

0

SP/EP

C.MEMORY

ADD

IN

TITLE

C.RESET/SKIP

A
B
C

J
K
L

S
T
U

V
W
X

Y
Z

D
E
F

G
H
I

P
Q
R

M
N
O

SELECT

MENU

CANCEL

ENTER

PAGE

CLEAR

CURSOR

CURSOR

PRINT

TM


For INDEX Plus+ System operation, refer
to the separate INDEX Plus+ instruction
manual.

HR-IP820U-EN-1  97.5.20 5:24 PM  Page Hyo-1

Summary of Contents for HR-IP820U

Page 1: ... dB 20 15 10 8 4 6 2 0 2 4 6 8 R dB 20 15 10 8 4 6 2 0 2 4 6 8 0 0 0 0 0 0 0 0 0 0 0 0 0 0 0 0 0 0 0 0 0 0 0 0 0 0 0 0 0 0 0 0 0 0 0 0 0 0 0 0 0 0 INSERT TV VIDEO DISPLAY INFO TIMER WEEKLY POWER DAILY M F AUX OSD CABLE TV VCR SEARCH F1 F2 F3 F4 VOL CH SET PLAY STOP JOG SHUTTLE REV FWD 1 2 3 4 5 6 7 8 9 0 SP EP C MEMORY ADD INDEXPlus TITLE C RESET SKIP A B C J K L S T U V W X Y Z D E F G H I P Q R ...

Page 2: ... Video Products Safety Guide enclosed with this manual before installing or operating the VCR n This instruction manual and the other reference materials enclosed with it contain important information on VCR operation and proper usage Please keep them near your VCR in a place where you can easily access them for reference n It should be noted that it may be unlawful to re record pre recorded tapes...

Page 3: ...43 For information on INDEX Plus refer to the separate INDEX Plus instruction manual Operaciones básicas en español 40 Contents Of Separate INDEX Plus Instruction Manual System Outline 3 INDEX Plus Button Functions 4 Preparing To Use INDEX Plus 5 Receiving Broadcasts 9 Channel Related Information Practical Use of CSPG 10 Program Related Information PRI Practical Use of PRI 11 About Cassettes 12 Re...

Page 4: ...Point the remote control toward this VIDEO AUDIO Input Connectors Z p 32 33 Display Panel Z p 6 Basic Operation Buttons 5 8 STOP EJECT 4 PLAY 2 3 Rewind Fast Forward JOG SHUTTLE control 6 PAUSE q REC Instant Timer Back Panel AC Power Cord Z p 8 RF Output Channel Select Switch Z p 8 ANT IN Connector Z p 8 AUDIO VIDEO OUT put Connectors Z p 8 RF OUT Connector Z p 8 OUT AUDIO VIDEO CH3 CH4 RF OUT ANT...

Page 5: ... Use TV VIDEO DISPLAY INFO TIMER WEEKLY POWER DAILY M F AUX OSD CABLE TV VCR SEARCH F1 F2 F3 F4 VOL CH SET PLAY STOP JOG SHUTTLE REV FWD 1 2 3 4 5 6 7 8 9 0 SP EP C MEMORY ADD INDEXPlus TITLE C RESET SKIP A B C J K L S T U V W X Y Z D E F G H I P Q R M N O SELECT MENU CANCEL ENTER PAGE CLEAR CURSOR CURSOR PRINT Tuner and Counter Control Jog Shuttle Control Z p 19 VCR control select switch Since PO...

Page 6: ...s ENTER OSD n All indications corresponding to the current status are displayed for 5 seconds leaving the counter information and RECORD PAUSE if in the Record Pause mode on the screen 2 Press ENTER OSD again to clear the display To recall an indication CH 125 RECORD SUN 12 00 AM PAUSE SP INDEX 1 NORM MEMORY OFF HI FI COUNT 1 23 45 Audio mode indicators To stop the on screen indications from being...

Page 7: ...5 ADD SELECT CH NO AND PRESS ADD SKIP PRESS MENU TO END GUIDE CHANNEL SET GUIDE CH VCR CH 1 111 PRESS SELECT SET DIGIT PRESS MENU TO END GUIDE CHANNEL MAP GUIDE VCR GUIDE VCR 6 047 00010 055 12 041 00015 038 33 028 00067 049 PRESS SELECT TO NEXT PRESS MENU TO END ES TAMBIEN POSIBLE LLAMAR EN PANTALLA EL MENU EN ESPAÑOL Z p 40 41 If the clock has not been set MENU Z p 28 If the clock has not been s...

Page 8: ...atch a program while recording another Z p 23 CH3 CH4 RF OUT CABLE BOX SPECIAL FUNCTION LINK OUT RF CONNECTION For TV sets without AV input terminals 1 Disconnect the TV antenna from the TV 2 Connect the TV antenna to the VCR s ANT IN 3 Connect the VCR s RF OUT to the TV s antenna terminal using the provided RF cable Back of VCR ANT IN Antenna or Cable input RF OUT RF Cable provided 75 ohm termina...

Page 9: ... clock is adjusted to 1 00AM n If you live in an area without Daylight Saving Time keep D S T OFF when setting the clock Auto Daylight Saving Time POR INSTRUCCIONES EN ESPAÑOL VEA p 40 41 1 2 3 4 5 6 7 8 9 0 TV VIDEO 5 3 4 6 7 8 2 9 1 TURN ON THE VCR 1 Press POWER n If watching on channel 3 or 4 press TV VIDEO to select the VIDEO mode The VCR s VIDEO indicator will light ACCESS THE ON SCREEN MENU ...

Page 10: ...T AUTO SET 7 Press SET to move the cursor to AUTO CHANNEL SET and then press SELECT n Auto set is in progress and SCANNING is displayed n When available channels are scanned ADD will be displayed on the screen n When unavailable channels are skipped SKIP will be displayed n After completion of auto set the lowest tuned in channel number and SCAN COMPLETED are displayed n If SCAN COMPLETED NO SIGNA...

Page 11: ...s tuner 1 Press MENU to access the Main Menu screen n If the VCR Plus screen appears press MENU again 2 Press SET to move the cursor to TUNER SET and then press SELECT 3 Press SET to move the cursor to MANUAL CHANNEL SET and then press SELECT 4 Input the channel number using the Digit keys or the CH buttons 5 Press SKIP to delete the channel 6 Specify another channel number or press MENU as many t...

Page 12: ...R n Refer to the Cable Box s instruction manual for more information CONNECT CONTROLLER TO VCR 4 Connect the Cable Box Controller to your VCR s CABLE BOX terminal Transmitter Setting your VCR s tuner and Cable Box Controller Follow these steps if you use an external Cable Box descrambler to receive cable stations When properly set up the Multi System Cable Box Controller will automatically switch ...

Page 13: ...ON CH3 if the Cable Box provides its output on channel 3 n Choose ON LINE if the Cable Box is connected to your VCR s Audio Video input connectors 11 Press MENU n Cable Box Set menu will appear Continued on next page 3 4 5 6 7 8 9 0 SET UP MENU g INITIAL SET CABLE BOX SET INDEX PLUS INITIAL SET DOWNLOAD FUNCTION SETUP PRESS SELECT SET PRESS MENU TO END 3 4 5 6 7 8 9 0 CABLE BOX SET g CABLE BOX OUT...

Page 14: ...ontroller only during timer recording n If your cable box cannot be controlled by a remote control your VCR will not be able to change its channels during timer recording For this type of cable box turn it on and select the channel you want to record before the timer recording is programmed to start n If you are unable to set the cable box controller please contact JVC toll free at 1 800 252 5722 ...

Page 15: ... so there s no need for you to do it manually Refer to page 6 of the INDEX Plus manual Make sure that you have already set the VCR s clock set the VCR s tuner set the Cable Box Controller Z p 12 if using a Cable Box If NOT using Cable Box If using Cable Box TURN ON THE VCR 1 If the VCR is off press POWER to turn it on n If watching on channel 3 or 4 press TV VIDEO to select the video mode The VCR ...

Page 16: ...is completed automatically a screen like the one to the right appears prior to the normal screen You can choose whether or not the Guide Channel will automatically be updated when changes or additions occur To select automatic updating press 1 To make changes manually press 2 16 Setting Up Your VCR cont d POWER ON SELECT CHANNEL 3 OR 4 OR AV MODE GUIDE CHANNEL SET GUIDE CH VCR CH 15 15 PRESS PR SE...

Page 17: ...D OR FAST FORWARD 4 Press REW to rewind the tape 5 Press FF to fast forward the tape n Press STOP to stop the tape n To rewind or fast forward the tape using the VCR s control turn the SHUTTLE ring fully to the corresponding direction and release it TO EJECT THE TAPE 6 Press the VCR s STOP EJECT button again 0 0 0 0 0 0 0 0 0 0 0 0 0 0 0 0 0 0 0 0 0 0 0 0 0 0 0 0 0 0 0 0 0 0 0 0 0 0 0 0 0 0 3 5 4 ...

Page 18: ...ure mode 2 Press PLAY to resume normal playback Or During Playback 1 Press FF for forward fast motion or REW for reverse fast motion 2 Press PLAY to resume normal playback n For short searches keep FF or REW pressed for more than 2 seconds When released normal playback will continue To view a slow reverse reverse slow or fast motion picture Your VCR is capable of recording two soundtracks Hi Fi an...

Page 19: ...at the speed with which the dial is rotated in the direction the dial is rotated By rotating the Jog dial counterclockwise at 2 revolutions per second or faster reverse play is possible To resume normal playback press the PLAY button 19 Still Rever se search Reverse play Reverse slow Slow motion P l a y Fo rw ard se arc h 0 0 0 0 0 0 0 0 0 0 0 0 0 0 0 0 0 0 0 0 0 0 0 0 0 0 0 0 0 0 0 0 0 0 0 0 0 0 ...

Page 20: ...earch automatically seeks out these index codes so you can easily find the beginning of a recording up to 9 index codes away in either direction During Stop 1 Press SEARCH T or Y INDEX 1 or INDEX 1 will be displayed and search will begin in the corresponding direction 2 If you wish to access index codes 2 through 9 press SEARCH T or Y repeatedly until the correct index number is displayed n When t...

Page 21: ...r the tape is rewound 1 Press REW 2 Press PLAY within 2 seconds For automatic power off after the tape is rewound 1 Press REW 2 Press POWER within 2 seconds For automatic timer standby after the tape is rewound 1 Press REW 2 Press TIMER within 2 seconds n To do the above using the VCR s controls During Stop turn the Shuttle all the way to the left and release it instead of pressing REW and then pr...

Page 22: ...4 5 6 7 8 9 0 Digit key 1 Digit key 2 The remote control is capable of controlling two JVC VCRs independently one set to respond to your remote control s A code control signals and another set to respond to B code control signals The remote control is preset to send A code signals because your VCR is initially set to respond to A code signals You can easily modify your VCR to respond to B code sig...

Page 23: ...ecording TO STOP RECORDING 7 Press STOP TV signals being received by the VCR s built in tuner can be recorded onto a video tape This is realtime video recording 0 0 0 0 0 0 0 0 0 0 0 0 0 0 0 0 0 0 0 0 0 0 0 0 0 0 0 0 0 0 0 0 0 0 0 0 0 0 0 0 0 0 POWER ON SELECT CHANNEL 3 OR 4 OR AV MODE 1 During Recording 1 Press TV VIDEO The VCR s VIDEO indicator and the TV broadcast being recorded will disappear ...

Page 24: ... prevention Safety tab Hi Fi Audio Recording Level Control Your VCR allows manual adjustment of the Hi Fi audio recording level Although the preset audio recording level is satisfactory for normal recording if the sound you are going to record is too loud or too low adjust the audio recording level while referring to the VCR s audio level meters 1 Press MENU SET and SELECT as many times as necessa...

Page 25: ...the Hi Fi audio track No special operation is required Simply follow the basic recording procedure n To listen to the stereo soundtrack while recording set the on screen AUDIO MONITOR to HI FI Z p 18 To record stereo programs 1 Press MENU SET and SELECT as many times as necessary to access the 2ND AUDIO screen Z p 7 2 Press SET to choose ON 3 Press MENU as many times as necessary to exit Then foll...

Page 26: ...tching on channel 3 or 4 be sure that the VIDEO indicator is lit If the indicator is not lit press TV VIDEO so that it lights INPUT THE TV PROGRAM S CODE NUMBER 2 Press MENU n The VCR PLUS input screen will be displayed 3 Press the Digit keys to enter the PlusCode number for the TV program you wish to record n To make corrections press CANCEL and re input with Digit keys CHECK FOR CORRECTNESS 4 Pr...

Page 27: ...VCR will enter the timer mode and power will go off For AUTO TIMER and other timer programming features Z p 30 For other error indications Z p 37 This function lets you set the recorder to timer record at the same time every day Monday through Friday n After pressing SELECT in step 4 press DAILY Digit key 8 DAILY will appear To Timer Record Daily Serials This function lets you set the recorder to ...

Page 28: ...screen will appear SELECT A PROGRAM NUMBER 3 Press SET to move to a vacant program number and then press SELECT n Initially all programs are vacant and the cursor is at program 1 So simply press SELECT INPUT THE DATE 4 Press SET to set the month and then press SELECT 5 Press SET to set the day n The day of the week will automatically appear n To record the program daily Mon Fri press DAILY Digit k...

Page 29: ...ing TIMER again Now all functions will be operable n To re engage the timer press TIMER For AUTO TIMER and other timer programming features Z p 30 For other error indications Z p 37 PROGRAM 1 ERROR DATE 13 22 WED START 12 30 AM STOP AM CHANNEL SP PRESS SELECT SET PRESS MENU TO END PROGRAM 1 DATE 12 28 THU START 12 00 PM STOP AM CHANNEL SP PRESS SELECT SET PRESS MENU TO END PROGRAM 1 DATE 12 28 THU...

Page 30: ...ess MENU SET and SELECT as many times as necessary to access the AUTO TIMER screen Z p 7 2 Press SET to choose ON 3 Press MENU as many times as necessary to exit Auto Timer Make sure the timer mode is disengaged first Then 1 Press MENU and then press SELECT to access the Program Set screen 2 Press SET to check through the programs in succession To cancel the program 3 Press CANCEL n Repeat steps 2...

Page 31: ... code PREPARATION 1 Turn off the TV by using the TV s remote control 2 Set the VCR switch to the left 3 Set the TV CABLE switch to TV 4 While holding down the POWER button enter your TV s brand code with the Digit keys then press STOP n Brand setting is completed Once you set the brand you do not have to reset it until the remote s batteries are replaced n If you set the wrong code re enter the ri...

Page 32: ...ch for a scene to be edited 0 Press the recorder s PLAY button where you want to start editing Press the recorder s PAUSE button to stop editing Repeat steps 9 through 11 to continue editing Assemble Editing is also possible using your VCR as the playback deck FOR INSERT EDITING Insert editing replaces part of the recorded scene with new material Both the picture and Hi Fi audio soundtrack are rep...

Page 33: ...mcorder To edit from a camcorder AUX INPUT g FRONT REAR PRESS SET FOR CHOICE PRESS MENU TO END AUDIO OUT VIDEO OUT EDIT 0 0 0 0 0 0 0 0 0 0 0 0 0 0 0 0 0 0 0 0 0 0 0 0 0 0 0 0 0 0 0 0 0 0 0 0 0 0 0 0 0 0 A DUB Audio conponent CD player etc Audio Dubbing replaces the normal audio sound of a previously recorded tape with a new soundtrack PREPARATION 1 Connect an audio component to the recorder s fro...

Page 34: ...IT PAUSE 7 Press MENU as many times as necessary to exit OPERATION 8 Insert a recorded cassette into your VCR 9 Play back the tape in your VCR 0 Press MENU SET and SELECT as many times as necessary to access the R A EDIT screen n The screen is superimposed on the video playback Use the SEARCH buttons to search for the point where you want an edited scene to start and press SELECT n The cut in poin...

Page 35: ... and out points for 2 will be cleared MEMORY CAPACITY Random Assemble Editing utilizes the same memory space as the VCR s timer so the number of sequences available to this function may not be 8 depending on how many programs are already stored in memory n Example Only sequences 1 5 are available because three programs are stored in the timer memory n Example The PROGRAM FULL screen appears when t...

Page 36: ...nnel selector set to the correct video channel Set it to the RF converter channel 3 or 4 Z p 8 n If you are using AV connection is the TV receiver set to the AV mode Set it to the AV mode Noise appears during visual search n This is normal Noise appears during normal playback n Is the automatic tracking mode engaged Try manual tracking Z p 17 Noise appears during slow playback n Try manual trackin...

Page 37: ...though the provided remote control unit is compatible with JVC televisions as well as many TV models manufactured by others it is possible that the provided remote control will not operate your TV or in some instances will have limited function capability Z p 31 n Is the remote control s VCR switch set to the left and the TV CABLE switch set to TV If not set the VCR switch to the left and the TV C...

Page 38: ... recording the on screen menu will not be recorded on tape n Although the provided Cable Box Controller is compatible with many different cable box brands it is possible that it will not work with your cable box Remote TV Operation n Whenever you replace batteries in the remote control it is necessary to reset the TV code if your television is not a JVC TV n With some televisions the TV VIDEO butt...

Page 39: ... damage to the VCR remote control or video cassette Avoid extreme heat and direct sunlight Avoid extreme cold Avoid extreme humidity Avoid dust Avoid places subject to vibrations Avoid strong magnetic fields Do not block the VCR s ventilation openings Do not place anything heavy on the VCR or remote control Do not place anything which might spill on top of the VCR or remote control Do not place th...

Page 40: ...luego presione SELECT n Se inicia la sintonización automática de canales y después de completada la misma aparecerá en la pantalla el mensaje FIN DE EXPLORACION 9 Presione MENU tantas veces como sea necesario Operaciones básicas en español Para las conexiones VCR TV vea la hoja de la Guía básica para las conexiones del VCR adjunta a este manual de instrucciones AJUSTE INICIAL FECHA 19 3 95 DO HORA...

Page 41: ...ilice los controles de canales del televisor para elegir otro canal que desee ver n El programa seleccionado con los controles de canales de TV aparecerá en la pantalla del televisor mientras el programa seleccionado con los controles de canales del VCR se grabará en la cinta Grabación por temporizador Preparación n Encienda el televisor n Seleccione el canal 3 o 4 o modo AV 1 Inserte un cassette ...

Page 42: ... 2666 FACTORY SERVICE CENTER LOCATIONS Sophisticated electronic products may require occasional service Just as quality is a keyword in the engineering and production of the wide array of JVC products service is the key to maintaining the high level performance for which JVC is world famous The JVC service and engineering organization stands behind our products NATIONAL HEADQUARTERS JVC SERVICE EN...

Page 43: ...ith the products or if the model or serial number has been altered tampered with defaced or removed 2 Initial installation and installation and removal for repair 3 Operational adjustments covered in the Owner s Manual normal maintenance video and audio head cleaning 4 Damage that occurs in shipment due to act of God and cosmetic damage 5 Signal reception problems and failures due to line power su...

Page 44: ...D U C H V U S PATENTS 4034276 4092684 4829419 4064537 4120583 4896260 4068257 4121284 4942576 4079412 4178606 4954951 4091426 Canada Patented Breveté 1979 1980 JVC COMPANY OF AMERICA DIVISION OF US JVC CORP 41 Slater Drive Elmwood Park N J 07407 HR IP820U EN 1 97 5 20 5 24 PM Page Hyo 4 ...

Page 45: ... 20 15 10 8 4 6 2 0 2 4 6 8 R dB 20 15 10 8 4 6 2 0 2 4 6 8 0 0 0 0 0 0 0 0 0 0 0 0 0 0 0 0 0 0 0 0 0 0 0 0 0 0 0 0 0 0 0 0 0 0 0 0 0 0 0 0 0 0 INSERT TV VIDEO DISPLAY INFO TIMER WEEKLY POWER DAILY M F AUX OSD CABLE TV VCR SEARCH F1 F2 F3 F4 VOL CH SET PLAY STOP JOG SHUTTLE REV FWD 1 2 3 4 5 6 7 8 9 0 SP EP C MEMORY ADD INDEXPlus TITLE C RESET SKIP SELECT MENU CANCEL ENTER PAGE CLEAR CURSOR CURSOR...

Page 46: ... A Directory 21 Deleting Information From A Directory 21 Retroactive Indexing 22 Consolidating Program Names 23 Uploading A Directory 23 Reading A Directory From A PR Tape 25 Other Convenient Functions 26 Transferring Directories 26 Disabling INDEX Plus Functions 28 Re enabling INDEX Plus Functions 28 Initializing The Library 29 Confirming Status Of Back Up 30 Restoring Lost Data 31 Error Messages...

Page 47: ...nel Related Information Screen These screens display various types of information which can include the date and time channel number channel name name of program and time remaining of the program currently being received refer to page 10 of this instruction manual Channel Specific Program Guide CSPG Screen Programming schedules from host broadcasting stations are also made available by INDEX Plus ...

Page 48: ...uctions for use of this button SEARCH TY Moves cursor to beginning of title T or end Y at REVISE TITLE screen CURSOR REW scrolls LEFT FF scrolls RIGHT VOL moves cursor UP VOL moves cursor DOWN during INDEX Plus operation screens JOG Pg 19 Enters letters and numbers at the REVISE TITLE screen Press the JOG SHUTTLE button when using the JOG dial for this purpose INFO Pg 12 Displays information relat...

Page 49: ...age 13 of the HR IP820U instruction manual 4 Press SET to select DOWNLOAD FUNCTION then press SELECT The screen to the right appears 5 Press SET to select ON then press MENU The DOWNLOAD FUNCTION SET UP screen reappears NOTE If you decide you don t want to receive CSPG from the host station select OFF at the DOWNLOAD FUNCTION confirmation screen Inputting Zip Code 6 Press SET to select ZIP CODE th...

Page 50: ... on your cable box and press ENTER to initiate scanning To correct your entry before pressing ENTER press CLEAR The right most digit will be deleted first If you do not know the lowest and highest channel numbers available on your cable box enter 1 for the lowest channel and 199 for the highest channel number When the host station is located the Guide Channel settings for VCR Plus timer recording ...

Page 51: ...ally refer to page 15 of the HR IP820U s instruction manual AUTOMATIC GUIDE CHANNEL SETTING IS NOT AVAILABLE PLEASE SET MANUALLY PRESS CANCEL TO RETURN DOWNLOAD HOST STATION COULD NOT BE FOUND PLEASE TRY AGAIN LATER PRESS CANCEL TO RETURN COMPLETE PRESS CANCEL TO RETURN RECEIVING CHANNEL GUIDE NUMBERS PRESS CANCEL TO CANCEL If using a cable connection the display to the right appears superimposed ...

Page 52: ...select MAIN MENU 2 Press SET to select SET UP MENU then press SELECT 3 Press SET to select INDEX PLUS INITIAL SET then press SELECT The screen to the right appears NOTE In the INDEX Plus INITIAL SET screen the INDEX PLUS FUNCTIONS option does not appear during recording 4 Press SET to select AUTOMATIC CLOCK SET then press SELECT The screen to the right appears 5 Press SET to select either ON or OF...

Page 53: ... MENU The INDEX PLUS INITIAL SET screen reappears INDEX PLUS Functions Setting Using the INDEX Plus Functions screen the INDEX Plus system can be disabled The INDEX Plus functions default setting is ON To disable INDEX Plus perform the following steps 0 Press SET to select INDEX PLUS FUNCTIONS then press SELECT The screen to the right appears Press SET to select OFF INDEX Plus is now disabled Pres...

Page 54: ...st be on in order to download data from host station To watch a TV broadcast during reception of download data If using the RF connection press the TV VIDEO button so that the VCR s VIDEO indicator goes out If using the AV connection change the TV s input mode from AV to TV If using a cable box it is not possible to view cable box channels during the reception of download data Then use the channel...

Page 55: ...isplay from the screen press 0 Preparation 1 Turn on the power to the TV and the VCR 2 Set the TV to the channel or mode appropriate for video playback 3 Insert a cassette Procedure Perform steps 1 and 2 from the preceding procedure 1 Once the programming guide for the selected channel has appeared place the cursor next to the program you want to record by pressing the CURSOR button VOL Then press...

Page 56: ...regular PRI in the VCR s internal memory which allows you to recall it at a later time The stored data can also be erased should you decide you don t need it anymore Storing Procedure 1 Select a channel using the CH button 2 Press INFO The PRI index appears Place the cursor next to the title representing the information you want to store 3 To save the data press F1 A appears to the right of the se...

Page 57: ...on INDEX Plus VCR You can use INDEX Plus to add an index Preparation 1 Turn on the power to the TV and the VCR 2 Set the TV to the channel or mode appropriate for video playback Procedure In order to determine the tape type the VCR automatically goes into PLAY mode for a few seconds after the tape is inserted This screen appears while the tape is being read One of the following screens appears dep...

Page 58: ...don t press either 1 or 2 The new Tape Number is automatically assigned Go to step 6 3 Start recording The screen to the right appears Press 1 The screen to the right appears Use the DIGIT buttons to enter the Tape Number To make corrections to the number you ve entered press CLEAR and input the correct number To quit the process press CANCEL and the previous screen reappears Once the correct numb...

Page 59: ...ot recorded on the tape label This will help to eliminate accidents and confusion later ATTENTION If you don t input the Tape Number within 1 minute after the first screen in step 3 first appears a Tape Number will automatically be assigned That means that tape will have two numbers Be sure to input your Tape Number as soon as possible INFORMATION In the case of a tape that has accidentally been a...

Page 60: ...time is calculated as though the program were recorded entirely in EP mode The displayed length of each program is approximate If there is a blank space of more than 5 minutes on the tape BLANK SPACE appears on screen Preparation 1 Turn on the power to the TV and the VCR 2 Set the TV to the channel or mode appropriate for video playback 3 Insert an HR tape into the VCR Procedure 1 Press INDEX Plus...

Page 61: ...is next to it If you press ENTER the directory of the tape containing the selected title appears If you press PLAY or STOP 1If the tape containing the selected title is already in the VCR the tape either stops at the beginning of the selected program or starts playback from that point 2If there is no tape in the VCR the following screen appears Insert the correct tape and the VCR automatically beg...

Page 62: ...s accepted the directory corresponding to the Tape Number you entered appears Insert the correct tape and after selecting the desired program using the CURSOR button VOL press PLAY or STOP Continue on to step 4 4 The following screen appears to let you know the VCR is searching the tape for your program 5 Normally the VCR finds your program quickly and starts playback from the begnning of the sele...

Page 63: ...he other DIGIT keys represents multiple letters the 0 key represents multiple symbols The following symbols can be input by pressing the 0 button By repeatedly pushing the 0 button the symbols can be selected in the following order 0 O _ Letters and numbers can be input using the JOG dial on the remote control When using the JOG dial for this purpose press the JOG SHUTTLE button on the remote cont...

Page 64: ... of the tape whose directory you accessed appears automatically See NOTE at the end of this page The frame appears to the far right under NEW Input the new Tape Number using the DIGIT buttons Press CLEAR to make corrections or CANCEL to quit the process Once the number is input press ENTER 3 If the new number you input is already assigned to another tape the screen looks like this Wait a few secon...

Page 65: ...y is updated automatically However if anything remains from the program you re recording over ex a portion of a commercial the VCR may continue to recognize this as a single program and not erase it from the directory If this happens follow this procedure to erase the data of the old program 1 Access the inserted tape s directory by pressing INDEX Plus 2 Using the CURSOR button VOL place the curso...

Page 66: ...r is automatically set by the VCR Using the DIGIT and CURSOR buttons VOL REW FF input a name for each program When you re done press INDEX Plus and the normal screen returns 5 Press STOP EJECT to take the tape out When ejecting a tape to which a number has just been automatically assigned the screen to the right appears TAPE CAN NOT BE READ LIBRARY IS EMPTY 1 FIND 2 INPUT TAPE 3 RE INDEX SCAN PRES...

Page 67: ...Press INDEX Plus and the normal screen reappears NOTE If you consolidate programs that were recorded at different tape speeds SP EP appears The program time is calculated as though the program were recorded entirely in EP mode You can load the directory of a tape which you previously removed from your library or of a tape recorded on another INDEX Plus VCR into your VCR s memory Preparation 1 Turn...

Page 68: ...er has just been automatically assigned the screen to the right appears NOTES If the tape has been recorded over several times Index Marks may remain and uploading may not be successful Erase the Index Marks manually refer to pg 20 of the HR IP820U instruction manual If uploading was not successful FAILURE appears on screen Re perform the procedure from step 1 If a particular program title could n...

Page 69: ...ss STOP EJECT to take the tape out When ejecting a tape to which a number has just been automatically assigned the following screen appears NOTES If the VCR cannot read the directory FAILURE appears on screen Re perform the procedure from step 1 Depending on the condition of the tape the VCR may not be able to read the directory READING TITLES 3 PRESS CANCEL TO ABANDON MUSIC TV SPEND THE NIGHT 9 S...

Page 70: ...appears Using the DIGIT buttons input the Address Number of the back up tape Then press ENTER NOTE If you press ENTER without having input the back up tape s Address Number the VCR asks you if you want to read the data from the current tape position If so select YES by pressing ENTER If you want data read from a different address select NO by pressing CANCEL The RESTORE ADDRESS screen reappears 6 ...

Page 71: ...e that the back up tape s own directory is copied correctly first erase the previously copied version from the VCR s memory refer to Erasing A Directory on page 20 of this instruction manual Then perform the Uploading A Directory procedure Z page 23 of this instruction manual If transfer is unsuccessful using the LATEST tape use the SECOND tape Any data stored on the tape is completely restored Tr...

Page 72: ... SAUDI 110 BLANK SPACE 80 EP PAGE01 PLAY STOP UTIL MORE PRESS INDEXPlus TO EXIT UTILITY 1 IMPORT OTHER LIBRARY 2 DISABLE INDEX PLUS 3 ERASE LIBRARY 4 BACK UP INFORMATION MEMORY USED PRESS 1 2 3 or 4 PRESS CANCEL TO RETURN DISABLE INDEX PLUS FUNCTIONS TO DISABLE INDEX PLUS FUNCTIONS PRESS ENTER PRESS CANCEL TO RETURN Disabling INDEX Plus Functions Re enabling INDEX Plus Functions INDEX PLUS FUNCTIO...

Page 73: ... change your mind select NO by pressing CANCEL The UTILITY screen reappears 5 If there s a tape with the library s back up information on it a screen like this one appears To make sure you can restore the original library at some point in the future copy down the back up tape s Tape Number Address Number and Program Number After writing down the numbers press ENTER Or press CANCEL to return to the...

Page 74: ...et the TV to the channel or mode apppropriate for video playback 3 Insert an HR tape Procedure 1 Press INDEX Plus The tape s directory appears Press F3 2 The UTILITY screen appears Press 4 3 The following screen appears The Tape Numbers Address Numbers and Program Numbers of the two most recent sets of data are displayed Press INDEX Plus to return to the normal screen Confirming Status Of Back Up ...

Page 75: ...ntinues Upon completion of restoration the screen to the right appears Once restoration is complete press CANCEL to return to the normal screen NOTES The directory for the back up tape used in data restoration will not copy correctly To ensure that the back up tape s own directory is copied correctly first erase the previously copied version from the VCR s memory refer to Erasing A Directory on pa...

Page 76: ...NCEL then re perform the procedure from step 1 If you inserted the wrong HR tape the SEARCHING TAPE screen is followed by this screen Insert the correct tape If the data could not be restored the following screen appears Press CANCEL then re perform the procedure from step 1 Error Messages NO CASSETTE PRESS CANCEL TO RETURN THIS TAPE IS A PRE RECORDED TAPE PRESS CANCEL TO RETURN THIS TAPE IS A NON...

Page 77: ...eceives information from regular and cable TV broadcasters and sends it along with the host station s own CSPG and PRI to users of INDEX Plus Each host station covers a specific region VISS VHS Index Search System A VISS mark or index mark is written on the tape during recording Its purpose is to indicate to the VCR during playback that a new program is beginning VISS marks are always written on H...

Page 78: ...s Restore the lost data Z pg 31 When the library becomes full a screen like the following one appears In order to create new directories you have to cancel some of the existing ones Z pg 21 If a problem occurs with INDEX Plus a screen like the following one appears Please consult your nearest JVC service center Troubleshooting AUTOMATIC CLOCK SET FAILURE PLEASE SET MANUALLY THEN TRY AGAIN PRESS CA...

Page 79: ...35 Memo HR IP820U INDEX Plus 97 5 20 5 46 PM Page 35 ...

Page 80: ... U C I V U S PATENTS 4034276 4092684 4829419 4064537 4120583 4896260 4068257 4121284 4942576 4079412 4178606 4954951 4091426 Canada Patented Breveté 1979 1980 JVC COMPANY OF AMERICA DIVISION OF US JVC CORP 41 Slater Drive Elmwood Park N J 07407 HR IP820U INDEX Plus 97 5 20 5 44 PM Page Hyo 4 ...

Reviews: