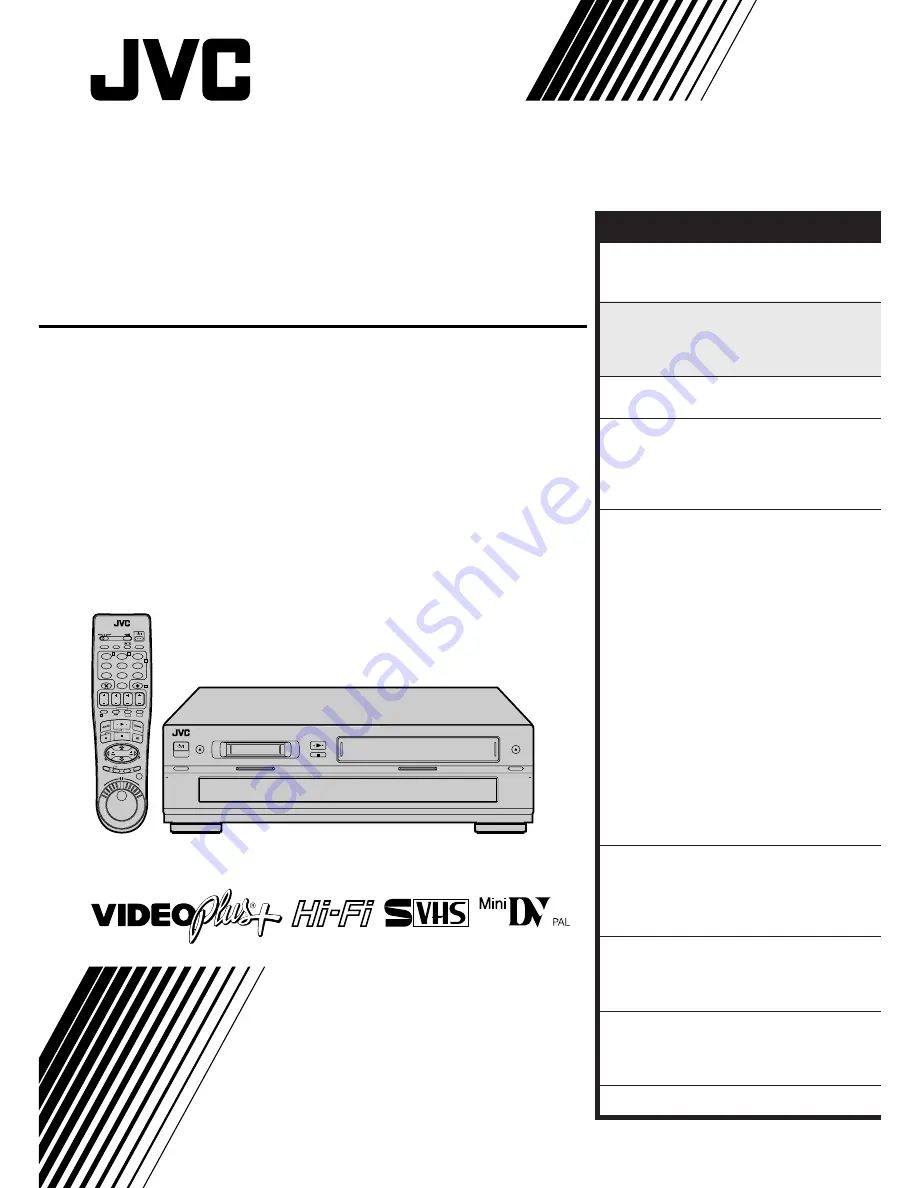
background image

HR-DVS1EK

Mini DV/S-VHS
VIDEO CASSETTE RECORDER

INSTRUCTIONS

LPT0338-001A

625

PULL - OPEN

DV

PULL - OPEN

VHS

STANDBY/ON

1

2

3

4

5

6

7

8

9

0

2

T

W

4

1

DV

VHS

3

CONTENTS

SAFETY FIRST

2

Safety Precautions ............................. 2
Some Do's And Don'ts ..................... 4

QUICK SET UP GUIDE

5

CHECK THE CONTENTS .................. 5
INSTALLATION ................................ 6
AUTO SET UP .................................. 8

T-V LINK

11

T-V LINK Functions ......................... 11

BASIC OPERATIONS

12

Playback ......................................... 12
Recording ....................................... 15
VIDEO Plus+ Timer Programming ... 18
Express Timer Programming ............ 20

ADVANCED OPERATIONS

23

Recording According
To Tape Type ................................... 23
Playback/Recording According
To Tape Characteristics ................... 24
Playback Picture Adjustment .......... 26
Looking For The Scene You Want ... 29
Selecting The Sound You Want ....... 30
Minimizing Picture Degradation
While Editing .................................. 33
Tape Dubbing ................................. 34
Normal Dubbing ............................ 35
Random Assemble Editing .............. 36
Edit From A Camcorder ................... 40
Edit To Or From Another Video
Recorder ......................................... 42
Audio Dubbing ............................... 44
Insert Editing ................................... 46
Remote Control Functions .............. 49
Other Functions .............................. 52

SYSTEM CONNECTIONS

57

Connecting To A Satellite Tuner ...... 57
Connecting To A Stereo System ....... 58
Connecting To A Printer .................. 59
Connecting To A Video Titler .......... 60

SUBSIDIARY SETTINGS

62

Tuner Set ......................................... 62
Clock Set ........................................ 69
VIDEO Plus+ Setup ......................... 70

SUBSIDIARY INFORMATION

71

Questions And Answers .................. 71
Troubleshooting .............................. 72
Index .............................................. 75

SPECIFICATIONS

Back Cover

Summary of Contents for HR-DVS1EK

Page 1: ...According To Tape Characteristics 24 Playback Picture Adjustment 26 Looking For The Scene You Want 29 Selecting The Sound You Want 30 Minimizing Picture Degradation While Editing 33 Tape Dubbing 34 Normal Dubbing 35 Random Assemble Editing 36 Edit From A Camcorder 40 Edit To Or From Another Video Recorder 42 Audio Dubbing 44 Insert Editing 46 Remote Control Functions 49 Other Functions 52 SYSTEM C...

Page 2: ...ock hazard by inadvertent connection to the mains supply If this product is not supplied fitted with a mains plug then follow the instructions given below DO NOT make any connection to the Larger Terminal coded E or Green The wires in the mains lead are coloured in accordance with the following code If these colours do not correspond with the terminal identifications of your plug connect as follow...

Page 3: ...recorder remote control or video cassette 1 DO NOT place the recorder in an environment prone to extreme temperatures or humidity in direct sunlight in a dusty environment in an environment where strong magnetic fields are generated on a surface that is unstable or subject to vibration 2 DO NOT block the recorder s ventilation openings 3 DO NOT place heavy objects on the recorder or remote control...

Page 4: ... stated that it is de signed for unattended operation or has a standby mode Switch off using the switch on the equipment and make sure that your family knows how to do this Special arrangements may need to be made for infirm or handicapped people DON T use equipment such as personal stereos or radios so that you are distracted from the requirements of road safety It is illegal to watch television ...

Page 5: ...E A R T U O N I T R A T S MENU OK DV VHS STEP 1 CHECK THE CONTENTS CHECK ALL THE CONTENTS SHOWN BELOW Dear Customer Thank you for purchasing this JVC Video Cassette Recorder Please use this QUICK SET UP GUIDE to help you to set up your video cassette recorder Video Cassette Recorder Infrared Remote Control Unit RF Cable AA Batteries x 2 You are now ready to install your video recorder PULL OPEN DV...

Page 6: ...TV Aerial Cable not provided Back of Recorder Mains outlet AV1 INPUT OUTPUT SIGNAL SELECTION FOR AV CONNECTION The AV1 IN OUT connector accepts and delivers either a composite signal regular video signal or a Y C signal a signal in which the luminance and chrominance signals are separated For input signal selection select VIDEO regular video signal or S VIDEO Y C signal for AV1 SELECT setting Z pg...

Page 7: ... mains outlet until all connections are completed n Do NOT press the button on the recorder or on the remote control to turn on the recorder s power before you start the Auto Set Up procedure described on page 8 Go to Step 3 AUTO SET UP AFTER YOU FINISH THIS STEP Mains outlet Mains power inlet Back of Recorder Aerial connector RF Cable provided Back of TV S Video cable not provided Audio cable not...

Page 8: ...rform tuner setting Z pg 62 NOTES Auto channel set function takes place first it assigns automatically all receivable stations in your area Auto clock set function sets the clock automatically During auto channel set the recorder recognizes each station name of the detected stations and stores them in the recorder s memory then automatically sets the VIDEO Plus assigned Guide Program numbers for t...

Page 9: ... channels by downloading preset data from your TV instead of using the Auto Set Up function Z pg 8 After downloading is completed the recorder sets the clock and VIDEO Plus assigned Guide Program numbers automatically For details refer to the instruction manual for your TV NOTES In areas where no TV station transmits the PDC signal the recorder cannot perform either auto clock set or auto Guide Pr...

Page 10: ...ed at the top left corner of the screen for about 5 seconds each time the recorder is tuned to a different station If you want to set the tuner manually such as to add or skip channels to change preset positions or to set or change station names see pages 64 66 Now you have finished the basic set up and can use your recorder for both playback and recording B If auto channel set has succeeded but a...

Page 11: ...ing the programme that you are watching on your TV with simple operation Press and hold RECORD and press PLAY on the remote control or press RECORD on the recorder Follow the procedure below to use this function TURN ON THE RECORDER 1 Press ACCESS MAIN MENU SCREEN 2 Press MENU ACCESS MODE SET SCREEN 3 Press fi to move the highlight bar pointer to MODE SET then press OK or SELECT DIRECT REC MODE 4 ...

Page 12: ...eck only Z pg 24 Playback picture quality of LP recordings will not be as high as SP recordings STOP PLAYBACK 5 Press STOP Then press EJECT on the VHS or DV deck to remove the cassette 1 2 3 4 5 6 7 8 9 0 2 T W 4 1 DV VHS 3 P L A Y STOP 4 5 1 REW 3 FF 3 3 4 INFORMATION Initiating playback causes the VCR indicator to light and the TV to automatically enter AV mode To return the TV to TV mode after ...

Page 13: ...ight for forward frame by frame playback or to the left for reverse frame by frame playback OR Press PAUSE OR Press or VHS deck only To resume normal playback press PLAY R e v e r s e R e v e rse Reverse Slow Pla y F o r w a r d s e a r c h p l a y slow motion s e a r c h Still NOTES Refer to the SHUTTLE ring illustration above as you read the following procedures To use the remote control s JOG d...

Page 14: ... played that recording back in order to check it and now wish to continue recording When you have lost power or the batteries have died while you were recording with a camcorder Tape Position Indicator VHS Deck The tape position indicator appears on screen when from the Stop mode you press FF REW or perform an Index Search The position of 5 in relation to 0 beginning or end shows you where you are...

Page 15: ...e you can change the preset by pressing the TV PROG buttons or the NUMBER keys STOP RECORDING 7 Press STOP Then press EJECT on the VHS or DV deck to remove the cassette 1 2 3 4 5 6 7 8 9 0 2 T W 4 1 DV VHS 3 PAUSE 6 5 6 RECORD 5 S T O P 7 NUMBER 3 6 1 TV PROG 2 5 6 3 6 R E C O R D 3 2 B E S T takes place at the beginning of both the first SP and the first LP recording after inserting the cassette ...

Page 16: ...n a recorded cassette set its erase protection switch to SAVE To record on it later set the switch to REC Record safety tab Accidental erasure prevention Recording Resume Function If there is a power cut during recording or Instant Timer Recording or timer recording the recording will resume automatically when power is restored to the recorder unless the recorder s memory backup has expired Erase ...

Page 17: ...ns is recorded on the tape Instant Timer Recording ITR This easy method lets you record for from 30 minutes to 6 hours VHS or to 120 minutes DV selectable in 30 min increments and shuts the recorder off after recording is finished START RECORDING 1 Press RECORD on the recorder ENGAGE ITR MODE 2 Press RECORD again blinks and 0 30 appears on the front display panel SET RECORDING DURATION 3 If you wa...

Page 18: ...umber you entered is invalid ERROR appears on the screen and Err appears on the display panel Press and input a valid PlusCode number If the GUIDE PROG SET screen appears see ATTENTION Regarding Guide Program Number Set on page 19 VIDEO Plus Timer Programming Before performing VIDEO Plus Timer Programming Make sure that the recorder s built in clock is set properly Select the recording deck by pre...

Page 19: ...station then press OK or to set the Guide Program Number The VIDEO Plus Program screen appears Ex To timer record a BBC2 programme with VIDEO Plus If your recorder receives BBC2 on the preset position 2 press OK or after entering 2 Satellite Receiver Users To timer record a satellite broadcast using VIDEO Plus 1 Set AV2 SELECT to the appropriate mode Z pg 48 2 Perform steps 1 7 3 Set the satellite...

Page 20: ...this ENTER PROGRAMME STOP TIME 4 Press STOP to enter the time you want recording to stop Press and hold STOP to move in 30 minute increments or press and release repeatedly to move 1 minute at a time ENTER PROGRAMME DATE 5 Press DATE to enter the date on which you wish to record The current date first appears on screen The date you enter will appear in its place Before performing Express Timer Pro...

Page 21: ...necessary programmes Z pg 22 Now available from some TV stations PDC Programme Delivery Control is a service designed to assure safe accurate timer recording With this system special code signals are transmitted together with the audio video signals These code signals control your video recorder and have precedence over the advertised times which you may have preset into the timer This means that ...

Page 22: ...e CANCEL OR REPLACE A PROGRAMME 4 Press to cancel a programme To replace a programme press the appropriate button START STOP DATE TV PROG SP LP PDC RETURN TO NORMAL SCREEN DISPLAY 5 Press as many times as necessary If there are still some programmes to be recorded go on to step 6 RETURN TO TIMER MODE 6 Press NOTE You can also check the programmes on the display panel even if the recorder s power i...

Page 23: ...FF the S VHS indicator will go out The VHS recording mode will be selected ACCESS MAIN MENU SCREEN 1 Press MENU ACCESS VHS MODE SET SCREEN 2 Move the highlight bar pointer to VHS MODE SET by pressing fi then press OK or SELECT S VHS MODE 3 Move the highlight pointer to S VHS by pressing fi then press OK or to select AUTO or OFF RETURN TO NORMAL SCREEN 4 Press MENU NOTE When playing back a tape tha...

Page 24: ...RN ON THE RECORDER 1 Press ACCESS MAIN MENU SCREEN 2 Press MENU ACCESS VHS MODE SET SCREEN 3 Press fi to move the highlight bar pointer to VHS MODE SET then press OK or SELECT B E S T MODE 4 Press fi to move the highlight bar pointer to B E S T then press OK or to set to ON or OFF RETURN TO NORMAL SCREEN 5 Press MENU PLAY PAUSE PLAY O K MENU RECORD RECORD PAUSE Turn on the TV and select the AV mod...

Page 25: ...g BEST appears blinking on the recorder s display panel NOTES When watching a tape recorded with B E S T set to ON it is recommended that you leave B E S T on during playback as well When watching a rental tape or one recorded on another video recorder or when using this recorder as the player for editing set B E S T to your preference by performing steps 1 through 5 on page 24 BEST only appears a...

Page 26: ... and rental cassettes The on off of Digital 3 DNR Noise Reduction which cuts noise and enables clear picture reproduction is also linked to this function The default setting is ON We recommend that you use the Digital TBC feature when playing back a tape recorded on a camcorder playing back a tape repeatedly used using this video recorder as the player for editing 4 5 6 7 8 9 0 2 4 1 DV VHS 3 MENU...

Page 27: ...T MODE 3 Move the highlight bar pointer to DIGITAL 3R by pressing fi then press OK or to set to ON RETURN TO NORMAL SCREEN 4 Press MENU NOTES Normally it is recommendable to keep DIGITAL 3R set to ON Depending on the type of tape being used picture quality may sometimes be better with DIGITAL 3R set to OFF MAIN MENU MODE SET VHS MODE SET DV MODE SET AUTO CH SET MANUAL CH SET INITIAL SET 5 MENU EXI...

Page 28: ... After zooming in use fi to move the screen up down left or right STOP ZOOM 3 To leave the zoom view and return to the normal screen press W Another method is to press STOP and then press PLAY MENU ICON EFFECT Select when you do not want to use any playback effects CLASSIC FILM Select when you want to add a movie like effect to the playback by omitting frames MONOTONE Select when you want the play...

Page 29: ...IVATE INDEX SEARCH 1 Press or or 1 or 1 is displayed on screen and search begins in the corre sponding direction To access index codes 2 through 9 press or repeatedly until the correct index number is dis played Ex To locate the beginning of B from the current position press twice To locate the beginning of D from the current position press once When the specified index code is located playback be...

Page 30: ...Display USE HI FI For Hi Fi stereo tapes L R HI FI For main audio of Bilingual tapes L HI FI For sub audio of Bilingual tapes R NORM For audio dubbed tapes HI FI For audio dubbed tapes NORM NOTES HIFI L R should normally be selected In this mode Hi Fi stereo tapes are played back in stereo and the normal audio track is played back automatically for tapes with only normal audio For instructions on ...

Page 31: ...urn to the normal screen 32kHz MODE SOUND YOU HEAR SOUND1 Original recorded sound SOUND2 Audio dubbed sound FULL SOUND Original recorded sound and Audio dubbed sound DV MODE SET SOUND MODE 32kHz 32kHz MODE SOUND1 DISPLAY OFF AUDIO REC NICAM 5 MENU EXIT Sound Mode Selection DV Deck 1 Press MENU to access the Main Menu screen 2 Move the highlight bar pointer to DV MODE SET by pressing fi then press ...

Page 32: ...And Bilingual Programmes Only For The Users In Eastern Europe VHS deck The NICAM audio programme will be recorded on the Hi Fi audio track and the Standard audio programme on the normal audio track DV deck See AUDIO REC Mode Setting below NOTES If the quality of stereo sound being received is poor the broadcast will be received in monaural with better quality Before playing back a programme record...

Page 33: ...nter to VHS MODE SET by pressing fi then press OK or SELECT PICTURE CONTROL SET MODE 3 Move the highlighted bar pointer to PICTURE CONTROL by pressing fi then press OK or to select the desired mode AUTO Provides optimised picture benefits of B E S T Picture System Normally select AUTO EDIT Minimizes picture degradation during editing recording and playback SOFT Reduces image coarseness when viewin...

Page 34: ...cally The recording deck goes into Record Pause mode and the playback deck goes into Pause mode When both decks have finished rewinding dubbing begins automatically After dubbing is completed the decks rewind both tapes automatically and eject them The recorder then shuts off NOTES If you set the dubbing direction incorrectly you could erase an important recording that you wanted to copy We recomm...

Page 35: ... press RECORD so that the recording deck enters the Record Pause mode START DUBBING 5 Press START PAUSE DUBBING 6 Press START END DUBBING 7 Press STOP Then press VHS or DV to select the playing deck and press STOP Normal Dubbing NOTES There may be a discrepancy of several seconds between where you intend editing to start and where it actually starts The on screen display during the operation or du...

Page 36: ...L A Y P A U S E O K DV PLAY PAUSE R A EDIT I N O U T LOAD CASSETTES 1 Insert a VHS or S VHS cassette and a Mini DV cassette SELECT DV DECK 2 Press DV ACCESS R A EDIT SCREEN 3 Press R A EDIT R A EDIT screen will appear SELECT PROGRAMME 4 Press fi to move the highlight bar pointer to the programme number you want to edit then press OK or To remove a programme from the R A EDIT screen select the prog...

Page 37: ...PLAYBACK EFFECT IF NECESSARY 8 Press EFFECT Cycle through the effects by pressing repeatedly and stop when the one you want is displayed You can use Classic Film Monotone Sepia Strobe or Video Echo effects Z pg 28 You can also select so that the date and time are displayed REGISTER ADDITIONAL SCENES 9 Repeat steps 5 8 To change previously registered points press The registered points disappear one...

Page 38: ...the R A EDIT screen Press R A EDIT once more to return to the normal screen To use Random Assemble Editing consecutively for two or more programmes press START for each programme When dubbing from another Mini DV cassette swap the Mini DV cassettes first and then press START If you use the Sepia or Monotone Playback Effect you can t use the Dissolve or Black White Fader The Classic Film or Strobe ...

Page 39: ...ver the scene WIPE SCROLL The scene wipes in from the bottom to the top of a black screen or wipes out from top to bottom leaving a black screen WIPE SHUTTER Wipe in towards the centre of a black screen from the top and bottom or wipe out from the centre towards the top and bottom leaving a black screen P DISSOLVE The new scene gradually appears as the old one gradually disappears P WIPE CORNER Th...

Page 40: ...uipped JVC camcorder is used the camcorder is capable of controlling the recorder Refer to the camcorder s instruction manual for operating procedure SELECT RECORDING DECK 2 Press VHS or DV SET RECORDER S INPUT MODE 3 Press NUMBER key 0 and or TV PROG to select L 3 When using the VHS deck as the recording deck set L 3 AV to VIDEO for the AUDIO VIDEO input connectors or S VIDEO for the AUDIO S VIDE...

Page 41: ...the appropriate mode depending on the connector VIDEO or S VIDEO input connector being used on the front panel 1 Press MENU to access the Main Menu screen 2 Press fi to move the highlight bar pointer to VHS MODE SET then press OK or 3 Press fi to move the highlight bar pointer to L 3 AV 4 Press OK or to select VIDEO or S VIDEO a VIDEO If a connected device s output is compatible only with regular ...

Page 42: ...g deck set AV1 SELECT to S VIDEO and AV2 SELECT to AV2 Z pg 48 When using your recorder as the source player set the AV1 OUT switch on the rear panel to Y C Z pg 6 SELECT DECK 2 Press VHS or DV When using your recorder as the source player set S VHS AUDIO OUT to VHS or DV depending on the deck being selected Z pg 48 SET RECORDING DECK S INPUT MODE 3 Set to AUX With this video recorder press NUMBER...

Page 43: ...eo Recorder As The Source Player connect its rear panel S OUT and AUDIO OUT connectors to the recording deck s S Video and Audio input connectors When Using Your Video Recorder As The Recording Deck connect its front panel S VIDEO and AUDIO input connectors to the source player s S Video and Audio output connectors Then set the recorder s input mode to L 3 and set L 3 AV to S VIDEO Z pg 41 Another...

Page 44: ... DECK 2 Press VHS SET INPUT MODE 3 Press NUMBER key 0 and or TV PROG so that L 3 appears in place of a preset number LOCATE START POINT 4 Press PLAY to start playback of the tape in your recorder and press PAUSE when you find the point where you want to start dubbing ENGAGE AUDIO DUBBING 5 Press A DUB It is possible to take the original sound recorded on the tape in your recorder and mix it with o...

Page 45: ...as had its record safety tab removed or on a Mini DV cassette that has had its erase protection switch set to SAVE When playing back an audio dubbed tape on the VHS deck press AUDIO on the remote control to select the soundtrack you wish to hear Z pg 30 When playing back an audio dubbed Mini DV tape on the DV deck set 32kHz MODE to SOUND2 Z pg 31 Audio dubbing is not possible using the DV IN OUT c...

Page 46: ... NOTES Insert Editing is not possible with a Mini DV tape recorded in LP mode To use the DV deck as the recording deck press and then DV after selecting L 3 in step 3 7 8 9 0 4 1 DV VHS 3 JOG SHUTTLE TV PROG VHS PAUSE NUMBER 0 DV MAKE CONNECTIONS 1 Connect the player s VIDEO OUT or S VIDEO OUT and AUDIO OUT connectors to your recorder s VIDEO or S VIDEO and AUDIO input connectors on the front pane...

Page 47: ... the segment to be replaced using the SHUTTLE ring or the JOG dial or pressing and PAUSE Be sure to engage the Still mode at the edit in point ENGAGE INSERT EDITING 7 Press INSERT Your recorder enters the Insert Pause mode and light up on the front display panel The TV screen changes from the still picture to the input source you are going to record START EDITING 8 Load the source cassette and pla...

Page 48: ...to move the highlight bar pointer to MODE SET then press OK or 3 Press fi to move the highlight bar pointer to AV1 SELECT 4 Press OK or to select VIDEO or S VIDEO a VIDEO If a connected device s output is compatible only with regular video signals set AV1 SELECT to VIDEO b S VIDEO If a connected device s output is compatible with Y C signals set AV1 SELECT to S VIDEO This setting will let you take...

Page 49: ...recorder to respond to B code signals REMOVE POWER SUPPLY 1 Unplug the mains power cord from the mains outlet SET REMOTE CONTROL CODE 2 While holding down A B on the remote control press the NUMBER key 2 and then press STOP RE SUPPLY POWER 3 Plug the mains power cord back into the mains outlet TURN THE RECORDER ON 4 Press on the remote control The recorder will now only respond to B code signals N...

Page 50: ...ote Control Your remote control can operate the basic functions of your TV set In addition to JVC TVs other manufacturer s TVs can also be controlled Before you start Turn on the TV using its remote control Set the remote control s VCR TV SAT switch to TV TV PROG TV Control Your TV Using Additional Buttons Use the NUMBER keys and the button button or button to select the TV s channel With televisi...

Page 51: ...llite receiver brands have more than one code If the satellite receiver does not function with one code try entering another OPERATE SATELLITE RECEIVER 2 Press the corresponding button TV PROG NUMBER keys For VIDEOWAY or some other brands of satellite receiver you must press after having pressed the NUMBER keys The NUMBER buttons may not function with some satellite receivers To return the remote ...

Page 52: ...d indication on the TV screen tells you what the recorder is doing MODE SET S VHS AUDIO OUT AUTO O S D ON AUTO TIMER OFF DIRECT REC ON POWER SAVE OFF AV1 SELECT VIDEO AV2 SELECT AV2 5 MENU EXIT q6 PR 12 ABCD SP 21 00 24 12 99 WARNING TIMER RECORDING TO START SOON VHS ST HI FI 1 23 45 NORM REMAIN 1 00 0 1 13 12 11 9 8 7 5 6 4 2 14 10 q6 PR 12 ABCD SP 23 59 48kHz 31 12 99 WARNING TIMER RECORDING TO ...

Page 53: ... function Z pg 69 does not work while the Power Save mode is engaged While the recorder is in the Power Save mode the picture may be distorted momentarily when you turn on off the recorder Power Save does not work when the recorder is in the Timer mode the recorder s power is turned off after timer recording or Instant Timer Recording AV2 SELECT is set to DECODER or SAT Z pg 48 1 2 3 4 5 6 7 8 9 0...

Page 54: ...n at the end of the tape There may be some picture noise and sound disturbance at the point on the tape where the recorder switches from SP to LP mode If you perform timer recording with both PDC and the Auto SP LP Timer activated and the programme goes beyond its originally scheduled length there may be times when the programme cannot be recorded in its entirety Total 210 minutes Approximately 15...

Page 55: ...le the Timer mode is engaged To disengage the timer press TIMER Next Function Memory The Next Function Memory tells the recorder what to do after rewinding Before continuing make sure the recorder is in the Stop mode a For Automatic Start Of Playback After Tape Rewind press REW then press PLAY within 2 seconds b For Automatic Power Off After Tape Rewind press REW then press within 2 seconds c For ...

Page 56: ...l found on some TVs This cannot be corrected if the TV does not have a V HOLD control The counter and tape remaining time readings will be incorrect During search still or frame by frame playback the picture will be distorted and there may be a loss of colour Depending on the type of TV the top and bottom portions of superimposed displays may be cut off during NTSC playback ADVANCED OPERATIONS con...

Page 57: ... to the instruction manual for the satellite tuner Mains outlet TV Aerial cable Aerial connector Satellite Tuner Unit Satellite Cable Outdoor Unit Aerial Back of TV 21 pin AV input connector SCART RF OUT ANT IN Back of Recorder IMPORTANT When you set AV2 SELECT to SAT Z pg 48 it is possible to view a satellite broadcast with the TV set to its AV mode even if the recorder is in Timer mode in Stop m...

Page 58: ...TV broadcasts in your area this recorder can record them independently of the TV set and play them back through the connected stereo system When listening to sound through the connected stereo system turn the TV s volume down completely CAUTIONS This recorder has a dynamic range of more than 80 dB with regards to its Hi Fi audio capability It is recommended that you check the maximum level if you ...

Page 59: ...der s DV IN OUT connector SELECT DECK 2 Press DV When you use the VHS deck Press beside the DUB button START PLAYBACK 3 Press PLAY The image being displayed on the TV screen is output to the digital printer Any on screen displays are not output Playback Effects are not output either DV IN OUT To DV IN connector Your recorder Digital printer DV cable not provided 1 2 3 4 5 6 7 8 9 0 2 T W 4 1 DV VH...

Page 60: ...r PREPARE RECORDING DECK 3 Insert a cassette for recording and press DV or VHS for the recording deck To set recording deck s input mode press NUMBER key 0 and or TV PROG to select L 2 Set AV2 SELECT to AV2 Z pg 48 LOCATE START POINT 4 Press DV or VHS for the playing deck Press PLAY to start playback and find the biginning of the scene you want to edit then press PAUSE PREPARE VIDEO TITLER 5 Prepa...

Page 61: ...he playing deck is left in the Pause mode it will automati cally go into Stop mode after a time for the protection of the video tape and the video head The duration of the Pause mode is 3 minutes for the DV deck and 5 minutes for the VHS deck If the recording deck is left in the Record Pause mode it will automatically go into Stop mode after a time for the protec tion of the video tape and the vid...

Page 62: ...buttons without going through any vacant channel TURN ON THE RECORDER 1 Press ACCESS MAIN MENU SCREEN 2 Press MENU PERFORM AUTO CHANNEL SET 3 Move the highlight bar pointer to AUTO CH SET by pressing fi then press OK or The Auto Set screen appears and remains on screen while the recorder searches for receivable stations As Auto Channel Set progresses the mark on the screen moves from left to right...

Page 63: ...ay not be stored correctly and auto Guide Program Number Set may not work properly If the Guide Program numbers are not set properly when you timer record a TV programme using VIDEO Plus the recorder will record a TV programme of a different station When program ming the timer using VIDEO Plus be sure to check that the preset position corresponding to the broadcasting station you wish to record ha...

Page 64: ...t timer program ming with VIDEO Plus in this state the GUIDE PROG SET screen appears set the Guide Program numbers on this screen Z ATTENTION Regarding Guide Program Number Set on page 19 Or perform Guide Program Number Set Z pg 70 The blueback screen and the programme currently being broadcast by the selected channel appear alternately for 8 seconds each SELECT BAND 4 Press fi to change the band ...

Page 65: ...CHANNEL SET SCREEN 2 Press OK twice The Manual Channel Set screen appears PERFORM TUNING 3 Press until begins blinking then press fi until the picture is clearest Then press OK The Confirmation screen appears Repeat steps 1 through 3 as necessary CLOSE CONFIRMATION SCREEN 4 Press MENU Fine Tuning Channels Already Stored PR CH ID PR CH ID 01 26 BBC1 08 02 23 ITV 09 03 30 CH4 10 04 33 BBC2 11 05 37 ...

Page 66: ...begins blinking ACCESS MANUAL CHANNEL SET SCREEN 2 Press OK twice SELECT NEW STATION 3 Press until the station name ID begins blinking then press fi until the new station s name ID you want to store begins blinking Registered station names Z pg 67 appear as you press fi SWITCH STATIONS 4 Press OK The Confirmation screen appears Repeat steps 1 through 4 as necessary CLOSE CONFIRMATION SCREEN 5 Pres...

Page 67: ... RAI2 RAI2 RAI3 RAI3 RB1 RB1 RB3 RB3 Rikisutvarpid S RKPS RTBF 1 RTB1 RTBF 2 RTB2 RTE 1 RTE1 RTL RTL RTL 2 RTL2 RTP RTP STATION NAME ID SAT SAT SAT 1 SAT1 Scottish TV SCOT SC4 SC4 SDR SDR SDR1 SDR1 SFB1 SFB1 SFB3 SFB3 SKY SKY Sky One SKY1 Sky Net SKYN Sport SPRT SR 1 SR1 Super RTL SRTL STV Test STVT STV 1 STV1 STV 2 STV2 Suedwest3 SWR SWF 1 SWF1 Schweiz4 SWZ4 TYNE TEES TEES Text TEXT TF1 TF1 TNT i...

Page 68: ...65 52 Midlands Ridge Hill 22 28 25 32 35 Sutton Coldfield 46 40 43 50 37 The Wrekin 26 33 23 29 35 Waltham 58 64 61 54 35 North Belmont 22 28 25 32 56 Emley Moor 44 51 47 41 37 BBC1 BBC2 ITV CH4 CH5 North West Caldbeck 30 34 28 32 56 Winter Hill 55 62 59 65 48 North East Bilsdale West Moor 33 26 29 23 35 Chatton 39 45 49 42 Pontop Pike 58 64 61 54 68 Scotland Angus 57 63 60 53 Black Hill 40 46 43 ...

Page 69: ...u can disregard the next step as you won t be able to receive regular clock adjustments SET CLOCK DATA SOURCE PRESET 7 The recorder is preset to receive clock setting and adjustment data from preset position 1 Press fi to set the preset position to the number representing the station transmitting clock setting data BBC1 BBC2 etc then press OK or START CLOCK OPERATION 8 Press MENU Clock Set NOTES J...

Page 70: ...N 2 Press fi to move the highlight bar pointer to INITIAL SET then press OK or ACCESS GUIDE PROG SET SCREEN 3 Press fi to move the highlight bar pointer to GUIDE PROG SET then press OK or ENTER GUIDE PROG NUMBER 4 Press fi or NUMBER keys to enter the Guide Program number for the desired station as shown in the TV listings Then press OK or Ex When inputting the Guide Program number 4 for CH4 ENTER ...

Page 71: ...Record Pause mode A No The video recorder shuts off automatically after 5 minutes VHS deck or 3 minutes DV deck to protect the heads Q What happens if the tape runs out during recording A The video recorder automatically rewinds it to the beginning or if Timer Recording the cassette is ejected ATTENTION This recorder contains microcomputers External electronic noise or interference could cause mal...

Page 72: ...ticeable in Hi Fi soundtrack VHS deck POSSIBLE CAUSE If you re using the AV or S VIDEO connection the TV receiver is not set to the AV mode This is normal The automatic tracking mode is engaged The video heads may be dirty Automatic tracking is engaged CORRECTIVE ACTION If you are using the AV or S VIDEO connection set the TV to its AV mode Try manual tracking Z pg 26 Consult your JVC dealer Engag...

Page 73: ...ed cassette has had its erase protection switch set to SAVE has been pressed when there are no programs in memory or the timer record information has been programmed incorrectly The end of the tape was reached during timer recording TIMER RECORDING CORRECTIVE ACTION Confirm that the camcorder is properly connected Set the input mode to L 1 L 2 or L 3 Set SOUND MODE to 32kHz at the original recordi...

Page 74: ... them are skipped over 3 The channel cannot be changed 4 Channel settings that were made manually seem to have changed or disappeared 5 No channels are stored in the recorder s memory 6 The remote control won t operate the TV or satellite tuner POSSIBLE CAUSE The camcorder s microphone is too close to the TV The TV s volume is too high Those channels have been desig nated to be skipped Recording i...

Page 75: ...o is used for products compliant with the i Link standard Dubbing DUB Button starts Tape Dubbing Z pg 34 Dubbing Direction Buttons select dubbing direction Z pg 34 Index DV Display Panel provides clear view of various displays and indicators for DV deck Z pg 77 INSERT Button engages Insert Editing mode Z pg 46 A DUB Button engages Audio Dubbing mode Z pg 44 RECORD Button starts regular recording p...

Page 76: ...pg 58 8 Mains Power Inlet enables connection to a mains outlet using the provided Mains Power Cord Z pg 6 7 4 Programme Time Indicators show the programme start time and the programme stop time for timer recording Z pg 20 5 Timer Indicator lights when has been pressed to engage Timer mode Z pg 19 21 6 Tape Remaining Time Indicator displays time remaining on tape when certain buttons are pressed Z ...

Page 77: ...e Timer mode Z pg 19 21 5 Channel Display shows preset position where the station currently being received is stored Clock Display shows current time Z pg 10 6 PDC Indicator lights when PDC has been engaged for timer recording Z pg 19 21 VPS Video Programme System recording is not currently available in the U K and not possible with this recorder 7 VCR Indicator lights when the video recorder is i...

Page 78: ...FECT Button selects playback effect during playback or at Random Assemble Editing Z pg 28 37 9 PDC Button enables disables PDC recording Z pg 19 21 VPS Video Programme System recording is not currently available in the U K and not possible with this recorder 0 Button cancels timer programme Z pg 22 0000 Button resets counter to 0 00 00 Z pg 17 START Button accesses Regular Program screen inputs pr...

Page 79: ...ast Forward FF Button same as button on recorder Z pg 12 13 Y Play Button same as button on recorder Z pg 12 13 U Pause Button same as button on recorder Z pg 13 I Button initiates functions such as Index Search Z pg 29 variable speed search frame by frame playback Z pg 13 TV Button controls volume of connected TV Z pg 50 O R A EDIT Button accesses R A EDIT screen Z pg 36 P IN OUT Button registers...

Page 80: ...0 000 Hz Hi Fi audio Maximum recording time SP 240 min with E 240 video cassette LP 480 min with E 240 video cassette DV DECK VIDEO AUDIO Signal system PAL type colour signal 625 lines 50 fields Recording system Digital Component Recording Format DV format SD mode Cassette Mini DV Cassette Maximum recording time SP 60 min with M DV60ME cassette LP 90 min with M DV60ME cassette Audio recording syst...

Reviews: