background image

HR-DD858E/EH
HR-J758E/EH

VIDEO CASSETTE RECORDER

INSTRUCTIONS

LPT0048-001C

SEE 

AUTO SET UP

ON REAR SIDE

SEE 

AUTO SET UP

ON REAR SIDE

PAL

TV PROG +

TV PROG –

T

V

TV

+

0000

START
DEBUT

STOP

FIN

DATE

MENU

OK

TV

PROG

TV/VCR

DAILY/QTDN.

VPS/PDC

AUX

WEEKLY/HEBDO

PROG

30 SEC

– –:– –

AUDIO

1

2

3

4

5

6

7

8

9

0

2

4

1

3

EXPRESS

VCR

TV

SAT

REW

INSERT A.DUB

FF

TV PROG/

JOG

SHUTTLE

3R PICTURE

TIMER

STANDBY/ON

VIDEO (MONO)L –AUDIO– R

SPATIALIZER

REC LINK

TV PROG

TV PROG

REVIEW

SP

VPS/PDC

VCR

+8

4
0

6

15dB

NORM

SLO

W

SLOW

EN

CONTENTS

SAFETY FIRST

2

Safety Precautions ............................. 2

INSTALLING YOUR NEW RECORDER

3

Basic Connections ............................ 3

INITIAL SETTINGS

4

Auto Set Up ...................................... 4
Language .......................................... 7
On-Screen Displays .......................... 8
Power Save Mode
[J758E, DD858E only] ...................... 9

INFORMATION ON COLOUR SYSTEM 10

Colour System Set ........................... 10

PLAYBACK

11

Basic Playback ................................ 11
Playback Features ........................... 12
TimeScan [DD858E/EH only] .......... 18

RECORDING

20

Basic Recording .............................. 20
Recording Features ......................... 21
B.E.S.T. Picture System .................... 24

TIMER RECORDING

26

S

HOW

V

IEW

 Timer Programming ....... 26

Express Timer Programming ............ 28
Automatic Satellite
Programme Recording .................... 32

SPECIAL FEATURES

33

Remote Control Functions .............. 33

EDITING

36

Edit To Or From Another Video
Recorder ......................................... 36
Edit From A Camcorder ................... 38
Audio Dubbing [DD858E/EH only] .. 39
Insert Editing [DD858E/EH only] ...... 40

SYSTEM CONNECTIONS

42

Connection To A Satellite Tuner ...... 42
Connecting/Using A Decoder ......... 43
Connecting/Using A Stereo System .... 44

SUBSIDIARY SETTINGS

45

Video Channel Set .......................... 45
Tuner Set ......................................... 46
S

HOW

V

IEW

 Setup ............................. 53

Clock Set ........................................ 54

TROUBLESHOOTING

56

QUESTIONS AND ANSWERS

58

INDEX

59

SPECIFICATIONS

62

ENGLISH

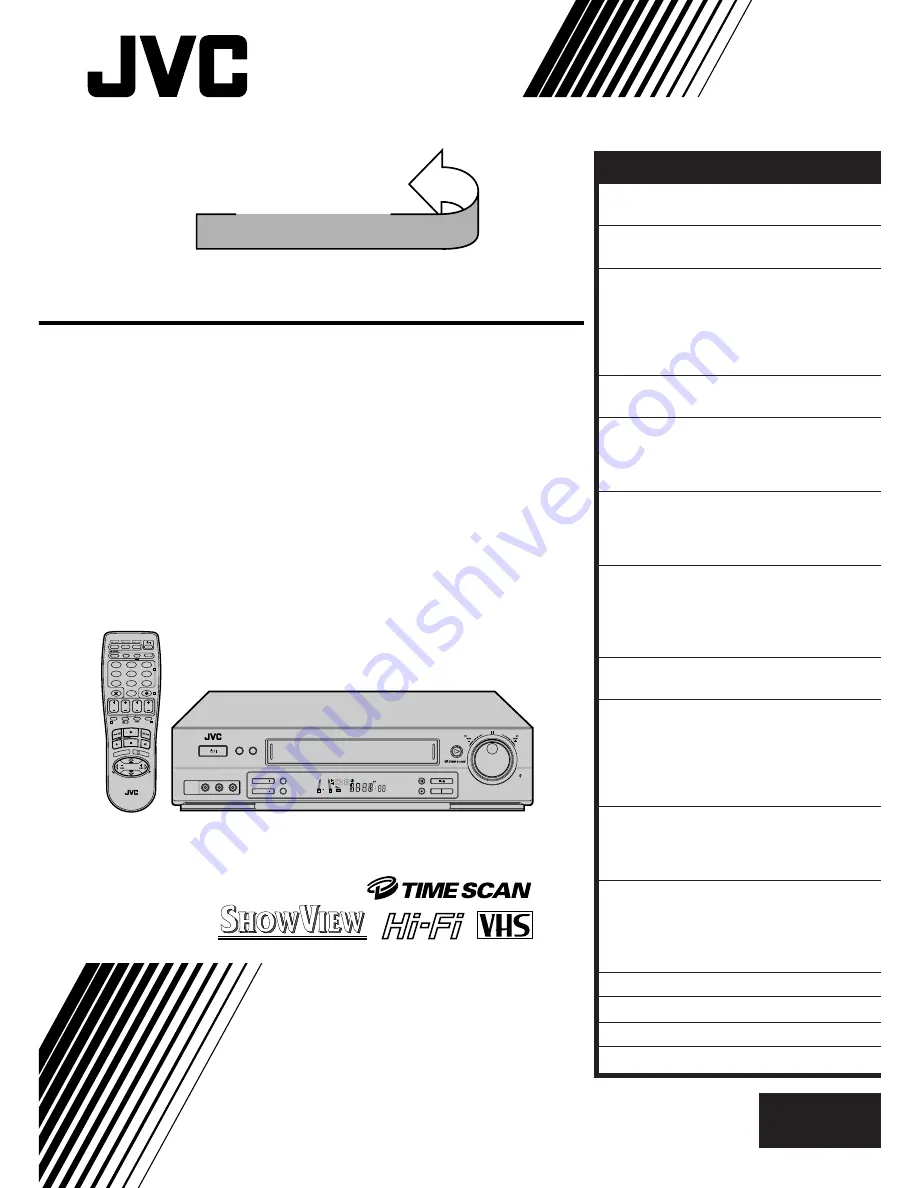
The recorder illustrations appearing in this instruction manual are of the
HR-DD858E/EH.

Summary of Contents for HR-DD858E

Page 1: ...RMATION ON COLOUR SYSTEM 10 Colour System Set 10 PLAYBACK 11 Basic Playback 11 Playback Features 12 TimeScan DD858E EH only 18 RECORDING 20 Basic Recording 20 Recording Features 21 B E S T Picture System 24 TIMER RECORDING 26 SHOWVIEW Timer Programming 26 Express Timer Programming 28 Automatic Satellite Programme Recording 32 SPECIAL FEATURES 33 Remote Control Functions 33 EDITING 36 Edit To Or Fr...

Page 2: ...not be played back on a single speed video recorder n Cassettes marked VHS or S VHS can be used with this video cassette recorder however only VHS signals can be played back and recorded n HQ VHS is compatible with existing VHS equipment n SHOWVIEW is a trademark of Gemstar Development Corpora tion The SHOWVIEW system is manufactured under licence from Gemstar Development Corporation n Certain aud...

Page 3: ...the recorder and the TV s 21 pin SCART connector CONNECT RECORDER TO MAINS 4 Plug the end of the mains power cord into a mains outlet It s essential that your video recorder be properly connected Follow these steps carefully THESE STEPS MUST BE COMPLETED BEFORE ANY VIDEO OPERATION CAN BE PERFORMED INSTALLING YOUR NEW RECORDER 21 pin SCART Cable 21 pin SCART connector Back of TV Mains Power Cord Ae...

Page 4: ...M or 41 SUISSE go to step 4 If you have selected 32 BELGIUM or 41 SUISSE go to step 3 If you are referring to the on screen display Press fi to move the highlight bar pointer to your country s name If you have selected a country other than BELGIUM or SUISSE go to step 4 If you have selected BELGIUM or SUISSE go to step 3 ATTENTION Once you have performed Auto Set Up even if the recorder s memory b...

Page 5: ...age 6 If you are using the on screen display the AUTO SET screen will appear As Auto Set Up progresses the mark on the screen moves from left to right NOTES Auto channel set function takes place first it assigns automatically all receivable stations in your area Auto clock set function sets the clock automatically by reading the clock setting data from a station transmitting a PDC signal while aut...

Page 6: ...ion on which your recorder receives the broadcasting station you wish to record is selected Z pg 26 SHOWVIEW Timer Programming n Your video recorder memorizes all detected stations even if reception of some of them is poor In these cases picture quality may be poor To delete those stations with an unacceptable picture Z Delete A Channel on page 49 n For RF connection users In certain reception con...

Page 7: ...ET then press OK or REC LEVEL CTL appears only with the HR DD858E and HR DD858EH SELECT COUNTRY 4 Press fi to move the highlight bar pointer to your country s name then press OK or SELECT LANGUAGE 5 Press fi to move the highlight bar pointer to the language of your choice You do not have to press OK pressing OK starts Auto Channel Set RETURN TO NORMAL SCREEN 6 Press MENU Turn on the TV and select ...

Page 8: ...tors 2 Tape speed SP LP EP EP is for NTSC playback only 3 Tape direction 4 Counter display 5 Tape remaining time indicator Z pg 21 6 Audio mode display Z pg 16 7 Tape position indicator Z pg 11 8 Type of Broadcast Z pg 22 9 SpatializerW indicator Z pg 16 10 Current day month year 11 Clock display 12 Channel position number and station name Aux indicator L 1 L 2 or F 1 13 Timer warning display Z pg...

Page 9: ...s MENU MAIN MENU MODE SET AUTO CH SET MANUAL CH SET INITIAL SET REC LEVEL CTL 5 MENU EXIT MODE SET AUTO TIMER OFF O S D ON B E S T ON AUTO SP LP TIMER OFF POWER SAVE ON AV2 SELECT AV2 NOTES During Power Save the display panel will be turned off The Just Clock function Z pg 54 does not work while the Power Save mode is engaged While the recorder is in the Power Save mode the picture may be distorte...

Page 10: ...he picture may roll up and down This can be corrected using the V HOLD control found on some TVs This cannot be corrected if the TV does not have a V HOLD control The counter and tape remaining time readings will be incorrect During search still or frame by frame playback the picture will be distorted and there may be a loss of colour Depending on the type of TV the top and bottom portions of supe...

Page 11: ...ppears blinking in the recorder s display panel during automatic tracking Z pg 24 STOP PLAYBACK 4 Press STOP on the remote or STOP EJECT on the recorder s front panel Then press STOP EJECT to remove the cassette Compact VHS camcorder recordings can be played on this video recorder Simply place the recorded cassette into a VHS Cassette Adapter and it can be used just like any full sized VHS cassett...

Page 12: ... to the left for reverse frame by frame playback OR Press PAUSE OR Press or To resume normal playback press PLAY Slow Motion For HR DD858E EH ACTIVATE SLOW MOTION PLAYBACK 1 Turn the TIME SCAN SHUTTLE ring to the left or press during playback to decrease speed in the forward direction To play in reverse slow motion and in reverse play mode continue to turn the TIME SCAN SHUTTLE ring to the left or...

Page 13: ...o the left for reverse frame by frame playback OR Press PAUSE OR Press or To resume normal playback press PLAY 1 3 High Speed Turbo Search For HR J758E EH ACTIVATE HIGH SPEED SEARCH 1 During playback or still turn the SHUTTLE ring all the way to the right for forward high speed search or to the left for reverse high speed search Releasing SHUTTLE resumes still picture playback OR For forward high ...

Page 14: ...er the playback picture moves To decrease speed press the button for the opposite direction To resume normal playback press PLAY NOTE In the search still or frame by frame playback mode the picture will be distorted and there will be a loss of colour 1 2 3 4 5 6 7 8 9 0 2 4 1 3 3R Picture 3R Resolution and Response Recovery technology maximises sense of resolution and sharpens image edges to make ...

Page 15: ...Search Next Function Memory You can set your recorder s power to go off automatically after the tape is fully rewound Before starting make sure the recorder is in the Stop mode For Automatic Power Off After Tape Rewind press REW then press within 2 seconds Instant ReView Simply by pressing a single button the recorder power comes on rewinds and begins playback of the last timer recorded programme ...

Page 16: ...le recording it SpatializerW has no effect on recording quality ACTIVATE SPATIALIZERW 1 Press SPATIALIZER the current setting will be displayed on the screen for about 5 seconds Pressing SPATIALIZER while the screen shows the display changes the setting To view a stereo programme such as movies or music select SPATIALIZER to create more spacious sound To view a monaural programme select SPATIALIZE...

Page 17: ...ACK 1 Press PLAY ACTIVATE REPEAT PLAYBACK 2 Press PLAY and hold for over 5 seconds then release The Play indicator on the display panel blinks slowly The tape plays 50 times automatically and then stops STOP PLAYBACK 3 Press STOP at any time to stop playback NOTE Pressing PLAY REW FF or PAUSE also stops Repeat Playback P L A Y PLAY STOP S T O P ...

Page 18: ...io can keep up with the video Slow motion is not possible with TimeScan 1 2 3 4 5 Audio signal during TimeScan Sound of 1 3 and 5 is heard Sound of 2 and 4 is not heard Output audio signal is normal monaural sound Playback tape ACTIVATE VARIABLE SPEED SEARCH 1 During playback or still turn the recorder s TIME SCAN SHUTTLE ring It remains at that position even after you release it Each time it pass...

Page 19: ...ideo and the audio and noise may appear in the audio signal TimeScan sound quality will differ in comparison to normal playback When material such as music videos where there is non stop sound very few breaks in the soundtrack are viewed at 2x normal speed the audio playback may be faster than normal When the playback direction is reversed it takes approximately 6 seconds until sound is heard Pict...

Page 20: ...der s front panel as well START RECORDING 4 Press and hold RECORD and press PLAY on the remote control or press RECORD on the recorder PAUSE RESUME RECORDING 5 Press PAUSE Press PLAY to resume recording STOP RECORDING 6 Press STOP on the remote control or STOP EJECT on the recorder Then press STOP EJECT to remove the cassette To prevent accidental recording on a recorded cassette remove its safety...

Page 21: ...ns 1 2 3 4 5 6 7 8 9 0 2 4 Tape Remaining Time DISPLAY REMAINING TIME 1 Press until the time remaining on the tape appears The display panel shows the tape remaining time with displayed By pressing the button you can change the display to show the counter reading channel position clock time or tape remaining time channel position is not displayed during playback The HR J758E EH owners can use the ...

Page 22: ... programme press AUDIO until or appears on the front display panel or HIFI L or HIFI R appears on the screen as required To listen to the Standard regular monaural audio while receiving a NICAM broadcast press AUDIO until NORM appears on the front display panel or on the screen HR J758EH or HR DD858EH only NOTE O S D must be set to ON or the on screen displays will not appear Z pg 8 Type of Broadc...

Page 23: ...ess OK or SELECT MODE 3 Move the highlight bar pointer to MANUAL by pressing fi then press OK or ADJUST AUDIO RECORDING LEVEL 4 Press or fi Press or fi briefly 5 times to move the on screen s audio levels by one division on the scale To move the audio levels faster keep or fi pressed Adjust the recording level while watching the recorder s audio level meters Set the level so that maximum volume ca...

Page 24: ...hannel or AV mode PLAY R E C O R D TURN ON THE RECORDER 1 Press ACCESS MAIN MENU SCREEN 2 Press MENU ACCESS MODE SET SCREEN 3 Press fi to move the highlight bar pointer to MODE SET then press OK or REC LEVEL CTL appears only with the HR DD858E and HR DD858EH SELECT B E S T MODE 4 Press fi to move the highlight bar pointer to B E S T then press OK or to set to ON or OFF RETURN TO NORMAL SCREEN 5 Pr...

Page 25: ... of the tape in use B E S T is active during Auto Tracking BEST appears blinking on the recorder s display panel NOTES When watching a tape recorded with B E S T set to ON it is recommended that you leave B E S T on during playback as well When watching a rental tape or one recorded on another video recorder or when using this recorder as the player for editing set B E S T to your preference by pe...

Page 26: ...de Program number for that SHOWVIEW number correctly If the number you entered is invalid ERROR appears on the screen and Err appears on the display panel Press and input a valid SHOWVIEW number If the GUIDE PROG SET screen appears see ATTENTION Regarding Guide Program Number Set on page 27 SP SHOWVIEW Timer Programming Before performing SHOWVIEW Timer Programming Make sure that the recorder s bui...

Page 27: ...d the extra programme you must first cancel any unnecessary programmes Z pg 30 It is not possible to timer record a TV programme with a SHOWVIEW number which starts with 0 ATTENTION Regarding Guide Program Number Set GUIDE PROG SET appears after performing step 3 if the Guide Program number for the SHOWVIEW number you entered has not been set Press the NUMBER keys or fi to input the channel positi...

Page 28: ...l looks like this ENTER PROGRAMME STOP TIME 4 Press STOP to enter the time you want recording to stop Press and hold STOP to move in 30 minute increments or press and release repeatedly to move 1 minute at a time ENTER PROGRAMME DATE 5 Press DATE The current date appears on screen The date you enter appears in its place SP SP Before performing Express Timer Programming Make sure that the recorder ...

Page 29: ...ogramme Delivery Control and VPS Video Programme System are service designed to assure safe accurate timer recording With this system special code signals are transmitted together with the audio video signals These code signals control your video recorder and have precedence over the advertised times you may have preset into the timer This means that your recorder will start and stop recording whe...

Page 30: ...propriate button START STOP DATE TV PROG VPS PDC SP LP RETURN TO NORMAL SCREEN DISPLAY 5 Press as many times as necessary If there are still some programmes remaining go on to step 6 RETURN TO TIMER MODE 6 Press NOTE You can also check the programmes on the display panel even if the recorder s power is off unless the recorder is in the Power Save mode Z pg 9 or the recorder is in the Timer mode ho...

Page 31: ...during timer programming In order to ensure that the recording fits on the tape this feature may leave a slight non recorded section at the end of the tape There may be some noise and sound disturbance at the point on the tape where the recorder switches from SP to LP mode The Auto SP LP Timer feature is not available during ITR Instant Timer Recording and the feature will not work properly with a...

Page 32: ...ssible with the AV1 IN OUT connector For timer programming of the satellite tuner refer to the instruction manual of the satellite tuner Auto Satellite Prog recording is not possible if your satellite tuner does not have a timer The button s light blinks while Auto Satellite Prog recording is in progress Pressing the recorder s button while Auto Satellite Prog recording is in progress turns off th...

Page 33: ...signals REMOVE POWER SUPPLY 1 Unplug the mains power cord from the mains outlet SET REMOTE CONTROL CODE 2 While holding down VCR on the remote control press the NUMBER key 2 and then press STOP RE SUPPLY POWER 3 Plug the mains power cord back into the mains outlet TURN THE RECORDER ON 4 Press on the remote control The recorder will now only respond to B code signals NOTE To set the recorder back t...

Page 34: ...button TV PROG TV VCR TV Volume Muting NUMBER keys For some brands of TV you must press OK after having pressed the NUMBER keys IMPORTANT Although the provided remote control unit is compatible with JVC televisions as well as many other models it may not work with your TV or in some instances may have limited function capability TV BRAND NAME CODE JVC 01 02 03 04 BRANDT 05 NORDMENDE 05 SABA 05 TEL...

Page 35: ...press the corresponding button TV PROG NUMBER keys For VIDEOWAY or some brands of satellite tuner you must press after having pressed the NUMBER keys The NUMBER buttons may not function with some satellite tuners IMPORTANT Although the provided remote control unit is compatible with JVC satellite tuners as well as many other models it may not work with your satellite tuner or in some instances may...

Page 36: ...NG DECK S INPUT MODE 2 Set to AUX With this video recorder press NUMBER key 0 and or TV PROG to select depending on the connector being used L 1 for the AV1 IN OUT connector or L 2 for the AV2 IN DECODER connector When using the AV2 IN DECODER connector make sure AV2 SELECT is set to AV2 Z pg 37 START SOURCE PLAYER 3 Engage its Play mode START RECORDING DECK 4 Engage its Record mode NOTES All nece...

Page 37: ...r OR To record a satellite programme through a satellite tuner connected to the AV2 IN DECODER connector b DECODER To use a decoder connected to the AV2 IN DECODER connector 5 Press MENU to return to normal screen If you have a decoder be sure to set AV2 SELECT back to DECODER after editing If you re not using a decoder leave AV2 SELECT set to AV2 The default setting is AV2 if the recorder s memor...

Page 38: ... a Master Edit Control equipped JVC camcorder is used the camcorder is capable of controlling the recorder Refer to the camcorder s instruction manual for operating procedure SET RECORDER S INPUT MODE 2 Press NUMBER key 0 and or TV PROG so that F 1 appears in place of a channel position number START CAMCORDER 3 Engage its Play mode START RECORDER 4 Engage its Record mode EDITING cont NUMBER 0 Mini...

Page 39: ...en press PLAY to start the tape in your recorder Audio dubbing begins at this point blinks and is displayed on the front display panel To stop dubbing temporarily press PAUSE Press PLAY to resume dubbing END AUDIO DUBBING 6 Press STOP to stop the tape in your recorder and engage the audio component s Stop mode Audio dubbed tape CD Player etc Mixer output Pre recorded tape Normal audio track Video ...

Page 40: ... 0 and or TV PROG so that F 1 appears in place of a channel number LOCATE END POINT 3 Load the recording cassette into your recorder and play it back to determine the edit out point the end of the segment to be replaced using the JOG TIME SCAN SHUTTLE controls or and PAUSE RESET THE COUNTER 4 Press 0000 to change the counter display to 0 00 00 LOCATE START POINT 5 Determine the edit in point the b...

Page 41: ... Fi audio soundtrack and normal audio soundtrack all at the same time In step 6 above after you press INSERT press A DUB also and blink and lights up on the front display panel NOTES Suitable leads can be obtained from your dealer Insert editing is not possible with cassettes whose safety tab has been removed When insert editing is performed on a tape that has been recorded on another video record...

Page 42: ...ector on the rear panel of your recorder allows simple connection to a satellite tuner NOTE For details check your satellite tuner s instruction manual Mains outlet TV Aerial cable Aerial connector Satellite Tuner Unit Satellite Cable Outdoor Unit Aerial Back of TV 21 pin AV input connectors SCART RF OUT ANT IN Back of Recorder SYSTEM CONNECTIONS ...

Page 43: ... When Connecting A Satellite Tuner if you don t have a decoder connect the satellite tuner directly to the video recorder s AV2 IN DECODER connector if you have a decoder first connect the decoder to the decoder input of the satellite tuner then connect the satellite tuner s output to the recorder s AV2 IN DECODER connector Refer to the instruction book for the satellite tuner and decoder set AV2 ...

Page 44: ...onnectors to a stereo amplifier make sure you connect L and R correctly If stereo or bilingual TV broadcasts are receivable in your area this recorder can record them independently of the TV set and play them back through the connected stereo system When listening to sound through the connected stereo system turn the TV s volume down completely CAUTIONS This recorder has a dynamic range of more th...

Page 45: ...cal white bars do not appear clearly re set the video recorder to another vacant channel and try again Ex If channel 50 is available in your area With AV Connection To view picture signals from the video recorder set your TV to its AV mode With RF Connection The channel on which the screen in step 2 appears clearly is your video channel To view picture signals from the video recorder set your TV t...

Page 46: ...ly assigns all receivable stations in your area to call them up by using the TV PROG buttons without going through any vacant channel TURN ON THE RECORDER 1 Press ACCESS MAIN MENU SCREEN 2 Press MENU ACCESS COUNTRY SET SCREEN 3 Press fi to move the highlight bar pointer to AUTO CH SET then press OK or REC LEVEL CTL appears only with the HR DD858E and HR DD858EH SELECT COUNTRY 4 Press fi to move th...

Page 47: ...For information on scrambled broadcasts refer to page 49 IMPORTANT In certain reception conditions station names may not be stored correctly and auto Guide Program Number Set may not work properly If the Guide Program numbers are not set properly when you timer record a TV programme using SHOWVIEW the recorder will record a TV programme of a different station When programming the timer using SHOWV...

Page 48: ...ENTER NEW CHANNEL INFORMATION 6 Press OK and the Confirmation screen appears Repeat steps 3 through 6 as necessary CLOSE CONFIRMATION SCREEN 7 Press MENU To change positions see Change Station Channel Position Z pg 49 If you wish to set station names other than the ones registered in your recorder Z Set Stations B on page 50 The blueback screen and the programme currently being broadcast by the se...

Page 49: ... be sure to perform Guide Program Number Set Z pg 53 in order to get proper results from SHOWVIEW timer recording Perform steps 1 and 2 of Storing Channels Manually on page 48 to access the Confirmation screen before continuing SELECT DECODER MODE 1 Set AV2 SELECT to DECODER Z pg 37 ACCESS CONFIRMATION SCREEN 2 Perform steps 1 and 2 of Storing Channel Manually on page 48 SELECT POSITION 3 Press fi...

Page 50: ...LECT ITEM 1 Press fi until the item you want begins blinking ACCESS MANUAL CHANNEL SET SCREEN 2 Press OK twice SELECT NEW STATION 3 Press until the station name ID begins blinking then press fi until the new station s name ID you want to store begins blinking Registered station names Z pg 51 appear as you press fi SWITCH STATIONS 4 Press OK The Confirmation screen appears Repeat steps 1 through 4 ...

Page 51: ...N ORF1 ORF1 ID STATION NAME ORF2 ORF2 ORF3 ORF3 OWL3 OWL3 PREM PREMIERE PRO7 PRO7 RAI1 RAI1 RAI2 RAI2 RAI3 RAI3 RET4 RETE4 21 TELE21 RTBF RTBF1 or 2 RTL RTL RTL2 RTL2 RTL4 RTL4 RTL5 RTL5 RTP RTP S4 SCHWEIZ4 SAT1 SAT1 SBS SBS SHOW SHOW SIC SOCIEDADE SKY SKY CHANNEL SKYN SKY NEWS SPRT SPORT SRTL SUPER RTL STAR STAR TV SVT1 SVT1 SVT2 SVT2 SW3 SUEDWEST3 TCC TCC TELE TELE TEL5 TELE5 TF1 TF1 TM3 TM3 TMC...

Page 52: ...ing ACCESS MANUAL CHANNEL SET SCREEN 2 Press OK twice The Manual Channel Set screen appears PERFORM TUNING 3 Press until begins blinking then press fi until the picture is its clearest Then press OK The Confirmation screen appears Repeat steps 1 through 3 as necessary CLOSE CONFIRMATION SCREEN 4 Press MENU Fine Tuning Channels Already Stored SUBSIDIARY SETTINGS cont 1 2 3 4 5 6 7 8 9 0 2 4 1 3 OK ...

Page 53: ...ve the highlight bar pointer to INITIAL SET then press OK or ACCESS GUIDE PROG SET SCREEN 3 Press fi to move the highlight bar pointer to GUIDE PROG SET then press OK or ENTER GUIDE PROG NUMBER 4 Press fi or NUMBER keys to enter the Guide Program number for the desired station as shown in the TV listings Then press OK or Ex When inputting the Guide Program number 2 for ZDF ENTER RECEIVING CHANNEL ...

Page 54: ...S CLOCK SET SCREEN 4 Move the highlight bar pointer to CLOCK SET by pressing fi then press OK or The Clock Set screen appears SET DATE AND TIME 5 Press fi to set the time then press OK or The date display begins blinking Repeat the same procedure to set the date and year When you set the time press and hold fi to change the time by 30 minutes When you set the date press and hold fi to change the d...

Page 55: ...usted at the start end of Summer Time Just Clock may not function properly depending on the reception condition SET JUST CLOCK 6 The default setting is OFF Set as desired by pressing fi then press OK or For the Just clock function Z Just Clock on page 54 If you set to OFF you can disregard the next step as you won t be able to receive regular clock adjustments SET CLOCK DATA SOURCE CHANNEL POSITIO...

Page 56: ...onnection the TV receiver is not set to the AV mode The automatic tracking mode is engaged The video heads may be dirty Automatic tracking is engaged CORRECTIVE ACTION If you are using the RF OUT connec tion set the TV receiver to the VIDEO channel Z pg 5 perform Video Channel Set Z pg 45 If you are using the AV connection set the TV to its AV mode Try manual tracking Z pg 14 Consult your JVC deal...

Page 57: ... Safety tab removed has been pressed when there are no programs in memory or the timer record information has been programmed incorrectly The end of the tape was reached during timer recording The recorder s channel positions have been set incorrectly CORRECTIVE ACTION Position the camcorder so its microphone is away from the TV Turn the TV s volume down If you need the skipped channels restore th...

Page 58: ... is normal It reduces distortion at the pause and resume points Q Can the video recorder indefinitely remain in the Record Pause mode A No The video recorder goes to its Stop mode automatically after 5 minutes to protect the heads Q What happens if the tape runs out during recording A The video recorder automatically rewinds it to the beginning TIMER RECORDING Q and remain lit on the display panel...

Page 59: ...OG Dial Z pg 12 13 7 TIME SCAN SHUTTLE Ring Z pg 12 HR DD858E EH SHUTTLE Ring Z pg 13 HR J758E EH 8 VIDEO AUDIO Input Connectors Z pg 38 9 TV PROG Buttons Z pg 20 0 REC LINK Button Z pg 32 3R PICTURE Button Z pg 14 Display Panel Z pg 60 Infrared Beam Receiving Window RECORD Button Z pg 20 PAUSE Button Z pg 12 13 INSERT Button Z pg 40 HR DD858E EH SP LP Button Z pg 20 HR J758E EH A DUB Audio Dubbin...

Page 60: ... Z pg 28 3 Symbolic Mode Indicators 4 Timer Indicator Z pg 27 29 5 Channel Clock Display Z pg 6 6 Tape Speed Indicators Z pg 20 EP is only for NTSC playback 7 Instant REVIEW Indicator Z pg 15 8Audio Mode Indicator Z pg 16 9 Tape Remaining Time Indicator Z pg 21 0 Cassette Loaded Mark VPS PDC Indicator Z pg 27 29 VCR Indicator Z pg 21 Counter Remain Display Mode Display L 1 L 2 or F 1 0 9 8 1 5 7 6...

Page 61: ...ROG TV PROG T V TV 0000 START DEBUT STOP FIN DATE MENU OK TV PROG TV VCR DAILY QTDN VPS PDC AUX WEEKLY HEBDO PROG 30 SEC AUDIO 1 2 3 4 5 6 7 8 9 0 2 4 1 3 EXPRESS VCR TV SAT i o u W 1 3 8 7 6 2 9 4 0 5 r e w q t y Q p E How To Use The remote control can operate most of your video recorder s functions as well as basic functions of TV sets and satellite tuners of JVC and other brands Z pg 34 35 Poin...

Page 62: ...n system Signal to noise ratio 45 dB Horizontal resolution 250 lines Frequency range 70 Hz to 10 000 Hz Normal audio 20 Hz to 20 000 Hz Hi Fi audio Input Output 21 pin scart connectors IN OUT x 1 IN DECODER x 1 RCA connectors VIDEO IN x 1 AUDIO IN x 1 AUDIO OUT x 1 TUNER TIMER TV channel storage capacity 99 positions AUX position Tuning system Frequency synthesized tuner Channel coverage VHF 47 89...

Page 63: ...EN 63 MEMO ...

Page 64: ... 31 SVERIGE 46 GREECE 30 DANMARK 45 OTHERS ÖSTERREICH 43 Language Code ENGLISH 01 NEDERLANDS 06 DEUTSCH 02 SVENSKA 07 FRANCAIS 03 NORSK 08 ITALIANO 04 SUOMI 09 CASTELLANO 05 DANSK 10 Language Code Ex FRANCAIS is selected for BELGIUM International Telephone Country Code 3 Press OK remote Do NOT press any button on the video recorder or remote control until the display panel shows as follows If you ...

Reviews: