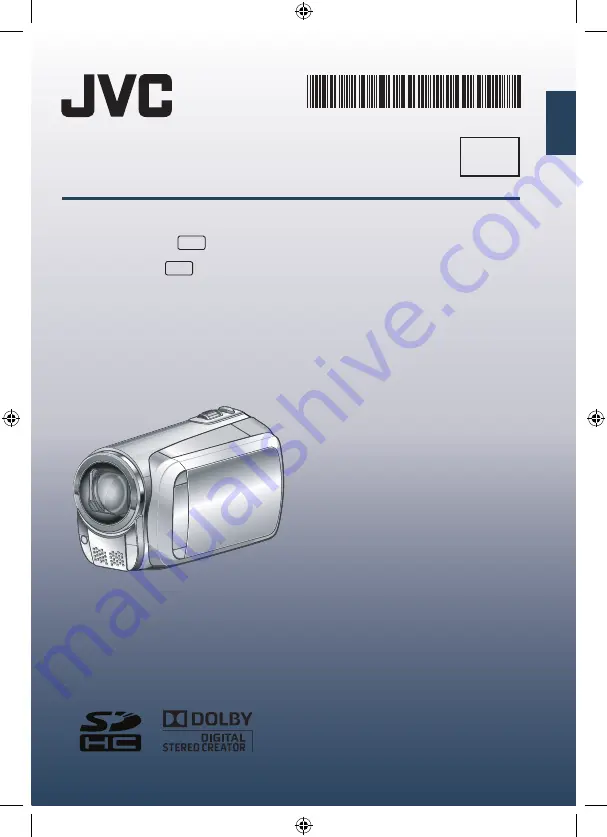
background image

ENGLISH

EN

CAMCORDER

Dear Customer

Thank you for purchasing this 

camcorder. Before use, please 

read the safety information and 

precautions contained in pages 2 

and 3 to ensure safe use of this 

product.

GUIDEBOOK

LYT2008-009B-M

GZ-MS120 

GZ-MS95 

EK

EK

GZ-MS120_95EK_GB_EN.indb   1

8/3/2009   12:14:33 PM

Summary of Contents for GZ-MS95 EK

Page 1: ...or purchasing this camcorder Before use please read the safety information and precautions contained in pages 2 and 3 to ensure safe use of this product GUIDEBOOK LYT2008 009B M GZ MS120 GZ MS95 EK EK GZ MS120_95EK_GB_EN indb 1 8 3 2009 12 14 33 PM ...

Page 2: ... into an AC outlet IMPORTANT for owners in the U K Connection to the mains supply in the United Kingdom DO NOT cut off the mains plug from this equipment If the plug fitted is not suitable for the power points in your home or the cable is too short to reach a power point then obtain an appropriate safety approved extension lead or consult your dealer BE SURE to replace the fuse only with an identi...

Page 3: ...nstallation operation or safety of your equipment DO be careful with glass panels or doors on equipment DON T continue to operate the equipment if you are in any doubt about it working normally or if it is damaged in any way switch off withdraw the mains plug and consult your dealer DON T remove any fixed cover as this may expose dangerous voltages DON T leave equipment switched on when it is unat...

Page 4: ...aranteed Do not remove the AC adapter the battery pack or the SD card when the lamp is blinking Insert the SD Card Slot B Slot A Firmly insert the card Press Power button to turn off the camcorder Grip Adjustment Do not pull the strap when you open the fasten Please pull the tab to open it Fasten the strap when you grip the camcorder When carrying the camcorder please be careful not to drop it Gri...

Page 5: ...econds Touch the sensors with your finger The sensors do not function if you touch them with your finger nail or with gloves on QUIT SET THE CITY DATE AND TIME CLOCK SETTING AREA SETTING SET FOR DAYLIGHT SAVING TIME CLOCK ADJUST Select the city closest to the area where you use the camcorder T AREA SETTING SET QUIT GMT 1 1 2009 01 00 Select ON or OFF U Select ON if daylight saving time is effectiv...

Page 6: ...mode Q 0 0 4 0 1 4 h 59 m REC The mode changes when you press the button Press the START STOP button to start recording and press it again to stop Start recording S Remaining space on the SD Card Record standby Video Quality Recording Select recording mode R REC The auto recording indicator appears GZ MS120_95EK_GB_EN indb 6 8 3 2009 12 14 39 PM ...

Page 7: ... K J L B Playback screen LTo perform operations such as forward search or reverse search Z p 24 LTo view files on TV Z p 31 Do not forget to make copies after recording To copy files onto DVD discs Z p 45 To dub files using a VCR DVD recorder Z p 50 To play back a created DVD disc Z p 44 To edit files on your computer Z p 45 CAUTION Select Touch OK S GZ MS120_95EK_GB_EN indb 7 8 3 2009 12 14 40 PM...

Page 8: ...anual Setting in Menu 28 USING WITH TV Viewing Files on TV 31 Connection with TV 31 Playback Operation 31 EDITING Managing Files 32 Capturing a Still Image from a Video 32 Deleting Files 32 Protecting Files 34 Viewing File Information 35 Changing the Event Registration 36 Trimming Files 37 Playlists 38 Creating Playlists 38 Playing Back Playlists 39 Other Operations of Playlists 39 COPYING Copying...

Page 9: ...LE ON SCREEN DISPLAY SET QUIT SWITCH DISPLAYED CONTENTS EDIT l Q R QSlide your finger up and down on the sensor RSelect SET Touch OK A B A To select an on screen button appearing on the left side touch the portion of the sensor next to the on screen button B To select an on screen button appearing at the bottom of the screen touch the buttons underneath them GZ MS120_95EK_GB_EN indb 9 8 3 2009 12 ...

Page 10: ...eries JVC cannot guarantee safety or performance of this product when it is operated by other batteries If the camcorder is subjected to electrostatic discharge turn off the power before using it again If a malfunction occurs stop using the camcorder immediately and consult your nearest JVC dealer If a problem occurs when using the SD card take the card together with the camcorder for repair If on...

Page 11: ...e AC Adapter Wind twice To be connected to the camcorder or AP V20M AP V14E AC Adapter Power Cord BN VF808U Battery Pack AV Cable USB Cable CD ROM Core Filter x2 Lens Cap Z 11 NOTE Make sure to use the provided cables for connections Do not use any other cables Attach the Lens Cap To protect the lens attach the provided lens cap to the camcorder as shown in the illustration Place here during recor...

Page 12: ...12 Index NOTE The LCD monitor can rotate 270 Be careful not to cover 4 5 and 6 during shooting GETTING STARTED DC D C DC B A GZ MS120_95EK_GB_EN indb 12 8 3 2009 12 14 44 PM ...

Page 13: ...ard Slot EXPORT Button Z p 51 AV Connector Z p 31 50 START STOP Button Z p 20 SNAPSHOT Button Z p 21 0 Zoom Lever W 7 T Z p 22 Speaker Volume Control VOL Z p 24 1 Speaker 2 DC Connector 3 USB Connector 2 Z p 41 46 4 Lens 5 LED Light Z p 22 6 Stereo Microphone 7 Grip Strap 8 Belt Strap 9 Fasten Stud Hole Tripod Mounting Socket Battery Release Button BATT Z p 16 GZ MS120_95EK_GB_EN indb 13 8 3 2009 ...

Page 14: ... Area Control Indicator Z p 30 2 Shutter Speed Z p 29 During Video Recording Only Mode Indicator Export Mode Indicator Z p 51 Counter Upload Mode Indicator Z p 53 Video Quality B ULTRA FINE C FINE D NORMAL E ECONOMY Z p 56 Remaining Time MREC Appears during recording MQ Appears during record standby mode Digital Image Stabilizer DIS Indicator Appears when DIS is set to OFF Z p 56 Auto Switch Rec M...

Page 15: ... p 56 Counter Playback Mode F Playback Q Pause K Forward Search J Reverse Search G Forward Slow Motion E Reverse Slow Motion The number on the left shows speed Battery Indicator Date Time Z p 16 Volume Level Indicator During Still Image Playback 16 55 1 11 2009 Mode Indicator Folder File Number Slide Show Playback Indicator Battery Indicator Date Time Z p 16 GZ MS120_95EK_GB_EN indb 15 8 3 2009 12...

Page 16: ... min BN VF815U 2 hr 40 min 5 hr 25 min BN VF823U 3 hr 40 min 8 hr 10 min LTo detach the battery pack NOTE You can also use the camcorder with just the AC adapter The actual recording time may shorten depending on the recording environment such as when recording scenes with fast moving Please do not pull or bend the AC adapter plug and cable This may damage the AC adapter Necessary Settings before ...

Page 17: ... 7 Select ON if daylight saving time is effective SET QUIT SET DAYLIGHT SAVING TIME 1 11 2009 16 55 SET FOR DAYLIGHT SAVING TIME DAYLIGHT SAVING TIME DST OFF 8 Set the date and time Select the item by using the touch sensor and select to set SAVE QUIT CLOCK SETTING GMT 0 00 DATE TIME 16 55 11 2009 1 9 Select SAVE To reset the setting select QUIT Setting the clock to local time when traveling After...

Page 18: ...der please be careful not to drop Tripod Mounting Align the camcorder stud hole with the tripod stud and the mounting socket with the screw and then rotate the camcorder clockwise to mount it to the tripod NOTE Do not use a tripod on unsteady or unlevel surfaces It could tip over causing serious damage to the camcorder Grip Strap Fasten Tab Bottom of the camcorder GZ MS120_95EK_GB_EN indb 18 8 3 2...

Page 19: ...its clipped edge first 3 Close the SD card cover LTo remove an SD card Push the SD card once After the card comes out a little pull it out NOTE Insert and remove the SD card only while the power is turned off Otherwise data on the card may be corrupted Do not touch the terminal on the reverse side of the label R Change the recording medium The camcorder is programmed to record on SLOT A when it is...

Page 20: ...selected when you turn the camcorder s power off and then on again If the camcorder is not operated for 5 minutes while the power is on it turns itself off automatically to conserve power To turn the camcorder on again when using the battery pack close the LCD monitor and open it again When using the AC adapter perform any operation such as zooming After recording video for 12 consecutive hours re...

Page 21: ...ing still image recording If the camcorder is not operated for 5 minutes while the power is on it turns itself off automatically to conserve power To turn on the camcorder again when using the battery pack close the LCD monitor and open it again When using the AC adapter perform any operation such as zooming LTo view the last recorded image Select A after shooting Selecting during playback deletes...

Page 22: ...elect LIGHT 3 Select the desired setting ON The LED light remains on regardless of the surrounding conditions AUTO The LED light turns on automatically when shooting in insufficient light conditions OFF Deactivates this function Checking the Remaining Battery Power Preparation Attach the battery pack Select the recording mode mode Press INFO three times or INFO and then select mode Press INFO INFO...

Page 23: ...rch by event See page 27 NOTE Once you select a certain event to register a file the setting will remain even if you turn off the camcorder Checking the Remaining Space on the Recording Media Preparation Select mode Select the recording mode Press the INFO button once Slot A or twice Slot B INFO DIRECT DVD MAX RECORDING TIME SLOT A FREE 14h27m 21h25m B C D E 28h27m 75h12m USED SET QUIT The maximum...

Page 24: ...number of thumbnails 6 thumbnails 20 thumbnails Move the zoom lever to W or T Slide the mode switch to select video mode LOperations during Video Playback On screen buttons N Return to the first scene of the file O Go to the first scene of the next file L Return to the index screen J Reverse search during playback E Frame by frame playback in reverse direction during pause F Playback Q Pause K For...

Page 25: ...n buttons P Change playback order of slide show in reverse direction F Change playback order of slide show in forward direction L Return to the index screen N Display the previous file F Start the slide show Q End the slide show O Display the next file LTo move to the previous or next page Touch or for over a second LTo delete a still image Select LTo change the number of thumbnails 6 thumbnails 2...

Page 26: ...creen Select QUIT NOTE The contents of the group may be changed depending on the interval of the recording time To change the contents register the event Z p 23 The created groups may not be listed by recording date such as when copying the files to an SD card Date Index Screen You can search the desired file by the recording date 1 Select In case of mode go to step 3 2 Select SEARCH DATE SET VIDE...

Page 27: ...l or may not run smoothly Event Screen You can search the desired file by the event that you registered the file to when recording Z p 23 After searching by the event you can search by the recording date to narrow down the search 1 Select 2 Select SEARCH EVENT SET VIDEO PLAYBACK 1 2 01 11 2009 16 45 GROUP SEARCH DATE SEARCH EVENT 3 Select the event SET QUIT SEARCH EVENT VACATION 1 4 Select the rec...

Page 28: ...setting when the LCD monitor is in the normal position Manual Setting in Menu In the manual recording mode 1 Touch MENU 2 Select MANUAL SETTING VIDEO LIGHT VIDEO QUALITY REGISTER EVENT SET QUIT USE DETAIL SETTINGS BASED M MANUAL SETTING n D C 1 3 Select the desired menu VIDEO SCENE SELECT SHUTTER SPEED FOCUS SET QUIT THE BRIGHTNESS OF THE ADJUST BRIGHTNESS 9 1 4 Select the desired setting SCENE SE...

Page 29: ...bject will not go out of focus if you adjust the focus at the telephoto T side before zooming to the wide angle W side g ADJUST BRIGHTNESS Adjusts the brightness mode AUTO The brightness is adjusted automatically 3 MANUAL 6 to 6 Corrects the brightness within this range in increments of 1 mode AUTO The brightness is adjusted automatically 3 MANUAL 2 0 to 2 0 EV Corrects the brightness within this ...

Page 30: ...t work well 6 WHOLE SCREEN Brightness is adjusted automatically for whole screen 7 SPOT Brightness for the specified spot is adjusted automatically w EFFECT Enables you to record videos or still images with special effects 1 OFF No effect is used J SEPIA The image has a brownish tint like old still images K MONOTONE The image becomes black and white like old movies L CLASSIC FILM This effect skips...

Page 31: ...ayback Operation After the connection with TV is completed 1 Turn on the camcorder and the TV 2 Set the TV to its VIDEO mode 3 Only when connecting the camcorder to the VCR DVD recorder Turn on the VCR DVD recorder and set the VCR DVD recorder to its AUX input mode 4 Start playback on the camcorder Z p 24 25 LTo display the camcorder s on screen display on TV Set DISPLAY ON TV to ON Z p 58 To AC O...

Page 32: ...he image can be elongated in the horizontal or vertical directions depending on the quality of the source video file The continuous shooting function cannot be used to capture images You cannot capture video during playback Deleting Files Protected files cannot be deleted To delete them release the protection first Once files are deleted they cannot be restored Check files before deleting Preparat...

Page 33: ...d Files After performing steps 1 2 Z p 32 3 Select FILE SELECT VIDEO DELETE FILE SELECT CURRENT SET QUIT SELECT AND DELETE SCENE DELETE ALL 4 Select the desired file and select CHECK EXEC VIDEO DELETE QUIT 1 2 The mark appears on the file To select other files repeat this step To check the content of the file select CHECK 5 Select EXEC 6 Select YES SET QUIT YES NO DELETE SELECTED SCENES VIDEO DELE...

Page 34: ...ECT CURRENT SET QUIT PROTECT EACH SCENE PROTECT ALL CANCEL ALL 5 Select YES SET QUIT YES NO PROTECT You can select the previous or next file by selecting or LTo quit the screen Select QUIT Protecting Selected Files After performing steps 1 3 4 Select FILE SELECT PROTECT CANCEL FILE SELECT CURRENT SET QUIT SELECT AND PROTECT SCENE PROTECT ALL CANCEL ALL 5 Select the desired file and select x CHECK ...

Page 35: ... and time of the recording PB TIME mode Playback time length of the file SIZE mode Image size QUALITY Video quality Image quality Z p 56 PROTECT File protection status Z p 34 LTo turn off the file information display Press INFO again Protecting All Files After performing steps 1 3 Z p 34 4 Select PROTECT ALL PROTECT CANCEL FILE SELECT CANCEL ALL CURRENT SET QUIT PROTECT ALL SCENES PROTECT ALL 5 Se...

Page 36: ...QUIT Changing the Event Registration Preparation Select mode Select the playback mode 1 Touch MENU 2 Select EDIT VIDEO EDIT PLAYLIST PLAYBACK MPG FILE EDIT SET QUIT CAN BE SET TO PREVENT COPY DUBBING PLAYBACK 3 Select CHANGE EVENT REG EDIT PLAYLIST PLAYBACK MPG FILE EDIT DUBBING PLAYBACK EDIT PLAYLIST PLAYBACK MPG FILE DUBBING PLAYBACK VIDEO SET QUIT SCENE SELECT FOCUS ADJUST BRIGHTNESS MOVE PROTE...

Page 37: ...ile SET TRIMMING QUIT 1 2 5 Select SET at the start point It is recommended to select SET after the pause button is pressed QUIT Q K J J SET TRIM FROM HERE E 0 12 05 S 6 Select SET at the end point It is recommended to select SET after the pause button is pressed QUIT Q K J J SET CANCEL TRIM UNTIL HERE E 0 08 05 0 12 05 S To cancel the start point setting select CANCEL 7 Select CAPTURE TRIMMED FIL...

Page 38: ...date CREATE BY GROUP Display all files listed by group CREATE BY EVENT Search for an event and display the corresponding files listed by recording date 5 Select the file to add to playlist FROM SCENE 01 11 2009 TOTAL 00h10m QUIT CHECK SELECT To preview scenes select the file and select CHECK 6 Select the insertion point FROM SCENE TOTAL 00h10m DVD1 QUIT CHECK SAVE SELECT 01 11 2009 To add other fi...

Page 39: ...index screen for playlist appears 2 Select the desired scene Other Operations of Playlists You can perform additional editing and delete files in a created playlist Adding Deleting Files in Playlist After performing steps 1 2 Z p 38 3 Select EDIT 4 Select the playlist you want to edit To add or delete files follow the steps 5 to 8 Z p 38 Deleting Playlist Original files are not deleted even if you...

Page 40: ... Slot A and Slot B of the SD cards Preparation Select or mode Select the playback mode Make sure that SD card is inserted in the SD slot Make sure that enough free space is left in the copy move destination medium 1 Touch MENU 2 Select EDIT VIDEO EDIT PLAYLIST PLAYBACK MPG FILE EDIT SET QUIT CAN BE SET TO PREVENT COPY DUBBING PLAYBACK 3 Select COPY or MOVE EDIT PLAYLIST PLAYBACK MPG FILE EDIT DUBB...

Page 41: ... USB Cable USB Jack DVD Burner 4 Select the direction SLOT A SLOT B or SLOT B SLOT A SET QUIT COPY VIDEO SELECT COPY DIRECTION SLOT B SLOT A SLOT A SLOT B 5 Select the desired menu SET QUIT SELECT AND COPY COPY ALL SELECT THE OBJECT TO BE COPIED COPY VIDEO COPY ALL MOVE ALL Select this to transfer all files in the recording medium When the size of all files in the SLOT A is larger than the free sp...

Page 42: ...plays the thumbnails by group NO Displays the thumbnails by date 5 Select EXECUTE The files are copied on the disc When COMPLETED appears touch OK When INSERT NEXT DISC PRESS STOP TO EXIT CREATE appears change the disc Remaining files are copied on the second disc To cancel copying select STOP Copying Video Files that Have Never Been Copied Files that have never been copied to the DVD discs are au...

Page 43: ... 1 Select the desired file To select other files repeat this process 2 Select SAVE 3 Select the desired disc number DVD CREATION LIST ALL TOTAL 3 DVD1 DVD2 DVD3 SET QUIT CHECK If you select ALL all discs in the list are created To preview scenes select CHECK mark shows that the disc is created already 4 Select YES or NO YES Displays the thumbnails by group NO Displays the thumbnails by date 5 Sele...

Page 44: ... burner CU VD50 CU VD3 1 Load the created DVD on the DVD player 2 On the TV select DIGEST PLAYBACK DIGEST PLAYBACK 1 2 01 11 2009 16 55 20 11 2009 14 03 01 11 2009 18 24 27 11 2009 04 52 05 11 2009 10 40 28 12 2009 01 15 You can view the previous or next page by selected The screen does not appear on the camcorder 3 The digest is played back continuously LTo normal playback To the index menu 1 Pre...

Page 45: ...512 MB LTo check the PC specification Right click on Computer or My Computer in the Start menu and select Properties NOTE Make sure your PC has a recordable DVD drive If your system does not meet the requirements it is recommended to copy files using the DVD burner Z p 41 Macintosh users may use the software included with their Macintosh iMovie 08 iPhoto to copy files to their computer Preparation...

Page 46: ...o MediaBrowser starts on the PC 3 Click All volume in camcorder and click Next 4 Click Start Backup starts LTo disconnect the camcorder from the PC 1 Right click the icon Safely Remove Hardware on the task bar and select Safely remove USB Mass Storage Device 2 Follow the on screen instructions and make sure that the device can be safely removed 3 Disconnect the USB cable and close the LCD monitor ...

Page 47: ...ist Preparation Make backup on the PC 1 Double click the icon and open the calendar 2 Select Movies only 3 Click 4 Input the name of the new user list and click OK 5 Double click the recording date The files recorded on the day are displayed 6 Drag the file and drop into the user list To add other files into the user list repeat steps 5 and 6 GZ MS120_95EK_GB_EN indb 47 8 3 2009 12 15 26 PM ...

Page 48: ...tep 4 3 Drag the file and drop into the part at the bottom and click Next 4 Input the disc name select the top menu style and click Next 5 Click Start NOTE For detail on operating Everio MediaBrowser click Help and refer to MediaBrowser Help Adobe Reader must be installed to read MediaBrowser Help Adobe Reader can be loaded from Adobe s web site http www adobe com For assistance in operating the p...

Page 49: ...C Worldwide Service Network at http www jvc victor co jp english worldmap index e html about this software please have the following information ready Product Name Model Problem Error Message PC Manufacturer Model Desktop Laptop CPU OS Memory MB Available Hard Disk Space GB Please note that it may take some time to respond to your questions depending on their subject matter JVC cannot answer quest...

Page 50: ... you want to start dubbing start recording on the VCR DVD recorder Refer to the VCR DVD recorder s instruction manual L To stop dubbing Stop recording on the VCR DVD recorder then press START STOP again L To hide the date or icons on the screen Change the settings in DISPLAY ON TV Z p 58 Dubbing Files to a VCR DVD Recorder Preparation Create a playlist Turn off all units LTo connect using the AV c...

Page 51: ...de Press EXPORT twice ON EXPORT TO LIBRARY MODE L To turn off the export mode Press EXPORT twice Changing the Export Setting You can set the recorded videos to the export setting Preparation Select mode Select the playback mode 1 Press EXPORT EXPORT 2 Select the file and select EXPORT SETTINGS LIB LIB LIB DONE CHECK 1 3 To check the content of the file select CHECK 3 Select DONE L To cancel the ex...

Page 52: ...XPORT TO LIBRARY SET QUIT EASY VIDEO REGISTRATION BACK UP All the files with the export setting turned on are transferred to PC LCannot export the file to iTunes Refer to Q A Latest Information Download Information etc in Click for Latest Product Info in the help of the provided Everio MediaBrowser software Using with a Portable Media Player Continued GZ MS120_95EK_GB_EN indb 52 8 3 2009 12 15 30 ...

Page 53: ...ach time recording is finished Upload Trimming You can select the necessary part of the video and save it as a new video file ready for uploading Preparation Select mode Select the playback mode 1 Touch MENU 2 Select UPLOAD SETTINGS VIDEO UPLOAD SETTINGS SEARCH DELETE SET QUIT SELECT SCENE FOR UPLOADING PLAYBACK PLAYLIST v 3 Select the desired file UPLOAD SETTINGS SET QUIT 1 2 4 Select SET at the ...

Page 54: ... guide of MediaBrowser in the CD ROM 1 Connect the camcorder to the PC with the USB cable 2 Select UPLOAD USB MENU CREATE DVD UPLOAD EXPORT TO LIBRARY SET QUIT EASY UPLOAD TO VIDEO PLAYBACK ON PC L Cannot upload the file to YouTube You need your YouTube account to upload files to YouTube Create your account Refer to Q A Latest Information Download Information etc in Click for Latest Product Info i...

Page 55: ...ER Starts recording when the set time elapses after the SNAPSHOT button is pressed OFF 2SEC 10SEC NOTE You can confirm the countdown on the camcorder screen It is recommended to attach the camcorder to a tripod and use this function to prevent the vibration after SNAPSHOT is pressed 8 SHUTTER MODE Records still images continuously while SNAPSHOT button is pressed RECORD ONE SHOT Records one still ...

Page 56: ... brightens the scene when it is dark Becomes brighter than AGC The motion of a subject may look unnatural if recorded in some condition mode OFF Deactivates the function AGC Electrically brightens the scene in dark place SELECT ASPECT RATIO Selects the aspect ratio for videos 16 9 Records videos in 16 9 size 4 3 Records videos in 4 3 size NOTE If the VIDEO QUALITY is set to ECONOMY you cannot reco...

Page 57: ...ss will automatically be set to BRIGHTER when using outdoors and to STANDARD when using indoors when using the battery pack Y BASIC SETTINGS Select BASIC SETTINGS then select sub menus DEMO MODE Introduces special features of the camcorder when there is no operation for about 3 minutes during recording mode OFF Deactivates the function ON Activates the function NOTE The demonstration only works wh...

Page 58: ...their default values YES Performs this function NO Returns to the menu screen without executing reset CONNECTION SETTINGS Select CONNECTION SETTINGS then select sub menus DISPLAY ON TV Displays camcorder s on screen display on a TV screen OFF Does not display on TV ON Displays on TV VIDEO OUTPUT Sets the aspect 16 9 4 3 to the screen of the connected television when outputting videos from the AV c...

Page 59: ... fewer pixels may be ineffective Trouble Action Power No power is supplied Connect the AC adapter correctly Recharge the battery pack After the low temperature message is displayed the power turns off when the camcorder warms up When the camcorder has warmed up after being cold the camcorder may switch itself off to check it is operating correctly Turn on the camcorder again to start using it Disp...

Page 60: ...djusted automatically Wipe the lens with lens cleaning cloth If you are recording in a dark place or a subject that has no contrast between dark and light adjust the focus manually The color looks strange Too bluish too reddish etc Set WB in MANUAL SETTING appropriately to the light source Select MWB in WB while holding a sheet of plain white paper in front of the camcorder so that the white paper...

Page 61: ... can be played back Cancel group display and date search functions Change the setting in VIDEO SLOT SELECTION or IMAGE SLOT SELECTION Files on other media are not displayed Slide the mode switch to select the desired mode or Some functions cannot be used when playing back a backup DVD through a DVD burner connected to the camcorder The following functions cannot be used for a backup DVD When playi...

Page 62: ...re range If the battery pack is being recharged outside the permitted temperature range recharging may stop to protect the battery pack Cannot upload the file to YouTube You need your YouTube account to upload files to YouTube Create your account Refer to Q A Latest Information Download Information etc in Click for Latest Product Info in the help of the provided Everio MediaBrowser software Cannot...

Page 63: ... ERROR Turn off the camcorder and turn it on again Remove and re insert the SD card MultiMediaCard cannot be used Remove any dirt from the SD card terminals Insert the SD card before switching the power on If the problem persists backup all data and then perform formatting All data is deleted CANNOT TAKE MORE STILL IMAGES AT THE MOMENT Stop video recording and then record a still image If an SD ca...

Page 64: ...stination with another disc Move the files or folder to a PC or other device and then format the SD card Select FILE MANAGEMENT NO in FORMAT SD CARD UPPER LIMIT OF RECORDABLE NUMBER OF FOLDERS FILES HAS BEEN REACHED SCENE QUANTITY LIMIT EXCEEDED PLAYLIST QUANTITY EXCEEDS LIMIT When creating a DVD reduce the number of playlists to be saved Reduce the number of the playlist to 99 files or less NO RE...

Page 65: ...Be careful not to damage the LCD monitor LTo clean the lens Wipe the lens gently with lens cleaning cloth NOTE Avoid using strong cleaning agents such as benzine or alcohol Mold may form if the lens is left dirty When using a cleaner or chemically treated cloth refer to the cautions for each product Indication Action DVD RW DISC HAS BEEN ALREADY USED Replace the disc of the DVD burner with another...

Page 66: ...ithin 1 5 m recommended shooting distance LConnectors AV output Video output 1 0 V p p 75 Ω Audio output 300 mV rms 1 kΩ USB Mini USB type B USB 2 0 compliant Mini USB type A and type B USB 2 0 compliant LAC adapter Power requirement AC 110 V to 240 Vd 50 Hz 60 Hz Output DC 11 V 1 A LStill image Format JPEG Image size 1 mode 832 x 624 Image quality 2 modes FINE STANDARD LVideo Signal format PAL st...

Page 67: ...INE 970 1950 3950 7590 9999 9999 9999 9999 832 x 624 STANDARD 1450 2920 5930 9999 9999 9999 9999 9999 640 x 480 FINE 1450 2920 5930 9999 9999 9999 9999 9999 640 x 480 STANDARD 2080 4180 8480 9999 9999 9999 9999 9999 16 9 640 x 360 FINE 1820 3660 7420 9999 9999 9999 9999 9999 640 x 360 STANDARD 2420 4880 9890 9999 9999 9999 9999 9999 The recordable time and the number of still images are approximat...

Page 68: ...ge and then fully discharge the battery every 6 months when storing the battery pack over a long period time remove from charger or powered unit when not in use as some machines use current even when switched off Recording Medium SD Card Be sure to follow the guidelines below to prevent corruption or damage to your recorded data Do not bend or drop the recording medium or subject it to strong pres...

Page 69: ...r in high places such as on a TV Leaving the unit in high places while a cable is connected may result in a malfunction if the cable is caught and the unit falls onto the floor place the camcorder in dusty or sandy areas such as on a beach To protect the unit DO NOT allow it to become wet drop the unit or strike it against hard objects subject it to shock or excessive vibration during transportati...

Page 70: ...cence to use the Program and may not distribute rent lease or transfer the Program to any third party or otherwise let them use the Program 4 LIMITED WARRANTY JVC warrants that any media in which the Program is embodied are free from any defects in materials and workmanship for a period of thirty 30 days from the date of Your purchasing any our products accompanying the Program JVC s entire liabil...

Page 71: ...tative of JVC 2 If any part of this Agreement is held invalid by or in conflict with any law having jurisdiction over this Agreement the remaining provisions will remain in full force and effect 3 This Agreement shall be governed by and interpreted under the laws of Japan The Tokyo District Court has jurisdiction over all disputes which may arise with respect to the execution interpretation and pe...

Page 72: ... Up 56 I Image Quality 56 iTunes 52 L Language Setting 17 LCD Monitor 14 68 LED Light 22 M Manual Recording 28 Menu Settings 55 Monitor Backlight 57 Monitor Bright 57 N Number of Images 67 O On screen Recording Control 20 On screen Zoom Control 22 Operation Sound 57 P Photometry Area 30 Playlists 38 Portable Media Player 51 Protecting Files 34 Q Quick Restart 58 Quick Review 20 21 R Recordable Tim...

Reviews: