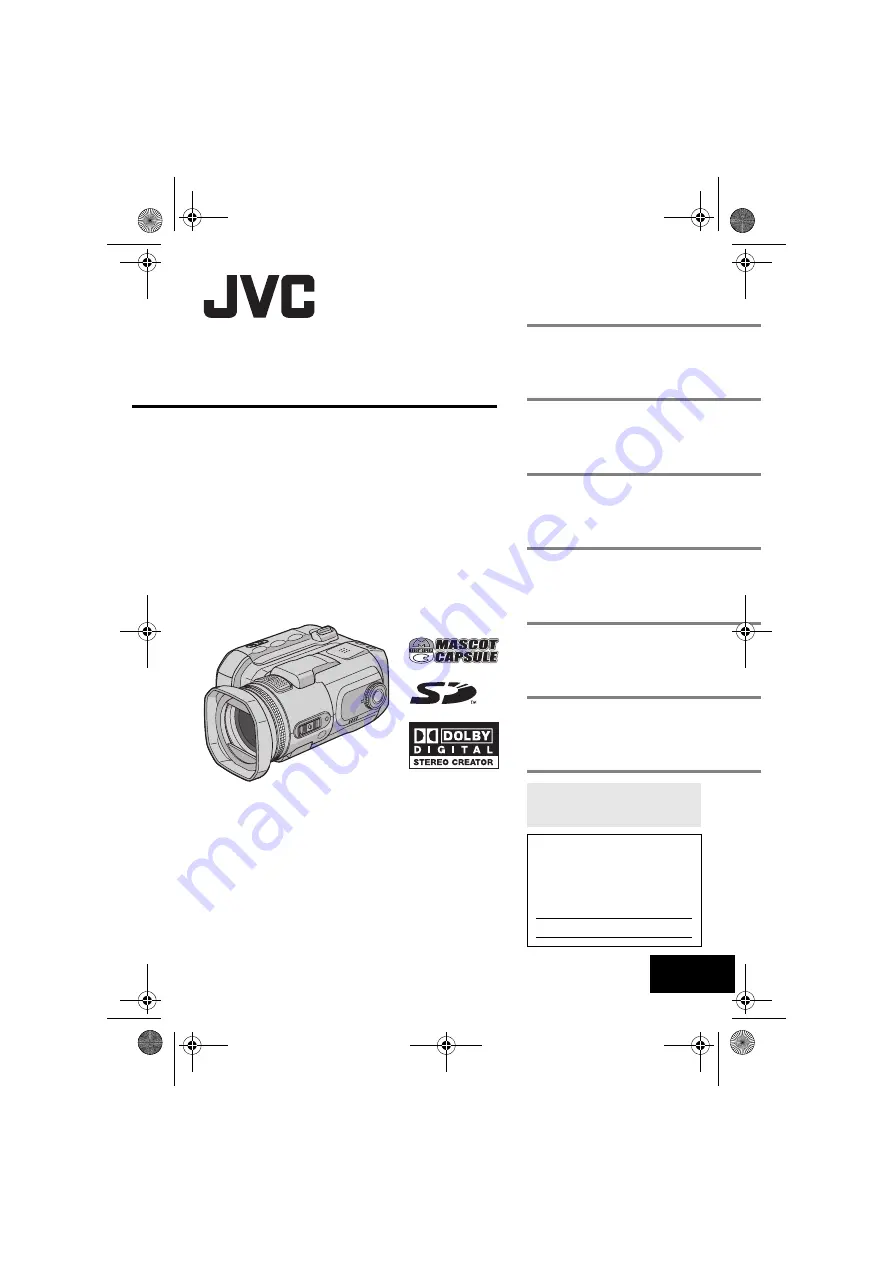
background image

MasterPage: Cover

GZ-MC500U

LYT1423-001A

EN

ENGLISH

DIGITAL MEDIA CAMERA

GETTING STARTED

7

VIDEO RECORDING & 
PLAYBACK

20

MENU SETTINGS

48

52

To deactivate the demonstration, 
set “DEMO MODE” to “OFF”. 
(

pg. 48) 

For Customer Use: 

Enter below the Model No. and 
Serial No. which is located on the 
bottom of the camera. Retain this 
information for future reference. 

Model No.

Serial No.

REFERENCES

INSTRUCTIONS

STILL IMAGE RECORDING 
& PLAYBACK

25

VOICE RECORDING & 
PLAYBACK

29

ADVANCED OPERATIONS

31

GZ-MC500US.book  Page 1  Wednesday, April 13, 2005  7:08 PM

Summary of Contents for GZ-MC500U

Page 1: ...ration set DEMO MODE to OFF 墌 pg 48 For Customer Use Enter below the Model No and Serial No which is located on the bottom of the camera Retain this information for future reference Model No Serial No REFERENCES INSTRUCTIONS STILL IMAGE RECORDING PLAYBACK 25 VOICE RECORDING PLAYBACK 29 ADVANCED OPERATIONS 31 GZ MC500US book Page 1 Wednesday April 13 2005 7 08 PM ...

Page 2: ... range of other functions that you can select according to the scene you are shooting 墌 pg 31 36 Enjoying Various Playback Features Unlike tape operation playback is simple and easy in this camera since no time is needed for rewinding or fast forward operations Playlist playback effects and other functions are also available for enjoying many different types of playback Editing Files on your PC US...

Page 3: ...perations 30 ADVANCED OPERATIONS 31 RECORDING FEATURES 31 Backlight Compensation 31 Spot Exposure Control 31 Program AE 31 Bracket Shooting 33 Manual Focus 33 Manual Settings in MSET Menu 34 How to Select a Menu Item 34 Manual Exposure 35 White Balance 35 Effect 36 PLAYBACK FEATURES 37 Wipe or Fader Effects 37 Playback Effects 37 MANAGING FILES 38 Viewing File Information 38 Protecting Files 39 De...

Page 4: ...he appliance This product has a fluorescent lamp that contains a small amount of mercury Disposal of these materials may be regulated in your community due to environmental considerations For disposal or recycling information please contact your local authorities or the Electronics Industries Alliance http www eiae org When the equipment is installed in a cabinet or on a shelf make sure that it ha...

Page 5: ... that this camera is not compatible with other digital video formats Remember that this camera is intended for private consumer use only Any commercial use without proper permission is prohibited Even if you record an event such as a show performance or exhibition for personal enjoyment it is strongly recommended that you obtain permission beforehand Before recording important video be sure to mak...

Page 6: ...Do not bring the recording medium near objects that have a strong magnetic field or that emit strong electromagnetic waves Since data must be read and written by the drive correctly the camera may be unable to shoot when the camera heats up such as during continuous shooting or when the camera is cooled down during usage in a cold location To fix this problem follow the messages displayed on the s...

Page 7: ...les See page 9 for attachment Large x 1 S Video Audio Video Cable Medium x 1 USB Cable Small x 2 Audio Extension Cable and AC Adapter s Cord l Lens Hood Already attached to the camera 墌 pg 8 NOTES In order to maintain optimum performance of the camera provided cables may be equipped with one or more core filter If a cable has only one core filter the end that is closest to the filter should be con...

Page 8: ... step 1 Put your hand through the strap then secure the strap to your wrist so that the camera cannot be dropped Attaching Detaching the Lens Hood The provided lens hood helps block out glare when shooting under bright sunlight the same way professional photographers do To attach Align the lens hood with the camera s lens and then turn the hood clockwise a To detach Turn the hood counterclockwise ...

Page 9: ...stration Wind the cable so that it is not slack 3 Close the core filter until it clicks shut NOTES Take care not to damage the cable When connecting a cable attach the end with the core filter to the camera How to Use the Audio Extension Cable When using optional headphones connect to the provided audio extension cable with a core filter attached then connect the audio extension cable to the camer...

Page 10: ...N MasterPage Heading0_Left GETTING STARTED Index ATTENTION Be careful not to cover X d and e during shooting Be careful not to cover Y during playback GZ MC500US book Page 10 Wednesday April 13 2005 7 08 PM ...

Page 11: ...墌 pg 38 m Menu Button MENU 墌 pg 48 n Flash Open Switch FLASH OPEN 墌 pg 26 o Manual Focus Ring 墌 pg 33 p Lens Hood 墌 pg 8 Connectors The connectors are located beneath the covers Q USB Universal Serial Bus Connector Refer to the software installation and USB connection guide R Headphone Connector 墌 pg 9 S S Video Audio Video Output Connector AV 墌 pg 24 T DC Input Connector DC 墌 pg 14 Indicators U P...

Page 12: ... Indicator 墌 pg 50 c Wind Cut Indicator 墌 pg 50 d Picture Quality U ultra fine F fine N normal E economy 墌 pg 50 e Remaining Time 墌 pg 20 62 f Counter 墌 pg 49 g 7REC Appears during recording 墌 pg 20 79 Appears during record standby mode 墌 pg 20 h Digital Image Stabilizer DIS Indicator 墌 pg 50 During Still Image Recording only a Mode Indicator 墌 pg 16 b ISO sensitivity GAIN 墌 pg 51 When set to AUTO...

Page 13: ... The number on the left shows speed e Counter 墌 pg 49 f Volume Level Indicator g Battery Indicator 墌 pg 54 h Date 墌 pg 49 i Selected Medium Indicator 墌 pg 19 49 j Effect Mode Indicator 墌 pg 36 k Wipe Fader Effect Indicator 墌 pg 37 50 During Still Image Playback a Mode Indicator 墌 pg 16 b Folder File Number c Slide Show Playback Indicator 墌 pg 27 d Battery Indicator 墌 pg 54 e Date Time 墌 pg 49 f Se...

Page 14: ...til it locks 5 Connect the AC adapter to the camera 6 Plug the AC adapter into an AC outlet The power charge lamp on the camera blinks to indicate charging has started 7 When the power charge lamp goes out charging is finished Unplug the AC adapter from the AC outlet Disconnect the AC adapter from the camera To detach the battery pack Open the battery CF card cover and remove the battery pack whil...

Page 15: ...Charging the Battery Pack Maximum continuous recording time NOTES Recording time is reduced significantly under the following conditions Zoom or record standby mode is engaged repeatedly Playback mode is engaged repeatedly Before extended use it is recommended that you prepare enough battery packs to cover 3 times the planned recording time Using AC Power Connect the AC adapter to the camera NOTE ...

Page 16: ...osition to switch the auto manual recording mode The indicator or appears on the LCD monitor 墌 pg 12 The language on the display can be changed 墌 pg 48 49 1 Set the power switch to or 2 Press MENU The menu screen appears 3 Select DISPLAY with the multi controller r t then press 49 4 Select LANGUAGE with the multi controller r t then press 49 5 Select the desired language with the multi controller ...

Page 17: ...the camera Note that the camera can be used without setting the date time You can use a CF card CompactFlash card as a recording medium in the CF slot The removable hard disk provided or Microdrive is a type of CF cards See page 62 for the guaranteed media to work with this camera 1 Make sure the camera s power is off 2 Slide and hold OPEN in the direction of the arrow a then open the battery CF c...

Page 18: ...ot See page 62 for the guaranteed media to work with this camera 1 Make sure the camera s power is off 2 Open the SD card cover 3 To insert an SD card firmly insert it with its clipped edge first To remove an SD card push it once After the SD card comes out of the camera pull it out Do not touch the terminal on the reverse side of the label 4 Close the SD card cover To protect valuable files Slide...

Page 19: ... sure to use the provided AC adapter as the recording medium may be corrupted if the battery becomes exhausted during format If the recording medium becomes corrupted format it again NOTE Do not format the recording medium on the PC Make sure to format the recording medium on the camera Select the recording medium before starting recording or playback 墌 pg 48 49 Example When recording still images...

Page 20: ...r turns off To cancel the sleep mode perform any operation such as zooming When the camera heats up the 7REC indicator flashes If the camera continues to heat up shooting may be stopped to protect the recording medium In this case turn off the camera power and then wait until the camera cools down 墌 pg 55 When shooting continuously shooting is automatically stopped when a file size of 4 GB is reac...

Page 21: ...g 33 then zoom in or out during recording During digital zoom the quality of image may suffer Macro shooting is possible as close as approx 5 cm 2 to the subject when the zoom lever is set all the way to W When you zoom into a subject close to the lens the camera may automatically zoom out depending on the distance to the subject In this case set TELE MACRO to ON 墌 pg 50 Angle Adjustment Tilt the ...

Page 22: ...n the LCD monitor or on a connected TV 墌 pg 24 At the junctions between scenes the image may stop momentarily or the sound may be interrupted However this is not a malfunction To join scenes without distortion load the video files into the PC and use the provided software to combine the files When the combined file is used to record a DVD it will have the same joints without distortion between sce...

Page 23: ...k is paused move the multi controller to e or w Moving the multi controller to w or e repeatedly advances or reverses the still picture frame by frame To resume normal playback press 49 Slow motion playback While playback is paused move and hold the multi controller to e or w for over 2 seconds To stop slow motion playback press 49 Playback Zoom You can magnify the playback image up to 5x 1 During...

Page 24: ... the camera to a TV or VCR as shown in the illustration If using a VCR go to step 3 If not go to step 4 3 Connect the VCR output to the TV input referring to your VCR s instruction manual 4 Turn on the camera the VCR and the TV 5 Set the VCR to its AUX input mode and set the TV to its VIDEO mode 6 Start playback on the camera 墌 pg 22 To choose whether or not the following displays appear on the co...

Page 25: ...To turn the shutter sound off see page 48 For approximate number of storable images see page 63 Zooming Use the zoom function for close up or wide angle shooting You can zoom in up to 8x by using the optical zoom To zoom in Slide the zoom lever towards T telephoto To zoom out Slide the zoom lever towards W wide angle The further you slide the zoom lever the quicker the zoom action NOTES Zooming is...

Page 26: ...ash pops up The flash icon appears 4 Select the desired flash mode with the multi controller w AUTO The flash fires automatically when the surroundings are dark AUTO RED EYE The flash fires automatically but reduces the red eye phenomenon of the subject s eyes ON The flash fires regardless of the shooting condition SLOW SYNCHRO The flash fires regardless of the shooting condition The shutter speed...

Page 27: ...tch to 2 Press MODE to select A still image is displayed To switch the medium to be played back see pages 19 48 and 49 3 Press 49 to start the slide show If you move the multi controller to t during the slide show files are displayed in descending order If you move the multi controller to r during the slide show files are displayed in ascending order To end the slide show press 49 again Index Scre...

Page 28: ...0 270 0 4 Move the multi controller to r to rotate 90 counterclockwise Each time you move the multi controller to r the image rotates counterclockwise 270 180 90 0 Playback Zoom You can magnify the playback image up to 5x 1 Set the power switch to 2 Press MODE to select A still image is displayed To switch the medium to be played back see pages 19 48 and 49 3 Slide the zoom lever towards T to zoom...

Page 29: ...ation on LCD Monitor a Remaining Time 墌 pg 63 b Selected Medium Indicator 墌 pg 19 49 c Sound Quality 48 fine 16 standard 8 economy 墌 pg 51 d Recording Level high middle low 墌 pg 51 e Wind Cut Indicator 墌 pg 50 f Counter g Battery Indicator 墌 pg 54 h Date Time i Microphone Input Level Indicator j Recording Mode 7 Record Record standby Deleting Files If you press during recording mode the file recor...

Page 30: ...the multi controller to t repeatedly skips files in forward direction Move the multi controller to r to locate the start point of the current file Moving the multi controller to r repeatedly skips files in reverse direction If the multi controller is moved to t or r during normal playback or search playback resumes after locating the start point of a file Indication on LCD Monitor a Playback Speed...

Page 31: ...ss and hold 49 for over 2 seconds The indicator appears To cancel spot exposure control Move the multi controller to r once so that the indicator disappears NOTES Spot exposure control may not be possible when some other functions are activated Depending on the shooting location and condition optimum result may not be attained You can use the program AE settings for specific shooting situations 1 ...

Page 32: ...et the power switch to 2 Set the recording mode dial to The shutter speed is displayed 3 Select the desired shutter speed with the multi controller w e You can select the shutter speed from the followings If you cannot change the value press 49 The shutter speed is set to 1 125 during the still image recording Not available for still image recording If the flash is used 1 500 is also not available...

Page 33: ...e multi controller to e so that the indicator disappears The camera s Full Range AF system offers continuous focusing ability from close up to infinity However the correct focus may not be obtained depending on the shooting condition In this case use the manual focus mode 1 Set the power switch to 2 Set the recording mode dial to other than so that is displayed 3 Press FOCUS The manual focus adjus...

Page 34: ...r blinking and You can use manual recording functions easily by selecting items in the MSET menus How to Select a Menu Item 1 Set the power switch to 2 Set the recording mode dial to other than so that is displayed 3 Move the multi controller to t The menu screen appears 4 Select a desired item from the MSET menu with the multi controller w e then press 49 There are 3 items in the MSET menu AE Man...

Page 35: ...tor appears NOTES You cannot use the manual exposure at the same time when the program AE function is set to Snow 墌 pg 31 or with backlight compensation 墌 pg 31 If the adjustment does not cause any visible change in brightness set GAIN UP to ON 墌 pg 50 White Balance The white balance is usually adjusted automatically for correctness of the color reproduction under various lighting However you can ...

Page 36: ...white balance settings Use this function for a more natural result Once you adjust white balance manually the setting is retained even if the power is turned off or the battery is removed Effect You can add special effects to your recording images 1 Select EF in the MSET menu 墌 pg 34 2 Select the desired mode with the multi controller r t SEPIA The image has a brownish tint like old photos MONOTON...

Page 37: ...right to cover the scene WIPE SCROLL The scene wipes in from the bottom to the top of a black screen or wipes out from top to bottom leaving a black screen WIPE SHUTTER Wipe in from the center of a black screen toward the top and bottom or wipe out from the top and bottom toward the center leaving a black screen 6 Press 49 The setting is completed 7 Press MENU to close the menu screen The selected...

Page 38: ...ile QUALITY Sound quality 墌 pg 51 PROTECT File protection status 墌 pg 39 If you press INFO in the playback list 墌 pg 30 information on the selected file is displayed To turn off the file information display Press INFO repeatedly Histogram for Still Image Files A histogram is a graph indicating the image s brightness The horizontal axis indicates the brightness level darker on the left and brighter...

Page 39: ...at step 6 The scroll bar can also be used with the zoom lever and the multi controller r t 墌 pg 22 27 30 If you slide the zoom lever towards T the preview screen is displayed Sliding the zoom lever towards W returns to the index screen 7 Press MENU 8 Select QUIT with the multi controller r t then press 49 The selected files are protected To release protection select the protected file in step 6 To...

Page 40: ...ing multiple files 5 Select FILE SELECT with the multi controller r t then press 49 The index screen video or still image or playback list voice appears 6 Select the file you want to delete with the multi controller r t w e then press 49 To select other files repeat step 6 The scroll bar can also be used with the zoom lever and the multi controller r t 墌 pg 22 27 30 If you slide the zoom lever tow...

Page 41: ...le until cleanup is completed CAUTION Do not remove the recording medium or perform any other operation such as turning off the power during cleanup You can copy or move still image files between recording media in CF and SD slots using the on screen display Before proceeding to following steps Make sure that recording media are inserted in both CF and SD slots Make sure that enough free space is ...

Page 42: ... t then press 49 If you want to cancel select CANCEL then press 49 9 File transfer starts To stop the file transfer press 49 then select EXECUTE and press 49 10 When COPYING MOVING COMPLETED appears press 49 to finish the operation By resetting the file number name a new folder will be made The new files you are going to make will be stored in the new folder It is convenient to separate the new fi...

Page 43: ...en press 49 To return to the edit screen select CANCEL If you do not want to save the play list select DELETE AND QUIT To check the play list by playing back the video You can check the play list before saving it 1 After step 10 select a thumbnail image of the play list with the multi controller e 2 Select a scene you want to check with the multi controller r t 3 Press 49 The playback of the play ...

Page 44: ...appears 4 Select PLAY LIST with the multi controller r t then press 49 5 Select EDIT with the multi controller r t then press 49 6 Select the play list you want to edit with the multi controller r t then press 49 To add or delete files follow the steps 7 to 12 in Creating Play List 墌 pg 43 or 1 to 2 in To delete the added file from the play list 墌 pg 43 Changing Play List Name The default name of ...

Page 45: ...UXILIARY input and engage the recording standby mode For details how to set VIDEO AUXILARY input refer to VCR instructions 3 Set the power switch to 4 Press MODE to select 5 Press MENU The menu screen appears 6 Select PLAY LIST with the multi controller r t then press 49 7 Select PLAY LIST CONTENTS with the multi controller r t then press 49 The table of play lists appears 8 Select a list you want...

Page 46: ...7 8 Press MENU to finish the setting To cancel the selection select the same image in step 6 NOTE The DPOF setting is available up to 999 images To print all still images One print for each 1 Display the DPOF menu screen 墌 To print by selecting a still image 2 Select ALL 1 with the multi controller r t then press 49 3 Select EXECUTE with the multi controller r t then press 49 4 Press MENU to finis...

Page 47: ...n press 49 The image is printed To cancel print setting Select CANCEL with the multi controller r t then press 49 To stop printing after printing starts 1 Press 49 The confirmation screen appears 2 Select EXECUTE with the multi controller r t then press 49 To print using the DPOF setting If the printer is compatible with DPOF you can use the DPOF setting 墌 pg 46 1 Set the power switch to 2 Press M...

Page 48: ...XECUTE Resets all settings to the factory preset CANCEL Returns to menu screen without executing reset OFF Disables the function ON Activates demonstration mode and shows various features on the display Demonstration starts in the following cases When the menu screen is closed after DEMO MODE is set to ON With DEMO MODE set to ON if there is no operation for about 3 minutes after the power switch ...

Page 49: ...ime for approx 5 seconds in the following cases When the power switch is set from OFF to When playback starts When the date is changed during playback ON The date time is always displayed NOTES The date time is always displayed for voice mode and the only date is displayed for the video playback You can set to different setting for each mode video recording playback and still image recording playb...

Page 50: ... if hand shake is excessive or depending on the shooting condition In this case the indicator blinks or goes out Switch off this mode when recording with the camera on the tripod CAMERA SETTING 10X Only optical zoom is available up to 10X 40X Digital zoom is available up to 40X 200X Digital zoom is available up to 200X NOTE Zooming is possible up to 8X regardless of the ZOOM setting in the still i...

Page 51: ...ictBridge Printer 墌 pg 47 墌 Playback Effects 墌 pg 37 The menu items of PROTECT and DELETE are the same as in the description on page 50 Factory preset Select the desired sound quality HIGH MIDDLE LOW Select the desired voice recording level The menu item of WIND CUT is the same as in the description on page 50 Factory preset Select the desired voice playback speed NORMAL Normal speed FASTPLAY Play...

Page 52: ...ack Playback cannot be performed Recording medium is not selected properly HSelect the recording medium 墌 pg 19 48 49 The battery CF card cover is open HClose the cover Playback starts but there is no picture on the connected TV HSet the TV s input mode or channel appropriate for video playback The same image is displayed for a long time during video playback or motion is choppy There are periods ...

Page 53: ...UP to OFF 墌 pg 50 The continuous shooting speed of still images is slow The continuous shooting speed will drop when repeatedly making continuous shots when using certain recording medium or under certain recording conditions 墌 pg 26 Other problems The power charge lamp on the camera does not light during charging Charging is difficult in places subject to extremely high low temperatures HTo prote...

Page 54: ...een Battery indicator Displays the battery remaining power Remaining power level As the battery power comes close to nil the battery indicator blinks When the battery power is exhausted power turns off automatically SET DATE TIME Appears when the date time is not set 墌 pg 17 Appears when the built in clock lithium battery is discharged and the previously set date time is erased 墌 pg 17 LENS CAP Ap...

Page 55: ...EN TO RECORD PLAYBACK VIDEO RECOVERY IS REQUIRED The video management file is broken Recovery is required to record or play back video files Select YES with the multi controller r t then press 49 to recover the video management file If the desired video file is not displayed on the video index screen in spite of the file recovery the file is moved to the EXTMOV folder Press the recording start sto...

Page 56: ...The recording medium cannot be played back correctly Try playback again CANNOT USE IN VIDEO MODE The operation is not available in the video mode Before cleaning turn off the camera and remove the battery pack and AC adapter To clean the exterior Wipe gently with a soft cloth Put the cloth in diluted mild soap and wring it well to wipe off heavy dirt Then wipe again with a dry cloth To clean the L...

Page 57: ...ire use only specified chargers To prevent damage and prolong service life do not subject to unnecessary shock charge in an environment where temperatures are within the tolerances shown in the chart below This is a chemical reaction type battery cooler temperatures impede chemical reaction while warmer temperatures can prevent complete charging store in a cool dry place Extended exposure to high ...

Page 58: ...nctions While using the camera the surface around the LCD monitor may heat up If you leave power on for a long time the surface around the LCD monitor becomes hot Main Unit For safety DO NOT open the camera s chassis disassemble or modify the unit short circuit the terminals of the battery pack Keep it away from metallic objects when not in use allow inflammables water or metallic objects to enter...

Page 59: ...ith Part 15 of FCC Rules Operation is subject to the following two conditions 1 This device may not cause harmful interference and 2 this device must accept any interference received including interference that may cause undesired operation Changes or modifications not approved by JVC could void the user s authority to operate the equipment This equipment has been tested and found to comply with t...

Page 60: ... 32 mm 8 1 power zoom lens Filter diameter ø37 mm Detach the lens hood when using an optional conversion lens or lens filter 墌 pg 8 LCD monitor 1 8 diagonally measured LCD panel TFT active matrix system Speaker Monaural Flash Within 2 m 6 5 ft recommended shooting distance Format SD VIDEO Recording Playback format Video MPEG 2 Audio Dolby Digital 2 ch Signal format NTSC standard Recording mode vid...

Page 61: ...1 0 V p p 75 Ω analog C 0 29 V p p 75 Ω analog Video output 1 0 V p p 75 Ω analog Audio output 300 mV rms 1 kΩ analog stereo Headphone output ø2 5 mm stereo USB Mini USB B type USB 1 1 2 0 compliant AC Adapter Power requirement AC 110 V to 240 Vd 50 Hz 60 Hz Output DC 11 V 1 A Design and specifications subject to change without notice For voice For connectors GZ MC500US book Page 61 Wednesday Apri...

Page 62: ...CompactFlash cards By LEXAR SanDisk and Hagiwara Sys Com SD memory cards By Panasonic TOSHIBA pqi still image only and SanDisk If other media are used they may fail to record data correctly or they may lose data that has already been recorded Microdrive of 1 GB or less are not supported MultiMediaCards are not supported For video recording use a removable hard disk high speed CompactFlash card at ...

Page 63: ...x 480 FINE 780 1555 3140 6040 640 x 480 STANDARD 1115 2225 4490 8635 1280 x 960 FINE 210 420 845 1630 1280 x 960 STANDARD 350 705 1425 2745 1600 x 1200 FINE 140 280 570 1095 1600 x 1200 STANDARD 225 455 920 1775 2048 x 1536 FINE 85 170 350 675 2048 x 1536 STANDARD 135 270 550 1055 2560 x 1920 FINE 55 110 225 435 2560 x 1920 STANDARD 85 175 355 685 Image size quality 128 MB 256 MB 512 MB 1 GB 640 x...

Page 64: ...e Information 38 Flash 26 Formatting a Recording Medium 19 49 G Gain Up 50 H Histogram 38 I Image Rotation 28 Image Size 51 Index Screen 22 27 L Language Setting 16 49 LCD Monitor 12 29 30 58 M Manual Exposure 35 Manual Focus 33 Mode Lamp 16 MSET Menu 34 O Operation Sound 48 P Picture Quality 50 51 Play List 43 45 50 Playback Speed 51 Portrait 31 Protecting Files 39 50 R Recording Level 51 Recordi...

Reviews: