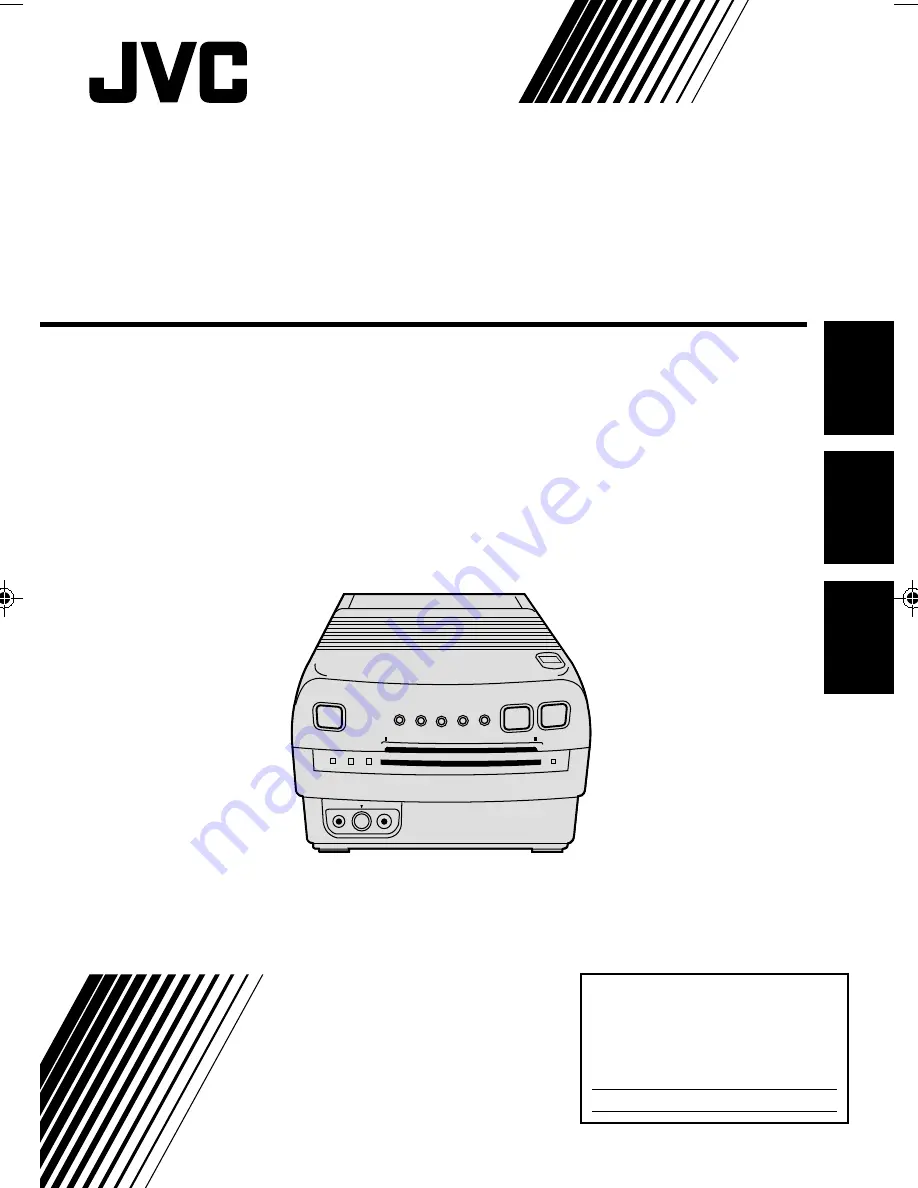
background image

GV-PT1

INSTRUCTIONS

YU30052-586

MANUEL D’INSTRUCTIONS

MANUAL DE INSTRUCCIONES

VIDEO PRINTER

IMPRIMANTE VIDÉO
IMPRESOR DE VIDEO

ENGLISH

FRANÇAIS

ESPAÑOL

For Customer Use:
Enter below the Serial No. of the
GV-PT1U Video Printer.
The serial number is located on the
bottom of the GV-PT1U.

Model No.         GV-PT1U

Serial No.

Summary of Contents for GV-PT1

Page 1: ... MANUAL DE INSTRUCCIONES VIDEO PRINTER IMPRIMANTE VIDÉO IMPRESOR DE VIDEO ENGLISH FRANÇAIS ESPAÑOL For Customer Use Enter below the Serial No of the GV PT1U Video Printer The serial number is located on the bottom of the GV PT1U Model No GV PT1U Serial No ...

Page 2: ...nditions 1 This device may not cause harmful interference and 2 this device must accept any interference received including interference that may cause undesired operation Change or modifications not approved by the party responsible for compliance could void the user s authority to operate the equipment This equipment has been tested and found to comply with the limits for a Class B digital devic...

Page 3: ...rized alternating current line plug a plug having one blade wider than the other This plug will fit into the power outlet only one way This is a safety feature If you are unable to insert the plug fully into the outlet try reversing the plug If the plug should still fail to fit contact your electrician to replace your obsolete outlet Do not defeat the safety purpose of the polarized plug B Your pr...

Page 4: ...ng amplifiers that produce heat SERVICING 1 Servicing If your product is not operating correctly or exhibits a marked change in performance and you are unable to restore normal operation by following the detailed procedure in its operating instructions do not attempt to service it yourself as opening or removing covers may expose you to dangerous voltage or other hazards Refer all servicing to qua...

Page 5: ...m To prevent possible burns and injuries do not touch the thermal heads When the Video Printer is used for extended periods the thermal heads experience wear and tear just like VCR heads As the thermal heads become worn print quality will gradually decrease When you notice a decline in quality it is possible that the heads may need to be replaced Consult your JVC dealer MOISTURE CONDENSATION If co...

Page 6: ...e or different scenes INSET PRINT Z pgs 22 23 Inset one scene onto another When using a JVC camcorder or VCR SNAPSHOT PRINT Z pgs 28 29 If your JVC camcorder is equipped with Snapshot Search such as the GR SV7 or GR DV1 you can automatically edit and print snapshots EDITING INDEX Z pgs 30 31 When used in conjunction with Random Assemble Editing this feature enables the making of an index TITLE IMP...

Page 7: ...12 Connections 12 Language Select 13 Single Print 14 ADVANCED PRINTING 16 Setting The Print Menu 16 Multi Print Same Scene 18 Multi Print Different Scenes 20 Inset Print 22 Strobe Print 24 Title Impose Print 26 Snapshot Print 28 Editing Index 30 ERROR MESSAGES 32 TROUBLESHOOTING 33 CORRECTIVE ACTION 34 Paper Jam 34 Cleaning The Thermal Heads 34 SPECIFICATIONS 35 INDEX 35 ...

Page 8: ...hen printing in multi print mode Z pg 20 Select title color in Title Impose mode Z pg 26 7 MODE SELECT Button Brings up and closes the Mode Select Menu screen 8 Slide Knob Open Slide to open the lid This allows you to install or remove the ink sheet cartridge or remove a sheet that has become stuck 9 PICTURE SELECT Button Determines whether the image being input or the image stored in memory is di...

Page 9: ...al video inputs on the rear of the unit Power Cord Plug into an AC outlet If the AC outlet is not a grounding type outlet use the provided conversion plug Video Output Connector Use this connector when you want to see the input image or the image stored in memory on a television Using a commercially available video cable connect the printer to a television Video Input Connector Rear If the source ...

Page 10: ...rting the unit 3 TAKE UP SLACK Using your index finger turn the roller on the side with the mark in the direction of the arrow 4 INSTALL CARTRIDGE Hold B turn the cartridge until it s at the proper angle then slide it in until you hear it click OR REMOVE CARTRIDGE Open the printer lid grab the B of the cartridge and slide it out slowly 5 CLOSE PRINTER LID Press down on the lid where PUSH appears u...

Page 11: ...nding it manually Storage Avoid storing cartridges in areas subject to high temperatures or humidity or in direct sunlight Keep ink sheets out of the reach of small children Before Printing If the print side the side with no writing on it becomes dirty due to dust or fingerprints poor print quality or paper jamming may result Do not use paper that is torn or bent as this can result in paper jammin...

Page 12: ...O mode TV set to VIDEO mode Connect To Image Source S Video Output Connector S Video Cable Optional Connect To Rear Input Connector Image Source With S Video Output Connectors Image Source With Video Output Connectors Rear Connectors Connect To Rear Input Connector Video Printer Front Connectors Connect To Front Input Connector φ 3 5 mm Mini Plug Cable Rear Connectors Video Printer Front Connector...

Page 13: ...r to the GV PT1 you can view the video printer s output image on the LCD monitor Language Select You can view on screen menus and messages in English French or Spanish 1 ACCESS PRINT MENU Press MENU The Print Menu screen appears on the connected TV 2 SELECT LANGUAGE Place the pointer next to LANGUAGE by pressing SELECT then press SET to cycle through the languages until the one you want appears 3 ...

Page 14: ...ay to make a photo album 1 ACCESS PRINT MENU SCREEN Press MENU The Print Menu screen appears on the connected TV 2 SELECT NO OF SCENES Press SELECT to place the pointer next to MULTI PIX then press SET to cycle through until OFF appears 3 CLOSE PRINT MENU Press MENU The Print Menu screen disap pears and setting is complete 1 2 PRINT MENU 1 2 PIX STABILIZER OFF MULTI PIX OFF CONTENT SELECTED PIX TO...

Page 15: ... TV alternately During printing the image being input alternates with NOW PRINTING appears on a blue background During printing noise or color changing may be visible on the connected TV This is normal and does not affect printing If you store the wrong scene press PICTURE SELECT so the input image appears then find the correct scene and store it in memory If you want to print multiple copies of t...

Page 16: ...ct this option when you want the same scene to appear in each section To print in Strobe Print format To print scenes at approximately 1 4 sec intervals in Strobe Print format To print scenes at approximately 1 2 sec intervals in Strobe Print format In the future connection to and operation from a personal computer will be possible using the JLIP connector The shaded options represent factory sett...

Page 17: ...esired option 4 MAKE CHOICES Press SET to cycle through each option s available settings 5 CLOSE PRINT MENU Press MENU The screen disappears and selection is complete 2 MENU Button SELECT Button SET Buttons POWER ON Lamp POWER Button PRINT MENU 1 2 PIX STABILIZER OFF MULTI PIX OFF CONTENT SELECTED PIX TO SELECT PUSH SELECT TO SET PUSH 2 2 STROBE SPEED LOW ID NUMBER 20 LANGUAGE ENGLISH TO SELECT PU...

Page 18: ...ressing SELECT then set to 4 or 16 by pressing SET 3 SELECT PRINT CONTENT Place the pointer next to CONTENT by pressing SELECT then set to SAME PIX by pressing SET 4 CLOSE PRINT MENU Press MENU The Print Menu disappears and selection is complete ADVANCED PRINTING cont 2 3 Print Lamp POWER ON Lamp MENU Button SELECT Button Print Sheet Insertion Slot Print Sheet Exit Slot MEMORY Button PICTURE SELEC...

Page 19: ...ICTURE SELECT The input image and the stored image appear on the connected TV alternately During printing the image being input alternates with NOW PRINTING appears on a blue background During printing noise or color changing may be visible on the connected TV This is normal and does not affect printing If you store the wrong image press PICTURE SELECT so the input image appears then find the corr...

Page 20: ...WER Button SET Buttons 2and 3 1 ACCESS PRINT MENU Press MENU The Print Menu appears 2 SELECT NO OF SCENES Place the pointer next to MULTI PIX by pressing SELECT then set to 4 or 16 by pressing SET 3 SELECT PRINT CONTENT Make sure CONTENT is set to SELECTED PIX If not place the pointer next to CONTENT by pressing SELECT then set to SELECTED PIX by pressing SET 4 CLOSE PRINT MENU Press MENU The Prin...

Page 21: ...n Then press SET to cycle through the images until the incorrect one appears and press PICTURE SELECT again to return to the source image display You can now store the image you want in its place If you want to switch between the image being input and the stored image press PICTURE SELECT The connected TV screen switches between the source image and the stored image During printing the image being...

Page 22: ...ssette recorder to the printer Z pg 12 Install the ink sheet cartridge in the printer Z pg 10 Plug in the printer and press POWER The power comes on and the POWER ON Lamp lights Inset Print ADVANCED PRINTING cont PRINT MENU 1 2 PIX STABILIZER OFF MULTI PIX 4 CONTENT SELECTED PIX TO SELECT PUSH SELECT TO SET PUSH PRINT MENU 1 2 PIX STABILIZER OFF MULTI PIX OFF CONTENT SELECTED PIX TO SELECT PUSH SE...

Page 23: ...V alternately During printing the image being input alternates with NOW PRINTING appears on a blue background During printing noise or color changing may be visible on the connected TV This is normal and does not affect printing If you store the wrong scene press PICTURE SELECT and the stored scene appears on screen Then press SET to cycle through the scenes until the incorrect one appears and pre...

Page 24: ...NTENT STROBE PIX TO SELECT PUSH SELECT TO SET PUSH PRINT MENU 1 2 PIX STABILIZER OFF MULTI PIX 4 CONTENT SELECTED PIX TO SELECT PUSH SELECT TO SET PUSH 2 1 ACCESS PRINT MENU Press MENU The Print Menu appears 2 SET PARAMETERS Set MULTI PIX to 4 or 16 Then set CONTENT to STROBE PIX and set STROBE SPEED to either HIGH or LOW 3 CLOSE PRINT MENU Press MENU The Print Menu disappears and selection is com...

Page 25: ...uring printing the image being input alternates with NOW PRINTING appears on a blue background During printing noise or color changing may be visible on the connected TV This is normal and does not affect printing If you store the wrong scene press PICTURE SELECT and the stored scene appears on screen Then press SET to cycle through the scenes until the incorrect one appears and press PICTURE SELE...

Page 26: ...sette recorder to the printer Z pg 12 Install the ink sheet cartridge in the printer Z pg 10 Plug in the printer and press POWER The power comes on and the POWER ON Lamp lights 1 STORE DESIRED IMAGE Use any of the methods described on pages 14 15 and 19 25 2 RECORD TITLE DRAWING Press PICTURE SELECT so that the input image is displayed Then record the handwritten title or drawing using a camcorder...

Page 27: ...g noise or color changing may be visible on the connected TV This is normal and does not affect printing If you want to print multiple copies of the same image after the first sheet comes out the exit slot put another in the insertion slot to print as before Repeat as many times as desired Do not attempt to insert a print sheet during printing as this can result in malfunctions If you want to chan...

Page 28: ...mcorder video cassette recorder to the printer Z pg 12 Install the ink sheet cartridge in the printer Z pg 10 Plug in the printer and press POWER The power comes on and the POWER ON Lamp lights Connect the camcorder s editing connector to the PAUSE Connector on the printer using the editing cable supplied with the camcorder or a commercially available φ 3 5 mini plug PRINT MENU 1 2 PIX STABILIZER ...

Page 29: ... yet been stored or if all available locations are filled you cannot change the location of the new scene If you want to switch between the image being input and the stored image press PICTURE SELECT The input image and the stored image appear on the connected TV alternately During printing the image being input alternates with NOW PRINTING appears on a blue background During printing noise or col...

Page 30: ...it Slot PICTURE SELECT Button MEMORY Button POWER Button SELECT Button 1 PERFORM RANDOM ASSEMBLE EDITING See your camcorder and video cassette recorder instruction manuals for editing procedures After editing the Random Assemble Editing selection screen appears 2 CONNECT IMAGE SOURCE TO PRINTER Connect either the camcorder or the video cassette recorder to the printer s PAUSE Connector using the e...

Page 31: ...tarts blinking printing is complete Remove the print from the exit slot The Print Lamp goes out MODE SELECT MENU TITLE SNAP SHOT PRINTING EDITING INDEX QUIT TO SELECT PUSH SELECT TO SET PUSH MODE SELECT 4 2 1 3 4 6 5 7 8 10 9 11 12 14 13 15 16 If the stored image is shaky set PIX STABILIZER in the Print Menu to ON This should stabilize the image If you want to switch between the image being input ...

Page 32: ... becomes impossible m Turn off the power wait a few minutes and then turn it on again Confirm that the error message has disappeared before trying to use the printer v When you press MEMORY after having stored the selected number of snapshots or when you have stored 8 Edit In and 8 Edit Out points m Start printing or access the Mode Select Menu screen Z pg 27 v When you have stored the selected nu...

Page 33: ...t Lamp stops blinking but stays lit signaling the end of printing v When using the Multi Print mode set to either 4 or 16 the segment where a scene is to be stored may change in size depending on the TV or the image source used This is not a malfunction The actual size of the printed image or the position in which it is to be stored do not change v The ink sheet cartridge being used does not match...

Page 34: ...eaning The Thermal Heads The thermal heads may be in need of cleaning If the heads become covered with dust or dirt print quality will drop Use a cotton swab to clean the heads If this doesn t remove the dirt please consult your nearest JVC dealer or Technical Service Center 1 OPEN LID See page 10 2 CLEAN HEADS Clean thoroughly using a clean cotton swab Using anything else could result in scratche...

Page 35: ...Operating humidity 35 80 Storage temperature 20 60 C 4 140 F Operating position Level horizontal 5 Dimensions 200 W x 116 H x 280 D mm 7 7 8 x 4 5 8 x 11 1 16 Weight Approx 3 4 kg 7 5 lbs Provided accessories Print sheet set VU PS50U standard print paper and ink sheet cartridge Conversion plug Design and specifications subject to change without notice C Content Z pg 16 E Editing Index Z pg 30 Erro...

Page 36: ...1996 VICTOR COMPANY OF JAPAN LTD U U C Printed in Japan 0296TOV UNME1 JVC COMPANY OF AMERICA DIVISION OF US JVC CORP 41 Slater Drive Elmwood Park N J 07407 JVC CANADA INC 21 Finchdene Square Scarborough Ontario M1X 1A7 ...

Reviews: