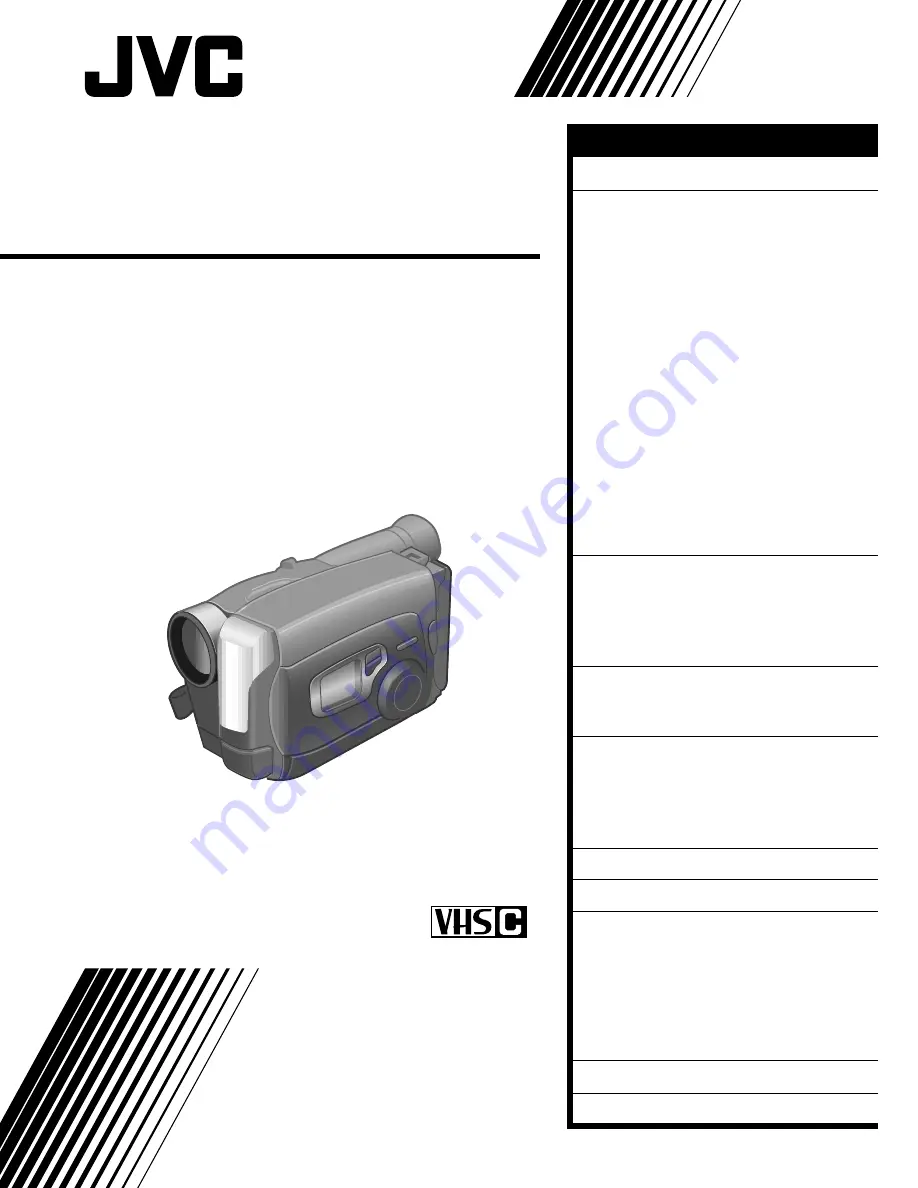
background image

GR-AX475

COMPACT VHS CAMCORDER

INSTRUCTIONS

LYT0002-026B

G

R-AX475

COPYRIGHT©  1997 VICTOR COMPANY OF JAPAN, LTD.

EK

Printed in Japan
0397TOV

*

UN

*

VP

Compact VHS

PAL

VICTOR COMPANY OF JAPAN, LIMITED

GETTING STARTED

6

RECORDING

12

Basic Recording

......................... 12

Basic Features

...........................13

Video Light

.............................. 15

Advanced Features

.....................16

Programme AE With Special

Effects

.................................... 16

Exposure Control

...................... 17

Focusing

.................................. 18

Fader

....................................... 20

Wide

....................................... 20

Instant Titles

............................. 21

Character Generator

................. 21

Date/Time Character Insert

....... 22

Manual White Balance Adjustment

... 23

Using Menu For Detailed

Adjustment

............................. 24

Self-Timer

................................ 26

Animation

................................ 27

Time Lapse

............................... 27

PLAYBACK .........................

28

Using The Cassette Adapter

...........28

Basic Connections

....................... 29

Basic Playback

..........................30

Features

..................................31

EDITING ............................

32

Tape Dubbing

............................ 32

Random Assemble Editing [R.A.Edit]

..... 33

USING REMOTE

CONTROL UNIT ..............

36

Installing The Battery

.................. 36

Insert Editing

............................ 38

Audio Dubbing

...........................39

USER MAINTENANCE ......

40

TROUBLESHOOTING ......

41

INDEX ...............................

43

Viewfinder

...............................43

Controls

..................................44

Connectors

...............................45

Indicators

................................45

Other Parts

.............................. 45

Terms

.....................................46

CAUTIONS ........................

47

SPECIFICATIONS ..............

49

CONTENTS

Summary of Contents for GR-AX475

Page 1: ...Insert 22 Manual White Balance Adjustment 23 Using Menu For Detailed Adjustment 24 Self Timer 26 Animation 27 Time Lapse 27 PLAYBACK 28 Using The Cassette Adapter 28 Basic Connections 29 Basic Playback 30 Features 31 EDITING 32 Tape Dubbing 32 Random Assemble Editing R A Edit 33 USING REMOTE CONTROL UNIT 36 Installing The Battery 36 Insert Editing 38 Audio Dubbing 39 USER MAINTENANCE 40 TROUBLESHO...

Page 2: ...o the Larger Terminal coded E or Green The wires in the mains lead are coloured in accord ance with the following code Blue to N Neutral or Black Brown to L Live or Red If these colours do not correspond with the terminal identifications of your plug connect as follows Blue wire to terminal coded N Neutral or coloured black Brown wire to terminal coded L Live or coloured Red If in doubt consult a ...

Page 3: ... or doors on equipment DON T continue to operate the equipment if you are in any doubt about it working normally or if it is damanged in any way switch off withdraw the mains plug and consult your dealer DON T remove any fixed cover as this may expose dangerous voltages DON T leave equipment switched on when it is unattended unless it is specifically stated that it is designed for unattended opera...

Page 4: ... Auto Light Z pg 15 Variable Speed Hyper Zoom Z pg 13 Zoom in Zoom out Random Assemble Editing Z pg 33 35 8 8 2 2 5 5 4 4 1 1 6 6 3 3 7 7 PROVIDED ACCESSORIES Remote Control Unit RM V704U or RM V700U DC Cord AC Power Adapter Charger AA V11EK Battery Pack BN V12U Cassette Adapter C P7U Shoulder Strap Lithium Battery CR2025 x 2 Editing Cable Program Manager Z pg 16 25 Programme AE with Special Effec...

Page 5: ...ls Z pg 30 n Or simply play back the tape on a VHS VCR using the Cassette Adapter Z pg 28 SHOOTING 1 Slide the LENS COVER open close knob to open the lens cover 2 Set the power switch to CAMERA The power indicator will light and an image will appear in the viewfinder 3 Press the Recording Start Stop button Recording starts To stop recording temporarily momentarily press the Recording Start Stop bu...

Page 6: ...ator BATT PACK APPROXIMATE RECORDING TIME BN V12U 1 hr 10 min 40 min BN V22U 2 hrs 25 min 1hr 30 min BN V25U 3 hrs 10 min 1hr 55 min USING THE BATTERY PACK ATTACH BATTERY PACK 1 Hook its top end to the camcorder and push the battery pack in until it locks in place DETACH BATTERY PACK 2 Slide BATT RELEASE and pull out the battery pack when the video light is on REFRESH The AC power adapter features...

Page 7: ...Power Adapter Charger near a radio Make sure you unplug the DC cord before charging or discharging the battery pack A blinking CHG indicator means that the battery pack has become hot Wait until it cools down to continue The CHG indicator may not light properly with a brand new battery pack or with one that s been stored for an extended period In this case remove and reattach the battery pack and ...

Page 8: ...d the compartment A and pull the battery out INSERT BATTERY 4 Ensuring the plus side is up insert a CR2025 lithium battery and push it in CLOSE COVER 5 Close the compartment cover until it clicks in place NOTE See SAFETY PRECAUTIONS Z pg 2 for information on safe handling of lithium batteries Viewfinder Adjustment POSITION VIEWFINDER 1 Adjust the viewfinder manually for best viewability see illust...

Page 9: ...ecide you want to return the date and time to the previous settings press FAR or NEAR to move the highlight bar to CANCEL then press MENU If you re satisfied with the settings go on to step 5 START CLOCK OPERATION 5 Once you ve set the day month year and time press FAR or NEAR until SET begins to blink then press MENU The Menu screen reappears CLOSE MENU 6 Press MENU NOTES To display the date and ...

Page 10: ... at the switching point Loading Unloading A Cassette OPEN CASSETTE HOLDER 1 Slide EJECT until the holder opens Do not use force to open INSERT REMOVE CASSETTE 2 Make sure the label is facing outward CLOSE CASSETTE HOLDER 3 Press PUSH and make sure the holder is closed and locked NOTES A cassette holder can t be opened unless a power supply is attached Make sure that the tape is not slack when load...

Page 11: ...e strap through the top of the eyelet 1 then fold it back and thread it through the keeper 2 and then through the buckle 3 Repeat the procedure to attach the other end of the strap to the other eyelet making sure the strap isn t twisted ADJUST LENGTH 2 Adjust as shown in the illustration at left 1 then slide both keepers snug against the eyelets to prevent slipping 2 Tripod Mounting ALIGN AND TIGH...

Page 12: ... EJECT until the holder opens Do not use force The tape s remaining time is displayed in the viewfinder as shown The indicated remaining time is approximate The time required to calculate the remaining tape length and the accuracy of the calculation may vary according to the type of tape used The tape remaining time displayed in the viewfinder is correct only if the correct tape length has been se...

Page 13: ... Out 1 Push the switch up toward W NOTES The further the power zoom switch is pushed the faster the zoom speed becomes Focusing may become unstable during zooming In this case set the zoom while in Record Standby set manual focus or Focus Lock Z pgs 18 19 then zoom in or out in Record mode RECORDING Basic Features Zoom indicator Power zoom switch Zoom in Zoom out ...

Page 14: ...rd Standby mode for the next shot NOTE Distortion may occur at start of playback This is normal FEATURE Retake PURPOSE To re record certain segments OPERATION 1 Make sure the camcorder is in the Record Standby mode 2 Press either RETAKE button to reach the start point for new recording Pressing F fast forwards the tape and pressing R reverses it 3 Press Recording Start Stop to start recording NOTE...

Page 15: ...r when you start recording with the video light turned on When the LIGHT ON AUTO OFF switch is set to AUTO Depending on the lighting conditions the video light may keep turning on and off In this case manually switch the light on or off using the LIGHT ON AUTO OFF switch While the Sports or High Speed Shutter mode Z pg 16 is engaged the light is likely to stay on While the Twilight mode Z pg 16 is...

Page 16: ...ects All you have to do to access any of the variety of shooting effects is to turn the PROGRAM AE select dial SELECT MODE 1 Turn the PROGRAM AE select dial until the symbol of the function you want is aligned with the mark The selected mode s name and its indication are displayed in the viewfinder for approx 1 second Then the name disappears and only the indication remains The mode is activated W...

Page 17: ...learly captures fast moving action High Speed Shutter 1 1000s 1 2000s Captures faster action than Sports mode Sports SPORTS Sepia SEPIA Twilight TWILIGHT 1 1000 sec High Speed Shutter 1 1000 S 1 1000 1 1 2000 sec High Speed Shutter 1 2000 S 1 2000 2 Exposure Control This feature automatically adjusts the iris for the best available picture quality but you can override and make the adjustment manua...

Page 18: ...the camcorder Engage the focus lock function to lock your subject in before recording When you want your subject to be focused and to appear in a corner of the screen First center on the subject and focus using auto focus mode Then engage the focus lock function and move the camcorder until the subject is where you want it SELECT MODE 1 Turn the PROGRAM AE select dial to any position except AUTO L...

Page 19: ... The focus indication is replaced by the focus lock indication and the adjusted focus is locked in RELEASE MANUAL FOCUS MODE 4 Press FAR and NEAR simultaneously The Manual Focus mode is immediately released and the focus lock indication disappears NOTES Be sure to focus the lens in the maximum telephoto position when you use the Manual Focus mode If you focus in on a certain subject in the wide an...

Page 20: ...ing Start Stop to end recording and engage fade out NOTES Pressing and holding the Recording Start Stop button allows you to record a black blank screen The screen becomes slightly reddish when the Fader is used with Sepia Z pg 17 With the Electronic fog filter mode Z pg 16 engaged the image fades in out to a white screen Wide This feature allows you to record black bars at the top and bottom of t...

Page 21: ...acters appear at the bottom of the screen Repeat as many times as desired max 18 To select the location of the next character press FAR or NEAR to highlight the row of squares at the bottom of the screen then press FAR or NEAR to make the desired location blink Press when you re done and the pointer returns to the character grid END CHARACTER SETTING 4 Press FAR or NEAR to make END blink then pres...

Page 22: ...Record Standby mode and then select the desired display mode using SET AUTO DATE RECORD Your camcorder automatically records the day month and year for about 5 seconds after recording is initiated in the following situations After changing the date After loading a cassette After Auto Date Record mode is selected by pressing SET In this mode the day month and year are replaced after 5 seconds with ...

Page 23: ...he PROGRAM AE select dial to any position except AUTO LOCK ADJUST FOCUS 2 Point the camcorder at a white flat object such as a sheet of white paper and adjust focus manually Z pg 19 ADJUST WHITE BALANCE 3 Press SET until MWB appears then press and hold SET for more than 3 seconds MWB blinks in the viewfinder during adjust ment then stops blinking but stays lit when adjustment is complete White bal...

Page 24: ...ress FAR or NEAR to cycle through the choices until the desired setting appears If you select SET CHARACTER or DATE TIME press NEAR to access the selection menu for each function SET CHARACTER Z pg 21 DATE TIME Z pg 9 CLOSE MENU 5 Press MENU The normal screen reappears NOTE The menu is available only in the Record Standby mode RECORDING Advanced Features cont If GAIN UP or TELE MACRO in the Menu h...

Page 25: ... is a distance more than 1m to the subject the lens is out of focus at the maximum telephoto setting When set to ON you can shoot a subject as large as possible at a distance of approx 60 cm Depending on the zoom position the lens may go out of focus INTERVAL TIMER This feature allows you to set the parameters for Self Timer Z pg 26 and Time Lapse recording Z pg 27 REC TIME This feature allows you...

Page 26: ...or NEAR to cycle through the choices Stop when the desired time appears Choose from 15S 30S 1MIN 5MIN or select to turn the function OFF CLOSE MENU 3 Press MENU START DELAYED RECORDING 4 Press RECORDING START STOP The tally lamp begins blinking and the blinking frequency increases about 5 seconds before recording is to start Once recording begins the lamp stops blinking but stays lit To Release Se...

Page 27: ...nimation or Time Lapse recording make sure the Animation or Time Lapse mode is deactivated Time Lapse You can record sequentially at preset time spans Leaving the camcorder aimed at a specific subject you can record subtle changes over an extended period of time NOTE Make sure the camcorder is in the Record Standby mode and the recording mode is set to SP before performing the following steps ACCE...

Page 28: ...oor PLAY BACK ON CONNECTED VCR 3 Load the cassette adapter into the VCR and play the tape back as you would any other REMOVE CASSETTE FROM ADAPTER 4 Slide the latch and the compartment door opens automatically Then insert your finger in the hole on the underside of the adapter as shown in the illustration at left push up and remove the cassette NOTES During tape loading and unloading do not touch ...

Page 29: ...ose on the TV SELECT MODE 2 Set the TV to its VIDEO or AV mode as specified in its instructions Connection To A TV With NO A V Input Connectors Playback ONLY NOTE Use the optional RF V5E RF unit Refer to the RF V5E instruction manual for connection procedure NOTES It is recommended to use the AC Power Adapter Charger as the power supply instead of the battery pack To monitor the picture and sound ...

Page 30: ...PLAYBACK 3 Press PLAY PAUSE The playback picture appears in the viewfinder and the connected TV STOP PLAYBACK 4 Press STOP Rewind or Fast forward the tape Press REW to rewind or FF to fast forward the tape during Stop mode NOTE The camcorder shuts off automatically after about 5 minutes in STOP mode or Still Playback mode To turn on again set the Power switch to POWER OFF then to PLAY REW PLAY PAU...

Page 31: ...To allow high speed search in either direction OPERATION Forward Search 1 Press FF during playback Reverse Search 1 Press REW during playback NOTE Noise bars appear and pictures may become monochrome or darken in Shuttle Search This is normal FEATURE Counter Memory Function PURPOSE To make it easier to locate a specific tape segment OPERATION 1 Press COUNTER R M and hold for more than 2 seconds Th...

Page 32: ... the edit in point Once it s reached press PAUSE on the camcorder START EDITING 5 Press PLAY on the camcorder and engage the VCR s Record mode STOP EDITING TEMPORARILY 6 Engage the VCR s Record Pause mode and press PAUSE on the camcorder EDIT MORE SEGMENTS 7 Repeat steps 4 through 6 for additional editing then stop the VCR and camcorder when finished PLAY PAUSE VCR Recording deck Audio and Video c...

Page 33: ... use the controls on the VCR MAKE CONNECTIONS CONNECT TO 1 A JVC VCR EQUIPPED WITH REMOTE PAUSE TERMINAL Connect the editing cable to the Remote PAUSE terminal B JVC VCR NOT EQUIPPED WITH REMOTE PAUSE TERMIANL BUT EQUIPPED WITH R A EDIT CONNECTOR Connect the editing cable to the R A EDIT connector C VCR OTHER THAN TYPE A OR B Connect the editing cable to the MBR s Pause In jack All other connectio...

Page 34: ...KE CORRECTIONS 5 Press CANCEL during steps 2 and 3 to erase the most recently registered point NOTES The MBR can be used to operate other camcorder functions as well Point the MBR at the camcorder s remote sensor and press any of the following buttons function appears in parentheses ON OFF camcorder R A EDIT IN OUT camcorder IN OUT CANCEL camcorder CANCEL There must be at least one second between ...

Page 35: ...pe with certain VCRs EDIT STOP 1 3 2 IN OUT IN OUT IN OUT SUPPLEMENTAL INFORMATION ON THE REMOTE CONTROL Using the MBR it is also possible to perform deck to deck Random Assemble Editing The playback deck must be an R A Edit capable JVC VCR The recording deck can be n a VCR other than JVC or n a JVC VCR which has neither a Remote PAUSE nor an R A EDIT connector How to use Connect the playback deck...

Page 36: ...4 INT TIME button Self Timer Time lapse Z pg 37 5 REC TIME button Animation Time lapse Z pg 37 6 FF button Retake Forward Z pg 14 FF FF Shuttle Search Z pg 30 7 REW button Retake Rewind Z pg 14 Rew Rew Shuttle Search Z pg 30 Quick Review Z pg 14 8 PAUSE button Pause Z pg 31 9 PLAY button Playback start Z pg 30 0 START STOP button Functions same as the Recording Start Stop button of the camcorder V...

Page 37: ...control Each time INT TIME is pressed the Interval Timer indicator appears changing in the following order 15S 30S 1MIN 5MIN and No indication off Each time REC TIME is pressed the Rec Time indicator appears changing in the following order 1 4S 1 2S 1S and No indication off 2 Release Instead of using the Menu in step 5 on pg 27 press INT TIME and REC TIME on the remote control until the indicators...

Page 38: ...e beyond the beginning of the scene you want to replace press PLAY to view the recorded tape and press PAUSE at exactly at the Edit In point where the new scene should start ENGAGE INSERT EDITING MODE 5 Press and hold INSERT and without releasing INSERT press and release PAUSE The Insert mode is engaged and the scene the camcorder is aimed at appears on the screen BEGIN INSERT EDITING 6 Press RECO...

Page 39: ...UDIO DUBBING 4 Press STOP NOTES Do not press FF or REW during Audio Dub Standby or the edit points will not be accurate If the microphone is too close to the TV or if the TV s volume is too high whistling or howling may occur NOTES for Insert Editing and Audio Dubbing Insert Editing and audio Dubbing may not work correctly if the tape contains blank segments or if the recording speed was changed d...

Page 40: ...y with a soft cloth CLEAN LENS 2 Blow it with a blower brush then wipe gently with lens cleaning paper CLEAN VIEWFINDER 3 1 Turn the eyepiece counterclockwise and pull it out 2 Remove dust using a blower brush 3 Align the marks re attach the eyepiece and turn it clockwise NOTES Avoid using strong cleaning agents such as benzine or alcohol Cleaning should be done only after the battery pack has bee...

Page 41: ...s In this case check the position of the tab The camcorder Power switch has not been set to CAMERA Z pg 12 PLAYBACK The tape is running but there s no playback picture Noise bars appear in the playback picture Playback picture is blurred or interrupted The counter indication is blurred during Still playback The TV has not been set to its VIDEO mode or channel If A V connection is used the TV s VID...

Page 42: ...over Warning indicator blinks The battery pack is running low The PROGRAM AE select dial is set to AUTO LOCK This sometimes occurs when the contrast between the background and the object is great It is not a defect of the camcorder Sunlight is directly entering the lens This is normal while recording in the LP mode Some noise may be present while recording in the SP mode Zpg 10 Turn the camcorder ...

Page 43: ...is indication appears all functions are disabled Turn the unit off without removing the power source for a few hours and when you turn it on again the indicator should disappear e Tape End Display Z pg 12 Appears when the end of the tape is reached during playback recording or fast forward INDEX Viewfinder 1 Cassette Warning Remaining Tape Time Z pg 12 When no cassette is inserted or when Erase Pr...

Page 44: ...pg 31 MENU Button Z pg 24 PUSH Button Z pg 10 q EJECT Switch Z pg 10 1 Diopter Adjustment Z pg 8 2 Power Zoom Lever Z pg 13 3 BATT Battery RELEASE Switch Z pg 6 4 Recording Start Stop Button Z pg 12 5 POWER Switch Z pg 12 30 6 STOP Button Z pg 30 7 Tape Length T30 45 60 Select Button Z pg 10 COUNTER R Reset M Memory Button Z pg 31 8 EDIT Button Z pg 35 9 Recording Mode SP LP Select Button Z pg 10 ...

Page 45: ...IN Jack Z pg 7 The jacks r to y are located beneath the jack cover r VIDEO OUT Jack Z pg 29 t RF DC OUT Jack Z pg 29 y AUDIO OUT Jack Z pg 29 Indicators u Tally Lamp Z pg 12 i Power On Indicator Z pg 12 Other Parts o Video Light Z pg 15 p Camera sensor Be careful not to cover this area built in here is the sensor necessary for shooting Remote sensor Z pg 37 Q Microphone Z pg 39 W Shoulder Strap Ey...

Page 46: ...ter Mode pg 17 I Index Code Marking pg 37 Insert Cassette pg 10 Insert Editing pg 38 Instant Titles pg 21 M Manual Focus pg 19 MBR code Setting pg 33 N ND Effect Mode pg 16 P Playback pg 30 Program AE with Special Effects pg 16 Provided Accessories pg 4 Q Quick Review pg 14 R Random Assemble Editing pg 33 35 Recording Advanced Features pg 16 27 Recording pg 12 Recording Start Stop pg 12 Recording ...

Page 47: ...HS C mark be aware that recording onto prerecorded tapes automatically erases the previously recorded video and audio signals make sure the cassette is positioned properly when inserting do not load and unload the cassette repeatedly without allowing the tape to run at all This slackens the tape and can result in damage do not open the front tape cover This exposes the tape to fingerprints and dus...

Page 48: ...our local JVC dealer SPECIAL NOTES ON VIDEO HEADS Dust and dirt on video heads 1 Always allow enough time for your camcorder to acclimatize to its environment before using it 2 Do not use the unit in areas of high humidity Typical areas of high humidity are given below From being used or stored in a very cold outdoor situation then immediately being used in a warm indoor situation From being used ...

Page 49: ...put 1 Vp p 75 ohms unbalanced via VIDEO out connector AUDIO Output 8 dBs 1 k ohm via AUDIO out connector AC POWER ADAPTER BATTERY CHARGER AA V11EK SPECIFICATIONS Power requirement AC 110 to 240 V 50 60 HZ Power consumption 23 W Output Charge DC 8 5 V 1 3 A VTR DC 6 3 V 1 8 A Charging system Constant current peak detection timer controlled Dimensions 150 W x 42 H x 68 D mm Weight Approx 400 g CASSE...

Page 50: ...MEMO ...

Page 51: ...MEMO ...

Page 52: ...B 6 2 2 3 5 6 6 7 8 0 0 1 1 2 3 4 6 7 7 8 8 9 0 1 2 2 3 6 6 8 9 0 1 3 3 4 5 5 5 6 7 9 ...

Reviews: