background image

EN

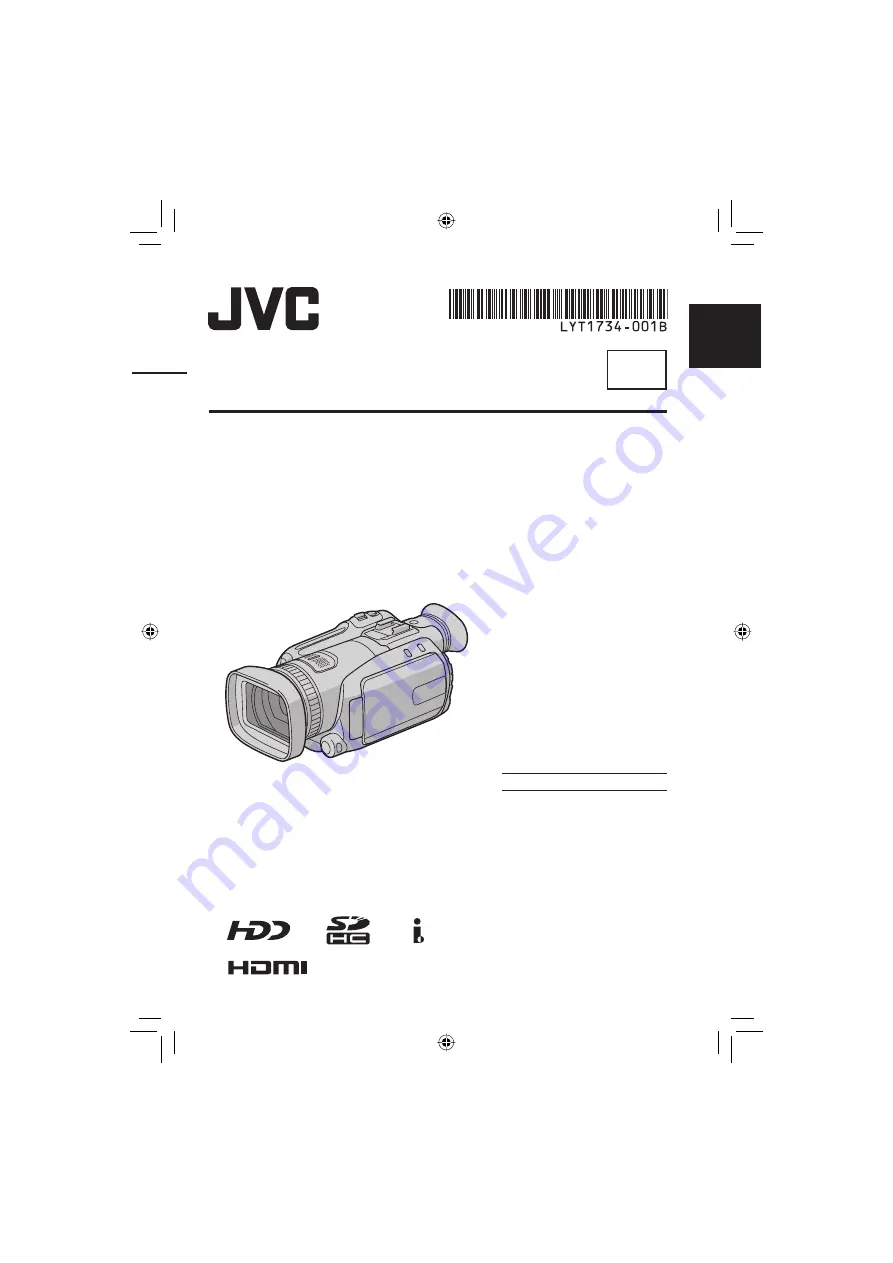
HD HARD DISK CAMCORDER

GZ-HD7U

Dear Customer

Thank you for purchasing 
this hard disk camera. Before 
use, please read the safety 
information and precautions 
contained in pages 4 and 5 to 
ensure safe use of this product.

For Future Reference: 

Enter the Model No. (located on 
the bottom of the camera) and 
Serial No. (located on the battery 
pack mount of the camera) 
below.

Model No.

Serial No.

INSTRUCTIONS

ENGLISH

Summary of Contents for Everio GZ-HD7U

Page 1: ...e use please read the safety information and precautions contained in pages 4 and 5 to ensure safe use of this product For Future Reference Enter the Model No located on the bottom of the camera and Serial No located on the battery pack mount of the camera below Model No Serial No INSTRUCTIONS ENGLISH ...

Page 2: ...Enjoy viewing images in high definition image quality by simply connecting the camera to a high definition television using the optional HDMI cable pg 36 8 If the television is not equipped with an HDMI connector Use the Component cable included and the AV cable included to connect to the television 8 To view on conventional or wide screen televisions Use the AV cable included Images can be viewed...

Page 3: ... DVD disc can then be played in the camera or a PC but not in a DVD player If a CU VD40 is used the DVD burner can be connected directly to a television so the disc can be played without using the camera Edit High Definition Images on a PC Perform advanced editing on high definition images by loading to a PC 8 For PC models that can be connected See page 53 or 64 ...

Page 4: ...See www dtsc ca gov hazardouswaste perchlorate When the equipment is installed in a cabinet or on a shelf make sure that it has sufficient space on all sides to allow for ventilation 10 cm 3 15 16 or more on both sides on top and at the rear Do not block the ventilation holes If the ventilation holes are blocked by a newspaper or cloth etc the heat may not be able to get out No naked flame sources...

Page 5: ...Refer all servicing to qualified service personnel Servicing is required when the apparatus has been damaged in any way such as power supply cord or plug is damaged liquid has been spilled or objects have fallen into the apparatus the apparatus has been exposed to rain or moisture does not operate normally or has been dropped Remember that this camera is intended for private consumer use only Any ...

Page 6: ...e no right to grant a license to use the Program and may not distribute rent lease or transfer the Program to any third party or otherwise let them use the Program 4 LIMITED WARRANTY JVC warrants that any media in which the Program is embodied are free from any defects in materials and workmanship for a period of thirty 30 days from the date of Your purchasing any our products accompanying the Pro...

Page 7: ...rized representative of JVC 2 If any part of this Agreement is held invalid by or in conflict with any law having jurisdiction over this Agreement the remaining provisions will remain in full force and effect 3 This Agreement shall be governed by and interpreted under the laws of Japan The Tokyo District Court has jurisdiction over all disputes which may arise with respect to the execution interpr...

Page 8: ...riority Setting 25 Changing the Shutter Speed 25 Adjust Brightness 26 Manual Focus 26 Nightalive 27 Backlight Compensation 27 Spot Exposure Control 27 Manual Setting in Function Menu 28 PLAYBACK Playing Back Files 30 Video Playback 30 Still Image Playback 31 File Search Function 32 To Play Back TPD Files 33 Playback with Special Effects 34 Watching Images on TV 36 Connection with TV 36 Playback Op...

Page 9: ... when using the SD card take the card together with the camera for repair If one of them is not included the cause of the malfunction cannot be diagnosed and the camera cannot be repaired Recorded data may be erased while the camera is being repaired or inspected Back up all data before requesting repairs or inspections 8 Because the camera may be used for demonstration in a shop the demonstration...

Page 10: ... the camera below Shoulder Strap pg 11 CD ROM pg 54 64 Remote Control Unit RM V750U pg 11 Lithium Battery CR2025 Pre installed in the remote control unit NOTE Make sure to use the provided cables for connections Do not use any other cables Attaching Detaching the Lens Hood Protrusion Place the protrusion in the groove GETTING STARTED Accessories ...

Page 11: ...emote Control A battery is included inside the remote control at the time of purchase Remove the insulation sheet before use Beam Effective Area NOTE The transmitted beam may not be effective or may cause incorrect operation when the remote sensor is directly exposed to sunlight or powerful lighting To Reinsert the Battery Pull out the battery holder by pressing the lock tab Eyelet Strap Guide Buc...

Page 12: ...S The LCD monitor can rotate 270 Power linked operation You can also turn the camera on off by opening closing the LCD monitor during the recording mode Be careful not to cover C D and K during shooting Index ...

Page 13: ...NDEX Button g DATE Button Camera Index Button INDEX pg 32 Remaining Space Button Data Battery Button 0 1 pg 18 23 Set Lever Move to Reverse Skip pg 30 Up Move to Forward Skip pg 30 Down Move to Reverse Search pg 30 Left Nightalive NIGHT pg 27 Move to Forward Search pg 30 Right Program AE PROGRAM AE pg 24 Press down Play Pause pg 30 Playback Recording Mode Switching Button SELECT PLAY REC pg 20 Aut...

Page 14: ...stment Indicator pg 26 Backlight Compensation Indicator pg 27 Spot Exposure Control Indicator pg 27 5 Iris Lock Indicator pg 27 During Video Recording Only REC 0 0 4 0 1 4 h 5 9 m Mode Indicator pg 20 Wind Cut Indicator pg 68 Picture Quality pg 68 Remaining Time pg 20 81 Counter pg 68 7REC Appears during recording pg 20 79 Appears during record standby mode External Microphone Input Level Indicato...

Page 15: ...er on the left shows speed Counter pg 68 Volume Level Indicator Battery Indicator pg 78 Date Time pg 70 Selected Medium Indicator pg 68 69 Drop Detection Indicator Appears when DROP DETECTION is set to OFF pg 70 Effect Mode Indicator pg 34 Wipe Fader Effect Indicator pg 35 During Still Image Playback PM 4 5 5 JA N 2 0 2 0 0 7 1 0 1 0 0 9 8 Mode Indicator pg 31 Folder File Number Slide Show Playbac...

Page 16: ... the AC adapter from the camera Required charging recording time approx Battery pack Charging time Recording time BN VF815U Provided 2 hr 40 min 1 hr 20 min 1hr 25 min BN VF823U 3 hr 50 min 2 hr 00 min 2 hr 10 min When using the viewfinder 8 To detach the battery pack Slide and hold BATT step 2 then remove the battery pack 8 To check the remaining battery power See page 18 NOTES You can also use t...

Page 17: ...E Select Set ENGLISH LANGUAGE SELECT SET QUIT 6 Select the desired language Select Set 8 To return to the previous screen Move the set lever to 8 To exit the screen Press MENU Date Time Setting After performing steps 1 4 left column 5 Select CLOCK ADJUST Select Set JAN 31 11 AM 07 2007 DATE TIME CLOCK ADJUST SELECT SET QUIT 6 Set the date and time Select Set Repeat this step to input the month day...

Page 18: ...he button is pressed and released quickly and for approx 15 seconds if the button is pressed and held for several seconds NOTES If COMMUNICATING ERROR appears there may be a problem with your battery In such a case consult your nearest JVC dealer The recordable time display should only be used as a guide It is displayed in 10 minute units Tripod Mounting Align the camera stud hole with the tripod ...

Page 19: ...the SD card cover 2 Firmly insert the card with its clipped edge first 3 Close the SD card cover 8 To remove an SD card Push the SD card once After the card comes out a little pull it out NOTES Insert and remove the SD card only while the power is turned off Otherwise data on the card may be corrupted Do not touch the terminal on the reverse side of the label R Change the recording medium The came...

Page 20: ...e is automatically selected when you turn the camera s power off and then on again If the camera is not operated for 5 minutes while the power is on it turns itself off automatically to conserve power To turn the camera on again when using the battery pack set the power mode switch to OFF then to STANDBY ON When using the AC adapter perform any operation such as zooming Video files are given the n...

Page 21: ...ing PHOTO 9 9 9 9 FINE 20 NOTES If the camera is not operated for 5 minutes while the power is on it turns itself off automatically to conserve power To turn the camera on again when using the battery pack set the power mode switch to OFF then to STANDBY ON When using the AC adapter perform any operation such as zooming The sides of still images recorded in 16 9 size may be cut off when printed Ch...

Page 22: ...cording by using the viewfinder is recommended in bright environments where the LCD monitor is difficult to see or to increase recording time on battery Preparation Slide the power mode switch to MODE to select or mode Press the PLAY REC button to select recording mode 1 Close the LCD monitor 2 Extend the viewfinder 3 Adjust the view using the control bar NOTE If the LCD monitor is opened while us...

Page 23: ...lect NEXT PAGE To cancel the event registration select NON SECTION Select Set The selected event is displayed on the screen Press the REC button to start recording 8 To exit the screen Press EVENT 8 To search by event for a file to play back See page 32 NOTE Once you select to register a file to a certain event the setting will remain even if you turn the power off Unless you change the setting yo...

Page 24: ...er speed to suit your surroundings or the subject After performing To Change to Manual Recording Mode left column 1 OFF 2 Select the desired setting For details on each setting see below Select Set 8 To cancel the program AE Select OFF in step 2 8 Items for program AE setting 6 PORTRAIT The subject in the foreground is accentuated by blurring the background H SPORTS Records fast moving subjects cl...

Page 25: ...o that the value indicator disappears NOTE If the image is too bright set to a larger F number If the image is too dark set to a smaller F number Changing the Shutter Speed A fast shutter speed can freeze the motion of a fast moving subject and a slow shutter speed can blur the subject to give the impression of motion After performing To Change to Manual Recording Mode pg 24 1 S 1 6 0 2 Select the...

Page 26: ...nued Manual Focus After performing To Change to Manual Recording Mode pg 24 1 FOCUS 4 JA N 2 2 Slide the focus ring to adjust the focus 8 To cancel the manual focus setting Press the FOCUS button so that the A indicator disappears Focus Assist The borderlines of focused images are displayed in blue Use these as a guide for adjusting the focus precisely FOCUS 8 To cancel the focus assist mode Press...

Page 27: ...exposure After performing To Change to Manual Recording Mode pg 24 8 To cancel backlight compensation Press the BACK LIGHT button twice so that the indicator disappears Spot Exposure Control Use this function when backlight compensation does not work well or to adjust the brightness in the desired spot After performing To Change to Manual Recording Mode pg 24 1 Press twice 2 Select the desired spo...

Page 28: ...video light or similar type of lighting is used Manual Setting in Function Menu You can use manual recording functions easily by selecting items in the function menus The following illustrations of display screens are examples of when EFFECT is set to SEPIA After performing To Change to Manual Recording Mode pg 24 1 FUNCTION ZEBRA WB TELE MACRO CUSTOM SETTING EFFECT 2 Select the desired menu For d...

Page 29: ...are displayed in a striped pattern Use this as a guide for adjusting the brightness OFF Deactivate this function 70 Sections that are close to being reflected as white bright are displayed in a striped pattern 100 Sections that are completely reflected as white too bright are displayed in a striped pattern CUSTOM SETTING Press down the set lever then select sub menus SHARPNESS Adjusts the enhancem...

Page 30: ...ired file then press down Select Set Video Playback Slide the power mode switch to MODE to select video mode MODE The switch returns to the original position when it is released The lamp on the camera lights up Operations during Playback Return to the first scene of the file Reverse search Frame by frame playback during pause Play Pause Forward search Frame by frame playback during pause Go to the...

Page 31: ... still images appears Move the set lever to to select the desired file then press down Select Set Still Image Playback Slide the power mode switch to MODE to select still image mode MODE The switch returns to the original position when it is released The lamp on the camera lights up Rotate 90 degrees counterclockwise Display the previous file Start end the slide show Display the next file Rotate 9...

Page 32: ...006 DEC 22 2006 DEC 19 2006 DEC 01 2006 SELECT SET SORT 2 Select the recording date Select Set JAN 07 2007 1 3 SELECT SET SORT 3 Select the file you want to play back Select Set 8 To return to the index screen Press the INDEX button Event Screen mode only You can search the desired file by the event that you registered the file to when recording pg 23 After searching by the event you can search by...

Page 33: ...Select PLAYBACK TPD FILE Select Set VIDEO TPD 8 8 SELECT SET QUIT 3 Select the file you want to play back Select Set 8 To exit the screen Press FUNCTION 8 To return to the normal file playback mode Select PLAYBACK NORMAL FILE in step 2 NOTE During TPD file playback you cannot use some of the functions 2 Select the event To move to the next page select NEXT PAGE Select Set SEARCH EVENT SELECT SET S...

Page 34: ... CLASSIC FILM MONOTONE SEPIA OFF SELECT SET QUIT 3 Select a desired effect For details on each effect see right column Select Set VIDEO 8 8 SELECT SET SORT 4 Select the file you want to play back Select Set 8 To exit the screen Press FUNCTION 8 To turn off the effect Select OFF in step 3 8 Items for EFFECT setting J SEPIA The image is given a brownish tint like an old photo K MONOTONE The image be...

Page 35: ... FADER WHITE Fade in or out with a white screen P FADER BLACK Fade in or out with a black screen Q FADER B W Fade in to a color screen from a black and white screen or fade out in the opposite way R WIPE CORNER Wipe in on a black screen from the upper right to the lower left corner or wipe out in the opposite way S WIPE WINDOW The scene starts in the center of a black screen and wipes in toward th...

Page 36: ...l units 8 To connect using the HDMI connector NOTE Change the settings in HDMI OUTPUT HDMI COLOR SETTING or HDMI ENHANCE SETTING as you like pg 71 8 To connect using the COMPONENT connector NOTE Change the settings in COMPONENT OUTPUT as you like pg 71 HDMI Connector AC Adapter DC Connector HDMI Connector HDMI Cable optional To AC Outlet AV Cable AC Adapter To AC Outlet Video Connector is not in u...

Page 37: ...ra and the TV 2 Set the TV to its VIDEO mode 3 Only when connecting the camera to the VCR DVD recorder Turn on the VCR DVD recorder and set the VCR DVD recorder to its AUX input mode 4 Start playback on the camera pg 30 31 8 To display camera s on screen display on TV Set DISPLAY ON TV to ON pg 71 AV Cable S Cable optional S Connector DC Connector AC Adapter To AC Outlet AV Connector S Input Conne...

Page 38: ...CK position Preparation Slide the power mode switch to MODE to select or mode Press the PLAY REC button to select playback mode The following illustrations of display screens are examples of when performing DELETE 1 FUNCTION DELETE PROTECT PLAYBACK TPD FILE PLAYBACK NORMAL FILE EDIT PLAYLIST PLAYBACK PLAYLIST WIPE FADER EFFECT 2 Select DELETE or PROTECT Select Set DELETE DELETE ALL FILE SELECT CUR...

Page 39: ... Move the set lever to to select EXECUTE then press down Selecting and Deleting Protecting Files After performing steps 1 2 pg 38 3 Select FILE SELECT Select Set VIDEO DELETE 8 8 SELECT SET QUIT 4 Select the desired file Select Set VIDEO DELETE 8 8 SELECT SET QUIT The or x mark appears on the file To select other files repeat this step If you slide the zoom lever towards T the preview screen is di...

Page 40: ... 8 To turn off the file information display Press INFO again Histogram mode only A histogram is a graph indicating the image s brightness By checking the image and its histogram you can see the exposure level pattern and the overall tone reproduction Preparation Play back the still image Press twice INFO B D 1 250 s F3 5 ISO100 A larger number of pixels in the center position indicates correct exp...

Page 41: ...to the next page select NEXT PAGE To cancel the event registration select NON SECTION Select Set VIDEO 8 8 SELECT SET QUIT 3 Select the file you want to register Select Set To select other files repeat this step If you slide the zoom lever towards T the preview screen is displayed Sliding the zoom lever towards W returns to the index screen 4 BACKUP EVENT DIRECT SELECT SET EVENT RE REGISTRATION EN...

Page 42: ...d To Extract a Still Image File From a Video File mode only You can extract the desired scene from a recorded video file and record it as a still image file Preparation Slide the power mode switch to MODE to select mode Press the PLAY REC button to select playback mode 1 Select the desired video file Select Set VIDEO 8 8 SELECT SET SORT Playback starts Search the desired scene 2 SNAP SHOT NOTES Ex...

Page 43: ... following steps 4 and 5 8 To reset DPOF settings 1 In step 3 move the set lever to to select RESET then press down 2 Move the set lever to to select EXECUTE then press down Setting All Files Together One Print for Each After performing steps 1 2 3 Select ALL1 Select Set ALL1 EXECUTE CANCEL SELECT SET 4 Select EXECUTE Select Set 8 To exit the screen Press FUNCTION 8 To cancel the selection Set the...

Page 44: ...ORT FROM EVENT Search for an event and display the corresponding files listed by recording date Move the set lever to to select the event then press down IMPORT FROM DATE Display all the files in the medium listed by recording date ALL SCENES Display all files individually EDIT 8 8 TOTAL 00h00m SELECT REGISTER 5 Select the file to add to playlist Select Set EDIT 8 8 TOTAL 00h00m Files recorded in ...

Page 45: ...esponding files are also deleted from the playlist Playing Back Playlists 1 FUNCTION DELETE PROTECT PLAYBACK TPD FILE PLAYBACK NORMAL FILE EDIT PLAYLIST PLAYBACK PLAYLIST WIPE FADER EFFECT 2 Select PLAYBACK PLAYLIST Select Set PLAYBACK PLAYLIST 01 2007 JAN 07 04 45PM 02 2007 JAN 07 09 25PM 03 2007 JAN 07 09 55PM SELECT SET QUIT 3 Select the playlist that you want to play back Select Set 8 To exit ...

Page 46: ...aylist then press down 5 Move the set lever to to select the desired letter then press down Repeat this process to complete the name You can change the character types capital letters small letters or marks by selecting A a To correct a letter select or and press down the set lever to move the cursor to the letter then select CLEAR and press down the set lever 6 Move the set lever to to select the...

Page 47: ...c must first be finalized on the camera Connection with a DVD Burner Preparation Set the power mode switch to OFF NOTE Use the USB cable that came with the DVD burner Continued on next page FUNCTION Types of Copying and Connectable Device The Camera You can copy still images between the HDD and SD card with this camera alone pg 52 DVD Burner CU VD40 CU VD20 You can copy video still image files rec...

Page 48: ...CUTE EXECUTE AND FINALIZE SELECT SET TOP 4 Select EXECUTE or EXECUTE AND FINALIZE By selecting EXECUTE AND FINALIZE the disc is finalized after the files are copied Select Set The disc begins to be created When COMPLETED appears press down the set lever to complete the operation When COMPLETED CHANGE DISC appears change the disc The second disc begins to be created To cancel the disc creation sele...

Page 49: ...ss down SELECT FROM PLAYLIST Select the desired playlist from the list of playlists The selected playlists are displayed in a list 1 Move the set lever to to select the desired list then press down To select other lists repeat this process 2 Move the set lever to twice SELECT FROM DATE Files are sorted according to the date on which they were recorded Relevant files are displayed in a list Move th...

Page 50: ...or EXECUTE AND FINALIZE By selecting EXECUTE AND FINALIZE the disc is finalized after the files are copied Select Set The disc begins to be created When COMPLETED appears press down the set lever to complete the operation When COMPLETED CHANGE DISC appears change the disc The second disc begins to be created To cancel the disc creation select STOP 8 To return to the top screen Press MENU then move...

Page 51: ... CBR a confirmation screen is displayed after operation Select OK and proceed to step 4 2 When dubbing using the i LINK connection and with i LINK OUTPUT DUB set to 1440 CBR the image to be dubbed is not displayed on the camera s screen Check the images on the VCR DVD recorder side 3 At the point you want to start dubbing start recording on the VCR DVD recorder Refer to the VCR DVD recorder s inst...

Page 52: ...files in the source medium Select Set IMAGE COPY CANCEL EXECUTE HDD SD MEDIA FILE UNIT NUMBER OF FILE 0059 ALL SELECT SET QUIT 3 Set the direction of copy move HDD SD or SD HDD 4 5 Set the file unit ALL or FILE to copy move FILE Select when you want to transfer the selected files 1 Move the set lever to to select the desired file then press down The s mark appears on the file To select other files...

Page 53: ...ast 1 GB recommended Free hard disk space At least 750 MB for installation For creating Blu ray disc at least 30 GB at least 60 GB recommended Connector USB 2 0 connector Sound card Direct Sound compatible sound card Display Must be capable of displaying at least 1024 x 768 XGA in high color 16 bit or higher 1280 x 1024 SXGA or higher is recommended Intel nVidia ATI MPEG 2 HD DxVA compatible card ...

Page 54: ...ically starts from an operation in PowerCinema NE for Everio Digital Photo Navigator 1 5 Allows you to change the format of still image files backed up on your computer Preparation Quit any other software you are using Check that there are no other application icons on the status bar 1 Load the provided CD ROM into the PC After a moment the SETUP screen appears If the SETUP screen does not appear ...

Page 55: ...are installation starts 6 Click Finish 8 When installation is completed The installed software is displayed in All Programs The backup destination folder MyWorks for files is created on the hard disk drive that has the most free space ...

Page 56: ...e USB cable 6 Turn off the camera and PC Connecting the Camera to the PC Preparation Set the camera s power mode switch to OFF NOTES When the USB cable is connected turning on or off the camera causes malfunctions of the PC Connect the camera directly to the PC not through the hub Do not use an extension USB cable Saving the wrong kinds of files in a recording medium or deleting files or folders f...

Page 57: ... the PC screen However you do not need to use the dialog box File copy starts automatically When the progress bar disappears the process is complete NOTE When backup is performed a folder for each of the media HDD or SD stored in the MyWorks folder pg 55 is created and the files are backed up inside those folders If backup is performed from more than one camera HDD that number of HDD folders is cr...

Page 58: ...lick EVERIO_HDD or EVERIO_SD 5 Select the folder that you want to back up and drag drop it into the folder you created in step 1 SD_VIDEO Folder that contains video files If you want to back up files individually open this folder and drag drop folders such as PRG001 one by one DCIM Folder that contains still image files If you want to back up files individually open this folder and drag drop files...

Page 59: ...C then press down A dialog box is displayed on the PC screen However you do not need to use the dialog box PowerCinema starts automatically 3 Click Browse Videos for video playback or Browse Pictures for still image playback 4 Click the media that contains desired files 5 Click the desired file You can use the convenient file search function Sort by The order of files is rearranged according to it...

Page 60: ...o STANDBY ON SELECT SET BACK UP PLAYBACK ON PC QUIT 2 On the camera move the set lever to to select PLAYBACK ON PC then press down A dialog box is displayed on the PC screen However you do not need to use the dialog box PowerCinema starts automatically 3 Click Copy Edit 4 Click the media that contains desired files 5 Click the check box of the desired file The s mark appears in the check box To se...

Page 61: ...nnot be used Regarding DVD R DVD R discs only unused DVD R DVD R discs can be used Regarding DVD RW DVD RW discs used DVD RW DVD RW discs can also be used but they need to be formatted before recording Formatting a disc deletes all content recorded on the disc up until that time You may not able to play back the created disc depending on the performance of a device Also the image may stop momentar...

Page 62: ...xpress from All Programs 2 Click User s Guide or Readme Digital Photo Navigator 1 5 The User s Guide is included on the CD ROM in PDF format 1 Load the provided CD ROM into the PC 2 Right click the CD ROM icon in My Computer then click Open 3 Double click the DOCS folder 4 Open the Start pdf file and click the button of the desired language NOTES You need to connect to the Internet to be able to s...

Page 63: ...estions regarding basic operation of your PC or questions regarding specifications or performance of the OS other applications or drivers CyberLink Telephone fax support Location Language Office hours Mon to Fri Phone Fax Germany English German French Spanish Italian Dutch 9 00 am to 5 00 pm 49 700 462 92375 49 241 70525 25 Taiwan Mandarin 9 00 am to 6 00 pm 886 2 8667 1298 ext 333 886 2 8667 1300...

Page 64: ...ld wide web server at http www2 cli co jp products ne System Requirements Hardware Macintosh 1 25 GHz or faster Power PC G4 G5 or Intel processor at least Intel CoreTM Duo recommended USB 2 0 connector is required OS Mac OS X 10 4 4 to 10 4 8 RAM At least 512MB at least 1GB recommended Software Installation Preparation Quit any other software you are using 1 Load the provided CD ROM into the PC 2 ...

Page 65: ...edium or deleting files or folders from a recording medium can cause problems with the operation of the camera When it is necessary to delete a file from a recording medium delete it through the camera Also do not move or rename folders and files in the medium on PC Never disconnect the USB cable while the access charge lamp on the camera lights or blinks Continued on next page 5 Click Continue 6 ...

Page 66: ... the computer with the USB cable pg 65 1 Create a folder to back up files into 2 Set the camera s power mode switch to STANDBY ON SELECT SET BACK UP PLAYBACK ON PC QUIT 3 On the camera move the set lever to to select PLAYBACK ON PC then press down 4 Double click EVERIO_HDD or EVERIO_SD 5 Select the folder that you want to back up and drag drop it into the folder you created in step 1 SD_VIDEO Fold...

Page 67: ...and modes OUTPUT SETTING Display menus related to image output when connecting to other devices MEDIA Display menus related to recording media HDD and SD cards Select Set DISPLAY DISPLAY ON TV CLOCK ADJUST LANGUAGE DATE DISPLAY STYLE GENERAL SELECT SET QUIT 4 Select the desired menu from the second menu item For details on each menu see page 68 to 72 Select Set ON OFF DEMO MODE SELECT SET QUIT 5 S...

Page 68: ...al zoom is used When one of the larger values is set the digital zoom is used q OIS Compensates for hand shake OFF Disables the function ON Activates the function NOTES Accurate stabilization may not be possible if hand shake is excessive or depending on the shooting conditions Switch off this mode when recording with the camera on a tripod p GAIN UP Makes the subject appear bright automatically w...

Page 69: ... select the image that has a suitable exposure after shooting NOTES The interval between recording still images is approx 0 5 seconds Continuous shooting may not work well depending on the recording medium The continuous shooting speed will drop if this function is used repeatedly z SELF TIMER Starts recording when the set time elapses after the SNAPSHOT button is pressed OFF 2SEC 10SEC NOTES The ...

Page 70: ... power mode switch to OFF and to STANDBY ON again CAUTION Setting this function to off increases the chances of damaging the built in hard disk if the camera is accidentally dropped N FOCUS ASSIST When the focus assist function is used the borderline of the focused subject is displayed in the selected color BLUE RED GREEN REMOTE Turns reception of the operation signal from the remote control on of...

Page 71: ... COMPONENT connector 480i Outputs at 480i 1080i Outputs at 1080i T HDMI OUTPUT Set the definition of the video output from the HDMI connector AUTO The definition that best suits the connected device is automatically selected in the following order 1080i 480p 480p Outputs at 480p Select when the video is not projected correctly U HDMI COLOR SETTING Set the video format of the video output from the ...

Page 72: ...o recover data on the HDD which has already been erased It is recommended that you do this when disposing of the camera to prevent illegal data recovery using commercially available software Connect the AC adapter EXECUTE Performs this function Select OK when completed CANCEL Cancels this function FORMAT SD CARD You have to format newly purchased SD cards with this camera before using them This wi...

Page 73: ...n the FOLDER option setting of Windows Management information Recording medium X number Contains the video file folders Contains the still image folders Management information for the media as a whole Video file Management information for the video file After backing up to a PC the video files which were edited on a PC and then recopied to the camera are saved Contains management information files...

Page 74: ...s not turn on or the battery operation time is extremely short even after the battery is fully charged Make sure to use the camera under appropriate operating temperatures The battery is worn out and needs to be replaced Please purchase a new one 80 The access charge lamp on the camera does not light during charging Charging is difficult in places subject to extremely high low temperatures To prot...

Page 75: ...C indicator flashes The temperature of the camera is increasing If the camera continues to heat up recording may be stopped to protect the recording medium In this case turn off the power and then wait until the camera cools down The LCD monitor indications blink Certain modes of program AE effect OIS and other functions that cannot be used together are selected at the same time Digital zoom does ...

Page 76: ...o of the image is strange when watching images on your TV Change the settings in VIDEO S OUTPUT so that it matches the screen size of the connected TV 71 When outputting from the HDMI connector a part of the TV screen appears to be shaking Set HDMI OUTPUT to AUTO 71 Some functions cannot be used when using the camera to playback a disc created with a DVD burner Some functions cannot be used when p...

Page 77: ...be played back In order to allow high definition dubbing the i LINK OUTPUT DUB setting of this camera is set to 1440 CBR in the factory Due to this setting files other than those recorded at 1440 CBR quality are not output If you want to perform dubbing in high definition quality do not include files recorded at a quality other than 1440 CBR in the playlist When connected to a device that supports...

Page 78: ... 19 72 CHECK CARD S WRITE PROTECTION SWITCH Appears when you attempt recording when the write erase protection tab on the SD card is set to the LOCK position 38 VIDEO MANAGEMENT FILE IS BROKEN TO RECORD PLAYBACK VIDEO RECOVERY IS REQUIRED RECOVER The video management file is broken Recovery is required to record or play back video files Move the set lever to to select YES then press down to recove...

Page 79: ...or FORMAT SD CARD to reset the SD card folder numbers 2 With EXECUTE selected hold down the DIRECT BACK UP button and press down the set lever 3 When OK is displayed press down the set lever to complete the process Before cleaning turn off the camera and remove the battery pack and AC adapter 8 To clean the exterior Wipe gently with a soft cloth If the camera is particularly dirty dip the cloth in...

Page 80: ...er with 0 57 color LCD Speaker Monaural Language English French Spanish Portuguese Japanese Korean Traditional Chinese 8 For video Audio Format SD VIDEO Recording Playback format Video MPEG 2 TS Audio MPEG 1 Layer 2 Signal format 1080 60i Recording mode video FHD VBR average of 26 6 Mbps SP VBR average of 19 Mbps 1440 CBR CBR 27 Mbps Recording mode audio 48 kHz 384 kbps 8 For still image Format JP...

Page 81: ... 2850 5700 9999 1024 x 768 STANDARD 9999 2320 4540 9080 9999 640 x 480 FINE 9999 3650 7140 9999 9999 640 x 480 STANDARD 9999 6400 9999 9999 9999 16 9 1920 x 1080 FINE 9999 550 1080 2160 4320 1920 x 1080 STANDARD 9999 880 1720 3440 6880 Remote Control Power supply DC 3 V Battery life Approx 1 year depending on the frequency of use Operating distance Within 5 m 16 4 ft Operating temperature 0 C to 4...

Page 82: ...unit when not in use as some machines use current even when switched off Recording Medium Be sure to follow the guidelines below to prevent corruption or damage to your recorded data Do not bend or drop the recording medium or subject it to strong pressure jolts or vibrations Do not splash the recording medium with water Do not use replace or store the recording medium in locations that are expose...

Page 83: ...ace Do not store your CD ROM in a dusty hot or humid environment Keep it away from direct sunlight Declaration of Conformity Model Number GZ HD7U Trade Name JVC Responsible party JVC AMERICAS CORP Address 1700 Valley Road Wayne N J 07470 Telephone Number 973 317 5000 This device complies with Part 15 of FCC Rules Operation is subject to the following two conditions 1 This device may not cause harm...

Page 84: ... Assist 26 70 Formatting a Recording Medium 72 G Gain 69 Gain Up 68 H Hard Disk 82 HDMI Connection 36 71 I i LINK Connection 50 71 Image Rotation 31 Image Size 69 L Language Setting 17 69 LCD Monitor 12 14 82 Lens Cover 18 M Manual Recording 24 Menu Settings 67 N Nightalive 27 O On Screen Display 71 Operation Sound 70 Optical Image Stabilizer OIS 68 P PC 53 64 Picture Quality 68 69 Playlist 44 Pow...

Reviews: