background image

Model Number

Serial Number

In the spaces below, enter the model and serial number

for your television (located on the rear of the television cabinet).

Staple your sales receipt or invoice to the inside cover of this guide.

Keep this user’s guide in a convenient place for future reference.

Keep the carton and original packaging for future use.

FOR MODELS:

AV-36980 • AV-32980 • AV-27980

Color Television
User’s Guide

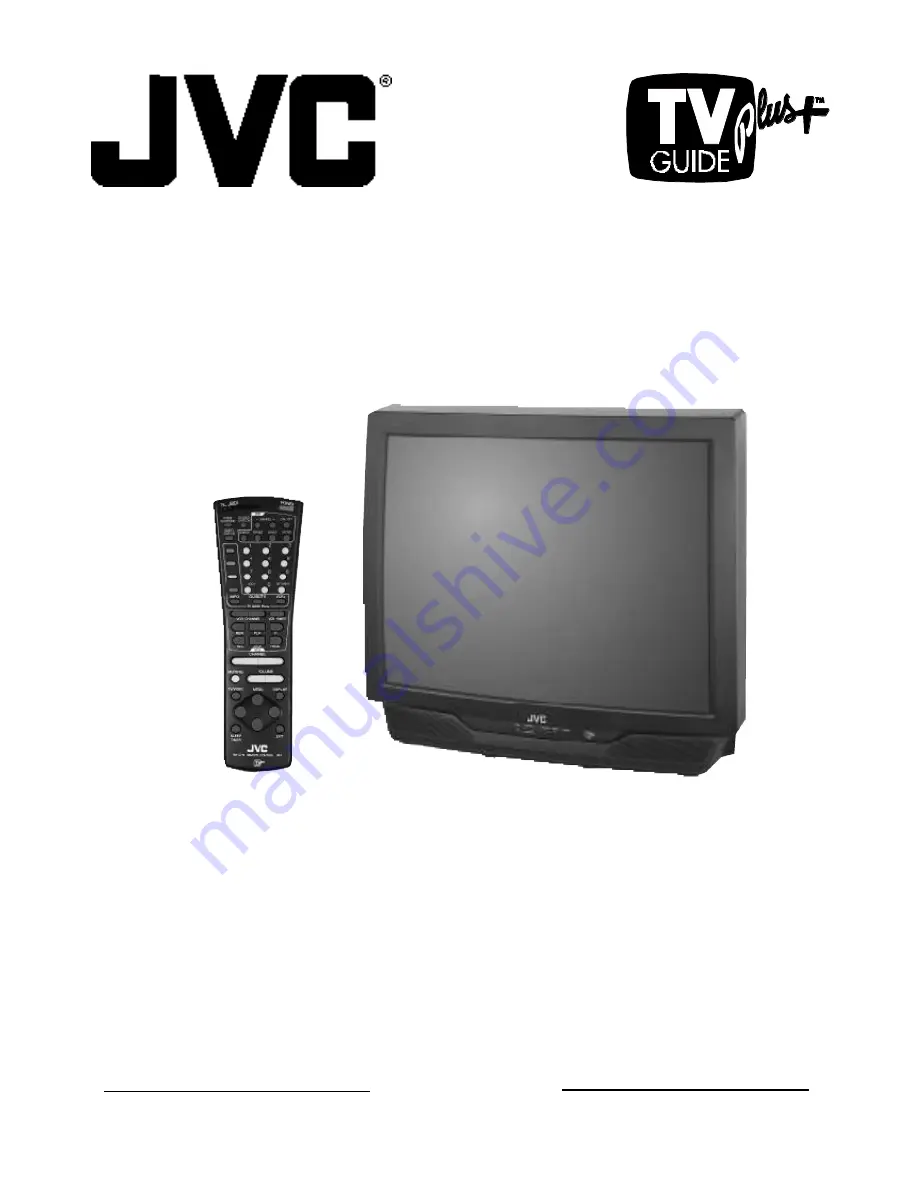
Illustration of AV-32980 and RM-C752

Summary of Contents for AV 36980

Page 1: ... of the television cabinet Staple your sales receipt or invoice to the inside cover of this guide Keep this user s guide in a convenient place for future reference Keep the carton and original packaging for future use FOR MODELS AV 36980 AV 32980 AV 27980 Color Television User s Guide Illustration of AV 32980 and RM C752 ...

Page 2: ...hbowl kitchen sink or laundry tub in a wet basement or near swimming pool etc IMPORTANT SAFETY PRECAUTIONS CAUTION RISK OF ELECTRIC SHOCK DO NOT OPEN CAUTION To reduce the risk of electric shock do not remove cover or back No user serviceable parts inside Refer servicing to qualified service personnel The lightning flash with arrowhead symbol within an equilateral triangle is intended to alert the...

Page 3: ...he TV set is to be left unattended for an extended period of time unplug it from the wall outlet and disconnect the antenna This will prevent damage to product due to lightning storms or power line surges 14 A TV set and cart combination should be moved with care Quick stops excessive force and uneven surfaces may cause the TV set and cart combination to overturn SERVICE 15 Unplug this TV set from...

Page 4: ...s 23 Using TV Guide Plus 24 Surfing 25 What s Next 26 Scanning 27 Sorting 28 Recording 29 Special TV Guide Plus Features 31 MENU FUNCTIONS Onscreen Menus 32 Initial Setup 33 TV Guide Plus Options Menu TV Guide Plus Demo Channel Summary 34 Channel Guard Lock Picture Adjust 35 Tint Color Picture Bright Detail Notch Noise Muting Set Video Status Sound Adjust 36 Bass Treble Balance MTS Multi channel S...

Page 5: ... between each connection 5 Each jack on the back of the TV is labeled If you read these instructions and still do not fully under stand the connections process seek assistance 6 The IR Mouse lets TV Guide Plus control your cable box and or your VCR You must place the transmitter of the IR Mouse in front of the correspond ing window on the cable box or VCR 7 The AV Compu Link Cable is supplied with...

Page 6: ...6 C O N N E C T I O N S FRONT PANEL DIAGRAMS REAR PANEL DIAGRAM REAR PANEL DIAGRAM Common to all models in this book FRONT PANEL DIAGRAM AV 36980 FRONT PANEL DIAGRAM AV 32980 AV 27980 ...

Page 7: ...to use a cable box to tune any or all channels use dia gram 2 next page 3 If you have a video output on your cable box refer to diagram 3 next page 1 Connect cable or antenna wire out from wall in to splitter RF input 2 Connect wire out from splitter RF output in to TV RF input 3 Connect wire out from splitter RF output in to VCR RF input NOTES A In order for TV Guide Plus to control the VCR put o...

Page 8: ... need to set the output of cable box to O AUX D When you connect cable box and VCR as shown in the above you must set the channel of VCR to RF output of cable box after you finished TV Guide Plus Setup from page 18 to page 22 1 Connect cable wire out from the wall in to the cable box input 2 Connect cable wire out from cable box in to the splitter RF input 3 Connect cable wire out from splitter RF...

Page 9: ...out from VCR Left Audio output in to TV Left Audio input jack 3 Red audio cable out from VCR Right Audio output in to TV Right Audio input jack NOTE If your VCR is mono it has only one audio out jack Connect it to the TV L Mono input AUDIO VIDEO CONNECTIONS STEREO 1 White audio cable out from camcorder in to TV Left Audio input jack 2 Yellow video cable out from camcorder in to TV Video input jack...

Page 10: ... an S VHS camcorder 1 S VHS Plug out from VCR in to TV s S Video input CONNECTING S VHS ACCESSORIES VCR or Camcorder CONNECTING TO AN EXTERNAL AMPLIFIER 1 White audio cable out from TV Left Audio output jack in to Amplifier Left input 2 Red audio cable out from TV Right Audio output jack in to Amplifier Right input NOTE A Set the TV Speaker to OFF page 39 switch the audio output to VARI page 39 an...

Page 11: ...k cable has a male 3 5 mm mono mini plug on each end B If your JVC brand VCR has A Code B Code Remote Control Switching see your VCR instructions using VCR A Code will switch the TV to Video Input 1 If you use Input 1 for Video out from the cable box use Input 2 here Using B Code will switch the TV to Video Input 2 C To connect a JVC HiFi receiver or amplifier for a completely automated home theat...

Page 12: ...place REMOTE CONTROL 12 G E T T I N G S T A R T E D 1 2 3 RM C752 RM C752 NOTES Once the batteries are in the remote and you have confirmed that the remote is working you must program the remote to operate your particular brand of VCR and or cable box If it takes you more than 3 minutes to change the batteries you might have to reprogram the CATV and or VCR codes If the remote control acts erratic...

Page 13: ...s and hold down the RETURN button for another three seconds and the message RETURN CHANNEL CANCELLED appears Pressing a number key or turning the set off will also cancel a Return channel Make sure that the TV CATV switch is set to TV Switch to CATV only to operate a cable box Press the POWER button on the remote control or the TV front panel The On Timer lamp will glow red The first time you turn...

Page 14: ...niversal Videoway Vid Tech Vidter Viewstar Zenith Zentek SATELLITE RCA Sony Gradiente CODES 004 019 035 062 074 054 092 077 032 040 042 078 094 018 019 035 033 034 048 049 001 042 091 073 036 007 066 070 004 040 065 069 029 001 044 088 091 063 042 030 052 076 011 001 042 043 044 052 063 088 082 007 050 023 045 064 064 013 022 058 062 020 040 026 021 007 050 023 075 059 CODES 097 098 100 CABLE BOX ...

Page 15: ...5 015 008 031 007 016 001 018 084 003 024 019 092 020 067 080 095 003 094 052 015 027 089 032 090 091 083 003 098 003 002 001 006 056 057 072 034 004 099 075 002 025 089 094 070 019 092 020 067 080 095 029 065 001 002 006 041 042 071 004 018 003 056 092 084 040 007 031 006 001 007 084 031 035 094 027 003 087 034 028 026 029 052 015 089 032 090 091 083 031 035 094 027 003 087 034 028 026 029 054 09...

Page 16: ...the next letter number or other choice in a submenu or Back up to correct an error Whenever you see left and right arrows we want you to press the MENU LEFT or MENU RIGHT button This function allows you to Select the highlighted item or Select the options in a submenu The Press Button means you should press that button on the remote control The Helping Hand points to the highlighted or selected it...

Page 17: ...NGUAGE To choose the language PLUG IN MENU The Plug In Menu comes up automati cally when you first turn on the TV after plugging it in The Plug In Menu sets the default preferences for you for The Language in which you want the onscreen displays to appear The Auto Tuner Setup of channels to be included in scan TV Guide Plus Setup If you experience a power interruption the Plug In Menu will reappea...

Page 18: ...e The TV Guide Plus Setup screen will automatically disappear when you don t operate anything further STEP 2 1 Using the 10 key pad on your remote enter your zipcode Press GREEN or to correct an error 2 When finished press BLUE to enter your zipcode 1 Input the first number or letter of your postal code Press the MENU arrow up button to begin the numbers and alphabet Once you are in the number let...

Page 19: ... in order for TV Guide Plus to download the data If you do not have a cable box press Yellow to skip to Step 8 on page 21 STEP 5 A screen telling you to turn your cable box to Channel 02 and to select your cable box brand from the list appears You can check for your cable box brand on page 20 1 Press or GREEN or YELLOW to go to your brand 2 Press the BLUE button once your brand appears STEP 6 A sc...

Page 20: ...s Pilot Pioneer ProScan Pulser Quasar Randix RCA Realistic Samsung Sansui Sanyo Scott Sears Sharp Shintom Shogun Signature Singer Sony Sylvania Symphonic Tatung Teac Technics Teknika Telefunken Thomas TMK Toshiba Totevision Vector Research Video Concepts Videosonic XR 1000 Yamaha Zenith VCR BRAND TABLE BRAND Archer Cable Cinema Cabletenna Cableview Century Citizen Curtis Diamond Eagle Eastern Garr...

Page 21: ... is testing the codes for your brand will appear The cable box will switch to Channel 9 when the proper code is found 1 Press the GREEN button if your VCR switches to Channel 9 2 If your VCR does not switch to Channel 9 press YELLOW and TV will try another version of your code If TV Guide Plus does not recognize your VCR a screen stating VCR test failed Please consult manual and try again will app...

Page 22: ...rd from the cable box typically Channel 03 or 04 2 Press the BLUE button to exit setup 3 Turn the TV off 4 Data downloading usually takes less than 15 minutes However on some cable systems this download may take as much as two hours SOME VERY IMPORTANT FINAL WORDS ON TV GUIDE PLUS NOTE 1 TV Guide Plus automatically includes up to 50 channels in the guide See page 33 TV Guide Plus Channel Editor if...

Page 23: ...DATA DOWNLOAD The second type of data download is based on the broadcasting schedule Several times a day TV Guide Plus will complete a download that updates the data information HOST SEARCH MESSAGES During the initial host search TV Guide Plus information and PIP are not available You will get the following message if you attempt to use TV Guide Plus during the Initial Host Search You will get the...

Page 24: ...ns of what you are likely to see As with the program information the Features and options or categories of TV Guide Plus are also downloadable and therefore these too can change daily This is really the information superhighway coming to your living room There will be more options available to you in the future as we come up with even more really good ideas For now enjoy USING TV GUIDE PLUS 24 T V...

Page 25: ...e channels through TV Guide Plus The TV Guide Plus PIP window will display each show as you go and when you exit TV Guide Plus you will automatically go to the channel last displayed in the PIP window T V G U I D E P L U S 25 ...

Page 26: ...WHAT S NEXT You can see what s on next for the channel that you are viewing and still see the current program in the PIP window 26 T V G U I D E P L U S ...

Page 27: ...T V G U I D E P L U S 27 SCANNING You can SCAN what s on later today or even all day tomorrow and still watch whatever you were watching in the TV Guide Plus PIP window ...

Page 28: ...SORTING You can SORT through all that s on and categorize by movies sports children s and other categories 28 T V G U I D E P L U S ...

Page 29: ...RECORDING Point and shoot recording makes timer recording as easy as pressing a button T V G U I D E P L U S 29 ...

Page 30: ...30 T V G U I D E P L U S RECORDING To check your preprogrammed shows or to cancel a show ...

Page 31: ...UIDE PLUS FEATURES This page shows services which will be provided by companies other than JVC Since the Features option is a future service as of March 1998 you will not be able to use it This page shows how to display the Features screen ...

Page 32: ...SELECT BY OPERATE BY EXIT BY EX IT PREVIOUS TV SPEAKER ON OFF AUDIO OUT VARI FIX LANGUAGE ENG FRE SPA CLOSED CAPTION NEXT PAGE SELECT BY OPERATE BY EXIT BY EX IT The Plug In Menu only appears the first time the TV is plugged in or after a power interruption of more than 90 seconds NOTE The menu screens depicted in this book are representations of the menu screens on your set They are not exact rep...

Page 33: ...n Guide Plus list If you set ON when you select the channel which no station is preset you will get the following message TV GUIDE PLUS DEMO Demo lets you view the features of TV Guide Plus right onscreen To TV GUIDE PLUS DEMO To begin the Demo When you operate the Demo screen Press the BLUE RED YELLOW or GREEN buttons on the remote control and you can actually operate the TV Guide Plus demo infor...

Page 34: ...NEL to select the channel To the SCAN column To include or delete from scan EXIT when finished Note Channels set to scan will be marked with an Note Some cable systems experience interference from radio frequencies on Cable Channel 95 If you like you can delete this channel from scanning by removing the CHNO SCAN CH NO SCAN 01 06 ESPN 02 WABC 07 WMPI 03 WCBS 08 XNBE 04 WPIX 09 MTV 05 WNBC 10 CHANN...

Page 35: ...o exit the Picture Adjust menu at any time press the EXIT button NOISE MUTING Inserts a blue screen and eliminates noise from channels that are not broadcasting or are too weak To NOISE MUTING To turn ON OFF Note Noise Muting will not work when you operate the Auto Tuner Setup or Channel Summary SET VIDEO STATUS Save Picture Settings as Choice To SET VIDEO STATUS To operate To operate the TINT opt...

Page 36: ...ncrease treble To decrease treble To move to next BALANCE The Balance adjustment feature allows you to center the TV s sound to your needs To BALANCE To shift the speaker balance to the right To shift the speaker balance to the left To move to next Some Sound Advice You can tell if a program is broadcast in stereo by the position of the ON AIR arrow in the MTS menu Unfortunately it is common for s...

Page 37: ...re receiving the TV Guide Plus signal you cannot set the clock TV Guide Plus sets it for you To SET CLOCK To operate To set the hour AM PM To move to minutes To set the minutes To move to START CLOCK when done with settings To start the clock Note If you attempt to Start Clock without setting the time you will receive this message Note You can only set the Clock manually if TV Guide Plus is not op...

Page 38: ...rogram reminder or to simulate that you re home when you re out of the house To ON OFF TIMER To operate To set the hour AM PM you want the TV to turn on To move to minutes To set the minutes To accept ON TIME and to move to OFF TIME set time again To move to CHANNEL To select channel To move to MODE Choose ONCE or EVERYDAY To YES NO Choose YES for on NO for off To FINISH To save settings Note A Ti...

Page 39: ...ernal amplifiers and speakers shut off the TV Speakers above AUDIO OUT VARI FIX CLOSED CAPTION If they are included in a program you can view closed captions or text information To CLOSED CAPTION To operate To select a caption channel CC1 to CC 4 To accept that channel and move to TEXT To select a text channel T1 to T4 To accept that channel and move to BACKGROUND To select BLACK or CLEAR To accep...

Page 40: ...ED CAPTION to turn it off Note Closed captioning may not correctly operate when the signal received is faint or when you are playing a video tape VIDEO STATUS The VIDEO STATUS button lets you select the Choice settings of the Set Video Status menu or reset to factory settings Standard resets the picture settings to factory standard levels Choice consists of the settings that you saved in the Set V...

Page 41: ...ther discus sion of Return and Return on page 13 HYPER SURROUND Create a deep 3 dimensional sound effect by channeling the sound through the TV s front firing speakers TV VIDEO1 VIDEO2 RETURN There are two kinds of Return Return Set a Return Channel to return to after scanning with CHANNEL RETURN and hold for 3 seconds Scan with CHANNEL RETURN Note To cancel a Return channel press and hold Return ...

Page 42: ...creen into the PIP window FREEZE Note When the PIP is off pressing FREEZE takes a snapshot of the main screen and puts it into the PIP window great for catching those mail order addresses Note When the PIP is on FREEZE stops the PIP picture SOURCE You can select the source for the PIP window SOURCE SWAP You can swap the PIP picture and the main picture SWAP 02 07 MOVE You can move the PIP window t...

Page 43: ...ions Perhaps the On Off Timer is set press the power button check page 38 The power was interrupted or the power cord unplugged The Sleep Timer may be set see page 40 TV Guide Plus information has not been downloaded begins page 18 CHECK Tint and color may be improperly adjusted Check page 35 Video Status mode may be set to an inappropriate setting Check page 35 There could be interference from an...

Page 44: ...nstallation removal for repair and reinstallation after repair is not covered 3 Operational adjustments covered in the Owner s manual normal maintenance video and audio head cleaning 4 Damage that occurs during shipment due to an act of God or of consequence to cosmetic changes 5 Signal reception problems and failures due to line power surges 6 Video Pick up Tubes CCD Image Sensor Cartridge Stylus...

Page 45: ...ay of JVC products service is key to maintaining the high level of performance for which JVC is world famous The JVC service and engineering organization stands behind our products National Headquarters JVC Service Engineering Company of America Division of U S JVC Corp 107 Little Falls Road Fairfield NJ 07004 2105 107 Little Falls Road Fairfield NJ 07004 2105 201 808 9279 5665 Corporate Avenue Cy...

Page 46: ...olor Television NTSC system BTSC system Multichannel Sound VHF 2 to 13 UHF 14 to 69 Sub Mid Mid Super Hyper and Ultra bands 181 channel frequency synthesizer system AC 120V 60Hz 3W 3W Remote control x 1 AA batteries x 2 IR Mouse x 1 Double Sided Tape for IR Mouse x 2 75 ohms VHF UHF terminal F type connector Video 1 Vp p 75 ohms Audio 500 mVrms 4 dBs high impedance Y 1Vp p positive 75 ohms negativ...

Page 47: ...N O T E S ...

Page 48: ...JVC COMPANY OF AMERICA A Division of U S JVC CORP 41 Slater Drive Elmwood Park New Jersey 07407 JVC CANADA INC 21 Finchdene Square Scarborough Ontario Canada M1X 1A7 LCT0135 001A A 0498 TN JII JIM ...

Reviews: