background image

English

Español

Français

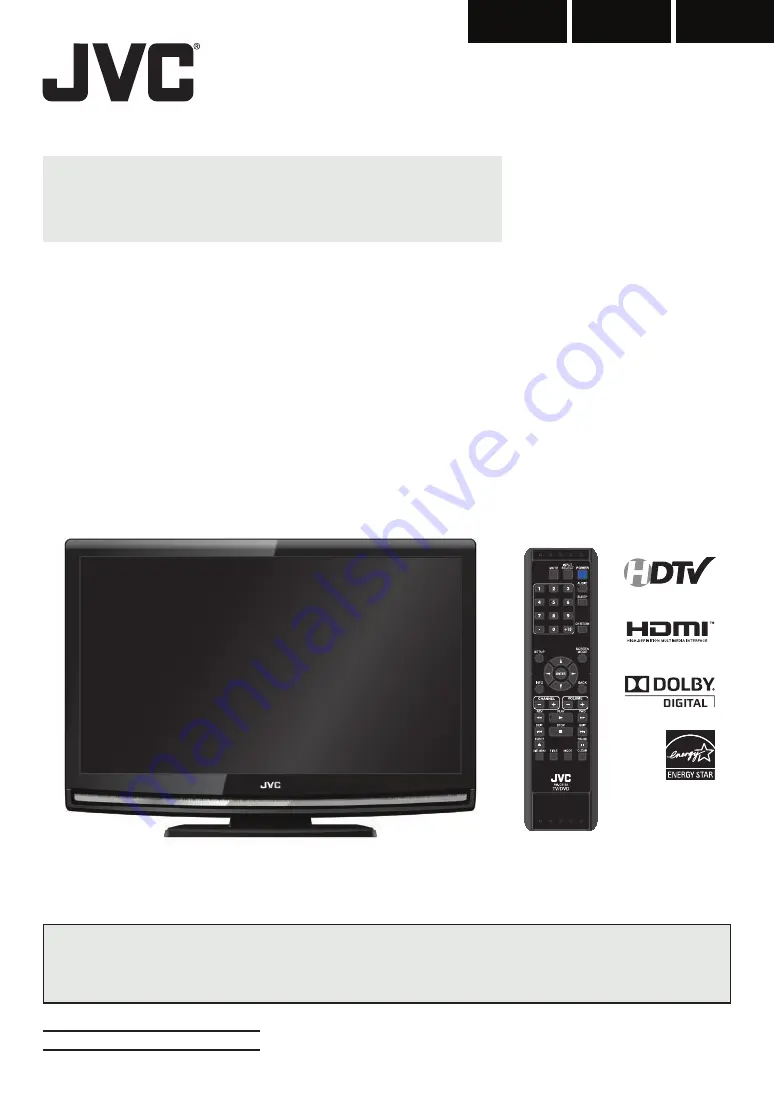
LCD Television Built-in 

DVD Player Users Guide

LT-32DV20
LT-32D200

32" class (31.5" Diagonal)

0209TKH-FU-FU

Important Note:

In the spaces below, enter the model and serial number of your television (located at the rear of the television cabinet).  Staple your 
sales receipt or invoice to the inside cover of this guide.  Keep this user’s guide in a convenient place for future reference. Keep the 
carton and original packaging for future use.

HIGH

DEFINITION TELEVISION

Serial Number:

Model No:

Summary of Contents for 1EMN24860

Page 1: ...spaces below enter the model and serial number of your television located at the rear of the television cabinet Staple your sales receipt or invoice to the inside cover of this guide Keep this user s guide in a convenient place for future reference Keep the carton and original packaging for future use HIGH DEFINITION TELEVISION Serial Number Model No ...

Page 2: ...nterference unless the modifications are expressly approved in the manual The user could lose the authority to operate this apparatus if an unauthorized change or modification is made RADIO TV INTERFERENCE This apparatus has been tested and found to comply with the limits for a Class B digital device pursuant to Part 15 of the FCC Rules These limits are designed to provide reasonable protection ag...

Page 3: ...he unit in the following conditions If so do not use this unit at least for a few hours until its inside gets dry The unit is moved from a cold place to a warm place Under conditions of high humidity After heating a cold room NOTE ABOUT RECYCLING This unit s packaging materials are recyclable and can be reused Please dispose of any materials in accordance with your local recycling regulations Batt...

Page 4: ...oles are aligned Make sure not to put the AC power cord between the stand and the unit 3 Drive screws in the 4 threaded holes at the bottom of the stand until they are tight To remove the stand from this unit Unscrew the screws indicated by above screw holes After the screws are removed pull the stand up toward the rear of the unit Be careful not to drop the stand when you remove it If you need to...

Page 5: ...video Input AV Input Digital Audio Output Analog Audio Output 5Features TV DVD Dolby Digital Sound Enjoy Dolby Digital multi channel surround sound when you connect the unit to your Dolby Digital decoder Still Fast Slow Step Playback Various playback modes are available including still pictures fast forward reverse slow motion and step frames DVD Menus in a Desired Language You can display DVD men...

Page 6: ...na Confirmation 22 Language Selection 22 Picture Adjustment 23 Sound Adjustment 24 Closed Caption 25 Child Lock 28 PC Settings 32 Energy Saving Mode 33 Location 33 Current Software Info 34 DVD Functions OPERATING DVD Playable Media 35 Unplayable Media 35 Playback 36 Disc Menu 36 Resume Playback 36 Paused and Step by step Playback 36 Fast Forward Fast Reverse 37 Slow Forward Slow Reverse 37 Zoom 37...

Page 7: ...an external device 16 HDMI 2 input jack p 10 p 11 HDMI connection from HDMI device Rear Panel 17 AC power cord p 14 Connect to a standard AC outlet to supply power to this unit 18 cable management p 14 Use this holder to bundle the cables 19 component video and audio input jack p 10 p 12 RCA component video cable and RCA audio cable connection from an external device 20 audio output jack p 13 RCA ...

Page 8: ...is displayed 6 INFO p 18 p 41 Digital mode DTV Press to display the channel information signal type and TV setting Analog mode TV Press to display the channel number signal type and TV setting External input mode Press to display the external input mode signal type and TV setting DVD mode Press to display the current status 7 CHANNEL p 16 p 17 Press to select channels and the external input mode 8...

Page 9: ...s to select the audio language Analog mode TV Press to select the audio mode DVD mode Press to select the audio language DVD or sound mode CD 16 SLEEP p 16 Press to activate the sleep timer 17 CH RETURN p 16 Press to return to previously viewed channel 18 SCREEN MODE p 19 Press to select aspect ratio available for the TV screen 19 BACK p 18 Press to return to the previous menu operation 20 VOLUME ...

Page 10: ...Satellite Box Use an HDMI or an RCA component video cable to connect the HDMI or the component video input jack of the unit to the HDMI or the component video output jack of the cable receiver satellite box If you connect to the unit s component Video Input jack connect RCA audio cables to the Audio L R jacks below the Component Video connector COMPONENT VIDEO OUT Pr Cr Pb Cb Y AUDIO OUT R L S ER ...

Page 11: ...I CEC enabled device When switching the TV s external input or channel When switching the TV s menu language Information regarding behaviour of the device when status is received refer to the external device s manual HDMI OUT CHAPT R 5 REPEAT B T TLE 5 Note This unit accepts 480i 480p 720p 1080i video signals and 32kHz 44 1kHz 48kHz audio signals This unit accepts only 2 channel audio signal LPCM ...

Page 12: ...y for video devices connected to the unit If you connect to the unit s S Video Input jack connect RCA audio cables to the Audio L R jacks below the Video connector e g CHAP ER 15 REPE T B T TLE 5 AUDIO OUT R L S VIDEO OUT Note If you connect to the S video input jack and the video input jack at the same time the S video connection will have priority No supplied cables are used in this connection P...

Page 13: ...y Audio Output Connection À Digital for digital broadcasting only If you connect this unit to an external digital audio device you can enjoy multi channel audio like 5 1ch digital broadcasting sound Use a digital audio coaxial cable to connect the unit to external digital audio devices À Analog for both analog and digital broadcasting If you connect this unit to an external analog audio device you...

Page 14: ...se the built in battery of your PC 5Cable Management Keep the cables through this holder to avoid tangle them 5Plug In the AC Power Cord Make sure that the AC power cord must be plugged to an AC outlet after all the necessary connections are completed Caution Do not connect the AC power cord to a power supply outside the indicated voltage of this unit AC 120V Connecting the AC power cord to a powe...

Page 15: ...f the ENERGY STAR qualification Select Home the unit is set to maximize the energy efficiency for home setting and it can be adjusted through a choice of picture and sound quality according to your preference When the initial setup is completed the lowest memorized channel with the confirmation message of the location setting will be displayed on the TV screen Note If you connect the cable system ...

Page 16: ...ultiple channels broadcast by a single network Note No Signal will appear on the TV screen after the subchannel broadcast is over Audio only program message will appear on the TV screen when you receive only sound signal 5Volume Adjustment This section describes how to adjust the volume The mute function which turns the sound off and on is also described Use VOLUME to adjust the audio volume Volum...

Page 17: ...on describes how to switch the audio in the analog mode and how to switch the audio language in the digital mode TV Press AUDIO to display the currently selected audio mode While receiving an MTS broadcast press repeatedly to cycle through the available audio channel 11 SAP STEREO When all audio are available SAP STEREO SAP MONO SAP STEREO When stereo and monaural audio are available MONO STEREO M...

Page 18: ... Memories C KABC A quarter century ago which may now qualify as the good old days of newspapering run of paper sales accounted for 80 percent of the industry s advertising revenues Department stores and supermarket were 1 2 3 4 5 6 7 8 9 10 1 program title 2 program guide The program guide added to broadcasting information is displayed to a maximum of 4 lines 3 broadcast station 4 channel number 5...

Page 19: ...e picture is stretched horizontally and vertically to fill the screen This crops out the top and bottom of the picture Wide Display the picture with its center at the original size and the edges stretched horizontally to fill the screen For 16 9 video signal Full Display a 16 9 picture at its original size Zoom Display a 16 9 picture at its maximum size without changing its horizontal and vertical...

Page 20: ...in stop mode Refer to DVD SETTING section on page 44 5Autoscan If you switch wires e g between antenna and CATV or if you move the unit to a different area after the initial setting or if you restore the DTV channel you deleted you will need to perform autoscan Beforeyoubegin Make sure the unit is connected to antenna or cable 1 Press SETUP to display the main menu 2 Use Cursor K L to select CHANN...

Page 21: ...s are highlighted When you remove a main channel its subchannels are removed as well Note The channel with the DTV indicated on the display is ATSC Otherwise the channel is NTSC 5 Press SETUP to exit 5Manual Register This function lets you add the channels that were not added by the autoscan due to the receptible condition at the initial setting 1 Press SETUP to display the main menu 2 Use Cursor ...

Page 22: ...he antenna condition n a Antenna Back Indicator s available for digital broadcasting only Video PICTURE SOUND CHANNEL DETAIL LANGUAGE DVD Ch Change CH 5 Press SETUP to exit 5Language Selection You can choose English Spanish or French as your on screen language 1 Press SETUP to display the main menu 2 Use Cursor K L to select LANGUAGE then press ENTER PICTURE SOUND CHANNEL DETAIL LANGUAGE DVD 3 Use...

Page 23: ...desired setting then press ENTER Personal Standard Sports Movie and Game Picture Picture Picture Mode Brightness Contrast Color Tint Sharpness Color Temperature Personal Standard Sports Movie Game PICTURE SOUND CHANNEL DETAIL LANGUAGE DVD Brightness Contrast Color Tint Sharpness Color Temperature Use Cursor K L to select the desired setting then use Cursor s B to adjust Cursor s Cursor B Brightnes...

Page 24: ...rcials and the programs Use Cursor K L to select the desired option then press ENTER Off On o Vo g Auto Volume Leveling Auto Volume Leveling reduces volume d fferences between channels and programs providing a consistent audio level PICTURE SOUND CHANNEL DETAIL LANGUAGE DVD On Select if you want to reduce volume differences between the TV commercials and the programs Off Select if you want to remo...

Page 25: ... press ENTER d C io Closed Caption Off Off Caption Service Digital Caption Service Caption Style PICTURE SOUND CHANNEL DETAIL LANGUAGE DVD 5 Use Cursor K L to select the desired closed caption then press ENTER Closed Caption Closed Caption Digital Caption Service Caption Style Caption Service Off CC1 CC2 CC3 CC4 Text1 Text2 Text3 Text4 PICTURE SOUND CHANNEL DETAIL LANGUAGE DVD Caption mode CC1 and...

Page 26: ... the caption style such as font color or size etc 4 Use Cursor K L to select Caption Style then press ENTER Closed Caption Off Off Caption Service D gital Caption Service Caption Style PICTURE SOUND CHANNEL DETAIL LANGUAGE DVD 5 Use Cursor K L to select User Setting then press ENTER n S Caption Style Off Middle Wh te So id Black Black None So id User Setting Font Sty e Font Size Font Color Font Op...

Page 27: ...OUND CHANNEL DETAIL LANGUAGE DVD Edge Color Edge color of the displayed caption can be switched as below White Black Red Green Blue Yel ow Magenta Cyan Closed Caption User Setting Font Style Font Size Font Color Font Opacity Background Color Background Opacity Edge Type t yle Caption Style Edge Color PICTURE SOUND CHANNEL DETAIL LANGUAGE DVD Edge Type Edge type of the displayed caption can be swit...

Page 28: ... Clear Downloadable Rating New Password ld Child Lock A D C B PICTURE SOUND CHANNEL DETAIL LANGUAGE DVD A A Channel Lock B B MPAA Rating C C TV Rating D D New Password D page 29 D page 29 D page 30 D page 31 Note When you select a rating and set it to Block the higher ratings will be blocked automatically The lower ratings will be available for viewing When you set the highest rating to View all r...

Page 29: ...LANGUAGE DVD Back BACK 7 Press SETUP to exit B MPAA Rating B MPAA Rating MPAA Rating is the rating system created by MPAA Motion Picture Association of America 5 Use Cursor K L to select MPAA Rating then press ENTER Cannel Lock MPAA Rating TV Rating Canadian Eng ish Rating Canadian French Rating Downloadable Rating Clear Downloadable Rating New Password Child Lock Child Lock PICTURE SOUND CHANNEL ...

Page 30: ...follow the step below Use Cursor K L s B to select the desired rating then press ENTER repeatedly to switch between View and Block TV MA TV 14 TV PG TV G TV Y7 TV Y FV V S L D R i g TV Rating Select View Block NTER PICTURE SOUND CHANNEL DETAIL LANGUAGE DVD Back BACK Rating Category TV MA Mature audience only higher TV 14 Unsuitable for children under 14 TV PG Parental guidance suggested TV G Gener...

Page 31: ...Password h Child Lock PICTURE SOUND CHANNEL DETAIL LANGUAGE DVD 6 Press the Number buttons to enter the new 4 digit PIN Code Enter PIN Code again in Confirm password entry field w w r New Password Confirm password Enter password PIN Code PICTURE SOUND CHANNEL DETAIL LANGUAGE DVD Back BACK 7 Press SETUP to exit Note Make sure new PIN Code and confirm PIN Code must be exactly the same If they are di...

Page 32: ...zontal Pos t on Vertical Position 0 0 PICTURE SOUND CHANNEL DETAIL LANGUAGE DVD 5 Adjust the setting Position Reset Use Cursor K L to select Reset then press ENTER Cancel Reset i n Position Reset Resets the d splay position of the p cture PICTURE SOUND CHANNEL DETAIL LANGUAGE DVD The horizontal vertical position of the PC screen are automatically adjusted Horizontal Position Vertical Position Use ...

Page 33: ...SOUND CHANNEL DETAIL LANGUAGE DVD On Select if you want to reduce the power consumption Off The power consumption may possibly exceed the limited requirement of the ENERGY STAR qualification 5 Press SETUP to exit 5Location When you select Retail the power consumption may possibly exceed the limited requirement of the ENERGY STAR qualification 1 Press SETUP to display the main menu 2 Use Cursor K L...

Page 34: ...ANNEL DETAIL LANGUAGE DVD 3 Use Cursor K L to select Current Software Info then press ENTER On Home Closed Caption Child Lock PC Sett ngs Energy Saving Mode Location Current Software Info t Detail PICTURE SOUND CHANNEL DETAIL LANGUAGE DVD 4 Confirm the version of the software currently used u n f r Current Software Info Release Vers on CJ32OD 1 0 Back PICTURE SOUND CHANNEL DETAIL LANGUAGE DVD 5 Pr...

Page 35: ...s Only the sound recorded on the normal CD layer can be delivered The sound recorded on the high density super audio CD layer cannot be delivered Do not use a single CD adaptor which makes 3 inch 8 cm to 5 inch 12 cm disc You can play back discs with the marks listed in Playable Media If you use non standardized discs this unit may not play them back or the sound and video quality will be compromi...

Page 36: ...d to any key commands 5Disc Menu DVD Some discs contain disc menus which describe the contents of the disc or allow you to customize disc playback or title menu which lists the titles available on the DVD To display the DVD menu press DISC MENU and use Cursor K L s B to select an item then press ENTER or PLAY B To display the top menu press TITLE and use Cursor K L s B to select an item then press...

Page 37: ...w playback mode are blurred Refer to page 47 Slow forward slow reverse speed varies with disc Approximate speed is 1 1 16x 2 1 8x and 3 1 2x The sound will be muted during this function 5Zoom DVD The zoom function allows you to enlarge the video image and to pan through the enlarged image 1 During playback press MODE repeatedly until appears OFF ZOOM The picture becomes twice as large 2 Press ENTE...

Page 38: ...hapter title or track search can only be performed during playback or when the unit has kept the resume information It cannot be performed in the stop mode The total number of chapters titles tracks in your disc with less than 10 chapters titles tracks press the chapter title track number directly To play a double digit chapter title track press the chapter title track number Track search is not a...

Page 39: ... input at step 3 Time search can only be performed during playback or when the unit has kept the resume information It cannot be performed in the stop mode Direct Search Direct Search Press the Number buttons to select your desired chapter title or track Note To select a single digit chapter title or track number press the number directly To select double digit chapter title or track number If the...

Page 40: ...e Cursor K L to select a desired track then press ENTER to store Additional tracks may be on other screens Use Cursor K L to go on to the next previous pages Repeat this step until you have selected all the tracks you wish to play back in the program or PROGRAM PLAY CLEAR CD DA TOTAL 0 08 22 1 1 3 3 T 15 3 18 T 16 4 24 ALL CLEAR T 4 3 58 T 16 4 24 T 16 4 24 EN ER OK Up to 99 tracks can be ordered ...

Page 41: ...A B A B repeat bit rate indication for the amount of audio and video data currently being read layer number appears only when playing a 2 layered disc L0 Layer 0 is playing L1 Layer 1 is playing CH Chapter current chapter number total chapters elapsed time of the current chapter remaining time of the current chapter current playback status appears only when multi angle is available on the DVD TT T...

Page 42: ... to change the audio setting from the disc menu Refer to the manual accompanying the discs for details If your language is not shown after pressing AUDIO several times the disc may not have that language However some discs allow you to change multiple audio languages setting in the disc menu Operation varies depending on the disc so refer to the manual along with the disc When NOT AVAILABLE appear...

Page 43: ...to something other than STEREO Refer to Stereo Sound Mode on page 43 Turn down the level or select OFF if the sound is distorted Marker Setup Marker Setup Thisfeatureallowsyoutoassignaspecificpointonadisctobecalledbacklater To set a marker 1 During playback press MODE repeatedly until appears e g DVD _ _ 12 SEARCH 2 Use Cursor K L repeatedly until marker search menu appears 1 2 3 4 5 6 7 8 9 10 AC...

Page 44: ...FF ENGLISH FRENCH SPANISH GERMAN ITALIAN SWEDISH SUBTITLE DISC MENU 1 Default ENGLISH Select the desired language in DVD menu LANGUAGE ENTER OK ENGLISH FRENCH SPANISH GERMAN ITALIAN SWEDISH DUTCH DISC MENU Note To change the on screen language call up LANGUAGE from the main menu and set the desired language Refer to Language Selection on page 22 1 Language options are not available with some discs...

Page 45: ...corded in the Dolby Digital format AUDIO ENTER OK DRC ON DOWN SAMPLING ON DOLBY DIGITAL BITSTREAM ON Compress the range between soft and loud sounds OFF No effects original sound DOWN SAMPLING Default ON This function is available only on digital outputting of a disc recorded in 96kHz AUDIO ENTER OK DRC ON DOWN SAMPLING ON DOLBY DIGITAL BITSTREAM ON When outputting in 48kHz OFF When outputting the...

Page 46: ...ursor K L to select the desired item then press ENTER PARENTAL ENTER OK ALL 8 ADULT 7 NC 17 6 R 5 PGR 4 PG13 3 PG PARENTAL LEVEL PARENTAL LEVEL ALL All parental locks are cancelled 8 ADULT All ratings adult general children can be played back 7 NC 17 2 G Only DVD intended for general use and children can be played back 1 KID SAFE Only DVD intended for children can be played back 7 Press SETUP to e...

Page 47: ...TER ANGLE ICON Default ON Set to ON to show the angle icon when multiple camera angles are available during DVD playback OTHERS ENTER OK ANGLE ICON ON STILL MODE AUTO AUTO POWER OFF ON STILL MODE Default AUTO Set the picture quality in the still mode If you select AUTO it automatically selects the best resolution setting FRAME or FIELD based on the date characteristics of the pictures FIELD The pi...

Page 48: ...NG 5160 Esperanto 5161 Estonian 5166 F H Faroese 5261 Fiji 5256 Finnish FIN 5255 French FRE 5264 Frisian 5271 Galician 5358 Georgian 5747 German GER 5051 Greek GRE 5158 Greenlandic 5758 Guarani 5360 Gujarati 5367 Hausa 5447 Hebrew 5569 Hindi 5455 Hungarian HUN 5467 I K Icelandic ICE 5565 Indonesian 5560 Interlingua 5547 Interlingue 5551 Inupiak 5557 Irish IRI 5347 Italian ITA 5566 Japanese JPN 564...

Page 49: ...nnel cannot be viewed by the Child Lock setting Refer to Child Lock on page 28 The unit requires some kind of antenna input An indoor antenna VHF UHF an external antenna VHF UHF or an RF coaxial cable from your wall cable satellite box needs to be plugged into the unit How come there is no image from the connected external devices Check if the right input mode is selected by pressing INPUT SELECT ...

Page 50: ... key on the keyboard to wake up your computer Make sure that the sound is not muted Press MUTE so that the volume bar and current volume level will appear on the TV screen Make sure that the volume is NOT set to 0 or Mute If so use VOLUME to adjust the desired volume No color View other TV channels The problem might be limited to the broadcasting station Adjust Color in the main menu Adjusted PICT...

Page 51: ...C2 CC3 CC4 or Off D V D Completely distorted picture or black white picture with DVD Make sure the disc is compatible with the unit Picture freezes momentarily during playback Check the disc for finger prints scratches and clean with a soft cloth wiping from center to edge Disc cannot be played Clean the disc Ensure the disc is correctly inserted Check if the disc is defective by trying another di...

Page 52: ...d digital format that is similar to the NTSC picture quality S video Offers higher quality images by delivering each signal color c and luminance y independently of each other through a separate cable 5Glossary 5Maintenance Cabinet Cleaning Wipe the front panel and other exterior surfaces of the unit with a soft cloth immersed in lukewarm water and wrung dry Never use a solvent or alcohol Do not s...

Page 53: ...r requirements 120V AC 10 60Hz 0 5 Power consumption maximum 160W LCD 32 inches class 31 5 inches measured diagonally Dimensions without stand with stand W 30 0 inches 760 0mm 30 0 inches 760 0mm H 20 5 inches 519 3mm 22 2 inches 563 0mm D 5 1 inches 127 5mm 9 3 inches 234 0mm Weight 20 6 lbs 9 3kg 21 7 lbs 9 8kg If you subscribe to cableTV the channels are displayed as 1 135 Cable companies often...

Page 54: ...Do not attempt to service the product yourself ...

Page 55: ......

Page 56: ...JVC COMPANY OF AMERICA Division of JVC Americas Corp 1700 Valley Road Wayne New Jersey 07470 JVC Loves the Earth A94F5UH A94F6UH 1EMN24860 Printed in China ...

Reviews: