Jet 169616, Operating Instructions And Parts Manual
The Jet 169616 Operating Instructions And Parts Manual is essential for properly operating and maintaining your equipment. This comprehensive manual covers all aspects of the product, ensuring you can easily troubleshoot and perform routine maintenance. Download it for free from manualshive.com to keep your equipment running smoothly.
Share
Download


Reviews:
No comments
Related manuals for 169616

DM-10
Brand: Baileigh Industrial Pages: 28

SD-255
Brand: Baileigh Pages: 32

USK SB 36580
Brand: Kalorik Pages: 16

HP1010
Brand: stayer Pages: 12

S1P-FF03-180
Brand: DCA Pages: 7

L225-A
Brand: Varan Pages: 25

BEGA
Brand: BEGA Pages: 2

D26430
Brand: DeWalt Pages: 80

D26420
Brand: DeWalt Pages: 88

D26450
Brand: DeWalt Pages: 7

1765
Brand: DeWalt Pages: 16
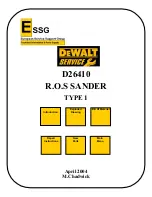
D26410
Brand: DeWalt Pages: 9
885911557818
Brand: DeWalt Pages: 40

D26410
Brand: DeWalt Pages: 112

202107
Brand: inventiv Pages: 36

50345
Brand: Dynabrade Pages: 4

51390
Brand: Dynabrade Pages: 8

51235
Brand: Dynabrade Pages: 8


