Jensen JCR-265, User Manual
The Jensen JCR-265 is a versatile and sleek electronic device that allows users to enjoy crystal-clear audio and reliable alarm functionality. Enhance your daily routine with this multifunctional product. To learn more about its features and settings, download the user manual for free at manualshive.com.
Share
Download


Reviews:
No comments
Related manuals for JCR-265

Sunshine
Brand: Accenda Pages: 16

FT-270R
Brand: Yaesu Pages: 34

RPW3008-CM3000
Brand: Explore Scientific Pages: 44

M-150 Plus
Brand: Intek Pages: 32

M-150 Plus
Brand: Intek Pages: 42

KCR-9
Brand: LENCO Pages: 1

Zlinx ZP24D-250RM-SR
Brand: B&B Electronics Pages: 2

LBI-31693B
Brand: Com-Net Ericsson Pages: 20

DAB 500 BTC
Brand: Gogen Pages: 28

98.1093
Brand: TFA Pages: 2

DJ-596E
Brand: Alinco Pages: 41
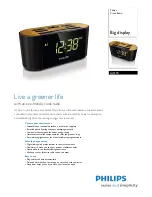
AJ-3570
Brand: Philips Pages: 20
AJ-3570
Brand: Philips Pages: 3

AJ3019/04
Brand: Philips Pages: 2

AJ3017/05
Brand: Philips Pages: 2

AJ3005/00
Brand: Philips Pages: 2

6500
Brand: Simplex Pages: 37

SY-1040
Brand: Sytech Pages: 7


