background image


  STAINLESS STEEL GAS GRILL 


  MODEL NO.: 720-0061-LP        ITEM NO: 57419

Jenn-Air is a Trademark of the Maytag Corporation and is used under license to Lowe’s Companies, Incorporated. 


FOR OUTDOOR USE ONLY 

PLEASE CONTACT 1-800-554-5799 FOR ASSISTANCE   

DO NOT RETURN TO PLACE OF PURCHASE


Summary of Contents for 720-0061-LP

Page 1: ...720 0061 LP ITEM NO 57419 Jenn Air is a Trademark of the Maytag Corporation and is used under license to Lowe s Companies Incorporated FOR OUTDOOR USE ONLY PLEASE CONTACT 1 800 554 5799 FOR ASSISTANCE...

Page 2: ...ION SEVEN Limited Warranty Gas Hook Up Leak Testing Installer Final Check SECTION FOUR Operating Instructions Lighting Instructions To Match Light the Grill Easy Lighting Illustrations Using the Side...

Page 3: ...ot connected for use should not be stored in the vicinity of this or any other appliance 3 Do not store spare LP gas cylinders under or near this appliance 4 Never fill the cylinder beyond 80 percent...

Page 4: ...ommended in this manual All other service should be referred to a qualified technician The grill is for outdoor use only The grill is not intended to be installed in or on recreational vehicles and or...

Page 5: ...to corrode Do not use the grill to cook excessively fatty meats or other products which promote flare ups Do not operate the grill under unprotected combustible constructions Use only in well ventilat...

Page 6: ...es of the left side shelf with those in the grill cart insert the screws and tighten The top two screws insert from inside the fire box while the bottom two screws insert from under the left side shel...

Page 7: ...ews from the handle and reinsert them through the side burner lid 3 Tighten the screws 5 SIDE BURNER HANDLE ASSEMBLY 1 Remove the four handle screws from the side of the burner shelf 2 Align the side...

Page 8: ...on housing 2 Insert the battery into the housing with the positive side facing outward 3 Replace the ignition button housing after the battery has been installed SPICE TRAY BRAKE ASSEMBLY Press the bl...

Page 9: ...o the slide tray with the retention kit screws PROPANE TANK ASSEMBLY 1 Attach the regulator to the propane tank by turning the regulator handle clockwise 2 Turn off the gas supply at the cylinder when...

Page 10: ...Manifold pressure operating 10 in water column W C non operating 11 2 in water column W C The LP gas cylinder must be fitted with an Overfill Protection Device OPD LP GAS HOOK UP Make sure the black...

Page 11: ...ny of these conditions exist first check to see if the burner is blocked by dirt debris spider webs etc If the burner is free of blockages you will need to fine tune the air gas mixture by moving the...

Page 12: ...tact customer service at 1 800 554 5799 1 Specified clearance maintained 24in from combustible materials construction 2 All internal packaging has been removed 3 The hose and regulator are properly co...

Page 13: ...capable of turning up to a 12lb cut of meat or poultry The motor slides onto the stainless steel motor mount The rotisserie motor must be electrically grounded in accordance with local codes or in the...

Page 14: ...lame 3 If the burner does not light turn off the gas supply wait 5 minutes for any excess gas to dissipate and then try again LIGHTING INSTRUCTIONS Burner flames should be blue and stable with no yell...

Page 15: ...gas to dissipate 2 Insert a lit extended match or lighter through the cooking grids to the burner 3 Press the control knob and rotate left to the HI setting continue to press the knob until the burne...

Page 16: ...Press and turn the rotisserie knob to the ON setting 2 Press the electric igniter 3 to 4 seconds to light the rotisserie burner 2 Press and turn one of the main or side burner control knobs to the HI...

Page 17: ...H LIGHTING 1 Hold a lit extended match or lighter near the side burner ports 2 Turn the control knob counterclockwise to the HI setting 3 Rotate the control knob to the desired setting CARE MAINTENACE...

Page 18: ...ure to properly place the burner over the orifice could cause a fire to occur behind and beneath the valve panel thereby damaging the grill and making it unsafe to operate GRILL BURNER REMOVAL INSTALL...

Page 19: ...unction properly use the following checklist before contacting your dealer for service You may save yourself the cost of a service call PROBLEMS WHAT TO DO Grill will not light when the control knob i...

Page 20: ...EXPLODED VIEW 18...
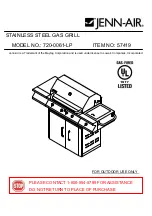
Page 21: ...1 12 Gas Valve Infrared Burner 1 40 Gas Pipe Side Burner 1 13 Gas Hose Side Burner 1 41 Side Burner Handle 1 14 Regulator LP 1 42 Orifice Base 1 15 Manifold 1 43 Bowl Assembly Side Burner 1 16 Manifo...

Page 22: ...re cooking To prevent steaks or chops from curling during cooking slit the fat around the edges at 2 inch intervals WARNING Do not leave the grill unattended while cooking GRILL COOKING CHART FOOD WEI...

Page 23: ...lash remaining fat at 2 inch intervals Grill turning once 1 1 2 inch High 14 to 18 minutes Medium 1 inch Medium to 13 to 20 minutes 1 1 2 inch High 18 to 25 minutes Well done 1 inch Medium 17 to 30 mi...

Page 24: ...ing FISH AND SEAFOOD Steaks Grill turning once Brush with Halibut 3 4 to 1 inch Medium to 8 to 15 minutes Melted butter margarine or oil Salmon High To keep moist Swordfish Whole Catfish 4 to 8 ounces...

Page 25: ...ng with the marinade occasionally Serve with mixed salad dressed with vinaigrette flavored with fresh dill BARBECUED POTATOES and CHEESE 1 1 2 cups shredded cheddar cheese 1 can 10 3 4 oz condensed cr...

Page 26: ...the ingredients in a large mixing bowl and marinate the chicken for 8 hours in the refrigerator Drain the chicken and spread on the spit running the rod on the fleshier side of the bone Bake using the...

Page 27: ...ter The warranty period is not extended by such repair or replacement Product repair as provided under this warranty is your exclusive remedy Nexgrill Industries Inc shall not be liable for any incide...

Reviews: