background image

1

CD82 07042017

CD Boombox

Instruction Manual

Model Ref: CD82 / Cat Number: MM338

Summary of Contents for CD82

Page 1: ...1 CD82 07042017 CD Boombox Instruction Manual Model Ref CD82 Cat Number MM338 ...

Page 2: ...tandards of performance and safety Before use please read this manual carefully It gives important instructions about safety use and maintenance of your device Remove all packaging material You may wish to keep the packaging for future use or storage of your device Alternatively dispose of accordingly ...

Page 3: ...play with the appliance 6 Cleaning and user maintenance shall not be made by children unless they are older than 8 and supervised 7 Keep the appliance and its cord out of reach of children less than 8 years 8 This product is not a toy 9 Do not use the appliance if any parts appear to be faulty missing or damaged 10 Always switch off at the mains supply before carrying out any cleaning performing u...

Page 4: ...Keep the power supply cord away from any parts of the appliance that may become hot during use 18 Do not disconnect the appliance from the mains power supply by pulling the cord switch it off and remove the plug by hand 19 Do not move the appliance when it is in use 20 Use of an extension cord with the appliance is not recommended 21 This appliance should not be operated by means of an external ti...

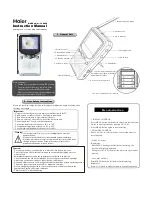
Page 5: ...04 PRODUCT OVERVIEW ...

Page 6: ...BAND SELECTOR 14 DIAL SCALE 15 TUNING CONTROL 16 SPEAKERS 17 PROGRAM BUTTON 18 FM STEREO INDICATOR 19 REPEAT INDICATOR 20 POWER INDICATOR 21 PROGRAM INDICATOR 22 LED DISPLAY 23 REPEAT BUTTON 24 RANDOM BUTTON 25 CASSETTE COMPARTMENT 26 CD SKIP SEARCH BACKWARD BUTTON 27 CD SKIP SEARCH FORWARD BUTTON 28 CD STOP BUTTON 29 CD PLAY PAUSE STANDBY BUTTON 30 FM TELESCOPIC ANTENNA 31 AC SOCKET 32 BATTERY CO...

Page 7: ...m can playback all digital audio CD finalized digital audio CD Recordable CD R discs finalized digital audio CD Rewritable CD RW discs and CD DA format digital audio CD CD R CD RW discs POWER SOURCE This unit is designed to be operated on AC DC AC OPERATION Plug the smaller end of AC power cord into AC jack on unit and the other bigger end into AC wall outlet The batteries will be automatically di...

Page 8: ... FUNCTION SWITCH to CD AUX or RADIO or TAPE position NOTE In CD AUX mode when the unit is not providing the main function for 15 minutes the unit will automatically switch into standby mode To turn on the unit again press STANDBY button or replug the unit ESD hints The product maybe reset or not reset to operation of control due to electrostatic discharge just switch off and reconnect again TO ADJ...

Page 9: ...d connect to the AUDIO OUT jack of the external audio source The unit will change to AUX mode automatically 3 Adjust the volume of the main unit to your desired level Press PLAY of the external audio source to start playback HEADPHONE JACK For private listening insert a 3 5mm headphone not included into the HEADPHONE jack 4 The SPEAKER output would be automatically cut off CAUTION LISTENING AT A H...

Page 10: ...n off the radio by switching the FUNCTION switch to TAPE position CASSETTE OPERATION PLAYBACK OF CASSETTE Be sure to tighten any slack tape in the cassette before use using either a pencil or a ball point pen simply insert the pen or pencil into the centre of spool and rotate to remove slackness Depress the STOP EJECT button to open the cassette door Insert the cassette into the compartment with t...

Page 11: ... play recorded broadcast please follow the instructions explained in playback section Note When you record over previously recorded tape the original recording is automatically erased and replaced by this newly recording materials RECORDING FROM CD 1 Insert a blank cassette tape into the tape compartment 2 Slide the FUNCTION switch to CD AUX position 3 Load a CD and select the desired track you wa...

Page 12: ... recorded follow instructions in PLAYING A CASSETTE TAPE TYPES OF CASSETTE Use only good quality cassettes IEC TYPE 1 for making recordings The use of C120 cassettes is NOT recommended in this machine CARE OF CASSETTE MECHANISM Gently clean the tape head and pinch wheel capstan assemblies after every 10 hours of using the unit The erase head and play head and the surface of the pinch roller are de...

Page 13: ... tracks of a disc which are still to be played Playing The Entire Disc 1 Playback will start by pressing CD PLAY PAUSE button playback starts with the first track The display will show the current track number 2 To interrupt playback press CD PLAY PAUSE button 3 To resume playback press CD PLAY PAUSE button once again 4 To stop playback press CD STOP button Note To ensure good system performance w...

Page 14: ... PLAY When playing press REPEAT button once REPEAT INDICATOR will light up and flash for playing the same track only If repeat all tracks press the REPEAT button again REPEAT INDICATOR will light up To cancel repeat play press the REPEAT button until the repeat indicator disappears PROGRAM PLAY Programming tracks of disc are possible when playback is stopped Up to 20 tracks can be stored in the me...

Page 15: ...ack 8 You can press CD SKIP SEARCH FORWARD BACKWARD button to select the track number in memory 9 In stop mode press STOP button to cancel the program play and the program indicator will disappear RANDOM PLAY Press the CD RANDOM button in Play Stop mode the current track number and will flashing again and again And then press the CD PLAY PAUSE button Playback will start from any one track not in t...

Page 16: ...nse 100Hz 16 KHz CD Section Receiving Band AM FM Tuning Range AM 540 1600 KHz FM 88 108 Mhz Antenna FM Rod Antenna AM built in ferrite bar Radio Section Output Power 1 5W x 2 AUX In Jack 3 5mm Phones Jack 3 5mm Power Source AC 230V 50Hz DC 9V 1 5V UM 1 D x 6 pcs Power Consumption 15W General ...

Page 17: ...16 Recording System Tracks 2 Channel Stereo Frequency Response 125 6 3Khz Wow and Flutter 0 35 WRMS JIS Cassette Section Instruction Manual AC Cord Accessories ...

Page 18: ...o not bend the disc 3 Storage Store the disc in its case Do not expose discs to direct sunlight or high temperatures high humidity or dusty places 4 Cleaning a disc Should the disc become soiled wipe off dust dirt and fingerprints with a soft cloth The disc should be cleaned from the centre to the edge Never use benzene thinners record cleaner fluid or anti static spray Be sure to close the CD doo...

Page 19: ...18 ...

Page 20: ...19 JD Williams Ltd ...

Reviews: