150
200
250
300
350
400
450
500
550
L
O
R
O
A
S
T
BA
KI
NG
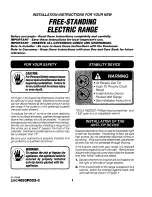
WARNING
WHEN MAIN GAS TO THE
APPLIANCE IS OFF, POWER
ON SWITCH MUST BE OFF.
TURN OFF ELECTRIC & GAS
TO APPLIANCE BEFORE
SERVICING ALL CONTROLS.
WARNING
THERMOSTAT
LITE
OFF
POWER
ON
BLOWER
AUTO
P.O.
MANUAL
WHEN MAIN GAS TO THE
APPLIANCE IS OFF, POWER
ON SWITCH MUST BE OFF.
O
F
F
Jade Range LLC
A MIDDLEBY COMPANY
2650 Orbiter Street, Brea, CA 92821 • 714-961-2400 • 800-884-5233 • www.jaderange.com
NOTES:
IN LINE WITH ITS POLICY TO CONTINUALLY IMPROVE ITS PRODUCTS, JADE RANGE, LLC RESERVES THE RIGHT TO CHANGE MATERIALS AND SPECIFICATIONS WITHOUT NOTICE.
JADE RANGE EQUIPMENT IS BUILT TO COMPLY WITH APPLICABLE STANDARDS FOR MANUFACTURERS. INCLUDED AMONG THOSE APPROVAL AGENCIES ARE UL, A.G.A., CSA, ETL AND OTHERS.
TITAN
™
SERIES
SUPER HEAVY DUTY
RANGE LINE
MODEL SERIES JTRH, JMRH & JTRHE
Installa
Installa
Installa
Installa
Installation &
tion &
tion &
tion &
tion &
Oper
Oper
Oper
Oper
Opera
aa
aation
tion
tion
tion
tion
Manual
Manual
Manual
Manual
Manual
RETAIN THIS MANUAL FOR FUTURE REFERENCE.
Manual number 2413200000 revC Printed in U.S.A.
Please read this manual completely before attempting to
install or operate this equipment! Notify carrier of damage.
Inspect all components immediately.