

● Microsoft Windows 10/ 8.1 / 8 / 7 / XP (32-bit or 64-bit)
● Mac OS X 10.6~10.10
● Freier USB -Anschluss(USB 3.0 empfohlen)
● Systemvoraussetzungen (mindestens)
CPU : Intel Core 2 Quad 2.33 GHz
RAM : 2 GB
* Windows XP-Nutzer : “Windows Media Player” Empfohlen
* Empfehlen Windows XP & Mac USB 2.0 nur für den ‘Bürogebrauch
● Microsoft Windows 10/ 8.1 / 8 / 7 / XP (32-bit or 64-bit)
● Mac OS X 10.6~10.10
● Un Port USB disponible (USB 3.0 est recommandé)
● Configuration minimale requise
CPU : Intel i3 Dual Core 1.5 GHz
Intel Atom “Bay Trail" Quad Core 1.33 GHz
RAM : 2 Go ou plus
* Windows XP utilisateur :“Windows Media Player” est recommandé
* Suggérons Windows XP & Mac USB 2.0 pour « l’application de bureau » seulement
English
Español
Deutsch
Française
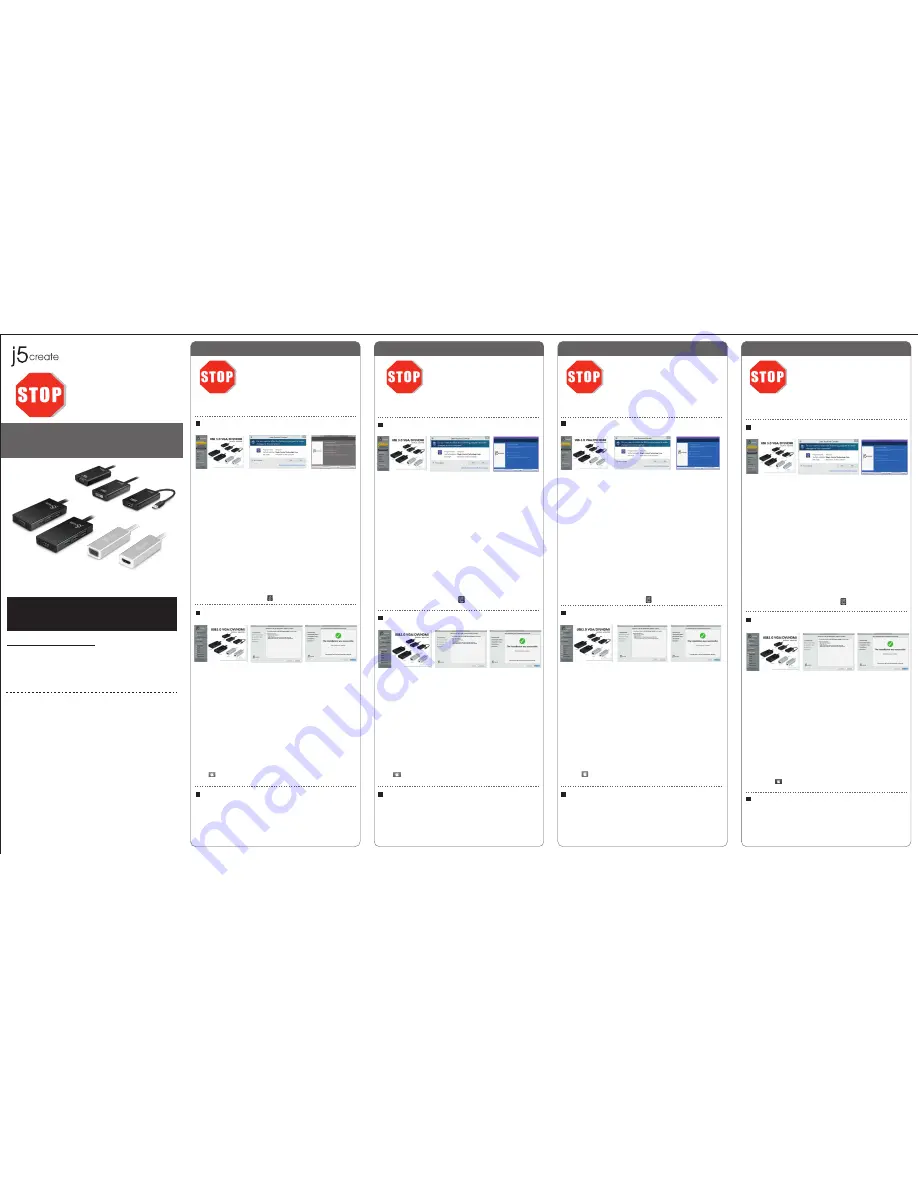
Windows - Driver Installation
Mac - Driver Installation
System Requirements
Step 1
Step 3
Step 2
Schritt 1
Schritt 3
Schritt 2
Étape 1
Étape 3
Étape 2
Step 1
If you have internet access it is
highly recommended
that you download the
latest
driver
from www.j5create.com under
Support & Services
–scroll down to the
product’s driver you are installing and download the latest driver for your operating
system. (Note: If possible run as an administrator)
Step 2
Follow the prompts to install driver. (You may have to click on
My Computer >
downloads
and choose
j5UsbDisplayAdapter
to begin installation)
Step 3
Once the driver has been installed choose
Yes
and click
Finish
to restart your
computer and complete driver installation. Once your computer has
restarted,
connect the j5create USB 3.0 Display Adapter
to your display first
and
then to your
computer
. Now you are ready to use your j5create USB Display Adapter!
(
***Note for XP
: Once you have connected your j5create USB 3.0 Display Adapter to
your display and your computer you will need to
restart
your computer. Once your
computer has restarted you will be ready to use your j5create USB 3.0 Display
Adapter!)
Step 1
Step 3
Step 2
Step 1
If you have internet access it is
highly recommended
that you download the
latest
driver
from www.j5create.com under
Support & Services
–scroll down to the
product’s driver you are installing and download the latest driver for your operating
system. (Note: If you have trouble downloading this driver your security settings may
need to be adjusted to allow for “downloading from anywhere”)
If you do not have internet access insert the Driver CD into your
computer’s CD-ROM drive. Click on
Finder
under
Devices
choose
j5create
. Click on
the
mac-install
folder and open the
dmg
file.
Step 2
Choose the correct operating system for your system and follow the prompts to
install the driver. (You may have to click on
Finder > downloads
and choose
j5UsbDisplayAdapter
to begin installation).
Step 3
Once initial installation has completed, click
Restart
to finish installing the software.
Once your computer has restarted, connect the j5create USB 3.0 Display Adapter
to
your display first
and
then to your computer.
Now you are ready to use your
j5create USB 3.0 Display Adapter!
Step 4 Display Settings
Go to ( ) and then
System Preferences
.Choose the
Display
or
Arrangement
tab
to adjust.
Schritt 1
Schritt 3
Schritt 2
● Microsoft Windows 10 / 8.1 / 8 / 7 / XP (32-bit or 64-bit)
● Mac OS X 10.6~10.10 Compatible
● Available USB port (USB 3.0 is recommended)
● Minimum System Requirements
CPU : Intel i3 Dual Core 1.5 GHz
Intel Atom “Bay Trail" Quad Core 1.33 GHz
RAM : 2 GB or higher
* Windows XP user: “Windows Media Player” is recommended
* Windows XP & MAC USB 2.0 for "office applications only" is recommended.
Windows - Treiberinstallation
Mac - Treiberinstallation
Systemanforderungen
Schritt 1
Treiber update gibt es auf www.j5create.com unter “
Support & Service”.
Windows - Installation du pilote
Mac - Installation du pilote
Environnement requis
Étape 1
Télécharger Pilote est disponible à sur www.j5create.com dans la rubrique
«Support
& Service»
domaine.
Do
NOT
plug the j5create USB 3.0
display adapter into the computer
until the driver is completely installed.
Installieren Sie zuerst den Treiber erst
vollständig, bevor Sie das USB-Kabel
des j5create USB 3.0 Monitor adapter
an den Computer anschließen.
Installez entièrement le pilote avant
d'insérer le câble USB del’adaptateur
graphique USB 3.0 dans votre
ordinateur
USB 3.0 Display Adapter
Windows XP - Instalación del controlador
Mac - Instalación del controlador
Entorno requerido
Paso 1
Paso 3
Paso 2
Paso 2
Siga las instrucciones para instalar el controlador. (Es posible que tenga que hacer clic
en
Mi PC> Descargas
y seleccione
j5UsbDisplayAdapter
para comenzar la
instalación)
Paso 1
Paso 3
Paso 2
NO enchufe el adaptador de pantalla
j5create USB 3.0 en la computadora
hasta que el conductor esté
completamente instalado.
● Microsoft Windows 10 / 8.1 / 8 / 7 / XP (32-bit or 64-bit)
● Mac OS X 10.6~10.10
● Un puerto USB disponible (USB 3.0 recomendado)
● Procesador : Intel i3 Dual Core 1.5 GHz
Intel Atom “Bay Trail" Quad Core 1.33 GHz
Memoria RAM : 2 GB o más
* Usuario Windows XP: “Windows Media Player” es recomendado
* Sugerimos el uso de Windows XP & Mac USB 2.0 para “aplicación de
ofcina” únicamente.
● Thank you for purchasing the
j5create USB 3.0 display adapter!
This adapter
acts as an external graphics card for your MAC or PC. It allows you to add an
additional display through your USB port.
● Gracias por comprar el
j5create USB 3.0 display adapter
usted! Este adaptador
funciona como una tarjeta gráfica externa para su MAC o PC. Se le permite añadir una
pantalla adicional a través de su puerto USB.
Paso 1
Actualice controladores está disponible en www. j5create.com en el área
“Support &
Services”.
● Vielen Dank, dass Sie sich für das
j5create USB 3.0 Monitor adapter
! Dieser
Adapter fungiert als externe Grafikkarte für Ihren Mac oder PC. Es ermöglicht Ihnen,
eine zusätzliche Anzeige durch den USB-Port hinzuzufügen.
● Merci d'avoir acheté
j5create l’adaptateur graphique USB 3.0
! Cet adaptateur
agit comme une carte vidéo externe pour votre MAC ou PC. Il vous permet d'ajouter
un affichage supplémentaire par votre port USB.
Step 4 Display Settings
Windows 7/8 : Right click on the desktop and go to
Screen Resolution.
Windows XP : Right click on the icon ( )on the lower right-hand side of the toolbar
Paso 3
Una vez que el controlador se ha instalado seleccione
Sí
y haga clic en
Finalizar
para
reiniciar el ordenador y completar la instalación del controlador. Una vez
reiniciado el
ordenador,
conecte el j5create USB 3.0 Display Adapter de
la pantalla y luego a su
ordenador.
Ahora ya está listo para su uso j5create USB 3.0 Display Adapter!
(
***Nota para XP:
Una vez que haya conectado la j5create USB Display Adapter a la
pantalla y el ordenador tendrá que
reiniciar
el equipo. Una vez reiniciado el equipo
estará listo para usar su j5create USB 3.0 Display Adapter!)
Paso 4 Mostrar la configuración
Windows 7/8 : Clic derecho en el escritorio y vaya a
Resolución de Pantalla
Windows XP : Clic derecho sobre el ícono ( ) en la barra de herramientas de la
parte inferior derecha
Paso 1
Actualice controladores está disponible en www. j5create.com en el área “
Support &
Services”.
(Nota: Si tiene problemas para descargar el controlador puede ser
necesario ajustar para tener en cuenta "la descarga desde cualquier lugar" la
configuración de seguridad)
Si usted no tiene acceso a internet, inserte el CD de instalación en la
unidad de CD-ROM del ordenador. Haga clic en
Finder
en
Dispositivos
elegir
j5create
. Haga clic en la carpeta
mac_install
y el archivo dmg abierta.
Paso 2
Elija el sistema operativo correcto para su sistema y siga el instrucciones para instalar
el controlador. (Es posible que tenga que hacer clic en
Finder > Descargas
y
seleccione
j5UsbDisplayAdapter
para comenzar la instalación).
Paso 3
Una vez que la instalación inicial se
haya completado,
haga clic en Reiniciar para
finalizar la instalación del software. Una vez reiniciado el ordenador, conecte el
j5create USB 3.0 Display Adapter a
la pantalla primero y luego a la computadora.
Ahora ya está listo para su uso j5create USB 3.0 Display Adapter!
Paso 4 Mostrar configuración
Vaya a ( ) y luego
Preferencias de Sistema
Elija la etiqueta
Mostrar
o
Ajustar
para ajustar
Schritt 1
Treiber update gibt es auf www.j5create.com unter “
Support & Service”.
(Hinweis: Wenn Sie Schwierigkeiten haben, dem Herunterladen des Treibers Ihre
Sicherheitseinstellungen möglicherweise angepasst werden, um für "Download von
überall" ermöglichen)
Wenn Sie keinen Internetzugang haben die Treiber-CD in das CD-ROM-Laufwerk des
Computers einlegen. Klicken Sie auf
Finder
unter
Geräte
wählen
j5create.
Klicken
Sie auf
mac_install
-Ordner und öffnen Sie die
dmg
-Datei.
Schritt 2
Wählen Sie das richtige Betriebssystem für Ihr System und befolgen Sie die
Anweisungen, um die Treiber zu installieren. (Eventuell müssen Sie auf
Finder>
Downloads
Taste und wählen Sie
j5UsbDisplayAdapter
Installation zu beginnen).
Schritt 3
Sobald die Installation abgeschlossen ist, klicken Sie auf
Neustart,
um die
Installation der Software. Wenn der Computer neu gestartet wurde, schließen Sie den
j5create USB 3.0 Monitor adapter an den
Monitor zuerst.
Jetzt sind Sie bereit, Ihre
j5create USB 3.0 Monitor adapter zu verwenden!
Schritt 4 Anzeigeeinstellungen
Gehen Sie auf ( ) und dann auf
Systempräferenzen
. Wählen Sie
Anzeige
oder
Anordnung
zur Justage aus.
Do
NOT
plug the j5create
USB 3.0 display adapter into
the computer until the driver
is completely installed.
If you do not have internet access insert the Driver CD into your computer’s CD-ROM
drive. (The setup program should launch automatically) If not, go to
my computer
and click on your optical drive and manually run the setup CD by double-clicking on
Setup.exe.
(the prompt may take a minute to appear).
Si usted no tiene acceso a Internet, inserte el CD de instalación en la unidad de
CD-ROM del ordenador. (El programa de instalación debería iniciarse automática-
mente) sino,
Vaya a Mi PC
y haga clic en la unidad óptica y ejecutar manualmente el
CD de instalación haciendo doble clic en
Setup.exe.
(el indicador puede tardar un
minuto en aparecer).
Pour commencer, insérez le CD de pilotes dans le lecteur de CD-ROM de votre
ordinateur. Le programme d'installation devrait se lancer automatiquement. Si
l'exécution automatique ne démarre pas, allez à
«Poste de travail»
, cliquez sur votre
lecteur optique, et lancez manuellement le CD d'installation en double-cliquant sur
«Setup.exe»»
Étape 2
Suivez les instructions pour installer le pilote. (Vous pouvez avoir à cliquer sur
Poste
de travail> téléchargements
et choisissez
j5UsbDisplayAdapter
pour commencer
l'installation)
Étape 3
Lorsque l'assistant d'installation est terminé. Cliquez sur
Terminer
pour
Redémarrer.
Après le redémarrage de votre ordinateur, connectez le dispositif d'affichage
externe
(moniteur / projecteur)
au connecteur de l’adaptateur graphique USB 3.0.
Connectez l’adaptateur graphique USB 3.0 dans un port USB disponible d'un
PC ou
d'un ordinateur portable.
(***
Remarque pour XP:
Une fois que vous avez connecté votre l’adaptateur
graphique USB 3.0 à votre écran et votre ordinateur, vous devrez redémarrer votre
ordinateur. Une fois que votre ordinateur a redémarré, vous serez prêt à utiliser votre
l’adaptateur graphique USB 3.0 !)
Étape 4 Réglage de l’affichage
Windows 7/8 : Faites un clic droit sur le bureau et allez dans
Résolution de l’écran
Windows XP : Faites un clic droit sur l’icône ( ) sur la barre d’outils en bas à droite
Legen Sie zunä chst die Treiber-CD in das CD-ROM-Laufwerk des Computers ein. Das
Setup-Programm wird jetzt automatisch gestartet. Wenn die Anwendung nicht
automatisch gestartet wird, gehen Sie zu
Computer
, klicken Sie auf das Symbol fü r
das optische Laufwerk, in dem sich die CD befindet, und starten Sie das Setup-Pro-
gramm manuell, indem Sie doppelt auf
Setup.exe k
licken.
Schritt 2
Folgen Sie den Anweisungen, um die Treiber zu installieren. (Eventuell müssen Sie auf
Arbeitsplatz> Downloads
Taste und wählen Sie
j5UsbDisplayAdapter
Installation zu
beginnen)
Schritt 3
Wenn der InstallShield-Assistent abgeschlossen ist, klicken Sie auf
Fertig
stellen, um
den Computer
neu zu starten
. Wenn der Computer neu gestartet wurde, schließen
Sie den j5create USB 3.0 Monitor adapter an den
Monitor zuerst.
Jetzt sind Sie
bereit, Ihre j5create USB Display Adapter zu verwenden!
(***
Hinweis für XP:
Sobald Sie Ihre j5create USB 3.0 Monitor adapter, um Ihre
Anzeige und den Computer angeschlossen haben, müssen Sie den Computer neu
starten. Sobald Sie Ihren Computer neu gestartet ist, werden Sie bereit, Ihre j5create
USB 3.0 Monitor adapter benutzen!)
Schritt 4 Anzeigeeinstellungen
Windows 7/8 : Klicken Sie mit rechter Maustaste auf den Desktop und gehen Sie zu
Bildschirmauflösung
Windows XP : Rechter Mausklick auf das Symbol ( ) auf der unteren rechten
Tool-Leiste
Étape 1
Étape 3
Étape 2
Étape 1
Télécharger Pilote est disponible à sur www.j5create.com dans la rubrique
«Support
& Service»
domaine. (Remarque: Si vous avez des difficultés à télécharger ce pilote
vos paramètres de sécurité peuvent avoir besoin d'être ajustée pour permettre
"le
téléchargement de n'importe où"
)
Pour commencer, insérez le CD de pilotes dans le lecteur de CD-ROM de votre
ordinateur. Cliquez sur
Finder
sous
Périphériques
choisir
j5create
. Click on
«mac_install»
folder and open
«dmg»
file.
Étape 2
Choisissez le système d'exploitation correspondant à votre système et suivez les
instructions pour installer le pilote. (Vous pouvez avoir à cliquer sur
Finder>
téléchargements
et choisissez
j5UsbDisplayAdapter
pour commencer l'installa-
tion)
Étape 3
Lorsque l'assistant d'installation est terminé. Cliquez sur
Terminer
pour
Redémarrer.
Après le redémarrage de votre ordinateur, connectez le dispositif d'affichage
externe
(moniteur / projecteur)
au connecteur de l’adaptateur graphique USB 3.0.
Connectez l’adaptateur graphique USB 3.0 dans un port USB disponible d'un
PC ou
d'un ordinateur portable.
Étape 4 Réglage de l’affichage
Aller à la ( ), puis
Préférences Système
. Choisissez
Affichage
ou
arrangement
onglet pour ajuster.
JUA310
JUH410
JUH450
JUA315
JUA355
JUA330
JUA350
CZ :
Rychlý Průvodce Instalací
HU
:
Gyors Telepítési Útmutató
JP :
クイックインストールガイド
TC :
快速安裝手冊
EN :
Quick Installation Guide
ES :
Guía De Instalación Rápida
FR :
Guide D'installation Rapide
DE :
Kurzanleitung Für Installation
STOP!
If you have any problems with this product please contact our technical
support team before returning it to the store.
SOPORTE TÉCNICO
Número gratuito: +1-888-988-0488
Horario de atención:
Lun-Vier. 10:00 a.m – 6:00 U.S.A-E.S.T
Email: [email protected]
TECHNISCHER SUPPORT
Kostenloser Anruf bei:+1-888-988-0488
Sprechstunden:
Mon.-Frei. 10.00 – 18.00 U.S.A-E.S.T
E-mail:[email protected]
SUPPORT TECHNIQUE
Numéro gratuit: +1-888-988-0488
Heures d’ouverture:
lun.-Ven. 10:00 a.m – 06:00 U.S.A-E.S.T
Email: [email protected]
201503-V5
TECHNICAL SUPPORT
Customer Service:
888-988-0488
Technical Support:
888-689-4088
Email:
Live Chat:
www.j5create.com/livechat
Support Ticket:
tickets.j5create.com
TECHNIKAI SEGÍTSÉG
Vevőszolgálat (angol nyelven): 888-988-0488
Technikai támogatás (angol nyelven): 888-689-4088
E-mail: [email protected]
Live Chat: www.j5create.com/livechat
Support Ticket: tickets.j5create.com
テクニカルサポート
お客様相談センター : 03-5540-9010
電子メール:j5̲[email protected]
テクニカルサポートやその他のご相談は下記
の時間にくださいますようお願い申し上げます
営業時間:平日:9:30˜11:30/13:30˜17:30
技術支援資訊
美國客服專線:+1-888-988-0488
台灣客服專線:+886-2-2269-5533#19
客服時間:
星期一至星期五9:30 AM-6:00PM (台灣時間)
Email信箱:[email protected]
TECHNICKÁ PODPORA
Zákaznická linka: 888-988-0488
Technická podpora: 888-689-4088
E-mail: [email protected]
Online Chat: www.j5create.com/livechat
Žádost o pomoc: tickets.j5create.com


