


2
3
6
5
8
9
7
SPECIFICATIONS
• Connection: 2.4GHz Radio Frequency Wireless Technology
• Wireless Working Range: up to 10 meters
• Battery Type: (2) AAA Batteries
• Keyboard Layout: 87-Key QWERTY
• Key Type: Membrane
• Multimedia Hotkeys: Play/Pause, Stop, Previous Track,
Next Track, Volume Up, Down, & Mute
• Indicators: Battery Low, Num Lock & Caps Lock
• Dimensions:
350 x 199 x 38 mm
• Weight:
800g
REQUIREMENTS
• Operating System:
Windows
®
7 or above
• Connectivity: USB for Wireless Receiver
HOTKEY DEFINITIONS & OPERATION
TIPS:
• When the Battery Low LED is ON, it means that the device requires to change
the batteries.
• We suggest to turn
“OFF”
the keyboard when leaving your desk for more than
an hour to save battery life for longer lasting use.
•The trackball will enter Sleep Mode after 2 minutes of idle time to save power.
•The trackball can wake up in 0.1 second by moving trackball.
TROUBLESHOOTING
If wireless keyboard cannot be operated, try the following:
1. Ensure you have inserted two AAA batteries inside the battery compartment
correctly. Switch keyboard to ON.
2. Ensure you have connected the USB receiver correctly to the computer's
USB ports. Move the keyboard 1 foot away from the receiver in order to avoid
interference while pairing connection.
3. Press CONNECT once on the bottom of keyboard within 15 seconds after
plugging USB receiver to computer.
Note:
Wireless phone, routers and other devices that uses 2.4GHz frequency,
may cause interference with wireless keyboard. Relocate such
wireless applicances away from your keyboard.
1. Turn ON your computer and let Windows load completely.
2. Plug the USB Wireless Receiver into the USB port of your computer
USB Wireless
Receiver
USB Port
7. Receiver will automatically connect with wireless keyboard and ready to use.
Windows will detect automatically. No driver required.
KEYBOARD DESCRIPTION
• The built in trackball can also be removed for occasional maintenance and cleaning.
To remove the trackball:
1. Place keyboard upside down on a flat surface.
2. Locate the hole where the trackball is enclosed, and use a pen to apply pressure to “pop
out” the trackball.
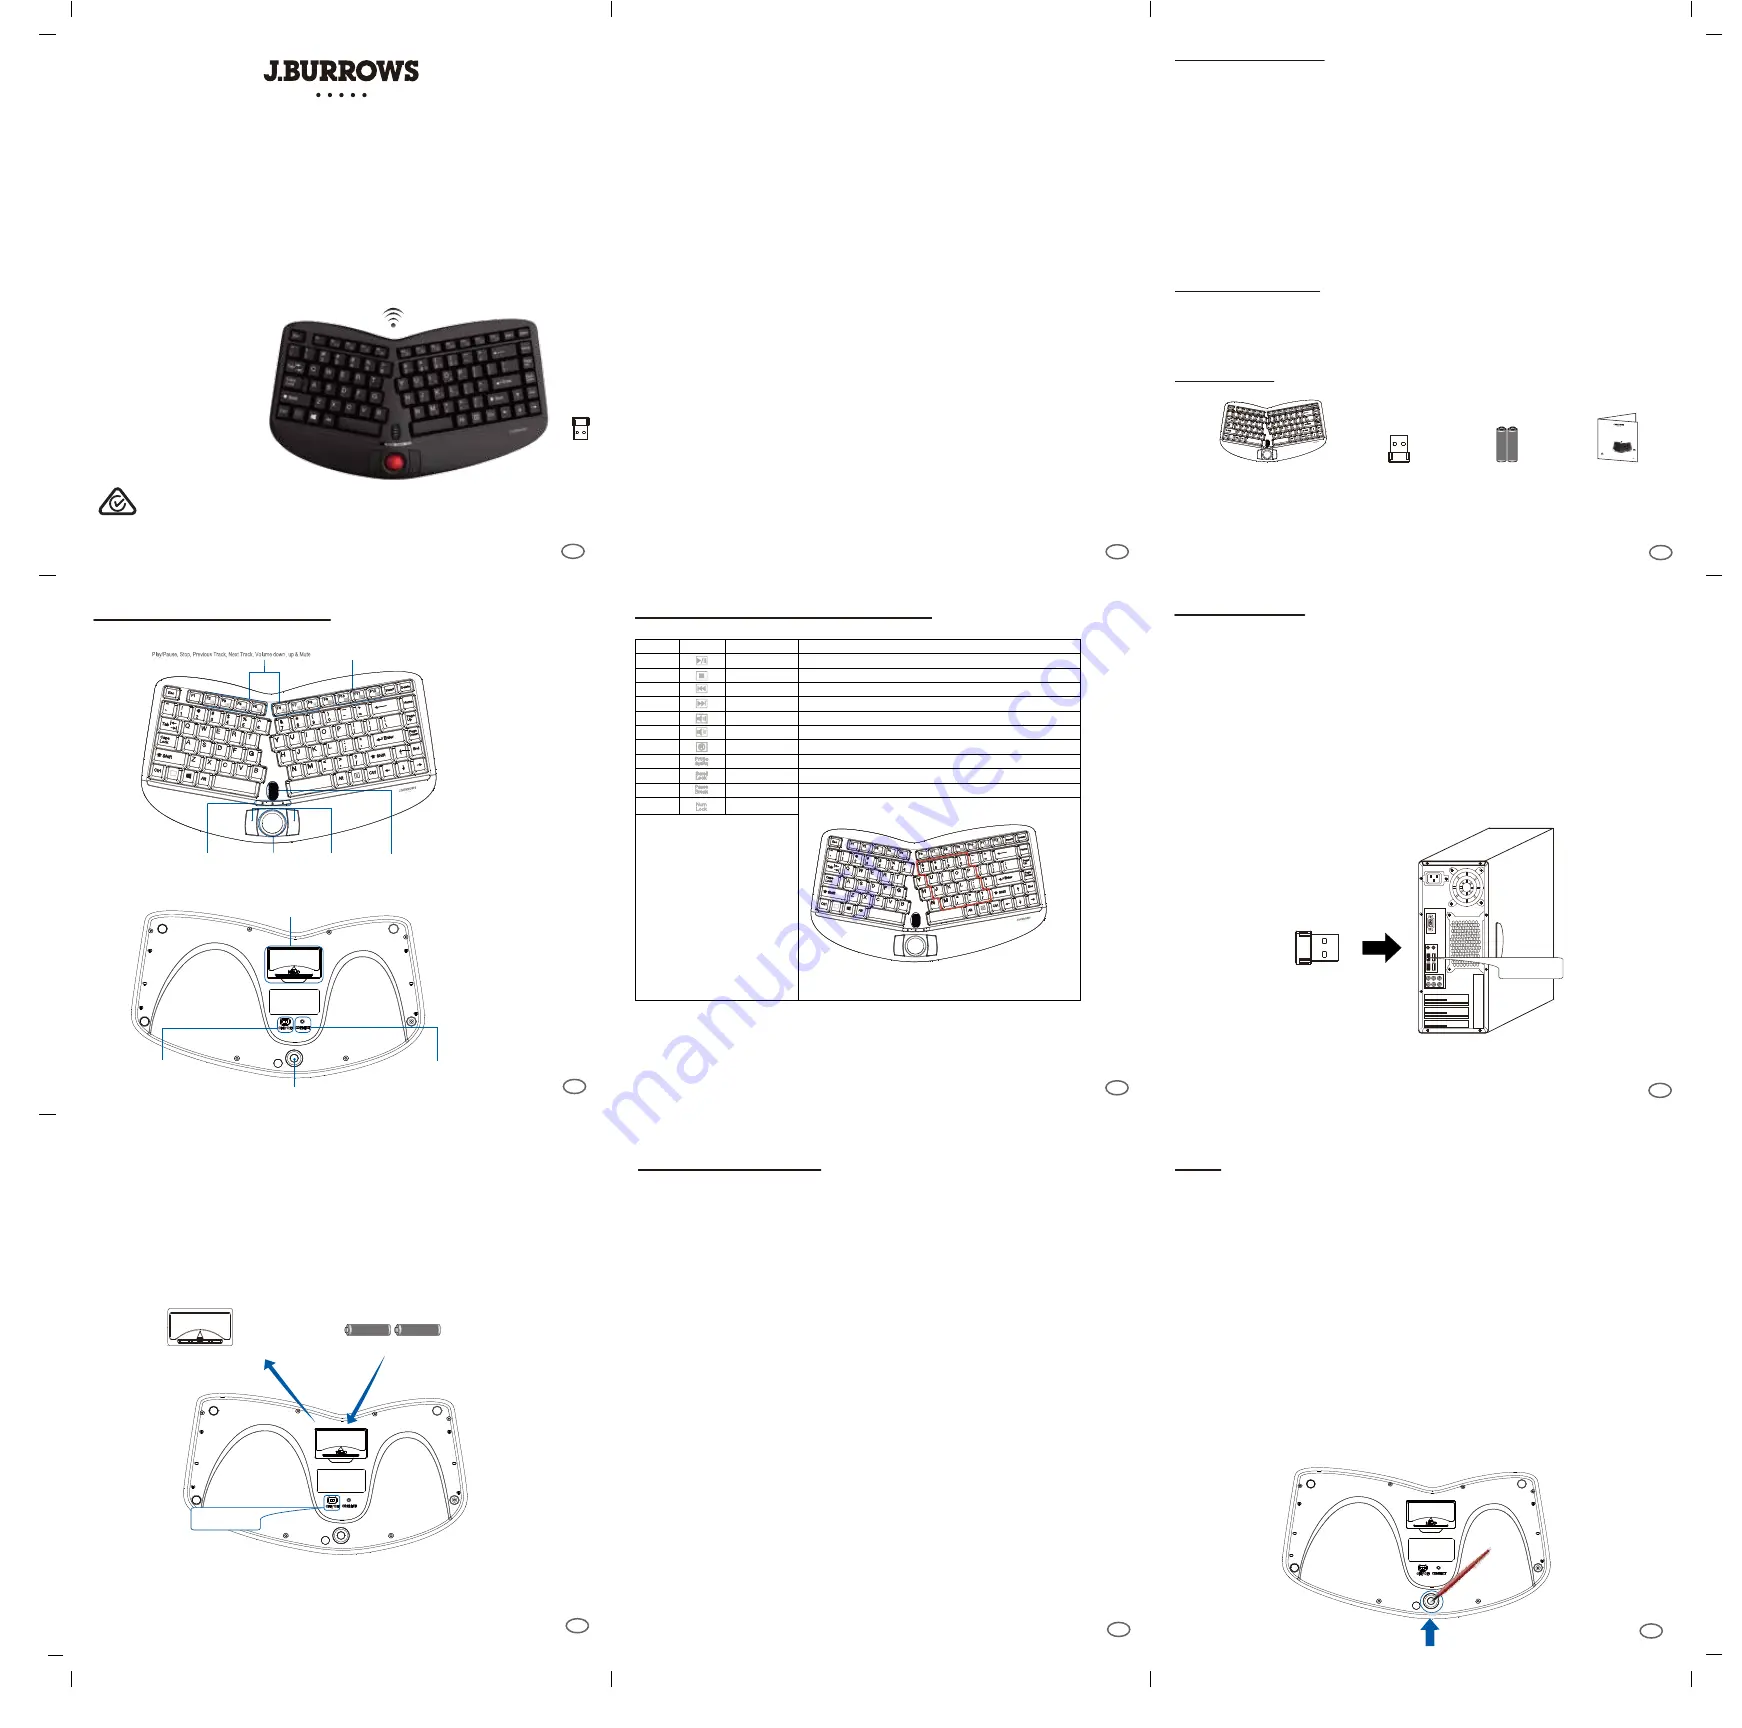
INSTALLATION
Power
Switch
Battery Compartment
& Receiver Holder
Connect
Button
Trackball Hole
4
AAA Battery
AAA Battery
+
-
3. Remove battery cover from keyboard battery compartment.
4. Insert (2) AAA batteries into keyboard.
5. Close the battery compartment cover.
6. Turn the power switch to
ON
.
Switch to ON
3.
4.
5.
6.
Action
Fn+F2
Fn+F3
Fn+F4
Fn+F5
Fn+F6
Fn+F7
Fn+F8
Fn+F9
Fn+F10
Fn+F11
Fn+F12
Description
Function
Symbol
Play/Pause
Plays or pauses track in multimedia software
Stop
Stops track from playing in multimedia software
Takes you to previous track in multimedia software
Takes you to next track in multimedia software
Increases computer volume
Decreases computer volume
Mutes computer volume
Captures the image or text found on screen display
Scrolls the spreadsheet with the arrow keys
Pauses computer programs and interrupts screen output by BIOS
Locks the input of the below keys in red frame to be numbers
Press Fn+F12 again to disable numlock.
NumLock
Pause Break
Scroll Lock
Prt Screen
Mute
Volume Dn
Volume Up
Next Track
Previous Track
Scroll Lock, Pause/Break,Num Lock
Built-in Trackball
Multimedia Hotkeys
Indicators
Num Lock, Caps Lock,
Battery Low
Built-in
Scroll Wheel
Mouse Buttons
Fn
Fn
CONTENTS
A
Wireless Keyboard
C
AAA Batteries (2)
AAA B
att
er
ies
AAA B
att
er
ies
D
Instruction Manual
B
Wireless Receiver
Fn
OFFICEWORKS LTD
236-262 EAST BOUNDARY ROAD
EAST BENTLEIGH VIC 3165 AUSTRALIA
Windows is a trademark of the Microsoft Corporation in the
United States and other countries.
INSTRUCTION MANUAL
Wireless Compact Ergonomic Trackball Keyboard
Ergonomic contour design
Split keys encourage natural
position of hands, wrist and
forearms
Trackball mouse to support
less muscle movement for
maximum comfort
Integrated palm rest
1
JBTRACKBD
INSTRUCTION MANUAL
Wireless Compact Ergonomic Trackball Keyboard
Ergonomic contour design
Split keys encourage natural
position of hands, wrist and
forearms
Trackball mouse to support
less muscle movement for
maximum comfort
Integrated palm rest
1
JBTRACKBD


