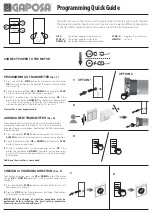
Pelmet 95
DIY Installation Made Easy
Follow the instructions below as a guide to
help to install your Pelmet 95.
How to Install your Pelmet 95 - Chain Drive Blind
Follow these steps for an easy installation:
Step 1 - Mounting the brackets
You will have received spring loaded brackets with your Pelmet 95.
•
Mount your brackets into the architrave, approximately
100mm from the edge. Install the two outside brackets first,
and make sure they are level. Use your spirit level here as your
architraves may not necessarily be straight/square.
•
Make sure all of your brackets are mounted level to the
others.
Step 2 - Fitting the pelmet to the brackets
•
If your pelmet is supplied in two pieces (due to longer length),
install a bracket on each side of the seam, slide pelmets
together so they join and there is no gap.
•
Present the pelmet to the brackets on an angle firstly, with the
front of the pelmet facing forward. The brackets will sit in the
groove on the top of the pelmet. Push the pelmet towards the
back and the pelmet will lock into place.
•
Your pelmet is now fully installed and you are ready to fit your
blinds inside the pelmet.
Step 3 - Fitting the blind inside the pelmet
•
Before inserting the blind into the bracket – make sure the
chain is hanging evenly from both sides and the flat surface is
facing towards the top.
•
Install your blind into the male bracket first which is also the
chain end.
•
Hold the chain end in position and move to the other end of
the blind. Guide the spring-loaded pin into the track of the
female bracket until it clicks into position.
•
Once the blind is installed it should have 1.5 mm - 2mm
movement from left to right between the brackets (the ‘float’).
If there is no float, your blind will not run smoothly – so adjust
your brackets accordingly for secure fixing.
•
Alternatively, you can adjust the pin end for more reach
if required.
•
Using the chain drive, lower your blind to the bottom of your
window frame and then install your stop ball on the chain at
the point just before it enters the chain drive. This will ensure
that your blind is not over rolled when lowering.
•
Install your safety cleat out of the reach of children.
•
Your pelmet and blind are now fully installed.
How to Install your Pelmet 95 -Motorised Blind
Follow these steps for an easy installation:
Step 1 - Mounting the brackets
You will have received spring loaded brackets with your Pelmet 95.
•
Mount your brackets into the architrave, approximately
100mm from the edge. Install the two outside brackets first,
and make sure they are level. Use your spirit level here as your
architraves may not necessarily be straight/square.
•
Make sure all of your brackets are mounted level to the
others.
Step 2 - Fitting the pelmet to the brackets
•
Present the pelmet to the brackets on an angle firstly, with the
front of the pelmet facing forward. The brackets will sit in the
groove on the top of the pelmet. Push the pelmet towards the
back and the pelmet will lock into place.
•
Your pelmet is now fully installed and you are ready to fit your
blinds inside the pelmet.
•
continued over page ...
iseekblinds fix the roller blind brackets into each
end of the Pelmet for you when we manufacture it.
So all you need to do is attach the Pelmet to your
wall or architrave and simply pop in your roller blind!
Organising your Pelmets
•
Each of your Pelmets will have a sticker on them
detailing the Room name .
•
Layout each of your pelmets (and matching blinds) in
front of the correct window.
•
Starting with the first one, remove the packaging
carefully.
Do not use anything sharp to open your
packaging as you may damage the blind
. Make sure
you lay the pelmet and blind down on a clean surface.
If your pelmet and/or blinds are a white colour, it is
handy to wear white cotton gloves whilst installing to
avoid getting any marks on the product.
Installation Tool Kit
What you will need to install your Pelmet 95
•
A grey lead pencil
•
A small cordless drill to pre-drill holes if required.
•
Pre-drilling your bracket holes will avoid splitting your
timber, particularly if you have an older style house. It
is also recommended for outside mounts.
•
Cordless screwdriver with a 150mm drill bit
(recommended)
•
Installation screws
•
A step ladder if necessary
•
A spirit level (optional)
Call:
1300 664 257
Email:
Order:
www.iseekblinds.com.au