40
File
S
40
40
40
40
40
40
CLIK!
™
DRIVE
FOR DIGITAL CAMERAS
Quick Start Guide
Quick Start Guide
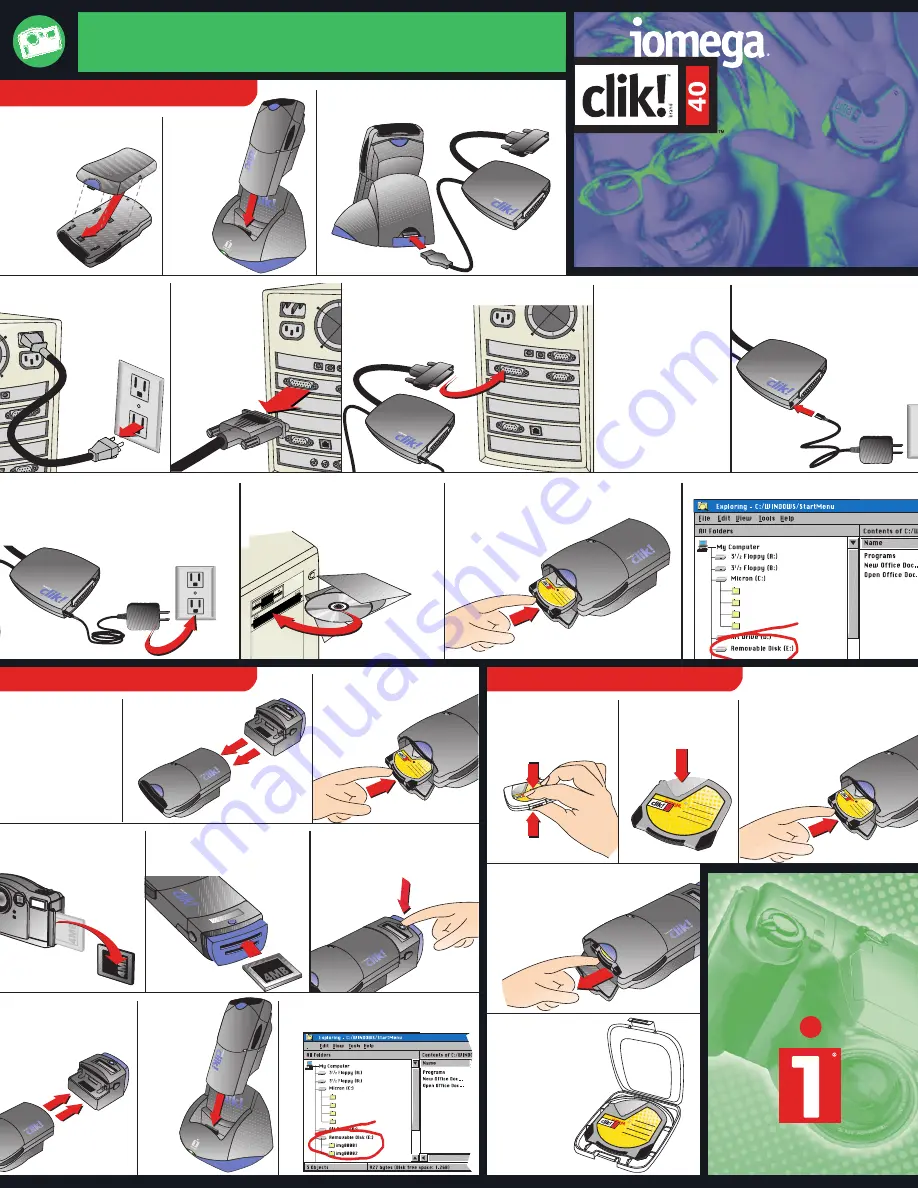
Clik! Flash Memory Reader Setup
Clik! Media Usage
Desktop PC Computer Setup
03466200
2. Set the
Clik! drive
into the
Clik!
Desktop
Dock.
3. Plug the Clik! Parallel Port Interface cable
into the back of the Clik! Desktop Dock.
4. Disconnect power on
your
computer.
5. Locate your
computer’s
parallel
port
and
disconnect
any
cable
already
attached.
8. Plug the Clik! Power Supply
into the Clik! Parallel Port
Interface.
12. Verify drive letter.
6. Connect the Clik! Parallel Port Interface
cable to your
computer’s
parallel
port.
7. If you have a printer,
connect the printer
cable to the Clik!
Parallel
Port
Interface.
(See the User’s
Manual for more
instructions.)
9. Plug the Clik! Power Supply into an
electrical outlet. Plug in the power to
your computer and turn computer on.
11. Insert a Clik! disk into the Clik! drive
(label side up) until it clicks.
10. Install Clik! Software.
(Attach Windows CE
®
device if necessary).
1. Slide the Clik!
™
Battery
onto
the back of
the Clik!
drive.
1. Set up your host
computer
using
one of the above
methods.
Verify that the
Clik! Battery is
charged.
2. Slide the Clik! Flash
Memory
Reader
onto the Clik!
drive.
3. Insert a Clik! disk into the
Clik! drive (label side
up) until it
clicks.
6. Press the button on the
Clik! Flash Memory
Reader
to
copy
files
onto
the
Clik!
disk.
5. Insert the memory card
into the Clik! Flash
Memory
Reader.
9. Locate copied files on the Clik!
disk as shown below.
8. Set the
Clik!
drive
into
the
desktop
dock
7. Remove the Clik!
Flash Memory
Reader from the
Clik!
drive.
4. Remove the memory
card from your digital
camera.
1. Squeeze the top and
bottom of the Clik!
disk case to open.
2. Never manually
open the shutter
of the Clik! disk.
3. Open the drive door on the
Clik! drive and gently
insert the disk
(label side up)
until
it
clicks.
4. To eject the Clik! disk, open
the drive door and
gently the push in
the Clik! disk
until it clicks.
5. Always store and
transport the Clik!
disk in the Clik!
disk
case.


