background image

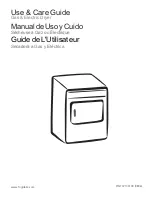
USER GUIDE

12-Cycle
Electric and Gas Dryers

NS-TDRE67W1/NS-TDRG67W1

Before using your new product, please read these instructions to prevent any damage.

Summary of Contents for NS-TDRE67W1

Page 1: ...USERGUIDE 12 Cycle Electric and Gas Dryers NS TDRE67W1 NS TDRG67W1 Before using your new product please read these instructions to prevent any damage ...

Page 2: ...21 Installing your dryer 24 Tools you will need 24 Materials you will need 24 Before you start 24 Step by step instructions 25 Reversing the dryer door 31 Using your dryer 34 Drying a load of clothes 34 Unloading your dryer 35 Cleaning the lint filter 35 Dryer options and settings 36 Special laundry tips 38 Fabric Care Chart 39 Maintaining your dryer 41 Cleaning the exterior 41 Cleaning the drum 4...

Page 3: ...iance Please read this manual carefully before installation and operation of this machine to prevent injury and property damage Warnings and Important Safety Instructions in this manual DO NOT cover all possible conditions and situations that may occur It is your responsibility to use common sense caution and care when installing maintaining and operating your dryer DRYER SAFETY YOUR SAFETY AND TH...

Page 4: ...se gasoline or other flammable vapors and liquids in the vicinity of this or any other appliance Installation and service must be performed by a qualified installer service agency or the gas supplier WARNING Fire Hazard Failure to follow safety warnings exactly could result in serious injury death or property damage Do not install a booster fan in the exhaust duct Install all clothes dryers in acc...

Page 5: ... the appliance if the drum is moving Do not install or store this appliance where it will be exposed to the weather or freezing temperatures below 33 F Do not tamper with the controls and latch Do not install a booster fan in the exhaust duct Do not repair or replace any part of the appliance or attempt any servicing unless it is specifically recommended in the user maintenance instructions or in ...

Page 6: ...at has been in contact with a cleaning solvent or flammable liquids or solids should not be placed in the dryer until all traces of these flammable liquids or solids and their fumes have been removed There are many highly flammable items used in homes such as acetone denatured alcohol gasoline kerosene some liquid household cleaners some spot removers turpentine waxes and wax removers Do not dry i...

Page 7: ...sing it This may result in injury Gas leaks may occur in your system resulting in a dangerous situation Gas leaks may not be detected by smell alone Gas suppliers recommend you purchase and install a UL approved gas detector State of California Proposition 65 Warnings SAVE THESE INSTRUCTIONS THIS APPLIANCE IS FOR HOUSEHOLD USE ONLY Features Package contents 12 Cycle Electric or Gas Dryer User Guid...

Page 8: ...8 www insigniaproducts com INSTALLATION INSTRUCTIONS Back components Wiring box Back venting hole Power cord gas dryer only Gas inlet Gas Dryer Electric Dryer ...

Page 9: ...any buttons being pressed it automatically turns off 4 Dry Temp Press repeatedly to select the drying temperature High For sturdy cottons or those labeled Tumble Dry Med For permanent press synthetics lightweight cottons or items labeled Tumble Dry Medium Low For lower heat than Medium to dry synthetic or washable knit fabrics No Heat Provides just the air cycle without any heat 5 Wrinkle Care Pre...

Page 10: ...ldren Keep all packing materials such as plastic bags and polystyrene out of the reach of children WARNING Fire Hazard Clothes dryer installation must be performed by a qualified installer Install the clothes dryer according to the manufacturer s instructions and local codes Do not install a clothes dryer with flexible plastic venting materials If flexible metal foil type duct is installed it must...

Page 11: ...t install or store your dryer in an area where it will be exposed to water or weather Keep the dryer area clear of combustible materials gasoline and other flammable vapors and liquids Your dryer produces combustible lint Keep the area around the dryer lint free 27 in 68 6 cm 41 7 in 105 9 cm ...

Page 12: ...must exhaust your dryer to the outside to reduce the risk of fire when installed any place inside the house Do NOT install another fuel burning appliance in the same closet as your dryer For information about how to select and install exhaust ducts see Exhausting requirements on page 15 30 0 in 76 3 cm 41 7 in 105 9 cm 49 2 in 125 0 cm ...

Page 13: ...NS Installing in a closed cabinet Minimum clearances between your dryer and adjacent walls or other surfaces are Either side 1 in 2 5 cm Rear 5 in 12 7 cm Top 24 in 61 cm Front 2 in 5 1 cm 1 in 2 5 cm 27 in 68 6 cm 1 in 2 5 cm 24 0 in 61 0 cm 2 0 in 5 1 cm 5 in 12 7 cm 30 0 in 76 3 cm ...

Page 14: ...ts com INSTALLATION INSTRUCTIONS Note The dryer can be installed in either the left or right side of the cabinet 1 0 in 2 5 cm 1 0 in 2 5 cm 27 0 in 68 6 cm 1 in 2 5 cm 482 in 3102 cm 3 in 7 6 cm 3 in 7 6 cm 242 in 1552 cm ...

Page 15: ...2 4 m See Duct requirements on page 16 for the maximum duct length and number of elbows WARNING Do not exhaust your dryer into a chimney a wall a ceiling an attic a crawl space or a concealed space in a building Your dryer must be exhausted to the outside to reduce the risk of fire when installed in an alcove or closet WARNING NEVER USE A PLASTIC OR NON METAL FLEXIBLE DUCT If your existing duct wo...

Page 16: ...fect your dryer s operation Exhaust systems longer than the recommended 90 ft 27 4 m can extend drying times affect dryer operations and collect lint The exhaust duct should end with an exhaust hood that has a swing out damper to prevent back drafts and entry of wildlife Never use an exhaust hood with a magnetic damper The hood should have at least 12 inches 30 5 cm of clearance between the bottom...

Page 17: ...cting your dryer s grounding conductor can result in electric shock Check with a qualified electrician or serviceman if you are in doubt as to whether your dryer is correctly grounded Do not modify the plug provided with your dryer If the plug does not fit the outlet have the correct type outlet installed by a qualified electrician To prevent unnecessary risk of fire electrical shock or personal i...

Page 18: ...ker on both sides of the line All Canadian models are shipped with the power cord attached The power cord should be plugged into a 30 ampere receptacle Power outlet types WARNING RISK OF ELECTRIC SHOCK When local codes allow the electrical supply of your dryer may be connected by means of a new power supply cord kit marked for use with a dryer that is UL listed and rated at a minimum of 120 240 vo...

Page 19: ...FPA 54 LATEST REVISION FOR THE UNITED STATES OR THE NATURAL GAS AND PROPANE INSTALLATION CODE CSA B149 1 LATEST REVISION FOR CANADA Gas dryers are equipped with a burner vent for use with natural gas If you plan to use your dryer with LP liquid propane gas it must be converted for safe and proper performance by a qualified service technician A in 1 27 cm gas supply line is recommended and must be ...

Page 20: ...nstalled and grounded in accordance with all local codes and ordinances Certain internal parts are intentionally not grounded and may present a risk of electric shock only during servicing Service Personnel Do not contact the following parts while the appliance is energized inlet valve control board and temperature regulating thermistor located on blower housing WARNING Dryer must be grounded with...

Page 21: ... left side Tools you will need Adapter kits are standard components and can be purchased from any retailer Materials you will need 4 in 10 2 cm duct rigid or UL listed flexible metal not included 4 in 10 2 cm elbow not included Adapter duct not included Side venting BACK VIEW 3 6 in 9 3 cm 12 1 in 30 8 cm Phillips screwdriver Aluminum tape Gloves SIDEVIEW 1 5 in 3 8 cm TOP VIEW 14 9 in 37 9 cm 3 6...

Page 22: ...section and secure all joints with aluminum tape Make sure that the male end of the elbow faces away from the dryer 5 Insert the elbow duct assembly through the side opening and press it onto the adapter duct Secure in place with aluminum tape The male end of the duct should protrude 1 5 in 3 8 cm out of the dryer to connect the remaining ductwork 6 Attach aluminum tape to the back of the dryer to...

Page 23: ...elbow to the 4 in 10 2cm duct section and secure all joints with aluminum tape Make sure that the male end of the elbow faces down through the hole in the bottom from the dryer 5 Insert the elbow duct assembly through the rear opening and press it onto the adapter duct Secure in place with aluminum tape The male end of the duct should protrude 1 5 in 3 8 cm out of the dryer to connect the remainin...

Page 24: ...See Electric requirements on page 17 Note For Canadian models the power cord comes pre installed Your dryer vent is in the correct location See Changing the dryer vent location optional on page 21 to change where your dryer vents Your exhaust ducting not included is made of rigid metal or semi rigid metal See Duct requirements on page 16 You have a 3 8 in 1 cm gas dryer gas line if you are install...

Page 25: ...ally DO NOT use a plastic thin foil or non metal flexible duct DO NOT use sheet metal screws that can accumulate lint when assembling the ducting Joints should be taped DO NOT let the aluminum tape cover the ventilation slots on the back of your dryer DO NOT use dented or clogged ducts and vent 1 Make sure that the exhaust hood flapper or louvers move freely If you do not have an exhaust hood inst...

Page 26: ...a 4 in 10 2 cm diameter rigid metal duct 3 Connect the other end of the ducting to the exhaust hood then tighten the duct strap to secure it in place Tape all joints including at the dryer Step 4 Connect the gas line for gas models only 1 Remove the pipe thread protective cap from the gas inlet Important Before you connect the gas line review the gas line requirements in Gas requirements on page 1...

Page 27: ...8 in 1 cm male threaded end on the dryer Use only new AGA or CSA certified gas supply line with SS flexible connectors The National Fuel Gas Code requires that an accessible approved manual gas shutoff valve be installed within 6 in 15 cm of your dryer WARNING All gas installations of the dryer must be equipped with Manual Shut Off valve Uncoated copper tubing will corrode when subjected to natura...

Page 28: ... 4 Tighten the strain relief screws 5 Insert the tab of the terminal block cover into your dryer s rear panel slot then secure the cover with a screw Important Before you connect the power cord review the electric requirements in Electric requirements on page 17 Before testing or operating your dryer make sure that your dryer is grounded See Grounding requirements on page 20 WARNING If your are co...

Page 29: ... screws 6 Insert the tab of the terminal block cover into your dryer s rear panel slot then secure the cover with a screw WARNING Electrical Shock Hazard All U S models are produced for a THREE WIRE SYSTEM CONNECTION The dryer frame is grounded to the neutral conductor at the terminal block A FOUR WIRE SYSTEM CONNECTION is required for new or remodeled construction mobile homes or if local codes d...

Page 30: ...an electrical outlet and is properly grounded Rigid or semi rigid metal vent material is installed Do not use a plastic flexible ducting The exhaust duct work is hooked up and the joints are taped The dryer is level and sits firmly on the floor Gas models the gas is turned on with no gas leakage Start your dryer to confirm that it runs heats and shuts off Note for GAS MODELS ONLY The burner may no...

Page 31: ...nd set the door aside 3 Remove the screws for the locker cover on the right side of the dryer and the screws for the locker cover on the left side of the dryer 4 Install the locker onto the right side of the dryer with the screws you just removed then install the locker cover on the left side of the dryer CAUTION Be careful not to drop the door when removing the screws Remove two screws Remove two...

Page 32: ... 5 Remove the 12 screws around the door 6 Pull the inside door board from the outside door board 7 Rotate the outside door board 180 then reassemble it with the inside door board with the screws you removed previously Inside door board Outside door board ...

Page 33: ...STALLATION INSTRUCTIONS 8 Install the hinges onto the left side of the dryer 9 Align the hinges on the door with the hinge screw holes on the front of your dryer then secure the door with the four screws you previously removed Install two screws Install two screws ...

Page 34: ... one or two items you can improve the tumbling action and drying efficiency by adding a couple of similar items to the load Overloading restricts tumbling action which results in uneven drying and excessive wrinkling of some fabrics Step 3 Select the dryer cycle and options 1 Turn the Cycle Selector to select a drying cycle For more information see Dryer options and settings on page 36 2 Optional ...

Page 35: ... filter out of the slot at the bottom of the drum Remove the accumulated lint then insert the filter back into the slot Note You should clean the lint filter after every load to avoid lint buildup and to make sure that your dryer is running efficiently See Cleaning the lint filter on page 35 CAUTION Do not operate your dryer without the lint filter in place Do not use a damaged or broken lint filt...

Page 36: ...r drum up to about 3 4 full Do not overload Items need to tumble freely CYCLE FABRIC TYPE TEMP DRYNESS MAX AMOUNT Normal Cotton Underwear Linen High Very Dry More Dry Normal Damp Heavy Duty Jeans Corduroys Work clothes High Very Dry More Dry Normal Damp Towels Towels Heavy cottons High Very Dry More Dry Normal Damp Casual Wrinkle free cottons Synthetic fabrics Knits Medium Very Dry More Dry Normal...

Page 37: ... Cycle Electric and Gas Dryers www insigniaproducts com OPERATING INSTRUCTIONS 60 Min High Med Low No Heat n a 80 Min High Med Low No Heat n a Air Fluff No Heat n a CYCLE FABRIC TYPE TEMP DRYNESS MAX AMOUNT ...

Page 38: ...e as soon as possible Cloth diapers Use the Normal cycle on the High temperature setting for soft fluffy diapers Down filled items like jackets sleeping bags or comforters Use the Delicates cycle or a Timed dry cycle with low temperature Add a couple of dry towels to absorb moisture and shorten drying time Foam rubber like rug backs stuffed toys or shoulder pads DO NOT dry on a temperature setting...

Page 39: ...and care labels on clothes and other fabrics Wash Cycle Water Temperature Bleach Normal Normal Permanent Press Wrinkle Resistant Wrinkle Control Gentle Delicates Hand wash Hot Warm Cold Any bleach when needed Only non chlorine color safe bleach when needed Tumble dry cycle Permanent Press Wrinkle Resistant Wrinkle Control ...

Page 40: ...ering Dry clean Gentle Delicates Line dry Hang to dry Drip dry Dry flat High Medium Low Any heat No heat air High Medium Low For machine washable wool Loads should be under 8 lbs 3 6 kg Do not wash Do not wring Do not bleach Do not tumble dry No steam added to iron Do not iron Dry clean Do not dry clean Line dry Hang to dry Drip dry Dry flat ...

Page 41: ... from your dryer and wipe up any spills or over spray immediately Cleaning and inspecting the exhaust system Inspect and clean the exhaust yearly to maintain optimum performance 1 Disconnect the exhaust duct from the dryer and from the exhaust hood at the exhaust outlet outside of the building 2 Check the interior of the duct and remove any lint accumulation 3 Make sure that lint is removed from t...

Page 42: ... a few towels or use the Manual Dry cycles Clean the lint filter and exhaust duct Check the circuit breaker and fuses for your dryer s electrical connection Make sure that the outside exhaust hood opens and closes freely Check the exhaust system for lint buildup Ducting should be inspected and cleaned annually Make sure that your exhaust duct is a 4 in 10 2 cm rigid or semi rigid metal duct Dryer ...

Page 43: ...l wrinkled after using the Wrinkle Care setting Small loads of one to four items work best If the dryer load is too large items cannot tumble freely Try loading fewer items Make sure that the items in the dryer load are similar The Wrinkle Care setting works best when the items in the dryer load are similar type items There is lint on the clothing Check pockets thoroughly before washing and drying...

Page 44: ...personnel for help DO NOT use your dryer The Cooling Wrinkle Care process and Wrinkle Care option indicators blink The humidity sensor failed Your dryer will complete the current operating cycle but items could be over dried Your dryer can still operate under the Manual Dry cycles Contact authorized service personnel for help The Wrinkle Care process Clean Filter and Wrinkle Care option indicators...

Page 45: ...er the Warranty Period expires you must pay all labor and parts charges This warranty lasts as long as you own your Insignia Product during the Warranty Period Warranty coverage terminates if you sell or otherwise transfer the Product How to obtain warranty service If you purchased the Product at a Best Buy retail store location or from a Best Buy online website www bestbuy com or www bestbuy ca p...

Page 46: ... OF WARRANTY INSIGNIA SHALL NOT BE LIABLE FOR ANY INCIDENTAL OR CONSEQUENTIAL DAMAGES FOR THE BREACH OF ANY EXPRESS OR IMPLIED WARRANTY ON THIS PRODUCT INCLUDING BUT NOT LIMITED TO LOST DATA LOSS OF USE OF YOUR PRODUCT LOST BUSINESS OR LOST PROFITS INSIGNIA PRODUCTS MAKES NO OTHER EXPRESS WARRANTIES WITH RESPECT TO THE PRODUCT ALL EXPRESS AND IMPLIED WARRANTIES FOR THE PRODUCT INCLUDING BUT NOT LI...

Page 47: ...U S and Canada or 01 800 926 3000 Mexico INSIGNIA is a trademark of Best Buy and its affiliated companies Distributed by Best Buy Purchasing LLC 7601 Penn Ave South Richfield MN 55423 U S A 2020 Best Buy All rights reserved V1 ENGLISH 20 0361 ...

Reviews: