Insignia NS-24ED310NA15, User Manual
The Insignia NS-24ED310NA15 is a compact and versatile television. Its user-friendly interface ensures a hassle-free setup with the included Quick Setup Manual. To fully benefit from its features and settings, ensure you've downloaded the free manual from manualshive.com to optimize your viewing experience.
Share
Download


Reviews:
No comments
Related manuals for NS-24ED310NA15

SY3281
Brand: Zenith Pages: 44
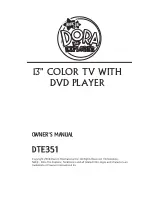
Dora the Explorer DTE351
Brand: Emerson Pages: 42

Emerson LD195EMX
Brand: Emerson Pages: 162

V295 - SD - DVD/VCR
Brand: Toshiba Pages: 1

SD-V594
Brand: Toshiba Pages: 2

SD-V592
Brand: Toshiba Pages: 2

SD-V593
Brand: Toshiba Pages: 2

SD-V296 - DVD/VCR
Brand: Toshiba Pages: 2

SD-V395
Brand: Toshiba Pages: 18

SD-V391
Brand: Toshiba Pages: 18

SD26VCR
Brand: Toshiba Pages: 63

SD46VSR
Brand: Toshiba Pages: 63

SD-V394SC
Brand: Toshiba Pages: 68

SD-V593
Brand: Toshiba Pages: 72

SD-V593SU
Brand: Toshiba Pages: 72

SD-V55HTSU
Brand: Toshiba Pages: 76

SD-V393SU
Brand: Toshiba Pages: 109

SD-V330SC2
Brand: Toshiba Pages: 108


