background image


www.insigniashowers.com


Last Modified:11/02/2021
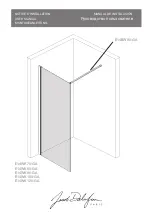
 

 1


INSTALLATION MANUAL


INS0509


1500mm x 900mm


ATTENTION INSTALLERS:


These instructions must be 


left with the customer


CHECK ALL CONTENTS BEFORE BUILD COMMENCES. NO RETURNS CAN BE MADE 

ONCE THE BUILD HAS STARTED AS IT IS DEEMED ACCEPTANCE OF PRODUCT!


30 Day Technical Support: 


Call 

01908 317512 

and request technical support for aiding your 

installation.


Replacements Parts:


Inside of your warranty period visit: 


https://www.insigniashowers.com

, click support and make a 

warranty claim.


Spares/Replacements Parts:


Outside of your warranty period visit 


https://www.insigniashowers.com/replacement

-

parts.html


WARRANTY REG NO: _______________________


To claim your full 5 year warranty, register your shower within 90 days visit:  


https://www.insigniashowers.com

click support and register for your warranty


Summary of Contents for INS0509

Page 1: ...ort Call 01908 317512 and request technical support for aiding your installation Replacements Parts Inside of your warranty period visit https www insigniashowers com click support and make a warranty...

Page 2: ...nels 11 Installing the Accessories 12 Installing the Column 13 Installing the Framework 14 Install the Roof LED Lights 17 Install Door Handles and Seals 18 Install Door Wheels 19 AMI Install 21 Valve...

Page 3: ...this booklet with great care to ensure you get the best out of your build and have a shower that will last for many years to come Like everything in order to obtain a first class product that will se...

Page 4: ...build up may cause damage to your shower and will not be covered under warranty TIP 3 Installation These showers are designed to be free standing and movable from their location should you have the n...

Page 5: ...www insigniashowers com Last Modified 11 02 2021 5...

Page 6: ...which type of pump is used location or design because all house plumbing layouts vary This is a job for your installer plumber The end delivery however must fall within the scope above Important Note...

Page 7: ...d DRY RUN this means you do not silicone anything just simply construct the shower align drill and screw everything together Once you are happy with the build take the unit apart and carry out the fin...

Page 8: ...parts can be obtained free of charge during or after the build Any claims can only be within the timescale permitted 48 hours after delivery and always BEFORE build Product Code Description Quantity S...

Page 9: ...www insigniashowers com Last Modified 11 02 2021 9 Step 1 Level the Tray Twist to adjust...

Page 10: ...www insigniashowers com Last Modified 11 02 2021 10 Step 2 Assemble Insert waste pipe Check the Spigot is drilled out prior to fitting If it isn t ensure you drill it out...

Page 11: ...www insigniashowers com Last Modified 11 02 2021 11 Silicone Red RubberGum Blue ST20 ST20 Step 3 Attach back and side walls...

Page 12: ...www insigniashowers com Last Modified 11 02 2021 12 x2 Step 4 Attach shelves and riser rail...

Page 13: ...www insigniashowers com Last Modified 11 02 2021 13 ST20 Silicone Red RubberGum Blue Step 5 Attach centre column...

Page 14: ...www insigniashowers com Last Modified 11 02 2021 14 ST35 ST35 ST35 ST35 ST25 Step 6 Fit front frame Internal Front view Birds eye view...

Page 15: ...www insigniashowers com Last Modified 11 02 2021 15 ST14 Step 7 Attach corner posts Internal View...

Page 16: ...www insigniashowers com Last Modified 11 02 2021 16 ST14 Silicone Red RubberGum Blue Step 8 Seal Front Panels Internal View...

Page 17: ...www insigniashowers com Last Modified 11 02 2021 17 Step 9 Fit roof and LED lights Internal View...

Page 18: ...www insigniashowers com Last Modified 11 02 2021 18 Step 10 Fit door handles...

Page 19: ...www insigniashowers com Last Modified 11 02 2021 19 Step 11 Fit top door wheels Slide cover off Unscrew Door Tighten to secure wheels into door runners...

Page 20: ...www insigniashowers com Last Modified 11 02 2021 20 Step 11 cont Fit bottom door wheels Slide cover off Unscrew Door...

Page 21: ...Install Place in middle hole first Turn Tri Jet to tighten Use Allen key to tighten left chrome outlet Use Allen key to tighten right chrome outlet Note Connect the 1 metre insulated hose to the back...

Page 22: ...ich output the water exits from then turn off the water and swap over the relevant hose Alternatively remove the outer chrome knob by removing the chrome cap and loosening the grub screw please ensure...

Page 23: ...niashowers com Last Modified 11 02 2021 23 Electric Box Connections Connect the cables below to the corresponding devices on the shower Roof Light Speaker Antenna Power Supply Thermostatic probe Speak...

Page 24: ...may require a male to male connector to connect them together to make them long enough depending on your shower model screwfix code 71087 Purchase a female blanking cap screwfix code 21851 which fits...

Page 25: ...rom one side and going around to the back and then to the other side finishing at the front If you have a small leak normally caused through insufficient sealer or air bubble on assembly dry the area...

Page 26: ...y activated Other buttons will remain functional whilst in this state of lock mode Button 5 Music Press once for FM Radio and press twice for Bluetooth For tuning radio stations or connecting Bluetoot...

Page 27: ...Step 1 To tune your radio channels firstly press the music function button which looks like a musical note Tuning your radio channels Step 1 To connect a device via Bluetooth press the music function...

Page 28: ...Cover SP034 Chrome Tri jet Steam Outlet SP270 Chromotherapy Lighting Internal Items Part Code Part Description SP300 Waste hose SP301 White insulated thermo pipe SP187 Drain Hose SP234 Vertical steam...

Page 29: ...re use 8 If you have any underlying health conditions which you feel could be aggravated by using a steam room consult your GP before use 9 If you begin to have any issues with your health after using...

Page 30: ...see a small C to the right of the display The large number in the middle of the display can be changed by pressing the arrows 4 The maximum temperature you can reach is 60 C The average temperature in...

Page 31: ...in water until it is fully hydrated Pour at least 5ml half a bottle of the AMI essential oil onto the pad The more oil you use the more intense the aroma 3 Fully insert the diffuser pad into the allo...

Page 32: ...www insigniashowers com Last Modified 11 02 2021 32 Bathroom Electrical Zones...

Page 33: ...room goes past zones 0 1 and 2 portable electrical appliances can be utilised if their cord length doesn t allow them to be used in zone 2 For example a hairdryer can be used in the outside zones prov...

Page 34: ...ommon crossed out wheelie bin label We accept returns of all products carrying the Insignia brand All other products are either considered outside the scope of WEEE or Insignia is not technically the...

Page 35: ...www insigniashowers com Last Modified 11 02 2021 35...

Reviews: