background image

· 1 ·

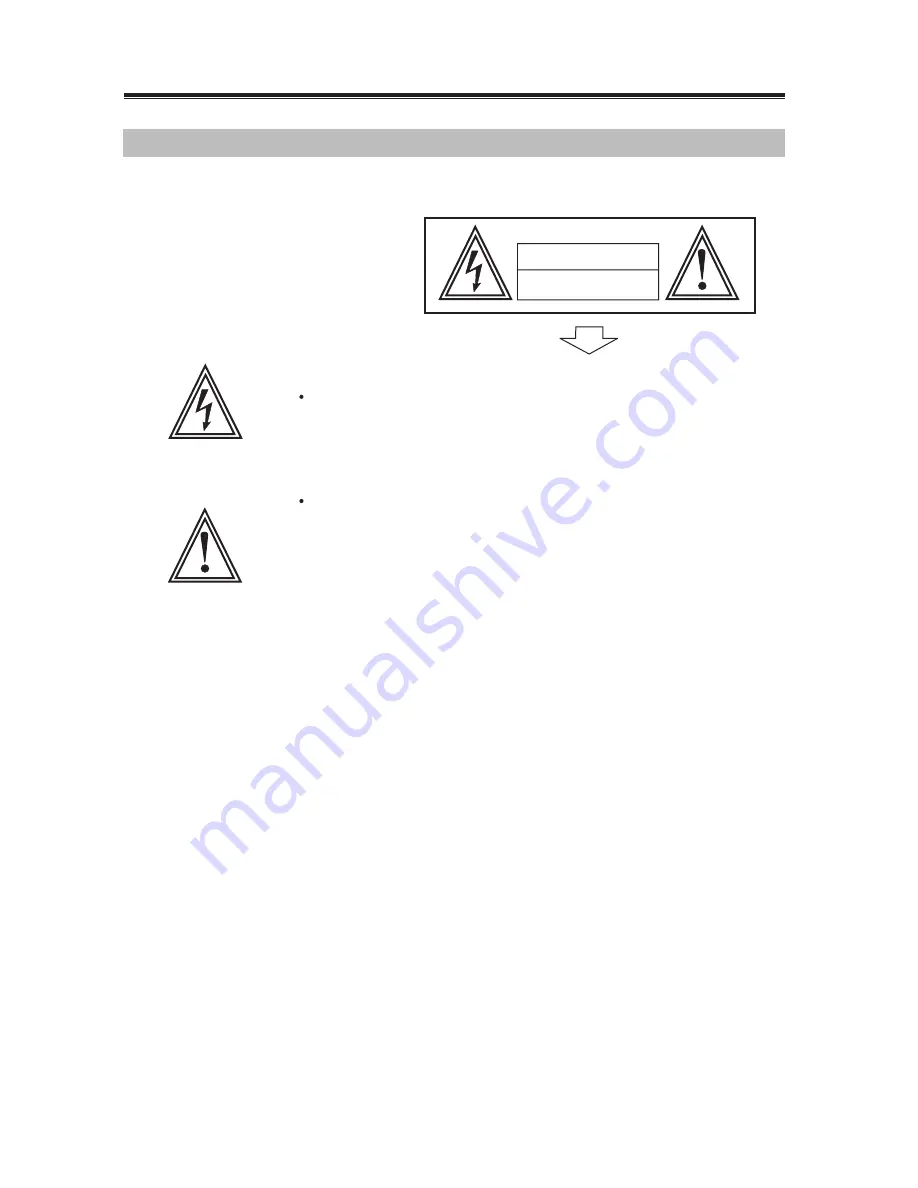
The lightning flash with arrowhead symbol within an equilateral
triangle is intended to alert the user to the presence of uninsulated "
dangerous voltage" within the product's enclosure that may be of
sufficient magnitude to constitute a risk of electric shock to persons.

WARNING:

CAUTION:
CAUTION:

WARNING:

To reduce the risk of fire or electric shock, do not expose this appliance

to rain or moistrue. Dangerous high voltages are present inside the

enclosure. Do not open the cabinet.

To prevent electric shock, match wide blade plug to wide slot, fully insert.

The unit employs a laser system. To ensure the proper use unit, read

this manual carefully and keep it for future reference. If the unit requires

servicing, contact the seller or our service center- see "troubleshooting ". To

prevent direct exposure to the laser radiation, do not open the cabinet. In

visible laser radiation when the cabinet is opened or the interlocks are

defeated. Do not stare into the laser beams.

Use of any controls, adjustments, or procedures other than those specified

herein may result in hazardous radiation exposure.

not for use where video monitor is visible to driver to avoid risk of serious injury

or possible violation of atate laws.

A

. SAFETY PRECAUTIONS

The exclamation point within an equilateral triangle is
intended to alert the user to the presence of important
operating and maintenance (servicing) instructions
in the literature accompanying the product.

CAUTION

RISK OF ELECTRIC SHOCK

DO NOT OPEN

Summary of Contents for IDM-FD10

Page 1: ...efully and keep it for future reference If the unit requires servicing contact the seller or our service center see troubleshooting To prevent direct exposure to the laser radiation do not open the cabinet In visible laser radiation when the cabinet is opened or the interlocks are defeated Do not stare into the laser beams Use of any controls adjustments or procedures other than those specified he...

Page 2: ...ing of the product should follow the manufacturer s instructions and should use a mounting accessory recommended by the manufacturer 9 A product and cart combination should be moved with care Quick stops excessive force and uneven surfaces may cause the product and cart combination to overturn 10 Power Sources This product should be operated only from the type of power source indicated on the pane...

Page 3: ... the wall outlet and refer servicing to qualified service personnel under the following conditions a When the power supply cord or plug is damaged b If liquid has been spilled or objects have fallen into the product c If the product has been exposed to rain or water d If the product does not operate normally by following the operating instructions Adjust only those controls that are covered by the...

Page 4: ... CONNECTIONS BASIC OPERATIONS LCD SCREEN ADJUSTMENT LAMP L AND LAMP R HOW TO RECEIVE AUDIO SIGNALS PLAY DISCS PAUSE OSD DVD MENU PLAY SELECT WITH NUMBER BUTTONS 1 2 3 4 5 5 6 7 7 8 8 8 9 10 11 12 13 13 13 13 14 14 15 18 18 19 K L M N O MENU SETUP MENU SETTING PLAY DISCS IN VARIOUS WAYS AUDIO MODE MUTE FAST PLAY SLOW PLAY REPEAT PLAY SELECT SUBTITLES SELECT ANGLES PLAY MP3 DISCS OTHERS TROUBLE SHOO...

Page 5: ... must be authorized by Macrovision Corporation and is intended for home and other limited viewing uses only unless otherwise authorized by Macrovision Corporation Reverse engineering or disassembly is prohibited Multi angle and multi language bring unique trick functions parental lock makes it easy to control the content of discs 2 UNIQUE FUNCTIONS The IDM FD10 is capable of displaying Full Screen...

Page 6: ...ay appear on the TV screen during operation This icon means the function explained in the owner s manual is not available on that disc MARK INDICATION functions of DVD functions of CD DVD CD E PLAYABLE DISCS TYPE DVD CD MP3 MARK CONTENT SIZE PLAYING TIME audio video motion pictures audio audio 12cm 12cm 12cm approx 2hrs single side disc approx 4hrs double side disc approx 74mins 600mins Note Regio...

Page 7: ...ge in video software title is movie to a piece of music in audio software it is music Each title has an indication number which makes it easy to locate CHAPTER It is smaller than title among the units of a DVD A title is made up of several chapters and each chapter has a number for search But some discs may not have numbered chapters TRACK The music in a CD Each track has a number for search ...

Page 8: ...isc you bought CONDENSATION Water will appear on the pickup lens in the following cases The unit is suddenly moved from a cold place to a warm place The unit is put in a room with a heater or in the cold air from a air conditioner Use the unit in a humid place In these cases the unit can not work Unload the disc and leave the unit on for about one hour to evaporate the water Use soft cloth with a ...

Page 9: ...he diagram open the battery compartment of the remote control insert batteries then close the compartment 2 To use the remote control point it at the remote sensor of the unit operate in the range of 5 meters and 60 3 Generally batteries last for about one year replace the batteries if the remote control does not work 4 Remove the batteries if remote control is not used for a long time User manual...

Page 10: ...EXT SKIP 6 STOP 7 PLAY 8 EJECT 9 PAUSE 10 LAMP L and LAMP L Switch 11 LAMP R and LAMP R Switch 12 Wireless Headphone Signal Transmitter FM Signal Transmitter 13 Indicate Light 14 SOURCE Button 15 MENU Button 16 DOWN UP Buttons 17 FM TX Buttons 18 Reset Button 1 10 13 12 11 2 3 45 6 78 9 1415 16 1718 ...

Page 11: ... LCD operation VOLUME ANGLE MUTE MUTE for LCD operation OSD REPEAT PREV NEXT SLOW FM TX for LCD operation POWER SOURCE 10 When the slide switch on the remote is set to the DVD position left the remote control is set to control all DVD player functions When the slide switch is set to the LCD position it is set to control all Display functions NAMES AND LAYOUT OF REMOTE CONTROLS 2 1 3 4 5 6 7 8 9 10...

Page 12: ...R red Video yellow fuse box Car fuse box main fuse Battery GND black 12V yellow door blue door white DOOR SW DOOR SW DVD PLAYER Ignition key switch ACC red Color Black Red Yellow Blue White Function Ground Switched or Ignition ACC power Constant Power Battery direct Dome Lamp Door Trigger switching GM Type Dome Lamp Door Trigger switching Ford Type Wire Color Chart ...

Page 13: ... power terminal Be sure to connect the black GROUND lead first Connecting the Inputs 1 Connect the monitor s power supply cords correctly according to the upper connections diagram 2 Connect external equipments to this monitor through AV1 IN and or AV2 IN cables 1 Connect the audio cables to the AUDIO OUT L left white and R right red jacks of your external equipments and to the corresponding Audio...

Page 14: ...t and press DOWN or UP buttons until moderate hue is available Press the MENU button to select Sharpness adjustment and press DOWN or UP buttons until moderate sharpness is available LAMP L and LAMP R Press the LAMP L button on the main unit or on the remote control to turn LAMP L on or off Press the LAMP R button on the main unit or on the remote control to turn LAMP R on or off Also the lamps ca...

Page 15: ...e to press this button twice to stop the playback of DVD discs PAUSE Press DVD CD DVD CD WHEN PLAYING PICTURES If the pictures of DVD are played press to make playback pause The unit enters step play status Each time you press the picture advances one frame WHEN PLAYING MUSIC CD Press to make playback pause Press PLAY to resume playback ...

Page 16: ...ber you can only access the Display when you re playing a disc Also the Display features are only available if the disc was created with that particular feature The invalid symbol appears on the screen when you press a button that doesn t have any function If one of the playback features is grayed out that Display feature isn t available for the disc you re playing To make the Display disappear fr...

Page 17: ...ss OSD on the remote to bring up the Display 2 Press the or buttons to highlight Subtitle 3 Press the PLAY button the subtitle languages appear 4 Press the or buttons to move through the subtitle languages that are available on the disc Press the PLAY button when the subtitle language you want to use is highlighted 5 To make the Display disappear press the OSD button on the remote Note Changing th...

Page 18: ... appear Press the or buttons to move through the repeat options Press the PLAY button when the repeat option you want to use is highlighted The selected repeat option will loop repeatedly until you turn Repeat off How to Cancel Repeat Press STOP twice Go to Repeat feature in the Display and select Off Eject the disc Shifting the Displayed Time Using the Time Display feature in the Display you can ...

Page 19: ...ring up the Display 2 Press the or buttons to highlight Repeat 3 Press the PLAY button the repeat options appear 4 Press the or buttons to move through the repeat options Press the PLAY button when the repeat option you want to use is highlighted 5 The selected repeat option will loop repeatedly until you rurn Repeat off Shifting the Displayed Time Using the Time Display feature in the Display you...

Page 20: ...over 5 press 5 once and a button among 1 5 Example if you select track 12 press 5 twice and button 2 The screen shows Track12 20 00 00 2 Example Select Audio Setup and do some setup Press direction button to highlight Audio Setup press PLAY to enter Audio Setup Page The main menu appears on the screen with icons across the top of the screen illustrating General Setup Audio Setup Video Setup Prefer...

Page 21: ...t Dual Mono in Dolby Digital Setup to Left Mono The screen shows Audio Setup Page Speaker Setup Dolby Digital Setup Channel Equalizer 3D Processing Main Page Go To Speaker Setup Page Press the direction button to exit from Dual Mono Press the direction button to exit from Dolby Digital Setup Press the direction button to highlight Main Page and press PLAY The screen shows 3 Exit setup menu Press t...

Page 22: ...connected to a mormal TV Wide screen images are shown on the screen with black belt on the top and bottom 3 WIDE This is selected when the unit is connected to a wide screen TV TV DISPLAY 1 NORMAL PS This is selected when the unit is connected to a normal TV Wide screen images are shown on the screen but with some parts cut automatically TV TYPE You may select according to the color system of the ...

Page 23: ...be incorported to stereo DOLBY DIGITAL SETUP The setting structure is DUAL MONO This is the output mode of the L and R signals of the set audio output If it is set to MIXED MONO the function only works when the DVD being played is 5 1 channel D R C This is selected to adjust liner compression rate to obtain the different compression results of the signals Dolby Digital Setup Dual Mono STR Stereo L...

Page 24: ... 3D Processing Page V SURR Reverb Mode Off On Off Audio Setup Off Off Concert Living Room Hall Bathroom Cave Arena Church V SURR Use to turn Virtual Surround on and off REVERB MODE Use to select a Reverb Mode that you want to use The setting structure is VIDEO SETUP Video Setup Page Sharpness Brightness Contrast Main Page High 00 00 High Medium Low SHARPNESS Uses to select the sharpness level HIGH...

Page 25: ...le ENG English French Spanish Chinese Japanese Off Disc Menu ENG English French Spanish Chinese Japanese Parental 08 1 G 2 3 PG 4 PG 13 5 PGR 6 R 7 NC17 8 ADULT Default Main Page Reset LANGUAGE SELECTION If a language mentioned above is recorded on the disc you can select sounds subtitles or disc menu languages If not the language recorded on the disc is shown PARENTAL LOCK When playing disc with ...

Page 26: ... 5 1CH Different discs differ in languages Press the screen shows orderly Mono Left Mono Right Mixed Mono Stereo DVD CD AUDIO MODE WHEN PLAYING CD AUDIO MODE Mono Left Mono Right AUDIO MODE AUDIO MODE Mixed Mono AUDIO MODE Stereo You may select one mode Notes Different discs differ in languages MUTE DVD CD MUTE When playing a disc this function can remove the sound 1 REMOVE SOUND Press MUTE the sc...

Page 27: ... CD FAST PLAY When playing a disc you may play it forward fast or reverse it fast to find what you want WHEN PLAYING DVD OR CD 1 Press to play forward fast Each time you press the button the screen shows orderly 2 Press to reverse the disc fast Each time you press the button the screen shows orderly 3 Press PLAY to switch to normal play while FF or FR playing DVD SLOW PLAY Enjoy slow motions by th...

Page 28: ...n the language of subtitles If the subtitles of discs can not be selected press the screen shows NO SUBTITLE Some discs have images with different viewing angles you may select among them For example when you watch a running train you may watch it from the front the left window or the right window without stopping it ANGLES SELECT Example A DVD has four viewing angles at your option 1 Press tosele...

Page 29: ...AY button to start playback 4 Press or button to select other tracks and press PLAY button to play 5 In stop mode select the folder icon on the left side then press PLAY button to return to the main menu 6 press or to play previous or next songs 2 Press direction key to select song folder Press PLAY to confirm selection Example Select CD02 the TV screen displays 00 00 00 00 001 016 FOLDER wave 11 ...

Page 30: ... button on the unit No video image The video input cable has not been connected correctly Make sure making the video connection correctly Press the SOURCE button to select AV inputs between AV1 IN and AV2 IN The screen is dark The unit is in a location where temperature is low If the temperature of the monitor unit drops the screen may appear darker when power is first turned on Wait a while after...

Page 31: ...nse Signal noise ratio Audio distortion noise Channel separation Dynamic range Output Audio out analog audio Video out Power supply Environment temperature Power consumption Weight wavelength 650mm NTSC PAL 30Hz 20KHz 5dB 85dB 70dB 1KHz 85dB 1KHz 80dB 1KHz output level Load impedance 2 V 10KΩ 0 1 output level Load impedance 1 0 2V 75KΩ DC12V 1 5A 14 122 F 20W Around 3 0 Kgs ...

Page 32: ... regulations Follow the following diagram to install the monitor in a suitable position in your car Install procedure Do not install the monitor where It will obstruct the driver s view when the monitor is in either the open or closed position It will obstruct the operation of the airbag system It will obstruct the operation of the vehicle especially the steering wheel shift lever or brake pedal A...

Reviews: