background image

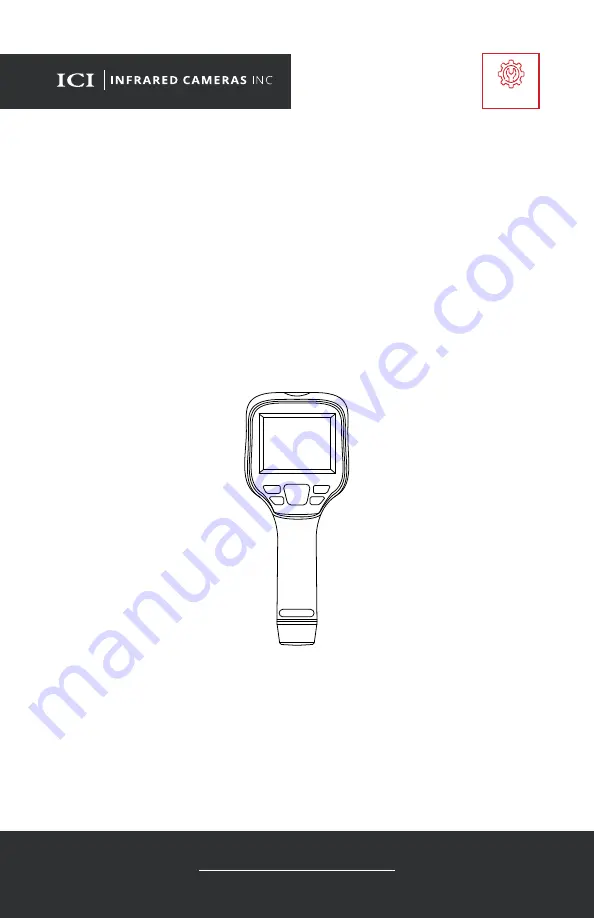
T-CAM 380 P-SERIES

USER MANUAL

PLEASE READ THIS MANUAL BEFORE SWITCHING THE UNIT ON.

IMPORTANT SAFETY INFORMATION INSIDE.

2105 W. Cardinal Dr. Beaumont, TX 77705

ICI cameras fall under US Federal Law and Export Control.

For more information, contact us: (409) 861-0788 | [email protected] | www.infraredcameras.com

Edit Text

Outlines

Industry

Industry

Revision: 12.2021-001

Summary of Contents for T-CAM 380 P Series

Page 1: ...NIT ON IMPORTANT SAFETY INFORMATION INSIDE 2105 W Cardinal Dr Beaumont TX 77705 ICI cameras fall under US Federal Law and Export Control For more information contact us 409 861 0788 sales infraredcameras com www infraredcameras com Edit Text Out Ind Industry Revision 12 2021 001 ...

Page 2: ...T CAM 380 P SERIES USER MANUAL 2 Revision History 07 2021 001 12 2021 001 Document created Fixed typographical inaccuracies and updated manual layout ...

Page 3: ...Definitions of Housing Interface 14 Package Includes 15 Quick Start Instructions 16 7 1 Tripod Setup 16 7 2 Battery Installation 18 7 3 Memory Card Installation 20 7 4 Charging Instructions Option 1 21 7 5 Charging Instructions Option 2 22 Operation Instructions 23 8 1 How to Charge the Battery 23 8 1 1 Charging via Type C Cable 23 8 1 2 Charging via Power Adapter not included 23 8 2 Power On Off ...

Page 4: ...PIP Location 32 8 20 Polarity 32 8 21 Auto Gain Control AGC and Manual Level Span Adjustment 33 8 21 1 Auto Gain Control AGC 33 8 21 2 Manual Level Span Adjustment 33 8 22 Emissivity 34 8 23 Non uniformity Correction NUC 35 8 24 Ambient Temperature 36 8 25 Temperature Units 36 8 26 Distance 37 8 27 Distance Units 37 8 28 Alarm Settings 38 8 28 1 Enable Alarms 38 8 28 2 Temperature Threshold Adjust...

Page 5: ...e Calibration 46 9 4 Storage 46 Troubleshooting 47 10 1 Thermal imager does not power on 47 10 2 Thermal imager shuts off unexpectedly 47 10 3 No thermal image 47 10 4 Unclear or dark visible images 47 10 5 Temperature readings are incorrect 47 10 6 Camera out of focus 48 10 7 Memory card error 48 About ICI 49 10 11 ...

Page 6: ...en permission of Infrared Cameras Inc The documentation must not in whole or part be copied photocopied reproduced translated or transmitted to any electronic medium or machine readable form without prior consent in writing from Infrared Cameras Inc Names and marks appearing on the products herein are either registered trademarks or trademarks of Infrared Cameras Inc and or its subsidiaries All ot...

Page 7: ...nt The crossed out wheeled bin symbol indicates that waste electrical and electronic equipment should not be discarded together with unseparated household waste but must be collected separately All local authorities have established collection schemes under which residents can dispose of equipment at a recycling center or other collection points or WEEE will be collected directly from households M...

Page 8: ... from the first 1 1000th of an inch of a subject Environment of use industrial and petrochemical buildings electrical plants security rooms science labs animal reserves as well as environmental conservatories and aerial integrations among others You agree that this product is for civilian use only and shall not use applications that may infringe the rights of third parties medical and safety devic...

Page 9: ...T CAM 380 P SERIES USER MANUAL 9 2 9 Training To read about infrared training visit https infraredtraininginstitute com ...

Page 10: ...me charged in the specified charging time If you continue to charge the battery it can become hot and cause an explosion or ignition Injury to persons can occur Do not attach the batteries directly to a car s cigarette lighter socket Using the incorrect equipment can cause the battery to become hot or cause an explosion Only use the correct equipment to discharge the battery Using the incorrect eq...

Page 11: ...s occurs Clean the case with a damp cloth and a weak soap solution Do not use abrasives isopropyl alcohol or solvents to clean the case or lens screen Be careful when cleaning the infrared lens Do not clean the infrared lens too vigorously This can damage the anti reflective coating Avoid condensation Taking the imager from cold to hot will cause condensation in thermal imager To protect the image...

Page 12: ... non condensing Pixel Operability 99 Drop Rating 2 m 6 56 Shock Vibration 25 G 2 G Dimensions without lens 256 4 mm x 105 1 mm x 105 3 mm L x W x D 0 5 mm 10 09 x 4 14 x 4 15 L x W x H 0 02 Power 5 V DC 2 A Battery Li ion rechargeable replaceable Operation Time 4 hours Charging Time 3 hours Power Management Adjustable Weight with lens 670 g 1 48 lbs Interface USB Type C MicroSD Video Format MP4 wi...

Page 13: ...t Units C F K IP Rating IP54 Brightness Adjustable Digital Camera 5 MP Interval Photography No Alarm Snapshot No Central Hot Cold Spot Measurements Yes Point Line Area Measurements Yes WLAN Support Yes Cloud Services No Laser Class II 650 nm 1 mW Language Multinational Voice annotation Microphone with noise cancellation Automatic alarms Internal non uniformity correction NUC 1 4 20 tripod support ...

Page 14: ...g Interface 1 Lens Cover 2 Laser 3 Digital Camera 4 Shutter Trigger 5 Germanium Lens 6 SD Card Slot 7 USB Slot 5 1 2 3 4 7 6 8 Touchscreen 9 Previous Back Cancel 10 OK Menu 11 Navigation up down left right 12 Microphone 13 Review 14 Power Laser 12 13 14 10 8 9 11 5 Structure ...

Page 15: ...RIES USER MANUAL 15 ENSURE ALL SYSTEM EQUIPMENT AND COMPONENT ITEMS ARE PRESENT BEFORE BEGINNING INSTALLATION T Cam device USB to Type C Cable Battery Charger Battery x2 Power Adapter MicroSD Card 6 Package Includes ...

Page 16: ... located on the bottom of the device handle The T Cam can be used as a handheld device A MAKE SURE TRIPODS DO NOT BLOCK THE DIRECT PATH OF PERSON S TO BE IMAGED TO ENSURE THE EQUIPMENT WILL NOT BE MOVED OR KNOCKED DOWN USING A DIVIDING BARRIER WILL HELP KEEP TRIPODS SEPARATE FROM THE PATH 7 Quick Start Instructions ...

Page 17: ...NDS PRESS AND HOLD THE POWER BUTTON FOR MORE THAN 5 SECONDS TO SHUT DOWN THE CAMERA THE THERMAL IMAGER NEEDS SUFFICIENT WARM UP TIME FOR THE MOST ACCURATE TEMPERATURE MEASUREMENTS AND BEST IMAGE QUALITY THIS TIME CAN OFTEN VARY BY ENVIRONMENTAL CONDITIONS IT IS BEST TO WAIT A MINIMUM OF 10 MINUTES FOR THE DEVICE TO COMPLETELY WARM UP ...

Page 18: ... lines firmly to create a gap Ensure metal contacts are aligned then push battery into battery bay MAKE SURE TO HOLD THE CAMERA FIRMLY IN BOTH HANDS WHEN REMOVING OR REPLACING BATTERY OR ATTACHING OR REMOVING THE BATTERY BAY COVER DO NOT FORCE THE BATTERY INTO THE BATTERY BAY IF USER FEELS SIGNIFICANT RESISTANCE REMOVE THE BATTERY AND ENSURE METAL CONTACTS ARE ALIGNED BEFORE TRYING TO PLACE BATTER...

Page 19: ...ery cover To replace a battery held in the battery bay push the battery buckle Battery will be ejected MAKESURETOHOLDTHECAMERAFIRMLYINBOTHHANDSWHENREMOVING OR REPLACING BATTERY OR ATTACHING OR REMOVING THE BATTERY BAY COVER ENSURE BATTERY COVER IS PROPERLY ATTACHED IMPROPER ATTACHMENT OF BATTERY COVER MAY EXPOSE THE BATTERY AND INTERNAL ELECTRONICS TO ELEMENTAL DAMAGE ...

Page 20: ...the T Cam device until a clicking sound is heard DO NOT FORCE MICRO SD CARD INTO THE SLOT THE SIDE OF THE CARD WITH CONTACT PINS MUST BE INSERTED FIRST IF THERE IS RESISTANCE FLIP THE CARD AROUND AND TRY AGAIN TO EJECT THE MEMORY CARD PRESS UNTIL A CLICK IS HEARD AND THEN RELEASE MEMORY CARD WILL BE EJECTED ...

Page 21: ... THE FIRST TIME ICI DOES NOT RECOMMEND CHARGING THE DEVICE WHILE IT IS ON A TRIPOD LAY DEVICE FACE DOWN ON A FLAT AND STABLE DESK OR TABLE WHILE CHARGING ENSURE THE IMAGER IS NEAR ROOM TEMPERATURE BEFORE CHARGING THE DEVICE DO NOT CHARGE IN EXTREMELY HOT OR COLD AREAS THE BATTERY CAPACITY MAY BE DECREASED IF CHARGED IN AN EXTREME TEMPERATURE ENVIRONMENT IF YOU DO NOT USE THE IMAGER FOR A LONG PERI...

Page 22: ...SB cable the power adapter Plug power adapter into a 110 120V electrical outlet REMOVE THE BATTERIES FROM THE DEVICE TO FOLLOW THIS METHOD OF CHARGING WHEN THE BATTERY IS NOT PLACED IN THE CHARGER THE INDICATOR LIGHT FLASHES THE LIGHT TURNS RED WHEN THE BATTERY IS PLACED AND CHARGING WHEN THE BATTERY IS FULLY CHARGED THE LIGHT TURNS GREEN 7 5 Charging Instructions Option 2 ...

Page 23: ...110v 120V electrical outlet ENSURE THE IMAGER IS NEAR ROOM TEMPERATURE BEFORE CHARGING THE DEVICE DO NOT CHARGE IN EXTREMELY HOT OR COLD AREAS THE BATTERY CAPACITY MAY BE DECREASED IF CHARGED IN AN EXTREME TEMPERATURE ENVIRONMENT THE THERMAL IMAGER NEEDS SUFFICIENT WARM UP TIME FOR THE MOST ACCURATE TEMPERATURE MEASUREMENTS AND BEST IMAGE QUALITY THIS TIME CAN OFTEN VARY BY ENVIRONMENTAL CONDITION...

Page 24: ...een display 8 6 Close the Main Menu Close the Main Menu by pressing the Previous button or tapping anywhere on the touchscreen display 1 Date and Time 2 Battery Life 3 Center Point Temperature 4 Settings 5 Sub menu 6 Main Menu 7 AGC 8 Level Span 9 Temperature Measurement Points CENTER POINT HIGH TEMPERATURE POINT AND LOW TEMPERATURE POINT ARE ACTIVATED IN THE PRESENTED IMAGE ABOVE 8 7 9 1 2 3 4 5 ...

Page 25: ...phone Add annotations to an image as follows 1 Capture an image or video 2 Using the touchscreen tap the microphone icon A tool tip on screen will denote recording is happening 3 Speak clearly directly and loudly into the microphone located at the top right of the touch screen 4 Tap the microphone icon again to stop recording 5 Name the image Using the touchscreen open the keyboard by tapping the ...

Page 26: ...eos When an image or video is captured it will be stored to the MicroSD card Media can be viewed at any time as follows 1 Press the Review button to enter the library 2 Use the Navigation buttons to select the image or video to review 3 Press the OK button to view the image or video in full screen Use the Navigation buttons to cycle left or right between images and videos 4 Press the Previous butt...

Page 27: ...r of the screen Enable hot spot tracking as follows 1 Press the Menu button or tap the touchscreen to display the Main Menu 2 Select the measurement icon 3 Press the OK button to open Sub menu 4 Select Hot Spot icon 5 Press the OK button to enable hot spot tracking Menu closes automatically To disable the hot spot repeat steps 1 5 8 12 Rename Images or Videos When an image or video is captured it ...

Page 28: ...o enable cold spot tracking Menu closes automatically To disable the cold spot repeat steps 1 5 8 16 Spot Temperature Measurement Detect temperature information from a user designated spot as follows limit 10 1 Press the Menu button or tap the touchscreen to display the Main Menu 2 Select the measurement icon 3 Press the OK button to open Sub menu 4 Select Spot icon 5 Touch the screen where the sp...

Page 29: ...ature data will be gathered 8 17 Line Temperature Measurement Users can detect the hottest temperature along a set line as follows 1 Press the Menu button or tap the touchscreen to display the Main Menu 2 Select the measurement icon 3 Press the OK button to open Sub menu 4 Select Line icon 5 Press and hold then drag on the touchscreen Release to set the line Hottest temperature point marked by a r...

Page 30: ...p and drag the area to change its location Release to set 8 18 2 Delete an Area Temperature Measurement Delete a temperature area as follows 1 Using the touchscreen tap the temperature spot to be deleted 2 Tap the delete icon at the top left of the screen IF THE FUSION MODE IS USED MAKE SURE YOUR IMAGE ALIGNMENT IS SET CORRECTLY Change the image mode as follows 1 Press the Menu button or tap the t...

Page 31: ...in Menu 2 Select the Setting icon 3 Press the OK button to open Sub menu 4 Select Dual spectrum Registration 5 Press the OK button to open Sub menu 6 Select Dual spectrum Fusion Registration 7 Press the OK button Options and a directional pad appears on screen 8 Using the touchscreen choose either Fine Tuning or Coarse Tuning Fine Tuning moves the image by small margin and Coarse Tuning moves the ...

Page 32: ...Select the Setting icon 3 Press the OK button to open Sub menu 4 Select Dual spectrum Registration 5 Press the OK button to open Sub menu 6 Select PIP adjustment 7 Press the OK button Options and a directional pad appears on screen 8 Using the touchscreen choose either Fine Tuning or Coarse Tuning Fine Tuning moves the PIP box by small margin and Coarse Tuning moves the PIP box by a larger margin ...

Page 33: ...trast If the user has manually adjusted the gain controls a reset can be performed by tapping the AGC button twice USING THE TOUCHSCREEN RESET THE AUTO GAIN CONTROLS BY TAPPING THE AGC BUTTON TWICE Preferably any temperature detected by the thermal device falls between the maximum and minimum temperature detected if a number falls outside this range the image may wash out i e the extraneous energy...

Page 34: ...metal wood water skin and cloth are particularly good at radiating energy and it is easy to get relatively accurate measurements For surfaces that are good at radiating energy high emissivity the emissivity factor is 0 90 This simplification does not work on shiny surfaces or unpainted metals as they have an emissivity of 0 6 These materials are not good at radiating energy and are classified as l...

Page 35: ...SIVITY THE GREATER POTENTIAL FOR ERROR WITHIN THE DEVICE S CALCULATIONS ERRORS MAY STILL OCCUR EVEN WHEN ADJUSTMENTS ARE PERFORMED PROPERLY 8 23 Non uniformity Correction NUC Non uniformity correction NUC is used to compensate for the non uniformity of detector pixels or other optical interference A common need for NUC correction is to reduce excess noise in an image caused by rapid changes in amb...

Page 36: ...in Menu 2 Select the Parameter Settings icon 3 Press the OK button to open Sub menu 4 Select Temperature 5 Press the OK button 6 Adjust number using the Navigation buttons 7 Press the OK button to set ambient temperature 8 Press the Previous button continuously to exit the menu 8 25 Temperature Units By default the imager is set to measure temperatures in Celsius C Change the temperature scale as ...

Page 37: ...o set new distance 8 Press the Previous button continuously to exit the menu 8 27 Distance Units By default the imager is set to measure temperatures in Celsius C Fahrenheit and Kelvin scales are also available Change the temperature scale as follows 1 Press the Menu button or tap the touchscreen to display the Main Menu 2 Select the Settings icon 3 Press the OK button to open Sub menu 4 Select Un...

Page 38: ...or a low temperature threshold is detected High Low 8 28 2 Temperature Threshold Adjustment By default the alarm thresholds are HI 120 C 248 F and LO 0 C 32 F The user will need to change the Hi and LO thresholds individually Adjust these settings as follows 1 Press the Menu button or tap the touchscreen to display the Main Menu 2 Select the Settings icon 3 Press the OK button to open Sub menu 4 S...

Page 39: ...LL ALSO PERFORM PERIODIC NUC CORRECTIONS TO ADJUST FOR NON UNIFORMITY OF PIXELS 8 29 Transferring Image and Video Files to a Computer 8 29 1 MicroSD Card The easiest way to move images from the device is to remove the MircoSD card from the device and insert it into a proper computer port or adapter Follow your company s procedures for moving images and video files between devices 8 29 2 USB Mode I...

Page 40: ...e scale as follows 1 Press the Menu button or tap the touchscreen to display the Main Menu 2 Select the Settings icon 3 Press the OK button to open Sub menu 4 Select Temperature Measurement Gear 5 Press the OK button 6 Select a temperature scale 7 Press the OK button 8 Press the Previous button continuously to exit the menu 8 29 3 Live Streaming to a Computer Users can synchronize the picture in t...

Page 41: ... open Sub menu 4 Select System Settings 5 Press the OK button 6 Select WLAN Hotspot 7 Press OK button 8 Using the touchscreen toggle the WLAN option to the On position by tapping the switch next to the option The switch will turn red when active Disable WLAN by tapping the switch again 9 Using the touchscreen open the keyboard by tapping the name next to the Network Name Use the keyboard by tappin...

Page 42: ...in military time 7 Press the OK button 8 Press the Previous button continuously to exit the menu 8 33 Language Settings Change the device language as follows 1 Press the Menu button or tap the touchscreen to display the Main Menu 2 Select the Settings icon 3 Press the OK button to open Sub menu 4 Select Language 5 Press the OK button 6 Select preferred language 7 Press the OK button 8 Press the Pr...

Page 43: ...enu 8 35 Power Management Settings To save power users can change the auto shut off settings The device can be set to turn off after 5 minutes 10 minutes or 20 minutes Auto shut off can also be turned off Change power management settings as follows 1 Press the Menu button or tap the touchscreen to display the Main Menu 2 Select the Settings icon 3 Press the OK button to open Sub menu 4 Select Auto...

Page 44: ... follows 1 Press the Menu button or tap the touchscreen to display the Main Menu 2 Select the Settings icon 3 Press the OK button to open Sub menu 4 Select System Settings 5 Press the OK button 6 Select Format SD Card 7 Press the OK button 8 Press the OK button again to confirm formatting SD card will be formated Press Previous button to cancel formating 9 Press the Previous button continuously to...

Page 45: ...ngs 5 Press the OK button 6 Select Restore Factory Settings 7 Press the OK button 8 Press the OK button again to confirm Device Settings will reset to factory settings Press Previous button to cancel 9 Press the Previous button continuously to exit the menu PERFORMING A FACTORY RESET ERASES CUSTOMIZED USER CONFIGURATIONS STORED ON THE DEVICE AND RESTORES THE ORIGINAL DEFAULT SETTINGS PROGRAMMED BY...

Page 46: ...an replace the cloth and repeat the wiping process 9 2 Disinfecting the Camera Surface Do not use corrosive cleaning solutions on the optical glass components It is recommended to disinfect the camera surface regularly with a non corrosive sanitizing product Follow the directions provided by the manufacturer of the cleaning solution Adhere to the sanitation protocols and cleaning schedule set fort...

Page 47: ... use professional equipment to clean the lens 10 4 Unclear or dark visible images Turn on lights in imaging area Turn on device light If lens is foggy use professional equipment to clean the lens 10 5 Temperature readings are incorrect Turn off the device then turn it back on Ensure the correct temperature range is selected The default temperature range is 20 C to 150 C 4 F to 302 F When measuring...

Page 48: ...T CAM 380 P SERIES USER MANUAL 48 10 6 Camera out of focus Adjust focus ring 10 7 Memory card error Insert memory card ...

Page 49: ...engineers scientists inspectors and operators in space power companies medical pulp and paper food industry research and development and various process industries You can see our products and services used in industrial commercial and government applications worldwide Additionally our ICI 7320 was awarded Product of the Month by NASA Originally named Texas Infrared still DBA Infrared Cameras Inc ...

Reviews: