background image

$8

UTNÄMND

Summary of Contents for UTNAMND

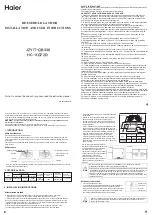
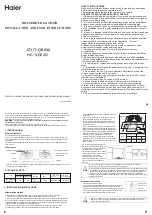
Page 1: ... 8 UTNÄMND ...

Page 2: ......

Page 3: ... ԡ4 Please refer to the last page of this manual for the full list of IKEA appointed Authorized Service Centre and relative national phone number ...

Page 4: ...rers and those using other electronic implants must consult their doctor or the manufacturer of the implanted device to assess XIFUIFS PS OPU JU JT TVԔDJFOUMZ SFTJTUBOU BHBJOTU interference Electrical connections must be performed by a trained technician Before making the electrical connection please read the section on ELECTRICAL CONNECTION For appliances with a power supply cable the terminals S...

Page 5: ...ass I appliances check that the domestic power supply guarantees an adequate earthing system Connect the product to the mains using an omnipolar switch If the power cable is damaged it must be replaced by the manufacturer by an authorised service centre or by a qualified technician to avoid any risk of danger WARNING Remove the protective films before installing the appliance Only use the screws a...

Page 6: ...d on the dangers that it involves Do not allow children to play with the appliance WARNING The appliance and its accessible parts become extremely hot during use Take great care not to touch the heating elements Keep children under 8 years of age well away from the appliance unless they are under constant supervision WARNING If the surface shows any signs of cracking UVSO UIF BQQMJBODF Pԑ UP QSFWF...

Page 7: ...al timer or a separate remote controlled system WARNING BOHFS PG ԒSF EP OPU SFTU PCKFDUT PO UIF cooking surfaces The appliance must be installed in such a way as too allow disconnection from the electrical power supply with a contact aperture 3 mm that ensures complete disconnection in category III overload conditions The appliance must never be exposed to weather rain sun Keep the packing materia...

Page 8: ...nce using an external timer or separate remote controlled system The appliance must never be installed behind a decorative door to prevent it from overheating Do not stand on the appliance as this may damage it Do not rest hot pots and pans on the edge as this may damage the silicone seals ...

Page 9: ...ions Create a front opening of at least 28 cm2 in the unit into which the hob is to be fitted to allow aeration of the product Requirements for kitchen units If the appliance is mounted on ԓBNNBCMF NBUFSJBMT UIF HVJEFMJOFT and regulations relating to low voltage JOTUBMMBUJPOT BOE ԒSF QSFWFOUJPO NVTU be followed strictly PS UIF ԒUUFE VOJUT UIF DPNQPOFOUT plastic materials and veneered wood must be ...

Page 10: ... connection Follow the connection diagram on the under side of the product This appliance has a Y type connection and requires a mains cable H05V2V2 F Cable needs mandatory sleeves According to IEC SFHVMBUJPOT VTF GPS POF QIBTF DPOOFDUJPO mains cable 3 x 4 mm for two phase DPOOFDUJPO NBJOT DBCMF צ Y ק פ NNr YUFSOBM DBCMF EJBNFUFS NJO ת NN NBY 12 mm Please respect specific national regulations in t...

Page 11: ...11 ENGLISH L1 L2 L3 N1 N2 Insert the shunts between the screws as shown Connection diagram product side L Black N Blue Yellow Green L1 Brown L2 Black N Blue Yellow Green ...

Page 12: ...f the cooking areas is equipped with a system to detect the presence of a pan The pan presence detection system recognises pans with a magnetisable base suitable for use with induction hobs If the pan is removed during operation or if an unsuitable pan is used the display shows the symbol Residual heat indicator The residual heat indicator is a safety feature indicating that the surface of the coo...

Page 13: ...Melting function button 9 Scroll keypad 10 Lock function button The cooking areas can be activated by pressing on the corresponding scroll keypad The EJHJU MJHIUT VQ UP DPOԒSN UIF PQFSBUJPO It is also possible to activate the cooking areas simply by resting a cookware on the cooking area The hob automatically recognizes the cookware and its dimensions and enables the necessary cooking areas as a r...

Page 14: ... to access the menu All the digits light up for a few seconds As soon as the digits go out again press and hold and for 4 seconds until the left hand scroll keypads light up Press and hold for 4 seconds both illuminated scroll keypads on the left simultanesly until the 3 command digits show CF6 Press until it shows PHA Press the furthest to the left scroll keypad to select the correct setting 4FF ...

Page 15: ...playing go out The operations described must be completed within 10 seconds Lock It is possible to lock the hob functions during use to avoid accidental NPEJԒDBUJPOT GPS FYBNQMF JO PSEFS UP DMFBO UIF IPC 5P BDUJWBUF QSFTT 5P EFBDUJWBUF QSFTT Cooking areas Timer Timer with alarm for cooking times 5P BDUJWBUF UVSO UIF IPC PO BOE TFMFDU POF PG UIF צ DPPLJOH BSFBT QSFTT Ȇ ȇ BOE ȇ UP TFU UIF 5JNFS 5IF ...

Page 16: ...Power Time at maximum Power 1 40 seconds 2 72 seconds 3 120 seconds 4 176 seconds 5 256 seconds 6 432 seconds 7 120 seconds 8 192 seconds 9 not available Booster not available Pause Function This function freezes all the hob settings if the person using the hob needs to go away for a time During the pause all digits display UP JOEJDBUF UIBU No energy is being produced in any of the cooking areas A...

Page 17: ...VTMZ QSFTT UIF CVUUPOT UIBU IBWF CFFO VTFE UP activate the bridge until the symbols and disappears Important The hob automatically recognises a larger pan occupying two cooking areas but it will treat the areas independently unless the bridge function is activated Power level Cooking method To be used for 1 Melting heating gently Butter chocolate gelatine sauces 2 Melting heating gently Butter cho...

Page 18: ...nging to the same group and automatically decreases the power of the other cooking area if necessary the last command has highest priority Hob in power limitation setting the function divides the power between cooking areas and doesn t allow to set the power for the other cooking areas exceeding the limit to increase the power of particular cooking area the power setting for the other ones need to...

Page 19: ... If this occurs do not touch anything and wait for all components to cool down If an error message appears refer to Ȇ5SPVCMFTIPPUJOHȇ Hint tips Noise during cooking When a cooking area is active it may hum briefly This is a characteristic of all induction cooking zones and does not impair the function or life of the appliance The noise depends on the cookware used If it causes considerable disturb...

Page 20: ...le using a small amount of limescale remover solution for example vinegar or lemon juice once the Hob has cooled down Then clean again with a damp cloth P OPU DVU PS QSFQBSF GPPETUVԑT PO the surface and do not drop hard objects onto it Do not drag pans or plates over the surface Do not use steam cleaning equipment Care and cleaning TVSGBDFT XIFSF EJԑFSFOU NBUFSJBMT NFFU The noise occurs on the coo...

Page 21: ...ing errors cookware have to be changed If error persists please contact After Sales Service E6 Cooking area cannot be turned on Power supply voltage and or frequency is out of range Check mains voltage and or frequency If needed contact After Sales Service E8 Cooking areas are UVSOFE Pԑ Fan failure Fan blocked by dust or fabrics Clean and remove foreign bodies from fan If error persists please con...

Page 22: ...EA store or the After Sales Service PV DBO ԒOE B GVMM MJTU PG ԡ BQQPJOUFE contacts at the end of this user manual When contacting the After Sales Service please provide the following JOGPSNBUJPO type of fault appliance model Art Cod serial number S N This information can be found on the SBUJOH QMBUF 5IF SBUJOH QMBUF JT BԔYFE to the bottom of the appliance If you operated the appliance wrongly or t...

Page 23: ...S UTNÄMND 604 678 25 Number of cooking areas 4 Number of Bridge cooking areas 1 Left Cooking technology Induction Dimension of Bridge cooking area Left 210 x 380 mm Dimension of cooking area Left front 210 x 190 mm Left rear 210 x 190 mm Right rear Ø 200 mm Right front Ø 160 mm Energy consumption per Bridge cooking area 192 Wh kg Energy consumption per cooking area Right rear 185 Wh kg Right front...

Page 24: ...ached to the cover of Safety booklet inside the product This will allow us to assist you better by identifying precisely your hob in case you need our assistance in the future Thank you for your help 108 0625 103 Model UTNÄMND 604 678 25 220 240V 50Hz or 220V 60Hz TOT 7400 W 108 0625 103Z1205344 009000047220Z1205344 9000047220 108 0625 103Z1205344 009000047220Z1205344 Serial No Z1205344 2025 CLASS...

Page 25: ...tion on how to re cycle this product please contact your local municipal offices local waste disposal service or the shop in which the product was purchased Disposal of packaging materials Materials with the symbol can be recycled Dispose of packing materials in special recycling collection bins Energy saving You can save energy during everyday cooking if you follow below hints When you heat up wa...

Page 26: ...ighway TePpe 16W ontact ustoPer 6erYice at www coP au For Western Australian and South Austral JBO DVTUPNFST QMFBTF DPOUBDU IKEA GUARANTEE What does this guarantee cover The guarantee covers faults of the appli ance which have been caused by faulty construction or material faults from the date of purchase from IKEA This guarantee applies to domestic use only The products have been designed and tes...

Page 27: ...have been caused by production faults Cases where no fault could be found dur ing a technician s visit Repairs not carried out by our appointed service providers and or an authorized service contractual partner or where non original parts have been used Repairs caused by installation which is faulty or not according to specification The use of the appliance in a non domes tic environment i e profe...

Page 28: ... 3 Ask for clarification on user manual contents and specifications of the IKEA appliance To ensure that we provide you with the best assistance please read carefully the Assem bly Instructions and or the User Manual section of this booklet before contacting us How to reach us if you need our service The IKEA after sales customer service centre will assist you on the phone with basic trouble shoot...

Page 29: ...29 ...

Page 30: ...308 UGĐ 1 OUFL עפ ת Italia 39 0732 691238 Lun Ven 8 20 Ireland 2076601517 Mon Fri 8 20 Ísland 5852409 Mánudagur Föstudagur Kl 8 20 Latvija http www ikea com P Pk 8 20 Lietuva 0 520 511 35 Pirm Penkt 8 20 Mayorca 913754126 Lunes Viernes 8 20 Malta 356 0 25464000 Mon Fri 8 20 Norge 23500112 Man Fre 8 20 Nederland 050 7111267 31 507111267 Ma Vr 8 20 Polska 225844203 1POJFE JBāFL 1JÅUFL עפ ת Portugal ...

Page 31: ......

Page 32: ...AA 2231745 2 Inter IKEA Systems B V 2020 23199 991 0667 439 _01 220111 D00008356_00 ...

Reviews: