iHome iK50, User Manual
The iHome iK50 User Manual is a comprehensive guide to harness the full potential of this remarkable product. Download this manual for free from manualshive.com to discover step-by-step instructions, helpful tips, and valuable insights, ensuring a seamless experience with your iK50.
Share
Download


Reviews:
No comments
Related manuals for iK50

WS-9001U
Brand: La Crosse Technology Pages: 16

iLightz
Brand: Ming Gear Pages: 30

WS-1171A
Brand: Ambient Weather Pages: 20

IP562UK
Brand: iMode Pages: 7

WD-2512U
Brand: WEATHER DIRECT Pages: 24

ShoreStation SSV60120EAC
Brand: Midwest Industries Pages: 17

IBTLIA14
Brand: iWantit Pages: 16
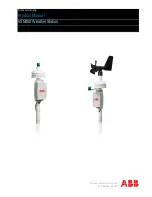
VSN800
Brand: ABB Pages: 16

WS-1
Brand: ABB Pages: 28

JiSS-20
Brand: Jensen Pages: 9

SVA12M5NA
Brand: StarTech.com Pages: 2

SDOCKU33HW
Brand: StarTech.com Pages: 5

USB5N1DOCK
Brand: StarTech.com Pages: 10

DKWG30DPHPD
Brand: StarTech.com Pages: 15

Meteo-Go! CX500
Brand: Ridder Pages: 2

TQDS-802B
Brand: TOOQ Pages: 30

TQDS-805G
Brand: TOOQ Pages: 26

LOWSB510PB
Brand: Logia Pages: 38


